
Table of Contents
What is a Furnace?
To understand your gas furnace and troubleshoot problems, it’s important to know its parts and functions.
In this section on understanding the furnace, we’ll cover the basics of a gas furnace, from its components and controls to the importance of the pilot light. We’ll also give you tips on how to adjust your thermostat setting for maximum efficiency during the heating season.
Keep reading to learn more about the parts of a gas furnace, the functions of the pilot light, and how to set your thermostat for winter.
Parts of a Gas Furnace.
Understanding a gas furnace is crucial.
Check out the components:
- Burners that burn gas for heat.
- Heat exchanger which transfers heat.
- Blower motor which circulates air.
- Control board to regulate the furnace.
Regular maintenance and inspection are essential for gas furnaces to work safely and efficiently. Forgetting to check can lead to dangerous carbon monoxide leaks.
Fun Fact: Gas furnaces have been around since the 1900s. They became popular in the 1930s when natural gas was more accessible.
Today, they still heat many homes. If ever confused, just follow the pilot light! Or, use a flashlight.
Functions of the Pilot Light.
- The pilot light is a small flame that ignites the furnace.
- It provides efficient heating with a continuous flame and lights up burners when needed.
A thermocouple sensor detects the light’s presence and sends electrical signals to open gas valves. In case of an outage, it starts up the furnace sequence and resumes normal operations when temperatures are stable.
Pilot lights come in different designs. There are standing pilots that stay lit at all times and intermittent pilots that light up on demand. They all perform combustion procedures for safe and reliable heating.
Pilot lights were introduced in 1830 with gas lighting advancements. Before then, people used hearths for stoves and had to tend fires manually. Automated heating systems not only keep homes warm securely but also conserve energy resources.
So, if you’re constantly adjusting your thermostat settings, remember your furnace is judging you!
Thermostat Settings for the Heating Season.
Stay cozy in your home this winter by understanding thermostat settings.
Keep these six tips in mind:
- Set the temp to your preference.
- Lower it when you’re out to save energy.
- Don’t make drastic changes.
- Regularly check and replace air filters.
- Upgrade to a programmable or smart thermostat.
- Ask a pro if you need help.
Each home is unique, so you may need to adjust the settings until you find what works best for you. Taking care of your thermostat can help save money and the lifespan of your furnace. Don’t waste the opportunity for savings. Take action now for comfort and efficiency!
If your furnace could speak, it would probably say, “I’m not mad, just disappointed!” if it breaks down.
Troubleshooting Steps For Furnace.

To troubleshoot furnace problems, you need to know the right steps. In this section, I will provide you with a list of troubleshooting steps to help you identify and address potential issues with your furnace.
These steps include checking for the power supply, inspecting the pilot light, checking for the gas supply, examining the air filter, and resetting the button and circuit breakers. By following these instructions, you can restore your furnace’s functionality and ensure it runs smoothly throughout the winter months.
Check for Power Supply.
To troubleshoot any electronic device, first, check the power supply. Make sure it’s properly plugged in and the outlet is working. If it is, try a different outlet.
Look for signs of damage on the plug or cable. Frayed wiring and bent pins can disrupt the connection. Check if it’s tightly plugged in.
Consider using a different power cable. It could be faulty and unable to provide enough power.
Fix your device right away! Don’t wait, so you don’t miss out on its helpfulness later.
And don’t forget to check the pilot light to make sure you don’t get an icy surprise in the shower!
Inspect the Pilot Light.
Troubleshoot a dysfunctional pilot light like an expert!
- First, take safety measures; turn off all gas valves and unplug any attached electric devices.
- Then, inspect the pilot light: locate it using the manual or online, and clean and dust around the area.
- Turn on the gas and electricity to ignite the light, and adjust/replace faulty components.
Note that a draft due to windows, doors, or ductwork could be the cause; if so, consult an HVAC pro.
Finally, a study from The National Institute of Standards and Technology showed that a single, dirty burner can increase gas bills by up to 30% annually.
Before blaming your stove, make sure you’ve paid the gas bill!
Check for Gas Supply.
Having issues with your gas supply can be very irritating.
Here are some troubleshooting steps to assist you in solving the issue:
- Check valves: Verify all valves leading to your stove, grill, or any other gas appliance. Assure each valve is in the “on” setting.
- Check for gas leaks: Sniff the area for a smell like rotten eggs; there may be a leak. Turn off the supply and call a technician right away if this occurs.
- Check gas meter: If your meter isn’t moving, it’s a sign that no gas is flowing through to your appliances.
- Inspect connections: Look at each connection point from each unit and make sure they are secure enough to avoid any leakage.
- Contact your gas provider: If none of these solutions works, then contact your gas provider service technician as it could be an external problem.
Safety should always come first when using natural gas appliances. Always double-check for leaking pipes and take the necessary steps before turning on any appliance.
My friend had a problem with his grill’s Gas Supply. He tried different solutions but failed. He eventually looked at the hose connections and found out that squirrels had chewed the rubber regulator line running through their crawlspace! So weird things can cause problems too!
Remember, trying to fix air without checking the filter is like trying to fix a car without taking off the blindfold; time to examine that air filter!
Examine the Air Filter.
When it comes to troubleshooting, examining the air filter is a must. A dirty one can lead to poor performance, higher energy bills, and expensive repairs.
Here’s how to check your air filter:
- Locate it: Look for a big metal box near your furnace or blower.
- Remove the cover: Use a screwdriver or unclip the fasteners to open the box and reveal the filter.
- Inspect the filter: If there’s visible dirt, change it. Otherwise, hold it up to a bright light. If you can’t see through it, clean or replace it.
Different filters need different cleaning/replacing frequencies. Check your user manual or ask an HVAC pro if you’re unsure.
A dirty filter can damage delicate parts like motors and fan blades. This reduces airflow, which can lead to improper cooling or heating in your home.
My family learned this lesson the hard way. We neglected our dirty filter, and our AC stopped working and made weird noises. We had to pay for costly repairs. Regular checkups avoid such problems.
Don’t forget to examine your air filter! It may save you money and make your HVAC system run smoothly.
Pushing the reset button is just a temporary fix; it doesn’t solve the root cause.
Reset Button and Circuit Breakers.
Reset buttons and circuit breakers are key for troubleshooting electronic devices.
- A reset button can restore a device to its original settings.
- A circuit breaker is an automated switch that safeguards electrical circuits from short circuits or overloads.
To troubleshoot a device that uses these parts, you must know how they work and potential issues.
Common Issues:
- Reset button not working: Check the power source, see if the button is loose or damaged, and replace it if needed.
- Circuit breaker repeatedly tripping: Find the cause of the overload, unplug unneeded devices, or upgrade the circuit breaker.
It’s important to remember that resetting a device with a reset button should only be done after all other attempts have failed. Otherwise, it could cause data loss or more damage.
In the late 1800s, Thomas Edison’s chief engineer, Max Jukes, invented primitive versions of circuit breakers. However, they became common after World War II when electronics became more commonplace.
To sum it up, comprehending reset buttons and circuit breakers, as well as potential problems will help you troubleshoot electronic devices efficiently.
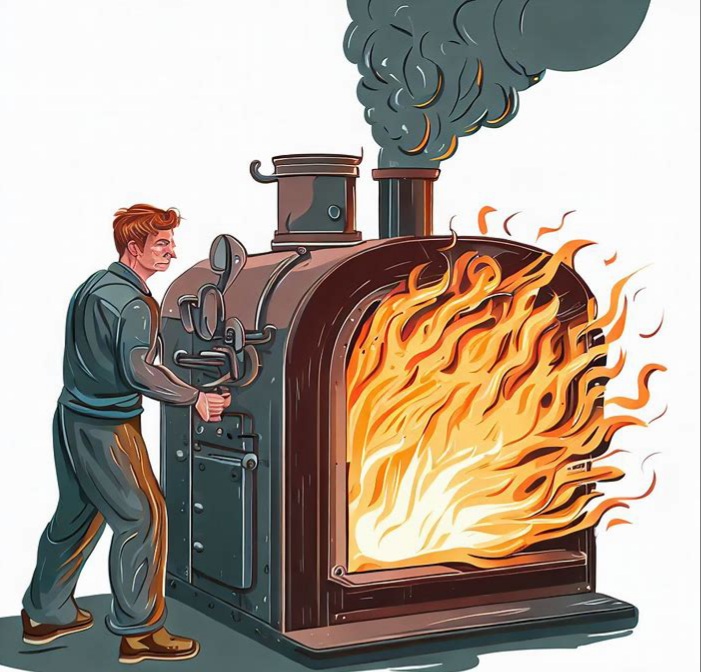
Starting The Furnace.
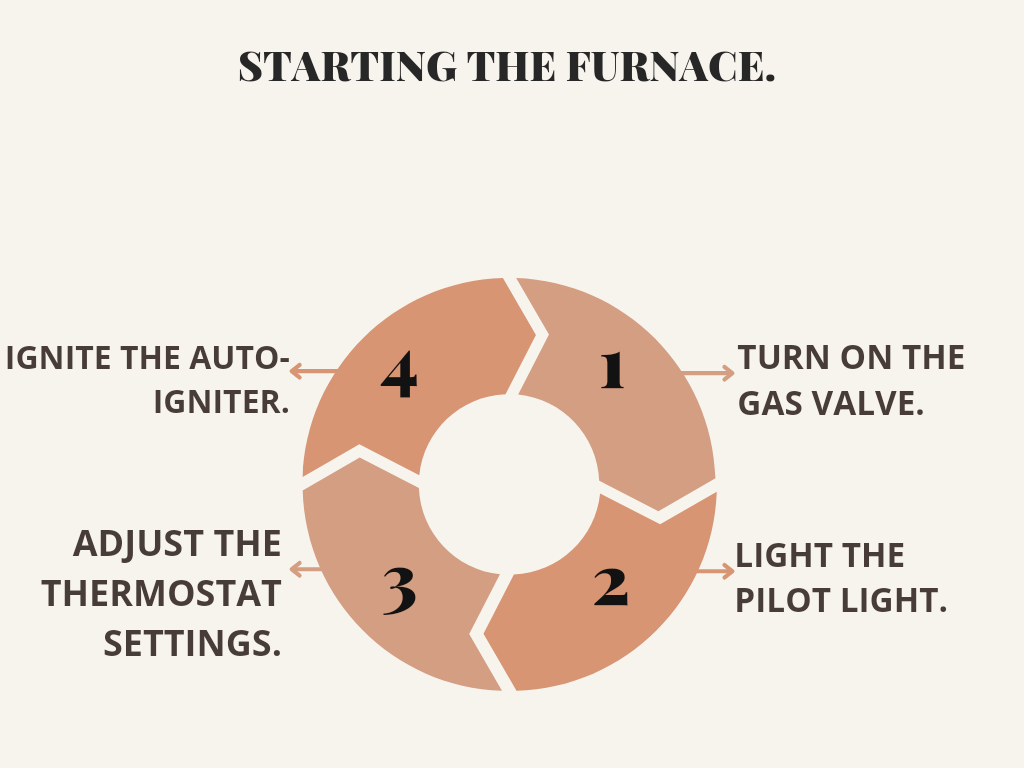
To start your gas furnace, lighting the pilot light is a necessary first step. With the gas valve turned on, locate the pilot light and use your lighter or match to ignite it. Next, adjust the thermostat settings to your desired temperature and make sure the auto-igniter is properly ignited.
These steps are the key components in starting your furnace and ensuring proper airflow and heating throughout your home during the winter season.
Turn on the Gas Valve.
Lighting the furnace requires turning on the gas valve. Be extra careful when doing this, as a gas leak can cause damage. Locate the valve handle, and turn it into a vertical position. This allows gas to flow into the furnace. It may take a few seconds for the gas to ignite in the burners. Check for any gas leaks or smells.
If you feel uneasy, call a professional. After that, go to the thermostat and turn it on. This lets your system heat up and control the temperature. It may take some time for the heat to reach your home.
Also, it’s essential to maintain your HVAC components. Have a technician check it every year. Poor maintenance can lead to more energy consumption and toxic carbon monoxide gases.
Winter is near when lighting the pilot light feels like a life-or-death situation.
Light the Pilot Light.
Time to start the furnace for winter? Let’s ignite the pilot light!
- First, switch off the furnace.
- Then, locate the pilot light assembly; take off the cover.
- Hold the knob or button down and light the pilot with a match or lighter.
- Keep holding for 30 seconds before releasing.
Helpful tips: Check for dust buildup on components like burners, flame sensors, and heat exchangers. They can affect performance.
My dad told me about his experience; he forgot to turn off his furnace before leaving for work. His neighbor noticed smoke coming from his home & called for help. Everyone was safe, but it was an unforgettable lesson about checking the furnace regularly.
Stay warm & safe this winter season! Don’t forget to wear more or less layers; like the rest of us peasants!
Adjust the Thermostat Settings.
When it comes to firing up your furnace, adjusting the thermostat settings is essential.
- Pick a temperature that’s comfy for you. Think about things like outside temperature, humidity, and your daily habits. Don’t set it too high; it can cost you extra on energy bills.
- For extra savings, install a programmable thermostat. Set different temps depending on the time of day. It’ll save energy and give you more control over heating your home.
Don’t forget to regularly replace the air filter. It’ll keep your furnace running smoothly.
Did you know? According to Energy Star, you can save up to 10% on heating costs annually by turning your thermostat down 7-10 degrees Fahrenheit for 8 hours daily. A small change that can make a big difference in energy savings and utility bills!
Who needs a match when you’ve got an auto-igniter? Just press a button for cozy warmth!
Ignite the Auto-Igniter.
Firing up a furnace can be a challenge. The Auto-Igniter sparks the furnace and must be treated with caution.
To activate it, just follow these steps:
- Locate the Auto-Igniter switch beneath the furnace.
- Switch the power supply to the furnace.
- Press and Release the Auto-Ignition button for 2-3 seconds.
- Wait a bit for the pilot light to turn on, then turn on the thermostat to your desired setting.
It’s important to remember that you only need to press the Auto-Ignition button once. Pushing it too often can cause gas build-up or harm your furnace’s internal system.
Before starting a furnace, make sure nothing is obstructing it and get professional inspections done regularly throughout its lifespan.
I once worked in an office complex where a new janitor caused an explosion by pressing the Furnace Ignitor Button multiple times. It cost a lot of money and had he followed instructions, this expensive mishap would have been avoided.
Whenever my furnace stops working, I just thank the heavens I don’t have to fix my ex.
Maintenance And Furnace Repair.
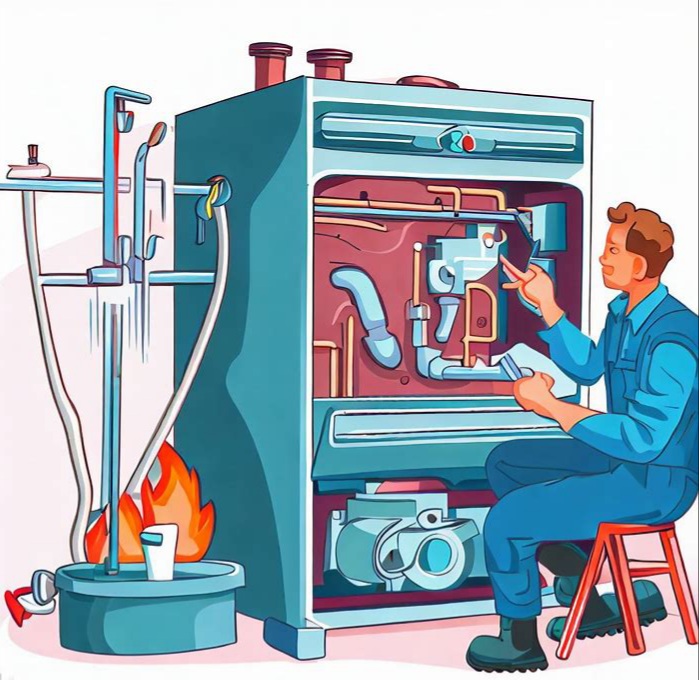
To keep your gas furnace in good working condition, maintenance and repair are essential. To avoid furnace problems during the heating season, it’s important to follow a few basic steps.
In this section, I will walk you through the subsections; Schedule a Service Call, Replace Furnace Filters, Dust and Clean Components, Check Electrical Panels and Fuses, and Replace Faulty Ignition Switch; to help you maintain your furnace and prevent any issues that may arise.
Schedule a Service Call.
As a responsible homeowner, it’s vital to schedule a service call for maintenance and repairs to ensure the efficiency and longevity of your appliances.
Here’s a quick guide on how to do it without any trouble!
- Detecting the issue. Before arranging a service call, make sure you identify the issue with your appliance. Note down details like when it started, what noise it makes, or which parts aren’t working.
- Find an authorized center. Search for a service center that specializes in repairing your specific appliance. Check reviews and ratings online before making a decision.
- Schedule the appointment. Call the service center or book an appointment online after providing the necessary info about your appliance and the issue.
- Get ready for the visit. When scheduling the appointment, ask what preparations you need to make before the technician arrives. This could include clearing out space around the faulty appliance or having the relevant documents ready.
It’s a must to keep your home appliances in good condition by scheduling regular maintenance appointments with authorized professionals. Otherwise, it might lead to safety hazards, costly repairs, and inconvenience. So, don’t hesitate; contact your nearest authorized service center now!
Be proactive and don’t let your home appliances deteriorate; schedule maintenance and repairs today!
Don’t forget your furnace filter either; it’s the only thing between you and a dusty abyss.
Replace Furnace Filters.
Replacing furnace filters is an absolute must! They capture dirt, dust, and debris, so they need to be changed often.
Here’s a 5-step guide to help you out:
- Locating Your Filter: Turn off the furnace. Find where the cold air returns ducts are.
- Removing the Old Filter: Handle it carefully. Dispose of it correctly.
- Cleaning the Area: Make sure the air is clean and dust-free around the filter.
- Picking a Replacement Filter Size: Choose one that fits tightly, so no debris can escape.
- Inserting the New Filter: Put it in, making sure it’s snug. Turn your furnace back on.
Check your filters regularly, as the manufacturer recommends. Generally, they should be replaced every 3 months or if they’re clogged or dirty.
To keep the system working and indoor air quality at its best follow these easy tips:
- Check for buildup each month.
- Replace monthly if you have pets with allergies.
- Vacuum non-disposable filters every two months and shift them after a year.
- Pick thicker pleated designs for better filtration.
Dust and Clean Components.
When it comes to keeping components in good condition, dust-free and clean is essential. Not doing so could lead to device failure or a shorter life span.
Follow these 6 steps to clean your components safely and effectively:
- Turn off the device and disconnect all cables.
- Use a can of compressed air or an anti-static brush to get rid of any loose dust particles.
- Use a lint-free microfiber cloth dampened with isopropyl alcohol to wipe away the remaining dust, hard-to-remove stains, and fingerprints.
- Be careful when using liquid cleaning agents on electrical contacts.
- Never submerge any electronics in water or use too much liquid cleaner.
- Let all components dry before reconnecting.
It’s worth noting that regular maintenance of computer systems can help you save money in the long run. Cleaning your components often can make them last longer, reduce noise levels and improve performance.
Don’t wait for something to go wrong! Incorporate this simple cleaning routine into your monthly plan.
Prevention is better than cure! Check your power source regularly; it’s like playing hide-and-seek with your house’s electricity!
Check Electrical Panels and Fuses.
Checking electrical panels and fuses at home regularly is key for keeping your electrical system safe, reliable, and efficient. Before you start, make sure to switch off the main breaker.
Here’s a 3-step guide to check ’em:
- Turn off the main power supply.
- Find the electrical panel and open it with a screwdriver or key.
- Inspect all fuses and circuit breakers for damages, wear, or other signs of failure.
- Replace any broken fuses with exact replacements.
For safety, it’s always best to hire a professional electrician. In Canada, around half of house fires are due to electrical malfunctions.
Don’t become part of this statistic; check your electrical panels and fuses regularly. And remember – you can’t spell ‘replace‘ without ‘race‘!”
Replace the Faulty Ignition Switch.
Replacing a faulty ignition switch can be a daunting task.
Here’s a guide to help you do it right and without any unwanted surprises.
- Disconnect the battery to avoid any electrical mishaps.
- Take out the fasteners of the steering wheel and carefully detach its wire connectors.
- Remove the mounting screws that hold the ignition switch in place.
- Replace the old faulty ignition switch with the new one.
- Reattach everything; mounting screws, steering wheel connectors, and the battery connector.
Take extra caution when handling electrical systems. Even a small mistake can cause a lot of damage.
Additionally, always buy genuine parts from an authorized dealer or supplier for optimal performance and longevity of your vehicle.
Common Furnace Problems.
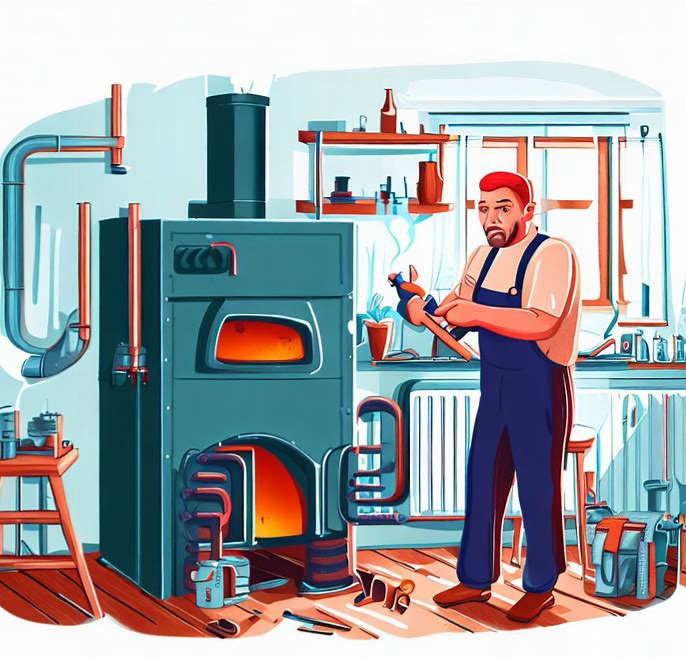
To troubleshoot common furnace problems like no heat or lukewarm air, strange noises, and burning smell, the pilot light keeps going out, the blower motor not working, and malfunctioning controls and knobs, you’ll need to take note of several steps.
In this part of the article, we’ll go over what you can do to fix these issues and identify their root causes.
No Heat or Lukewarm Air.
Nothing worse than coming home to an icy house with no heat! If this is your situation, there could be a few causes.
- First, check the thermostat.
- Next, remove any clogs or buildup from the furnace’s air filter.
- Maybe the pilot light has gone off or the ignition system is busted.
- Fix it quickly; no heat in winter is a nightmare!
Also, keep the furnace clean; otherwise, the blower motor or heating elements might not work. Also, check for disconnected ductwork. Lastly, age-related problems can appear due to wear and tear.
I recall an evening when my family gathered and the furnace suddenly failed. Chilly fear ran through me as I understood how vital heat was! Thankfully, I called the pros who came right away. Problem? A pressure switch went bad from regular use. Fixed in less than an hour. We ended up warming up by the fireplace!
What’s scarier than a furnace that makes weird noises and smells like burning?
Strange Noises and Burning Smell.
Strange noises and burning smells coming from your furnace are signs of something wrong. Don’t ignore them!
Issues could range from minor to major, like;
- Loose belts and bearings.
- Cracked heat exchangers.
- Clogged burners or air ducts.
- Burning smells can be caused by overheated blower motors due to dirt and debris.
- Electrical problems like faulty wiring can also cause combustible materials to ignite.
These can all lead to carbon monoxide leaks, which are very dangerous! So, it’s important to identify and fix the problem. Routine maintenance services with cleaning burners and air filters will help prevent toxic fumes. Investing in these services will keep you worry-free from potential disasters.
Don’t try to save money by neglecting installation services; it’s not worth the risk!
The pilot Light Keeps Going Out.
Is your pilot light not playing nice? It could be due to several potential issues.
- Check if the flame is strong and blue. If it’s weak or yellow, it may be because of dirty burners; get a pro in to clean ’em up!
- Maybe the thermocouple is faulty; replace it with a technician.
Still, having problems? Possible causes include:
- Ventilation.
- Gas pressure.
- Gas valve issue.
Don’t forget regular maintenance and cleaning, so you don’t run into these problems in the first place.
The blower Motor not Working.
Is your furnace blower motor not working? There are many possible causes.
- Generally, it is either due to an over-compromised motor capacitor or a faulty belt.
- Sometimes, electronic control board malfunction or too much dust/dirt can also be the reason.
- The blower motor pulls cool air in and sends the warm air out. When the filter is blocked with debris, airflow to the motor is reduced. This makes it work harder and can cause overheating or damage.
- Low-voltage electricity can also impact the start/run capacitor.
Troubleshoot by turning off the furnace and resetting its circuit breaker. Clean the power cables/switchboard with a dry cloth or vacuum cleaner nozzle. Check the HVAC filters were installed properly and are of good quality.
Check for worn-out belts and abnormal voltages in wiring connections. We recommend getting a qualified technician to do routine cleaning/maintenance checks every season.
Hot potato with malfunctioning controls and knobs is not recommended.
Malfunctioning Controls and Knobs.
When it comes to your furnace, knobs, and controls that don’t work can cause lots of issues. These components regulate the temp and settings, so if they malfunction, it can lead to overheating or not enough heat. Watch out for signs that something is wrong, like unresponsive controls or wrong temp readings.
- Dirt buildup can be a common issue. Over time, dust and debris can gather on the controls, making them hard to use.
- Clean your furnace regularly. Wipe down the knobs and controls with a damp cloth.
- Wear and tear can be a problem, too. Damaged or worn-down controls or knobs can’t accurately regulate your furnace’s temp or settings. You may need to replace them.
A friend of mine had a broken fan-speed knob. She thought she’d need an expensive replacement. But, a skilled technician fixed it without new parts. This shows even big issues can be solved fast and easily with professional help. So if you have problems with knobs or controls, call in an expert!
Safety first; the only time you want your furnace hot is when you’re snuggling up with a blanket!
Safety Precautions While Starting Furnace.

To ensure safety while starting a furnace, it’s crucial to take appropriate measures. With our article “How do you start a furnace”, we provide comprehensive instructions for starting a furnace in the best possible way.
In this section on safety precautions, we’ll go through the necessary precautions and tips to keep both you and your furnace secure. The sub-sections include understanding the heating system, ventilation, and airflow, checking for gas leaks, igniting the pilot light safely, and fire prevention measures.
Understanding the Heating System.
Heating systems are important in buildings. They give heat and comfort in cold weather, so it’s key to understand how they work.
Furnaces or boilers are often used to generate heat. Pipes and vents then spread this heat around the building.
You must know the different parts and components of a heating system. These include the thermostat, ductwork, and filters. Working together, they control the temperature inside the house and make sure there’s proper airflow.
Safety is an important factor too. With the right maintenance, inspections, and cleaning, you can reduce fire risks. It’s crucial to spot malfunctions early and fix them quickly.
Pro Tip: Have a professional HVAC technician inspect your furnace every year. This helps prevent risks from wear and tear.
Stale air can be dangerous; like playing Russian Roulette with your lungs.
Ventilation and Airflow.
Importance of good air quality: Ensuring healthy indoor air and reducing transmission of airborne viruses.
Types of ventilation:
- Natural: Windows, doors.
- Mechanical: Ventilation systems.
Factors to consider:
- Occupant density.
- Temperature.
- Relative humidity.
When choosing a ventilation system, take into account the type of activity and number of people in the room. Proper airflow is vital for all buildings: residential and businesses, e.g. restaurants prone to smoke and heat build-up.
I remember a stuffy conference hall with 200 people. AC is not enough for that many people – no airflow. Misery! This a reminder that safety measures like airflow should be taken seriously.
Don’t let a gas leak ruin your day; unless you were planning on blowing things up!
Checking for Gas Leaks.
Ensuring the safety of your loved ones is key; here’s a 6-step guide to detecting gas leaks in your home.
- Switch off all appliances that use gas; water heaters, stoves & dryers.
- Find the main gas supply valve, usually near the meter.
- Examine all visible pipes connected to the gas supply valve for signs of damage or corrosion. Make a soapy water solution to detect minor leaks; bubbles will form where there’s a leak.
- Check the hoses & connectors of each gas appliance; look for cracks, kinks, or frays.
- If you can’t locate the leak, contact a professional immediately. Get out of the building until it’s fixed.
- Once the problem is solved, arrange for routine maintenance checks.
For extra safety, install carbon monoxide detectors/alarms around the house.
Don’t try to fix the leak yourself; you may end up in the emergency room with severe injuries. Always use certified professionals.
Don’t set the pilot light ablaze without caution; light it safely and save your eyebrows!
Igniting the Pilot Light Safely.
The Pilot Light is an ignition source for gas appliances. It’s essential to ignite it properly to prevent hazardous scenarios.
Here’s a 5-Step Guide on how to ignite it safely:
- Find the gas valve. Turn it off.
- Wait for the gas to dissolve in the air.
- Look for the Pilot Light assembly. Usually behind or under the main burner.
- Light a match or lighter. Hold it near the assembly & press the reset button. This will release gas & ignite the flame.
- Press the reset button for a minute. Look for a steady flame in your appliance.
When dealing with Pilot Lights, take it slow. Gas leaks can cause dangerous explosions, fires, or carbon monoxide poisoning. So, take your time. Follow each step to avoid risks.
If you smell gas, open windows & doors. Don’t turn lights on/off or touch electric switches. They could create sparks strong enough to ignite an explosion. Leave the house & call an expert.
Igniting a Pilot Light safely needs patience, focus & caution. Take care of yourself & follow the steps accurately. Avoid risks that come with carelessness.
Follow safety precautions when dealing with Pilot Lights!
Don’t be the person who starts a fire through careless actions.
Fire Prevention Measures.
Fires can be destructive and destroy property and even lives. Therefore, prevention is key.
- One way of avoiding fires is to store flammable objects away from potential heat sources, such as stoves or space heaters.
- Smoke detectors and fire extinguishers are also important for preventing fires.
- Choosing the right type of detectors and keeping extinguishers in accessible locations can help detect and extinguish any fires.
Other precautions to take are unplugging appliances when not in use, turning off lights when leaving a room, and being careful with open flames.
Taking these steps can significantly reduce the risk of a fire.
Frequently Asked Questions.
Q: What are the initial steps to start a furnace?
- Check the thermostat: Ensure that the thermostat is set to a temperature higher than the current room temperature. This will activate the furnace to start heating.
- Verify the power supply: Make sure that the furnace is receiving power. Check if the circuit breaker or fuse connected to the furnace is in the “on” position.
- Inspect the fuel source: Determine the type of fuel your furnace uses, such as gas, oil, or electricity. Ensure that the fuel source is available and connected properly.
- Ignition system: Depending on the type of furnace, you might need to ignite the pilot light manually or rely on an electronic ignition system. Follow the manufacturer’s instructions to safely ignite the pilot light or activate the ignition system.
- Give it time: After turning on the furnace, allow a few minutes for the system to start circulating warm air. It might take a short while for the furnace to ignite and heat up.
- Check for proper operation: Once the furnace is running, check for any unusual noises, smells, or malfunctions. If you notice any issues, turn off the furnace and seek professional assistance to avoid potential hazards.
Conclusion:
Starting a furnace involves a few essential steps to ensure proper operation and efficient heating. First, check that the thermostat is set to a higher temperature. Verify the power supply and ensure the fuel source is available and connected correctly. Depending on the furnace type, ignite the pilot light or activate the electronic ignition system as instructed by the manufacturer. Allow some time for the furnace to heat up and begin circulating warm air. Finally, monitor the furnace for any irregularities and seek professional assistance if needed. Remember to consult your furnace’s user manual or contact an expert for specific instructions tailored to your furnace model. By following these steps, you can confidently start your furnace and enjoy a comfortable and safe heating experience.