
Table of Contents
Preparation for Blower Motor Replacement
To prepare for replacing your furnace blower motor with a new one, follow these easy steps. Begin by turning off the power supply to your furnace. Next, remove the blower door and disconnect the wires from the control board. Then, proceed to remove screws and brackets to separate the blower assembly from the housing. These steps will ensure a safe and efficient motor replacement, allowing for smooth operation and improved energy use of your HVAC system.
Turn Off the Power Supply
For safety, you must turn off the power supply before replacing a blower motor. Follow these 5 steps:
- Identify your home’s circuit breaker box.
- Locate the switch that controls the HVAC system and switch it off.
- Check if the thermostat or fan is still running to make sure the power is off.
- Seek an expert technician’s help if you are unsure how to safely turn off the power supply.
- Only continue with the replacement process when you are certain all power is off.
Be careful when turning off the power supply. Just switching off some switches may not shut down all of the electricity. So, be sure to identify the correct switch.
Ensure your safety by following these steps. Working on live electrical systems can be extremely dangerous. Don’t take any risks. Remember to switch off the power supply before starting the blower motor replacement. Your safety should always come first! And don’t worry, removing the blower door is easy-peasy!
Remove Blower Door
When it comes to replacing a blower motor, an important step is removing the blower door. Here’s how:
- Identify where the blower door is on your HVAC system.
- Use a screwdriver to loosen the screws that hold it in place.
- Gently pull the blower door outwards.
- Be careful not to damage any wires or components connected to it.
- Put the blower door in a safe area until you need it again.
It’s possible that other mechanisms are required for removing the blower door, so check your owner’s manual or contact an HVAC technician if you’re unsure.
Before accessing the blower door, you may need to first remove components like an air filter or other barriers. Here are a few tips:
- Consult your owner’s manual or a technician.
- Keep track of all screws and hardware as you remove them.
- Handle delicate components like wiring harnesses or control boards carefully.
Following these tips and using the above guide will help you replace your blower motor confidently. Unplugging wires never felt so satisfying – unless it’s from your ex’s phone charger!
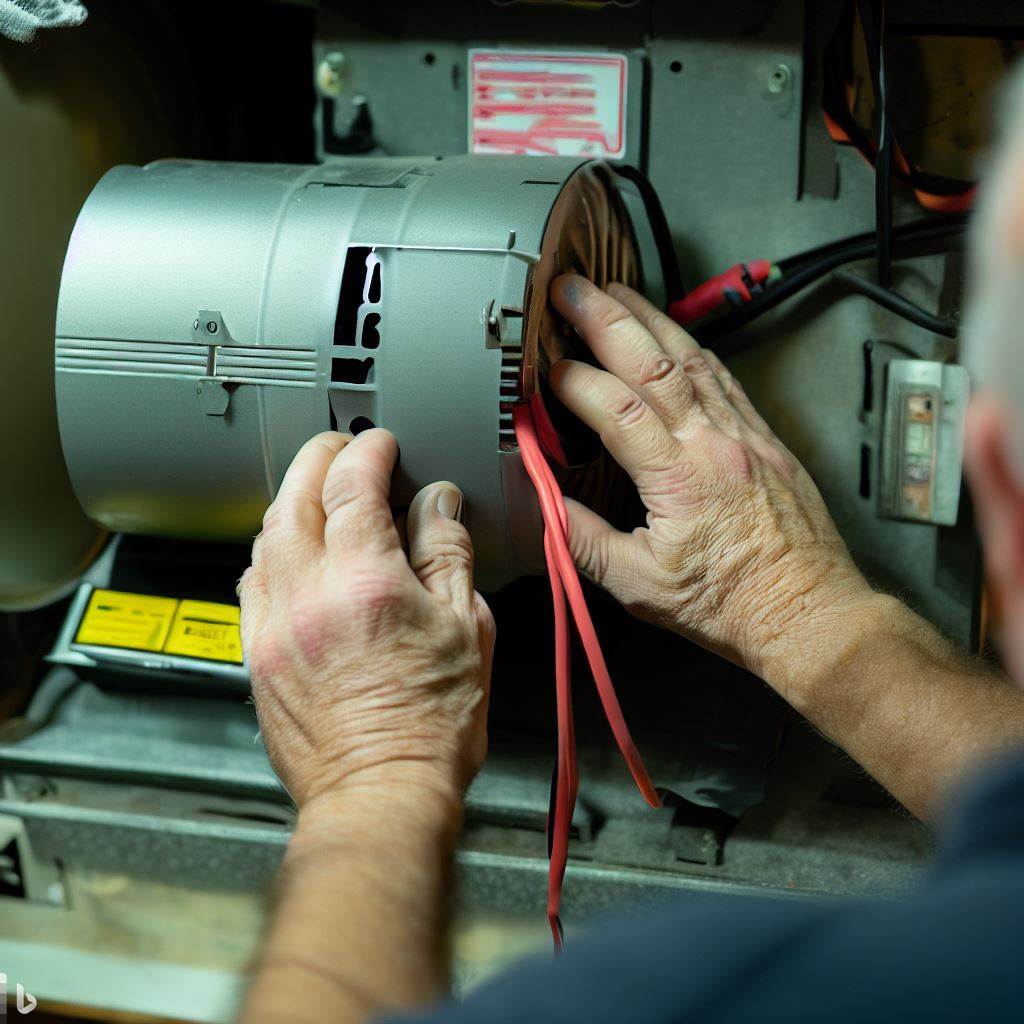
Disconnect Wires from Control Board
Disconnecting wires from the control board is a must when replacing a blower motor. This ensures the electrical connections are safely removed, preventing any damage. Here’s how to do it in 6 easy steps:
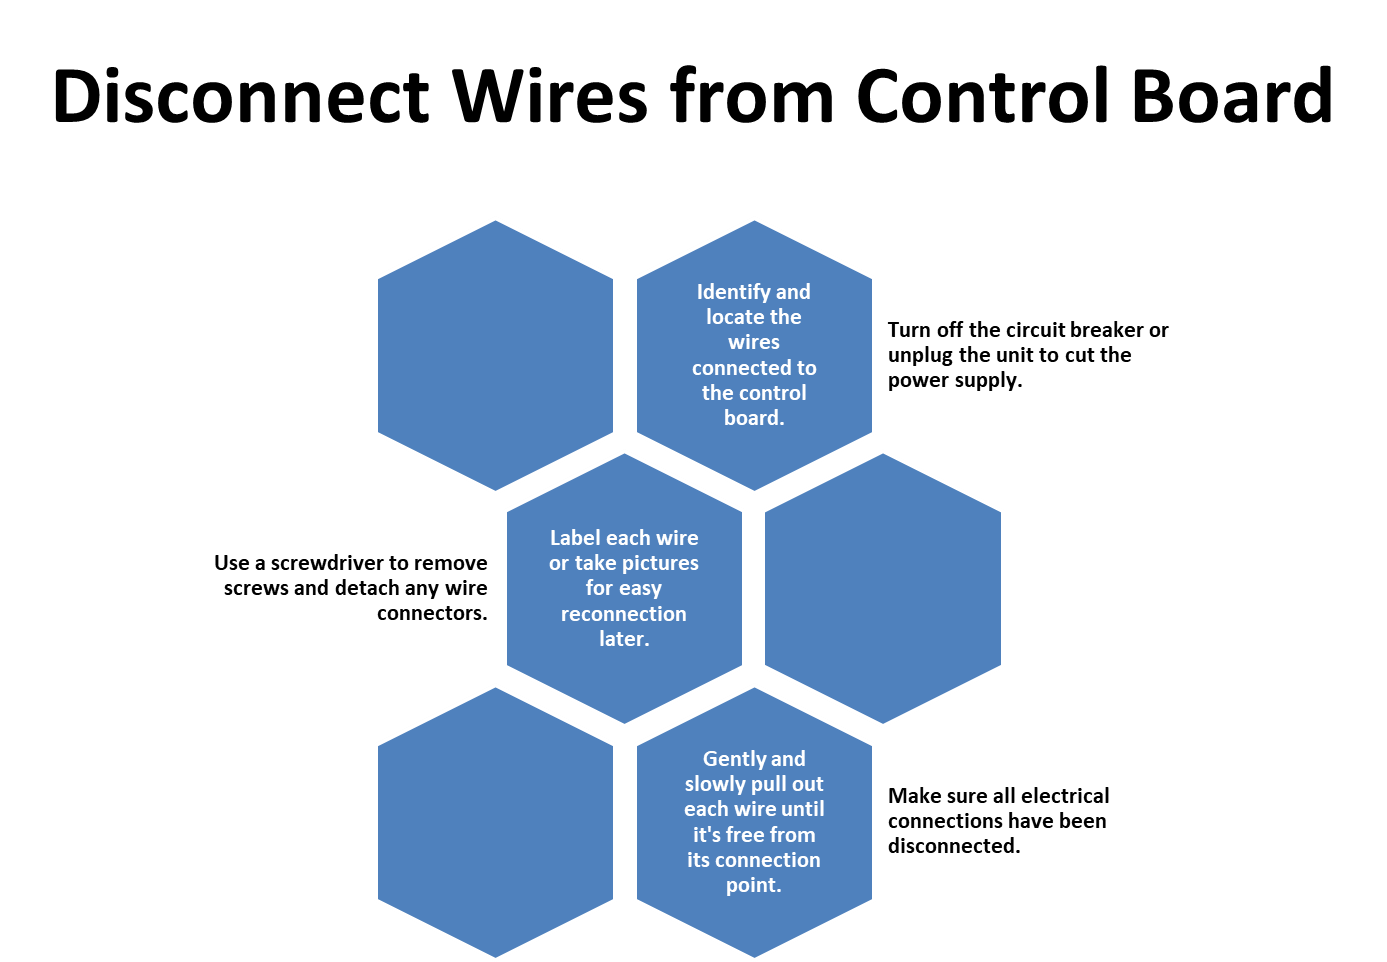
- Identify and locate the wires connected to the control board.
- Turn off the circuit breaker or unplug the unit to cut the power supply.
- Use a screwdriver to remove screws and detach any wire connectors.
- Label each wire or take pictures for easy reconnection later.
- Gently and slowly pull out each wire until it’s free from its connection point.
- Make sure all electrical connections have been disconnected.
Be careful! Some wires may be firmly attached, so tugging hard could damage or break components, costing you money.
Before attempting this procedure, make sure you have the right tools, such as pliers, screwdrivers, and tags for labeling wires.
Did you know that improper wiring is one of the main causes of HVAC failures? Research by Energy Star shows that 65-70% of HVAC failures are caused by electricity abnormalities or wiring defects. So, it’s best to let the experts handle disconnecting wires from control boards!
Remove Screws and Brackets
- Locate the screws and brackets that secure the motor.
- Using the appropriate screwdriver, loosen and remove each screw from its bracket.
- Carefully remove the brackets from the motor assembly.
- Store the screws and brackets safely to avoid losing them.
Note: Hard-to-reach areas may be tricky. Use a flashlight or mirror to spot and access the components.
Also, label each bracket and screw if there are multiple types/sizes. This makes reassembly easier when installing the new motor.
Follow these steps to prepare for the blower motor replacement job, and bid farewell to the old one. No drama!
Removal of Old Motor
To remove the old motor and start the blower motor replacement process for your furnace, you need to remove the blower wheel and capacitor, disconnect wire leads, and detach the motor from the blower assembly. These steps will guide you through the process of removing the old motor safely and efficiently so that you can install the new one.
Remove the Blower Wheel and Capacitor
Tearing out an old motor? Here’s how to safely remove the blower wheel and capacitor:
- Turn off the power supply to the HVAC system.
- Remove the access panel covering the blower assembly.
- Loosen the set screw with a wrench or pliers. Carefully pull out the blower wheel from the shaft.
- Disconnect capacitor wires from terminals.
Be sure to take safety precautions- wearing gloves and eye protection– and don’t rush! Remember, capacitors can store electrical energy even when no power is supplied. Discharge them before handling or disposing of them.
Failing capacitors are one of the most common causes of motor failure. Don’t forget to disconnect wires before removing the motor- unless you want a shocking experience!
Disconnect Wire Leads
When disconnecting wire leads from an old motor, it’s essential to take precautions. Here’s a five-step guide to doing it safely:
- Switch off the motor’s power supply.
- Identify and note down each wire lead’s location.
- Unfasten each connector’s screw or nut using pliers or a screwdriver.
- Gently remove the wire lead and cover it with electrical tape.
- Test for any residual voltage before proceeding with other steps.
Remember; not all motors have the same wiring system. So, consult the manual or an electrician for guidance.
From my own experience, I recall working as an electrician at the gymnasium. We were replacing old motors, and while disconnecting the wires, I found one of them frayed and caught in between screws and nuts. This could have been hazardous if left unattended. Thus, it’s vital to inspect wires while disconnecting them.
Dismantling the motor from the blower assembly can be a hassle. It’s like ending a clingy relationship – messy, tiresome, and you may get hurt.
Detach Motor from Blower Assembly
Detaching an old motor from a blower assembly can be tricky. Here’s a 4-step guide to help:
- Use a screwdriver to loosen the screws connecting the motor to the blower.
- Disconnect any wires or cables attached to the motor.
- Pull the motor away from the assembly with care.
- Place the old motor aside and move on to installing the new one.
Consult your manufacturer’s instructions, as each assembly has different methods for motor attachment.
Also, inspect the old motor for wear or damage. It could point to other repairs or replacements needed in your system.
Pro Tip: Before powering on, double-check all wires and connections when reattaching a new motor. Avoid accidents or further damage!
Installation of New Motor
To install a new blower motor in your HVAC system, you’ll need to follow a step-by-step guide that includes the proper configuration of wire colors, capacitor, motor housing, and set screws. In this section on ‘Installation of New Motor’ with sub-sections ‘Attach New Motor to Blower Assembly’, ‘Attach Blower Wheel and Capacitor’, ‘Connect Wire Leads’, and ‘Secure Motor in Place’, we’ll give you instructions on each of these tasks to make the process a smooth one.
Attach New Motor to Blower Assembly
Loosen the bolts from the motor mount to begin the crucial process of attaching a new motor to the blower assembly. Carefully remove the old motor and disconnect any cables connected to it. Align the new motor with the mount and tighten the bolts.
Now, fix the blower wheel onto the shaft of the new motor. Secure with screws or clamp rings. Connect electrical wires or terminals according to their respective colors and markings on the wiring diagram.
Test if everything is in order by rotating the blower wheel gently. If it moves smoothly without noise, the installation process is complete.
Remember, each model has unique specs and requirements for motor attachment. Get familiar with them before starting for quick and error-free installation.
Missing out on attaching new motors increases wear and reduce HVAC unit efficiency. So, book an appointment with experts today for optimal performance of the system!
Attach Blower Wheel and Capacitor
Installing a new motor? Attaching the blower wheel and capacitor is key for optimal performance. Here’s how:
| 1. Find the blower wheel on the motor shaft. |
| 2. Align the blower keyway with the motor shaft keyway. |
| 3. Slide the blower wheel onto the shaft. |
| 4. Use an Allen wrench to tighten the set screw on the blower hub. |
| 5. Locate the capacitor mounting bracket on the motor base. |
| 6. Install the capacitor on the bracket. |
| 7. Connect its leads to their respective terminals. |
Not all motors have a separate capacitor; some are built-in. Check the owner’s manual for specific instructions.
Secure the blower wheel and capacitor to ensure the efficient operation of the new motor. According to Electric Motors and Drives – fundamentals, types, and Applications by Austin Hughes, “The most common type [of AC motor] makes use of an external capacitor connected to one of two windings.” Connections made easy!
Connect Wire Leads
When installing a new motor, it’s important to properly connect wire leads. Follow these 4 steps:
- Identify the wire ends and their corresponding terminals.
- Strip 1/2 inch of insulation from each wire end.
- Insert each wire into its terminal.
- Secure and protect the wires with electrical tape or zip ties.
Remember to consult the manual. Double-check the connection points before testing. Don’t force wires into the terminals. Avoid kinking, twisting, or bending wires too much. Add insulation to prevent exposed conductors.
Following these tips will maximize safety and efficiency for optimal performance! Because having a motor fly across the room during installation is not ideal!
Secure Motor in Place
Installing a new motor properly is key for its efficient working. Follow these steps:
- Make sure the surface is neat and flat.
- Position the motor and fasten it with bolts.
- Tighten bolts in a diagonal pattern.
- Check alignment once more.
Secure the motor. It’s essential for optimal performance and safety. Don’t forget this step or your motor may malfunction or suffer damage. Check your work to be sure. Time to fit the pieces and hope this motor’s more reliable than my ex!
Reassembly and Testing
To successfully reassemble your furnace blower motor, it’s crucial to test the motor’s operation and make final adjustments. Install the blower door and screw it in place to ensure it fits securely. The next step is to reconnect the wires to the control board. Once this is done, it’s time to turn on the power supply and test the airflow. Finally, make any necessary adjustments to fine-tune the system for optimal energy use and airflow.
Install Blower Door and Screw in Place
Installing a blower door properly is key for accurate testing and optimal performance. Here’s the how-to:
- Put the blower door frame in the doorway.
- Match up the screw holes on both sides of the frame with those in the doorway.
- Screw in each hole on one side of the frame.
- Tighten ’em up, but not too much.
- Repeat steps three and four for all the other holes.
- Secure any extra components with the recommended methods and hardware.
Be sure to check alignment before starting. For specific installation instructions, refer to the manufacturer’s notes.
Reconnect Wires to Control Board
When it comes to reassembling and testing a control board, one essential step is reconnecting the wires. To ensure that the system runs without any glitches, here’s a concise guide to help you do this correctly.
- Identify the connectors: Take a look at the connectors on your control board. Check for labels or documentation if available.
- Align the connectors: Match each wire to its designated connector and make sure they fit snugly.
- Secure the connections: Use zip ties or clamps to secure the wire connections and avoid accidental disconnections.
- Test the system: After connecting the wires, power up the system and test its functionality.
- Get professional help: If you face any difficulties, don’t hesitate to seek professional assistance.
Remember to take safety precautions like grounding yourself before beginning the repair work. Double-check all connections before powering on the system again.
In the past, connecting various wires was a laborious task done manually. Modular Jacks changed this, eliminating the need to splice conductors onto cables at each installation point. Now, it’s time to get ready for the sparks, turn on the power supply, and feel the airflow!
Turn on Power Supply and Test Airflow
When putting together a device, the power supply and airflow testing is a must. Follow these four steps for success:
- Plug in the power supply and flick the switch.
- Listen for any unusual noises or vibrations.
- Feel the airflow from the vents.
- If all is normal, proceed with further testing.
Be aware! Insufficient/blocked airflow can cause overheating and damage.
Monitoring temperature and fan speeds is recommended too. This will prevent future issues and lengthen the device’s life.
Fun Fact: In 1965, IBM’s System/360 made waves. It had over 92,000 transistors and was considered revolutionary. But due to its high processing power, it needed huge cooling. Get ready to make the necessary adjustments to guarantee success in reassembly and testing.
Make Necessary Adjustments
Reassembling and testing need adjustments to run smoothly. These can be from tightening bolts to calibrating equipment. Note: Even a small wrong alignment can cause big issues.
Follow manufacturer guidelines and take expert advice while making these changes. Also, be careful of safety hazards while working with heavy machines and high-pressure elements.
Document every adjustment made in a logbook. This helps check consistency in testing. Additionally, use tools or software for calibration and measurement for more accurate results.
Adjustments during reassembly and testing are necessary for maximum performance and the longevity of equipment. Pay attention, follow guidelines, and document properly for a safe and efficient process.
Note on Variable Speed Blowers
Variable speed blowers are a regular thing in today’s HVAC systems. They can adjust output to fit the heating or cooling needs, saving energy and keeping comfort levels up. Look at the chart to learn more.
| Variable Speed Blower | Overview |
| How it Works | Adjusts airflow based on system needs |
| Benefits | Improves energy efficiency and comfort |
| Maintenance | Requires regular cleaning of air ducts and air filters |
Not all HVAC systems use variable speed blowers. Get a technician to check if yours does. When replacing a furnace blower motor, make sure it fits in the blower assembly. Verify wire colors and connections before removing the old motor. These steps will help you succeed.
Fun fact: Furnaces have been around for over 2,000 years! Back then they were wood or oil-fueled. Nowadays, they are much better designed and more efficient, perfect for modern homes. So if you’re changing the blower motor, don’t worry. Just keep these tips in mind and you’ll be enjoying the hot air soon!
Tips for Blower Motor Replacement
To help you with the blower motor replacement task, here are some tips you can use. When you’re replacing the old motor, blower assembly, and control board with new ones, it’s essential to keep track of all the screws and brackets. Be careful not to damage the blower housing while removing the motor. After installing the new motor, it’s important to check the alignment of the blower wheel so that the blower runs smoothly without any issues.
Keep Track of Screws and Brackets
Replacing a blower motor? Don’t forget the screws and brackets – they may be small, but they are vital for attaching the motor and keeping it running properly. Here are 5 tips to keep them in check:
- Find a small container to store all screws and brackets.
- Remove each part gently, without damaging threads or other components.
- Place each screw/bracket in the container right after taking it off.
- Label each piece with notes or diagrams for easy assembly later.
- Don’t lose any parts, or it could cause serious damage to the system.
Remember: some blower motors require special screw sizes or bracket configurations – make sure you check the manufacturer’s instructions. This practice is not new – mechanics have been doing it for decades. Follow these tips and you’ll successfully replace your blower motor while keeping all components safe! Oh, and don’t forget to be gentle with the housing – it may not have a say in the process, but it can still feel pain!
Be Careful Not to Damage Blower Housing
When replacing the blower motor, it’s important to handle the housing carefully. Damage can cause inefficiencies and more repairs. Follow these steps to replace the motor:
- Turn off the power supply.
- Disconnect all connections from the old motor.
- Remove screws or bolts that hold the motor and housing together.
- Lift out the old motor and set it aside.
- Take care installing the new blower motor, ensuring no damage is done to the housing.
Clean any debris or buildup inside the housing before installing the new motor. This will improve its efficiency and performance.
One HVAC technician shared a story of a client who cracked their housing during a DIY blower motor replacement. This led to a costly repair bill! So, always be careful when working on HVAC components. Make sure the blower wheel isn’t spinning out of control.
Check the Alignment of the Blower Wheel
It’s crucial to inspect your blower wheel for smooth and efficient HVAC system functionality. Not doing so can lead to higher energy bills or costly repairs. Follow these 3 steps:
- Turn off the power supply. Safety first!
- Locate the motor. This provides access to the wheel.
- Check the alignment. Rotate the wheel and watch for wobbling or imbalance. If seen, consult an expert.
Remember: Aligning the blower wheel correctly prevents malfunctions, repairs, and hefty costs. Always look out for issues!
A client once called an HVAC technician in a panic because of loud noises coming from the unit. Upon inspection, the blower wheel was misaligned and needed fixing. The technician saved them thousands by intervening early. To avoid problems – don’t let your cat sleep on it.
Common Issues and Troubleshooting
To troubleshoot common issues that arise with your furnace blower motor, this guide with sub-sections on diagnosing problems, checking for dirt and dust accumulation, and replacing the belt drive motor can be incredibly helpful. By working through these steps, you can identify potential issues, clear away any accumulated debris, and replace the motor if needed, returning your HVAC system to optimal operation and ensuring maximum energy efficiency for years to come.
- Diagnosing Problems
- Checking for Dirt and Dust Accumulation
- Replacing Belt Drive Motor
Diagnosing Problems
Diagnosing problems is key! First step: identify the issue. Stay calm when facing troubles. Start with the basics – check connections, restart the system, or clear the cache for software issues. Complex problems may require deeper research – analyze error messages, compare with default settings, or contact customer support. Documentation is essential to keep track of all attempts made. Pro Tip: Don’t rush into solutions without a proper diagnosis – it might do more harm than good. Ever thought maybe your computer is allergic to dust? Maybe it’s time to give it some antihistamines!
Checking for Dirt and Dust Accumulation
It’s a must to watch out for dust and dirt build-up, which can bring about diverse problems in electronic devices. To avoid this, regularly inspect for dirt and dust.
- Shut the device off and unplug it from power.
- Grab a soft-bristled brush or microfiber cloth to wipe away any visible dirt.
- Utilize compressed air to blow out any particles snuggled in the crevices of the device.
- Examine ventilation ports, grilles, and filters for blockage due to dirt and dust. Clean them cautiously.
- If needed, use a specialized cleaning solution to abolish hard stains or grime on surfaces.
- Engage in regular cleaning to stop the accumulation of dust and dirt.
Don’t use water or strong chemicals when cleaning an electronic device as it can harm delicate components. Neglecting to clean may cause devices to overheat or clog, shortening their lifespan. According to TechRepublic.com, “Dust buildup causes around 90% of computer failures.” Keeping it clean is key for optimal performance and extending the life of your electronics. So, say goodbye to dirt and dust, and ‘Hello‘ to a long-lasting electronic device!
Replacing Belt Drive Motor
Replacing the belt drive motor can be tough. Here’s a quick guide to make it easier:
- Unplug or switch off the machine to remove any power sources.
- Find the motor and take it out with the right tools.
- Secure the new one with the same tools. Take care to avoid personal injury or damage.
- Check for other issues, like belt or pulley wear.
Did you know? Belt-driven motors have been around since ancient times. They’re now in household appliances, like washers and treadmills.
And a tip: when troubleshooting, it’s not about finding the problem, it’s about blaming someone else!
Conclusion
It’s important to replace an old furnace blower motor correctly. To do this, you must remove the old motor, disconnect the wires, and install the new one. Make sure to note details such as wire colors, set screws, screw holes, and brackets.
Remember that some HVAC systems have variable speed blowers which need extra parts, like a control board or capacitor. Also, clean the blower wheel and housing before installing the new motor for efficient airflow and energy use.