
Summary
Changing the temperature display from Fahrenheit to Celsius on a Pioneer remote control is a straightforward process that involves navigating the remote’s settings. By following a few simple steps, you can easily switch the temperature unit to your preferred Celsius scale, allowing you to monitor and adjust the temperature of your air conditioning unit with greater precision and familiarity.
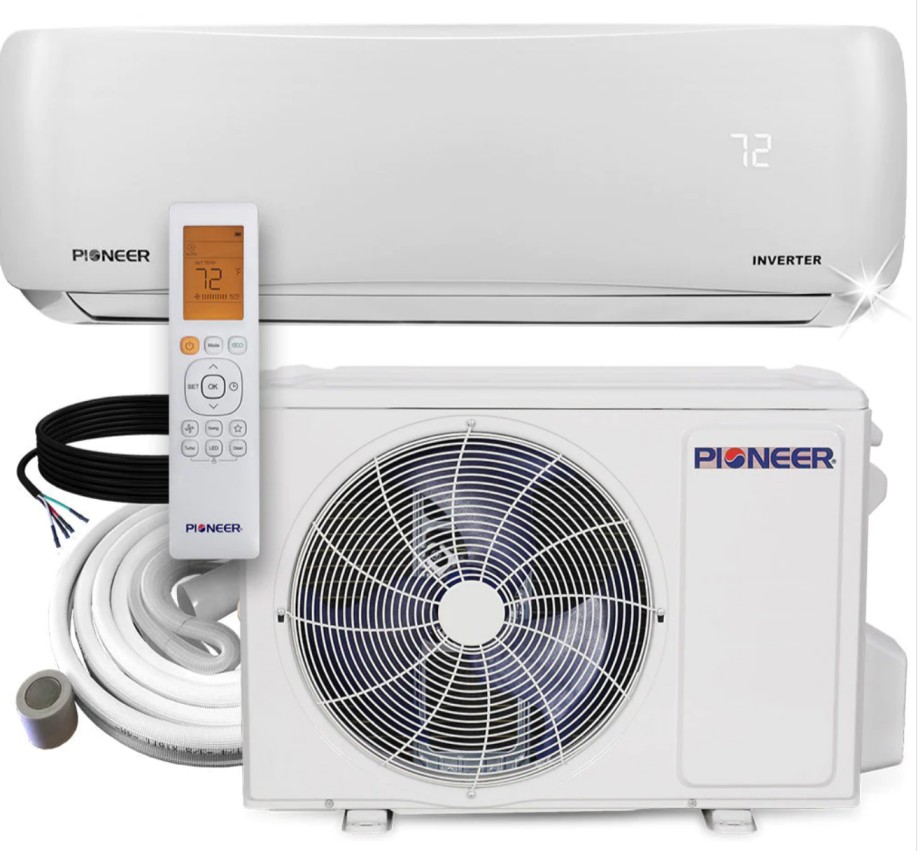
Turning on the Unit and Selecting COOL Mode
- Press the ON/OFF Button: Locate the ON/OFF button on your Pioneer remote control and press it to power on the air conditioning unit.
- Select COOL Mode: Press the MODE button repeatedly until the display shows the COOL mode indicator. This ensures that the temperature adjustment functions are active and ready for use.
Adjusting the Temperature
- Use the TEMP Buttons: Locate the TEMP and TEMP buttons on your Pioneer remote. These buttons allow you to increase or decrease the set temperature in 1-degree increments.
- Monitor the Temperature Display: Observe the temperature display on the remote’s screen to ensure that the desired temperature is set correctly.
Changing the Temperature Display from Fahrenheit to Celsius
- Press the MODE Button: Press the MODE button until the COOL mode is displayed on the remote’s screen.
- Press the SET Button: Locate the SET button on the remote and press it to access the functional settings.
- Scroll Through the Settings: Use the SET button to scroll through the various functional settings until you reach the TEMP setting.
- Change the Temperature Display: Press the TEMP button to toggle the temperature display from Fahrenheit to Celsius.
Verifying the Temperature Range
- Understand the Temperature Range: The temperature range for your Pioneer air conditioning unit is typically 62-86°F (17-30°C).
- Adjust the Temperature in 1° Increments: You can increase or decrease the set temperature in 1-degree increments using the TEMP and TEMP buttons.
Troubleshooting and Additional Resources
If you encounter any issues or have further questions regarding changing the temperature display on your Pioneer remote, refer to the following resources:
- Pioneer Heat Pump Systems Wireless Remote Controller Manual
- Pioneer Remote Controller Manual – Parker Davis HVAC International
- Pioneer Air Conditioner Remote Control Guide – YouTube
These resources provide detailed instructions, troubleshooting tips, and additional information to help you navigate the temperature display settings on your Pioneer remote control.
Technical Specifications and Considerations
- Remote Control Model: The exact steps for changing the temperature display may vary depending on the specific model of your Pioneer remote control. Refer to the manufacturer’s instructions or the remote’s user manual for model-specific guidance.
- Temperature Sensor Accuracy: The temperature sensor in your Pioneer air conditioning unit and remote control is designed to provide accurate readings within a certain tolerance range. Factors such as sensor placement, ambient conditions, and calibration can affect the temperature accuracy.
- Temperature Conversion Algorithms: The remote control’s internal software uses specific algorithms to convert between Fahrenheit and Celsius temperature scales. These algorithms are designed to provide precise and consistent temperature conversions.
- Remote Control Firmware Updates: Pioneer may release firmware updates for their remote controls, which can include improvements or changes to the temperature display functionality. Check for available updates and follow the manufacturer’s instructions to ensure your remote is running the latest software version.
- Remote Control Compatibility: Ensure that your Pioneer remote control is compatible with the specific air conditioning unit you are using. Incompatible remote controls may not be able to access or change the temperature display settings.
- Remote Control Battery Life: The remote control’s battery life can affect its performance and responsiveness. Replace the batteries as recommended by the manufacturer to maintain optimal remote control functionality.
- Remote Control Buttons and Feedback: The buttons on your Pioneer remote control should provide clear and tactile feedback when pressed, ensuring a responsive and intuitive user experience when adjusting the temperature settings.
- Remote Control Display Clarity: The remote control’s display should be easy to read, with clear and legible temperature readings and mode indicators, even in various lighting conditions.
By understanding these technical specifications and considerations, you can ensure a seamless and efficient experience when changing the temperature display from Fahrenheit to Celsius on your Pioneer remote control.