
Table of Contents
Gas Pressure Check: An Overview
Checking your furnace’s gas pressure is a must for optimal performance and safety.
- Start by finding the gas valve and switching off the furnace.
- Then, access the front/side panel and look for the model plate. This has info like the BTU rating, gas input, and pressure setting.
- Connect a manometer to the gas valve using a flexible hose.
- Turn on the furnace, light the pilot, and adjust the pressure valve with a screwdriver until it matches the WC measurement.
Don’t increase pressure beyond the specified amount, as that could cause issues like fire or damage. It’s better to get a heating technician for safety.
A homeowner once tried to fix his furnace himself to save money but ended up with more problems. DIY may not be cost-effective; consulting a pro can save you time and money, plus ensure safety.
When checking the pressure, don’t forget safety goggles; no one wants burnt eyes!
Necessary Tools And Safety Precautions To Check Gas Pressure On Furnace.

When checking the gas pressure on a furnace, safety is key.
Here are some tips:
- Turn off the appliance and wait for it to cool.
- Get a manometer that works with natural gas and has an output in inches of water column.
- Find the gas valve; consult your furnace’s manual or manufacturer’s website if needed.
- You may need a wrench or pliers to remove the access panel or disconnect the gas pipe.
- If uncertain, hire a professional technician.
Furnace models may have different pressure settings and requirements; consult the manual before adjusting. Normally, most furnaces work within a range of 3-5 inches of water column.
In the past, people checked gas pressure with glass tubes filled with liquid.
Now, we have modern technology; but how far we’ve come is still impressive!
Locating And Accessing The Gas Pressure Valves On the Furnace.

- Turn off the gas supply and remove the front access panel to reveal the manifold pipe.
- The gas pressure valve will be located at one end of this metal box, with a plug or cap covering it.
- Use a wrench to remove this plug.
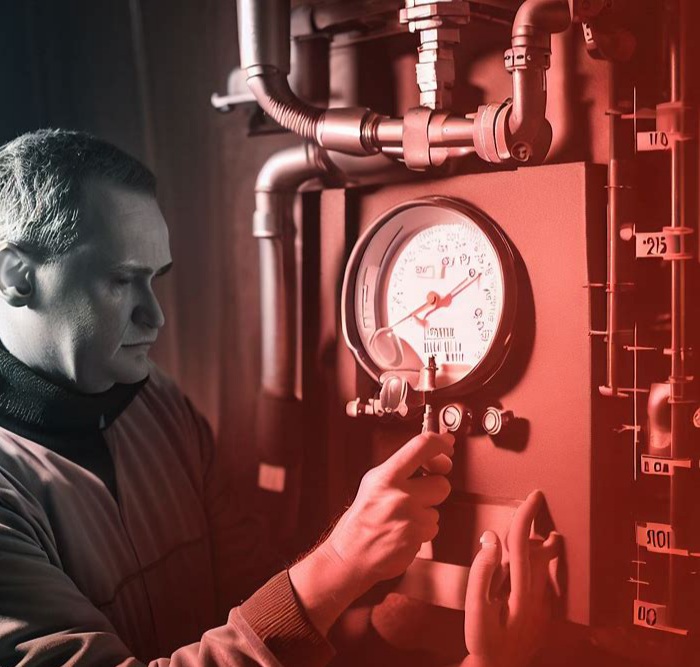
- Connect the hose adapter of a manometer to this port and turn on the furnace’s power.
- Turn up the thermostat and wait for the burners to light up.
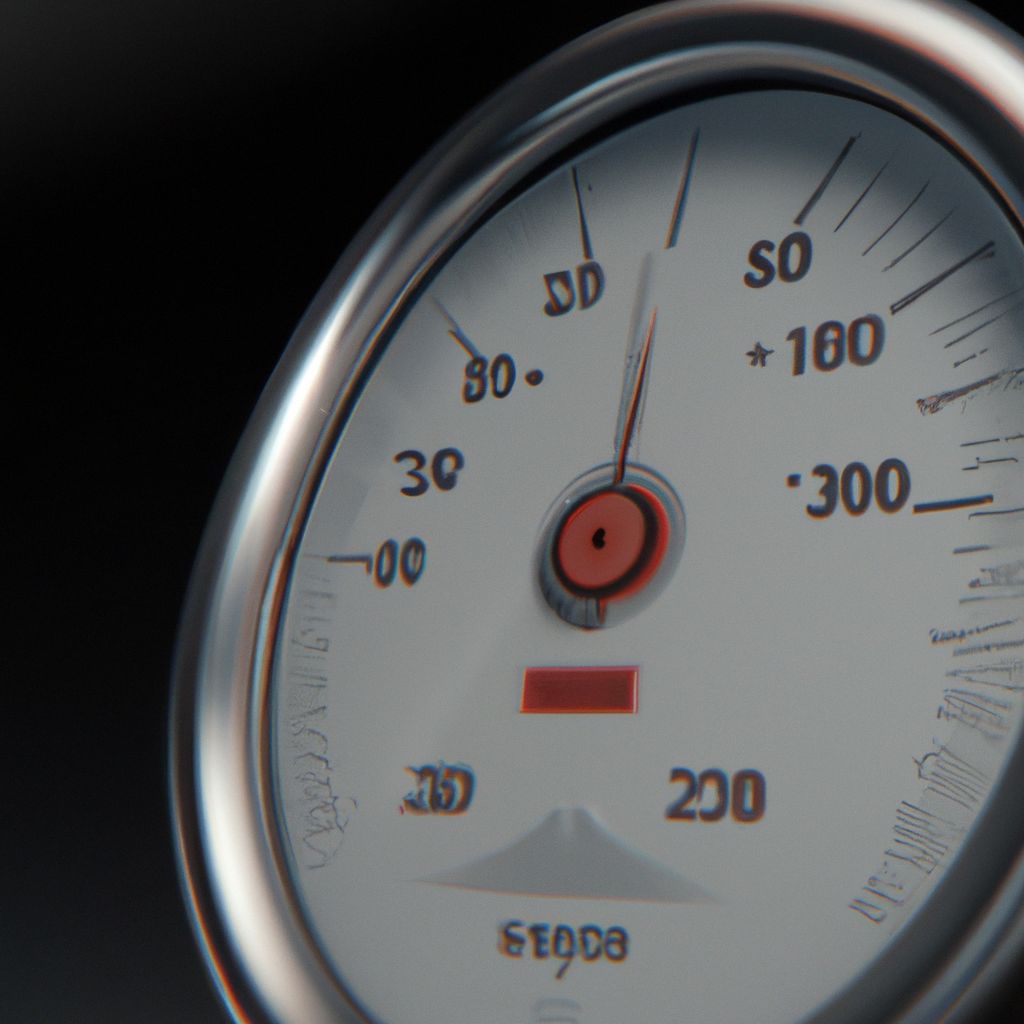
- Check the reading on the manometer; 3½ inches water column (in WC) for Stage I furnaces and 10 in WC for high-stage furnaces.
Adjust any problems by turning clockwise or counterclockwise until you reach an appropriate measurement.
Watch out for manufacturer pressure-setting stickers. With care, you can adjust it yourself without calling a technician.
Let’s man up and prepare the manometer!
Preparing The Manometer For Use On Furnace.

Gather your tools and equipment to prep the manometer for use when checking the gas pressure on a furnace.
It’s essential to ensure accuracy, so follow these 3 steps:
- Connect the tubes from the manometer to the gas valve on your furnace. Secure them in place.
- Set the furnace to burners-and-pilot mode. Don’t ignite the burners. Make sure the pilot light is on.
- Adjust the valve control per the appliance’s rating plate specifications.
- Carefully observe the gauge when increasing/decreasing pressure.
Remember to keep the gas pipe access panel doors open during measurements and adjustments.
For DIY projects, WikiHow is a great online source! Learn how to check furnace gas pressure and more! Let’s get started!
Connecting The Manometer To The Furnace.
To link the manometer and furnace, follow these 6 steps:
- Turn off the gas valve and unplug the furnace.
- Locate the pressure tap on the manifold. Remove any stickers or plugs.
- Attach one end of a hose to the pressure tap and the other to the inlet port of your manometer. Secure them with a barb fitting or adapter.
- Turn your furnace to heating mode. Let it run for a few minutes.
- Measure with your manometer. Calculate the number based on natural gas (inches of water column) or propane (PSI).
- Make adjustments to the pressure setting. Turn the adjustment screw counterclockwise to increase pressure or clockwise to decrease it.
- Check the burner flame until you see a blue flame with gentle flickering tips.
Remember, not all furnaces are the same. Research your model beforehand and consult a technician if you’re having issues.
Wrong pressure settings can lead to inefficient heating, wasted energy, and even fires or carbon monoxide poisoning.
Accessing the pressure tap may be hard, so try removing the front access panel or locating a side panel. If you have trouble timing during each stage, consider taking photos or recording videos to help.
Connecting the manometer is important for managing and optimizing pressures for your furnace.
Take your time, follow procedures, and prioritize safety.
Measuring The Gas Pressure On the Furnace.
When measuring gas pressure, it’s key to follow the right steps and use the proper equipment.
For this job you’ll need:
- Manometer.
- Hex head screwdriver.
- Manifold gauge set (for two-stage furnaces).
Here’s a guide to do it safely and accurately.
- To start, turn off the power to your furnace. Remove the front access panel.
- Locate the pressure tap on the gas valve for manifold pressure reading or the input/outlet port for gas input reading.
- Connect the hose from the manometer to the tap or port.
- Now, turn on the power to the furnace and set the thermostat higher than room temperature to activate the burners.
- Use the hex head screwdriver to make any needed pressure adjustments: counterclockwise for increase, clockwise for decrease.
- Check the primary air and manifold pressures at different times during the operation of the burners as specified by the manufacturer rating plate or research manual.
Remember, gas pressure can vary depending on the furnace type and individual appliance issues, so it’s important to stick to the right protocol for both accuracy and safety. Check for any stickers or markings indicating specific gas valve settings too; this can affect the results.
Going further, it’s good to involve a licensed technician with furnace experience if uncertain about how to check the gas pressure setting.
Also helpful are resources like wikiHow or instructional videos from manufacturers that offer step-by-step help.
By following proper procedures and seeking out helpful resources, homeowners can measure their furnace’s gas pressure accurately and keep their heating system safe and efficient.
Now you can confidently measure and adjust your furnace’s pressure!
Adjusting The Pressure Setting On the Furnace.
- Find the gas valve and switch off the pilot light.
- Open the front of your furnace and spot the pressure valve.
- Reference the model plate or stickers from the manufacturer.
- Connect a manometer to the valve outlet port.
- Set it for inches or water column (WC).
- Turn on the furnace and look at the manifold pressure reading.
- Make sure it is within the recommended range found on the rating plate or manual.
- Twist the screwdriver counterclockwise if needed to get within range.
Be wary of any possible trouble that could happen from the wrong pressure settings. Like too much pressure leading to primary air flow issues or too little pressure causing burner ignition problems.
Do not forget this important step for guaranteeing your gas furnace’s best performance! Take time to discover more ways to keep your appliance in good shape. Read manuals or watch videos online. Or, call a technician for help.
Double-checking gas pressure is always a smart move to avoid any future issues.
Re-checking Gas Pressure On Furnace After Adjustment.
Checking your furnace’s gas pressure is vital for safety and efficiency. After making changes, re-check the pressure to make sure it’s okay.
Follow this step-by-step guide:
- Turn off the furnace.
- Find the manometer (pressure measurer).
- Uncap the pressure valve and connect one hose end to it.
- Connect the other hose end to the manifold pressure tap or gas valve outlet port.
- Turn on the furnace and wait for it to start.
- Check that the manometer gauge is within the recommended range.
Every furnace model has unique details about adjusting/checking gas pressure; refer to the manufacturer’s user manual.
Pro Tip: If you have issues with increased pressure or any other problems after checking/adjusting, contact a licensed technician.
Troubleshooting furnace issues is like detective work; strange noises and no heat are your only clues!
Troubleshooting Common Gas Pressure Issues On The Furnace.

Gas pressure issues in a furnace can be so annoying for homeowners.
Step 1? Troubleshoot the common issues. One of these is gas pressure. To troubleshoot, use a manometer to adjust the pressure setting. Be careful! Follow safety precautions to avoid accidents.
Didn’t work? Could be other issues; like clogged tubes or Pilot light outages. Low manifold pressures can lead to poor heating. Do research according to manufacturer instructions. Check stickers and model plates for burners and primary air adjustments.
My friend Sheila had her gas valves adjusted to increase pressure. The problem was, her old furnace couldn’t support high BTU input. So a technician came over, replaced her pressure valve, and capped the hoses after tests with manometers and gauges.
Let’s hope your furnace doesn’t have any fiery surprises!
Frequently Asked Questions.
Q1: Why is it important to check the gas pressure on a furnace?
A: Checking the gas pressure on a furnace is important for several reasons. First, it ensures that the furnace is operating efficiently and safely. Proper gas pressure is necessary for the furnace to generate the right amount of heat and maintain a consistent temperature. Additionally, checking the gas pressure allows you to identify any potential issues or malfunctions in the system that may require repairs or adjustments.
Q2: What tools are needed to check the gas pressure on a furnace?
A: To check the gas pressure on a furnace, you will need a few specific tools. These typically include a manometer, a wrench or screwdriver for accessing the gas valve, and a gas pressure test kit. The gas pressure test kit often includes a pressure gauge, hoses, and connectors to facilitate the measurement process. It is important to ensure that the tools used are suitable for measuring gas pressure accurately and safely.
Q3: How can I locate the gas pressure test port on my furnace?
A: The location of the gas pressure test port can vary depending on the specific furnace model. In general, the test port is typically located near the gas valve. It may be a small fitting or nipple with a cap or plug that can be removed to connect the pressure gauge. Consult your furnace’s user manual or manufacturer’s documentation to find the exact location of the gas pressure test port for your specific furnace model.
Q4: What are the steps involved in checking the gas pressure on a furnace?
A: Here are the general steps involved in checking the gas pressure on a furnace:
- Ensure safety: Turn off the furnace and wait for it to cool down completely before proceeding.
- Access the gas valve: Remove the access panel or cover to reach the gas valve of the furnace.
- Connect the pressure gauge: Attach the pressure gauge from the gas pressure test kit to the gas pressure test port on the furnace.
- Turn on the furnace: Follow the manufacturer’s instructions to turn on the furnace while keeping the gas valve accessible.
- Monitor and record the gas pressure: Observe the pressure gauge readings and compare them to the recommended pressure range specified in the furnace’s documentation. Record the measurements for reference.
- Adjust if necessary: If the gas pressure is outside the recommended range, consult a professional HVAC technician to make the necessary adjustments to the gas valve.
Q5: What is the recommended gas pressure range for a furnace?
A: The recommended gas pressure range for a furnace may vary depending on the specific furnace model and the gas supply in your area. It is crucial to refer to the manufacturer’s documentation or consult a professional HVAC technician for the precise recommended gas pressure range. In general, the gas pressure range for residential furnaces typically falls between 3.2 to 3.8 inches of water column (in WC).
Q6: How often should I check the gas pressure on my furnace?
A: It is recommended to check the gas pressure on your furnace at least once a year as part of routine maintenance. However, certain situations may warrant more frequent checks. For example, if you notice any issues with the furnace’s performance, unusual noises, or a significant increase in your energy bills, it is advisable to check the gas pressure promptly to rule out any potential problems. Additionally, if you have recently had any repairs or modifications done to the furnace or gas supply system, it is essential to verify the gas pressure to ensure proper operation.
Conclusion
It’s time to do the final checks on your furnace. Check the gas valve, manifold pressure, pilot light, and burner rating plate for any issues. Make sure you follow the manufacturer’s instructions for setting the pressure. Now switch on the furnace and enjoy its heat. Safety is important. If you have any problems or don’t know what to do, ask an experienced technician for help. You can find resources online to help check gas pressure on furnaces. I had a unique problem with mine. After research, I found a primary air adjustment screw I had to fix. It showed small details can affect furnace performance if not fixed.