
Table of Contents
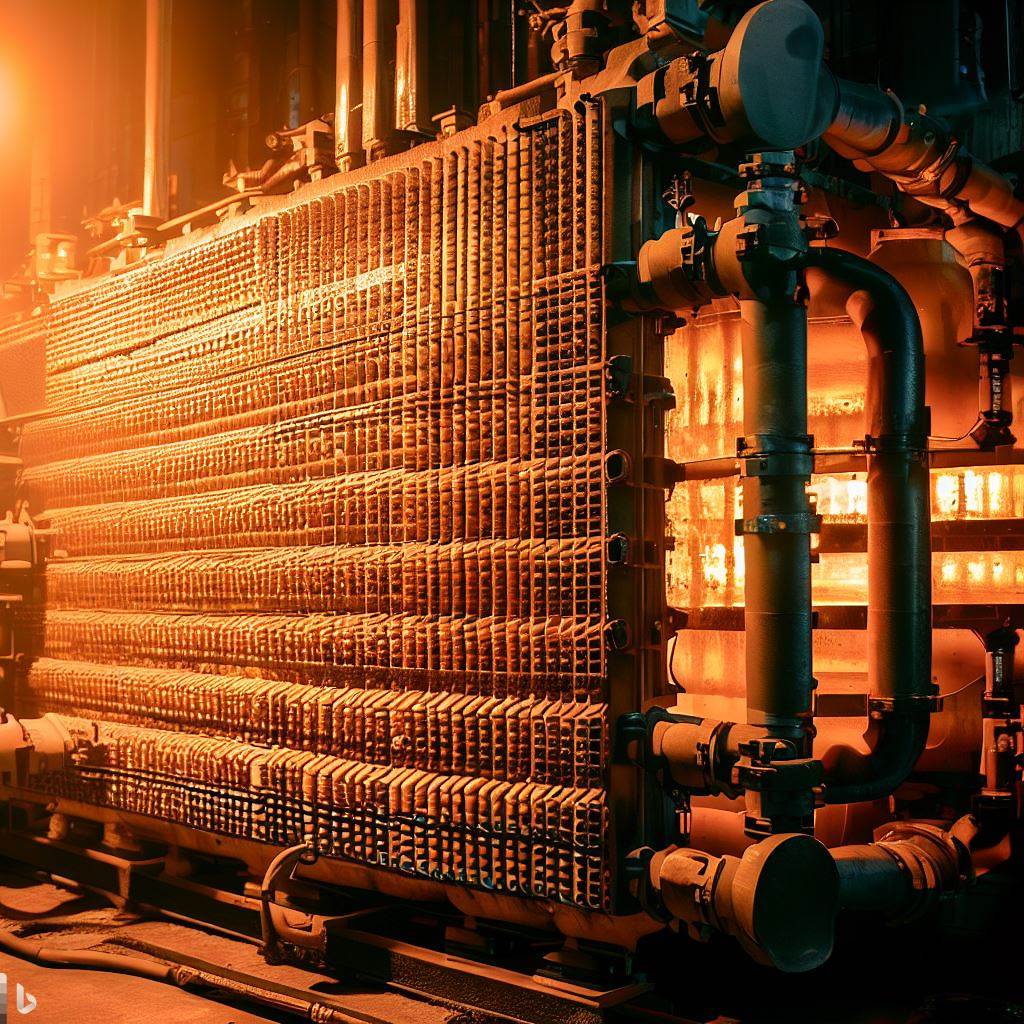
Oil Furnace Heat Exchanger
The oil furnace heat exchanger is an important part of your heating system. It helps transfer heat to warm the air in your home. Let’s explore its design, functions, and maintenance needs.
It’s a device that moves heat from one medium to another, e.g. oil to air. Its function is to produce and distribute heated air throughout your home. Parts include Primary Heat Exchanger, Secondary Heat Exchanger, Flue Pipe Extension, Combustion Chamber, Canister Cover Assembly, and Refractory Material.
Damage could come from soot build-up, elbow leakage, masonry degradation, and corrosion from humidity or acidity.
Maintenance should be done annually. An HVAC technician will inspect the unit for leaks, replace worn parts, and clean out deposits with compressed air.
Neglecting maintenance can lead to carbon monoxide poisoning or costly repairs. Get your PPE gear ready for oil furnace heat exchanger cleaning!
Preparation for Cleaning the Oil Furnace Heat Exchanger
To prepare for cleaning your oil furnace heat exchanger and avoid any damage, you need to inspect the furnace for any leakage or damage, turn off the power, gas, and oil supply to the furnace, and gather the required tools such as compressed air, blower, and oil furnace cleaning tools. In this section, we will briefly introduce the sub-sections – Inspection of the Furnace, Turn off Power, Gas and Oil supply to the Furnace, and Gather Required Tools as the solution for being ready to clean the heat exchanger.
Inspection of the Furnace
Inspecting an oil furnace before cleaning the heat exchanger is essential. Here are five steps to follow:
- Turn off the Power Supply: Make sure the electricity is disconnected.
- Clean the Exterior: Use a damp cloth to remove dust and debris.
- Check the Air Filter: Replace it if it’s dirty or clogged.
- Inspect the Flue Pipe: Look for any damage or corrosion. Replace if needed.
- Look for Leaks: Inspect all connections and components for signs of wear and tear.
After you’ve inspected the furnace, you can now start cleaning the heat exchanger. Keep in mind that every furnace is unique, so if you have questions, ask a professional technician. Also, regular maintenance can boost the furnace’s efficiency by up to 10%.
Turn off the Power, Gas, and Oil supply to the Furnace
Shutting down the power, gas, and oil supply to your furnace is a critical step in prepping for cleaning the heat exchanger. Do it right and you’ll keep safe and avoid any accidents or damage to the hardware.
Here’s how:
- Find the main switch and switch it off.
- Close off the gas supply valve near the furnace.
- Turn off the fuel supply valve, usually found on either side of the oil filter or pump.
Be sure to double-check that all sources are off before you proceed. This eliminates any risk of sudden ignition or other accidents during maintenance. Also, put a drip tray beneath your furnace to prevent spills from damaging your floors or home. Wear safety gloves and eyewear when working with your heat setup.
When you take the right precautions, you can ensure your furnace performs optimally for a long time. Don’t neglect these steps and risk harm to the machinery or anyone involved in the maintenance. Now grab your tools and get ready for a messy job – because cleaning an oil furnace heat exchanger sure isn’t fun!
Gather Required Tools
Gathering tools for cleaning an oil furnace heat exchanger is essential for a successful and safe job. Here’s a 4-Step Guide:
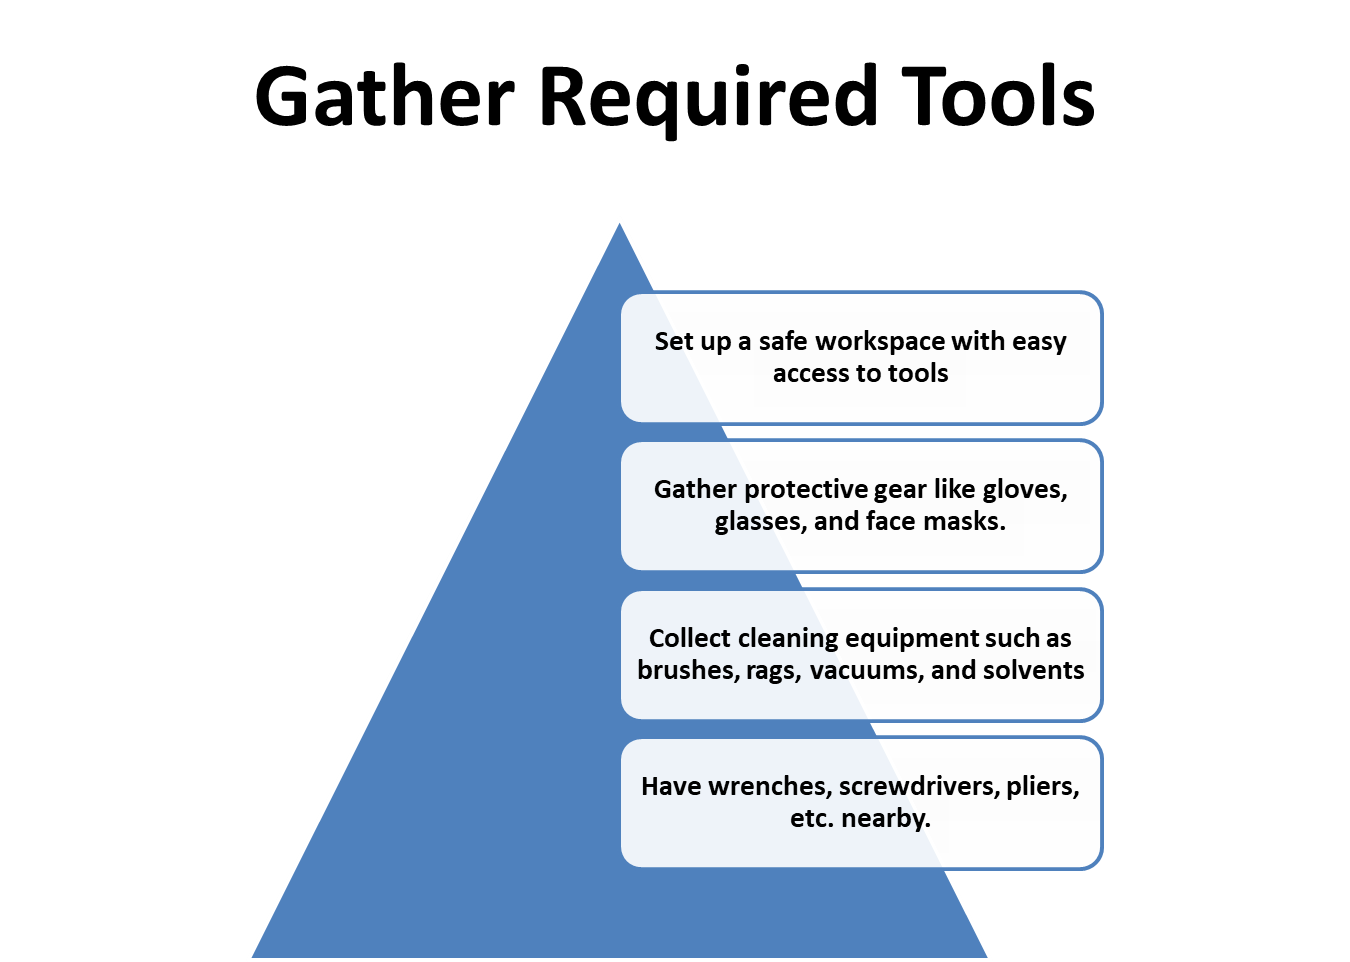
- Set up a safe workspace with easy access to tools.
- Gather protective gear like gloves, glasses, and face masks.
- Collect cleaning equipment such as brushes, rags, vacuums, and solvents.
- Have wrenches, screwdrivers, pliers, etc. nearby.
Safety is important! So, before starting, shut off the power and fuel supply.
Once, I had to gather tools for an oil furnace. But, the owner had misplaced some of them. We improvised with alternative tools which took longer but taught us to be resourceful.
Steps to Clean the Oil Furnace Heat Exchanger
To Clean the Oil Furnace Heat Exchanger with Open the Furnace Cover, Remove the Primary Heat Exchanger or Access Panel, Use Compressed Air to Clean the Primary Heat Exchanger, Remove the Secondary Heat Exchanger and Clean it with Compressed Air and Brush, Clean the Blower, Clean the Combustion Chamber, Clean the Flue Pipe Extension and Chimney, and Replace the Oil Filter and Nozzle if Required. These are all the necessary steps that you have to take into consideration to effectively clean your oil furnace. Each sub-section provides specific guidance on how to thoroughly clean each component of your furnace, which can help improve energy efficiency and prevent costly breakdowns.
Open the Furnace Cover
To start the cleaning process of your oil furnace heat exchanger, you must open the furnace cover. Care and caution must be taken for safe cleaning. Here’s a 6-step guide to opening the furnace cover:
- Turn off your furnace.
- Locate and remove screws or bolts using a screwdriver or wrench.
- Gently lift the cover off, being careful not to disturb anything.
- Disconnect any electrical connections if required, remembering how they were connected for later.
- Clean both sides of the cover.
- Replace the cover and secure it in place with the screws or bolts.
Note: Opening the furnace can be dangerous if you’re unaware of the process. Check the owner’s manual or get professional help if unsure. Wear protective gear like gloves and eye goggles. Follow safety guidelines when operating machinery.
By following these steps and taking necessary precautions, you can open the oil furnace heat exchanger cover and begin cleaning it to ensure optimal performance.
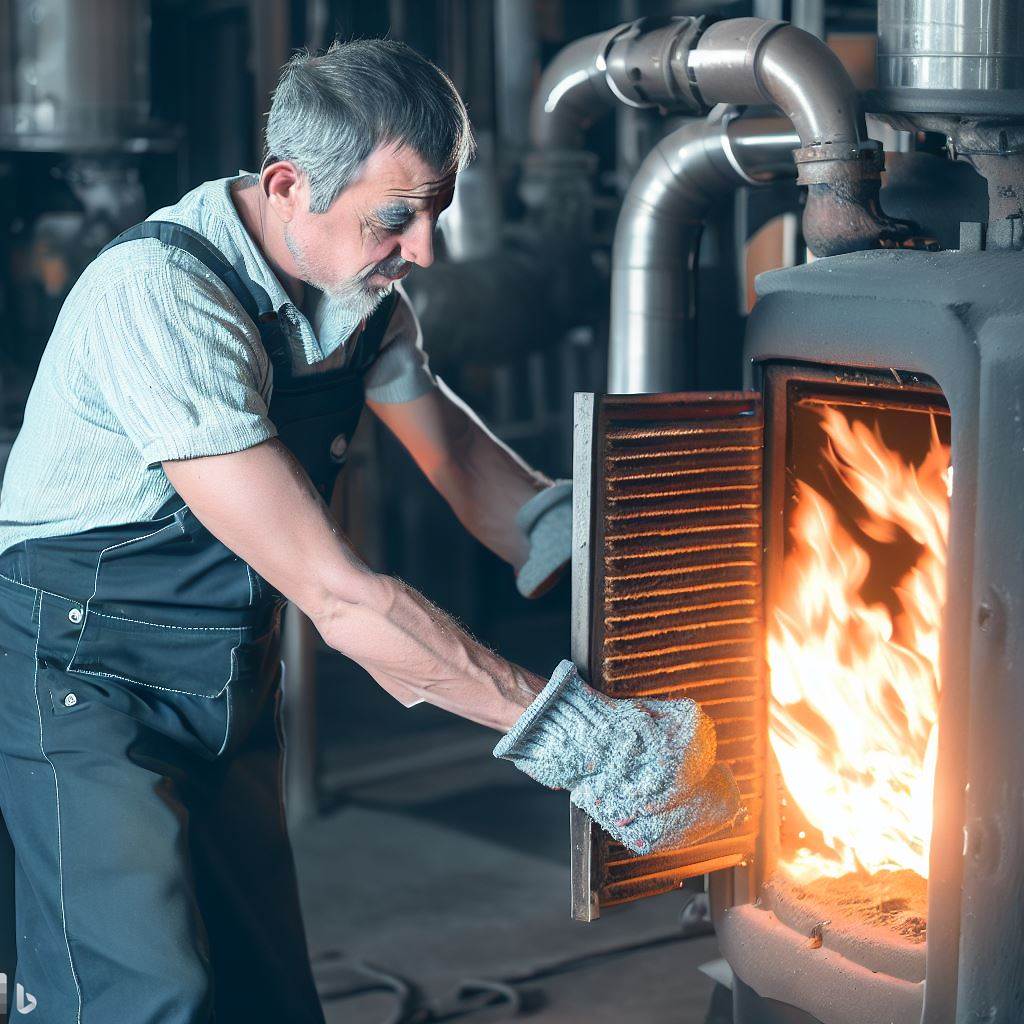
Remove the Primary Heat Exchanger or Access Panel
Uncovering the main heat exchanger or entrance panel is a significant advance when cleaning your oil furnace. Without the right consideration, your HVAC framework can get progressively less proficient with time. Here are the means by which you can remove the heat exchanger with no problem:
- Turn off the power to the furnace.
- Locate the primary heat exchanger or access panel.
- Utilize a screwdriver to eliminate any screws holding it in place.
Remember safety when taking out the primary heat exchanger: make sure to wear gloves and goggles. And don’t forget to clean other accessible parts of your furnace while you have access. This includes your burner nozzle, oil filter, and fuel pump screen.
Keep your furnace running at top efficiency throughout the year by scheduling maintenance checks every six months with a professional HVAC technician. Also, ensure to change air filters routinely and use quality heating oil from a dependable distributor. With customary upkeep, you can secure your speculation and stay warm all winter. At last, an extraordinary utilization for compressed air – cleaning your oil furnace heat exchanger!
Use Compressed Air to Clean the Primary Heat Exchanger
It’s essential to keep the oil furnace heat exchanger clean for efficient functioning and long life. Use compressed air for cleaning the primary heat exchanger. Here’s a guide:
- Turn off the power supply and let it cool.
- Remove access panels.
- Attach the air compressor with a pressure not exceeding 30 PSI.
- Blow compressed air through each duct.
- Vacuum any remaining particles.
- Cover back panels and turn on the furnace.
Moreover, check the filter regularly. Clogged filters affect both efficiency and indoor air quality. Cleaning the exchanger helps save energy and preserve ecology. So, use compressed air and a brush to clean the secondary heat exchanger.
Remove the Secondary Heat Exchanger Clean it with Compressed Air and Brush
Maintaining an oil furnace is key for optimal heating. The heat exchanger plays an essential role and must be kept clean. To do this, the secondary heat exchanger needs to be removed and cleaned with compressed air and a brush. Here’s a step-by-step guide:
- Turn off the power supply for safety.
- Detach the unit from its mount with a screwdriver.
- Blow off dirt with compressed air. Then, brush off any residue.
- Reattach all screws and the cover grill.
Be careful – wires could be attached to the screws. Never use water in this process. Read the manufacturer’s guidelines or instruction manual.
The practice of cleaning oil furnace heat exchangers dates back centuries. In those days, woodstoves were used for heating, and keeping them safe was very important. People could have been poisoned by carbon monoxide if these stoves malfunctioned. So, regular maintenance was highly valued. The same is true today. Don’t forget to give the blower a good scrub too!
Clean the Blower
To keep your oil furnace heat exchanger running efficiently, proper maintenance is key. Don’t neglect cleaning the blower, which helps circulate heat throughout your home. Otherwise, clogged filters, bad indoor air quality, and expensive energy bills can be the result.
Follow these 6 easy steps to clean the blower:
- Turn off the power.
- Remove screws or latches to access the blower compartment.
- Vacuum dust and debris around the blower assembly.
- Use a soft-bristled brush or cloth with warm water and mild soap to clean the blades.
- Reassemble blower components, making sure all nuts/bolts/screws are tight.
- Power up the oil furnace and check it works correctly.
Yearly cleaning and good ventilation will help prevent wear and tear and elevate air quality. Don’t wait until it’s too late – clogged blowers can cause costly internal parts damage. So take control now and call an HVAC technician! And remember, scrubbing soot out with a toothbrush is the perfect weekend activity.
Clean the Combustion Chamber
It’s important to keep your oil furnace heat exchanger clean. If it gets clogged with dust, debris, and other icky stuff, it could cause heating problems and cost you a lot of money. Here’s what you need to do:
- Turn off the furnace – safety first!
- Remove the burner cover with a screwdriver.
- Vacuum out the dust using a vacuum cleaner.
- Clean each burner tube with a cloth or brush.
- Check the flue pipe for any obstructions.
- Reassemble everything.
Don’t wait till it’s too late! Get regular maintenance to keep your furnace running smoothly and your home cozy during winter. Better clean the chimney now before Santa comes down it and gets covered in furnace gunk.
Clean the Flue Pipe Extension and Chimney
Clean your flue pipe extension and chimney regularly to keep the oil furnace heat exchanger running smoothly. Neglect this and suffer severe consequences! Here’s a 3-step guide:
- Switch off the furnace.
- Climb onto your roof with a brush and sweep away debris.
- Vacuum up any remaining dirt.
Also, check your chimneys more often, since clogging can occur if you don’t clean them each year. The National Fire Protection Association (NFPA) states that heating equipment fires make up 15% of home fires. So, it’s time to say goodbye to your old oil filter and nozzle – replacing them doesn’t require a heart transplant!
Replace the Oil Filter and Nozzle if Required
It is essential to change the oil filter and nozzle regularly, as directed by the manufacturer, for your oil furnace to run efficiently. This will increase its life and save you from costly breakdowns and fuel wastage. Here are five simple steps to replace them:
- Switch off the furnace and disconnect the power.
- Find the oil filter assembly (it looks like a canister or cartridge).
- Unscrew the old filter and drain any water or sludge.
- Tightly fit a new filter in place.
- Change the nozzle according to the manufacturer’s instructions.
Be sure to follow the manufacturer’s guidelines as there may be variations in instructions for different systems. Don’t over-tighten them during installation – it can damage your furnace. It is best to hire a professional for DIY maintenance, as doing it without the right knowledge can be risky.
Anthony from New Hampshire learned this the hard way. In 2005, he had to face a lot of trouble due to not replacing his oil filter during winter. Frozen pipes and total shutdown taught him a lesson that negligence can cause major issues. Not cleaning your furnace heat exchanger is taking a chance with your heating system.
Risks of Not Cleaning the Oil Furnace Heat Exchanger
To help you understand the potential consequences of neglecting your oil furnace heat exchanger, we will explore the risks of not cleaning the heat exchanger in this section titled “Risks of Not Cleaning the Oil Furnace Heat Exchanger”. If you don’t clean your heat exchanger, you run the risk of decreased efficiency as well as safety hazards like carbon monoxide poisoning. Let’s dive into the details of these risks so you can prevent any damage to your furnace and keep your household safe.
Risk of Decreased Efficiency
It’s crucial to maintain the efficiency of your heating system with an oil furnace heat exchanger. Not cleaning it regularly can cause a decrease in the effectiveness of your furnace and other issues.
The heat exchanger gets clogged with soot and debris. This limits airflow and reduces performance. It also puts strain on other parts, such as the blower motor. This can result in expensive repairs or replacements.
Dirty heat exchangers can be dangerous. The buildup of soot and debris increases the risk of carbon monoxide leaks, which can be fatal.
Maintaining your oil furnace can reduce its efficiency by up to 30%. Cleaning the heat exchanger regularly can prevent major problems. Carbon monoxide poisoning is rare, but cleaning your exchanger is still worth it. Be safe – clean your furnace!
Risk of Safety Hazards like Carbon Monoxide Poisoning
Maintaining your oil furnace is key to avoiding safety risks like carbon monoxide poisoning. The heat exchanger in an oil furnace collects soot and debris that can reduce the airflow. This blocked airflow can cause the furnace to overheat and create dangerous carbon monoxide gas.
Apart from the risk to people near the furnace, a malfunctioning heat exchanger could lead to damage to your home or property. You may also be stuck with repair bills or have to replace the furnace if neglected for too long.
For example, in 2019, a man’s family in Oregon was taken to the hospital because of suspected carbon monoxide poisoning. It was found out that their furnace heat exchanger had been blocked due to dirt and debris from bad maintenance. Fortunately, they were okay, but what if it had not been the case?
To sum it up, not cleaning your oil furnace heat exchanger puts lives in danger and may cost you a lot of money. Regular professional maintenance will ensure your heating system works safely and efficiently, without fear or safety concerns.
Keep your oil furnace running well with these maintenance tips, unless, of course, you don’t mind being stuck in a freezing house with a broken furnace.
Additional Maintenance and Service Tips for Oil Furnace Heat Exchanger
To ensure the longevity and efficiency of your heat exchanger, you should consider additional maintenance and regular service tips for your oil furnace heat exchanger with annual cleaning by experts, regular inspection of the furnace, use of quality oil and filter, and monitoring of the oil tank and valve. By following these easy steps, you can prevent damage, deposits, leaks, and partials in your furnace, and keep your heating system running smoothly throughout the heating season.
Annual Cleaning by Experts
Experts should annually clean your oil furnace heat exchanger. Hire a skilled technician to check and clean it yearly. This will make it run smoothly and last longer. They will examine for leaks, splits, and other signs of damage. Plus, they will scrub the burners, fan, and all parts of the furnace. And do any repairs needed to keep safety high. Find a reliable service provider for an easy process.
Proper airflow is also vital for a healthy heat exchanger. No blockages around the furnace, plus clean filters. This prevents it from using too much energy to warm the area.
Pro Tip: Log all maintenance on your oil furnace heat exchanger. This can reveal patterns of issues and stop major problems later. Don’t wait for furnace disaster – book inspections regularly.
Regular Inspection of the Furnace
It’s vital to inspect your furnace regularly to make sure it runs well. Not doing so can lead to terrible results. Here, we’ll talk about inspecting and maintaining a furnace.
These are the steps for a proper exam:
- Turn off the Furnace: Start by switching off the power.
- Check the Heat Exchanger: Look for cracks or deformities on the heat exchanger that could affect how it works.
- Ignition Check: Turn the power back on and run an ignition check with the cover open. Check the flames during operation; they should be blue, showing good combustion.
- Clean and Replace Filters: It’s best to clean or switch the filters regularly. Doing so improves efficiency and lengthens the life of your furnace.
Also, if you notice the furnace isn’t running as well after an inspection or you’re worried about using it, call a professional straight away.
Throughout time, deaths from carbon monoxide poisoning have gone up. Regular inspection is essential to keep your house safe and avoid such disasters.
To keep your oil furnace in good condition, give it high-quality oil and a nice filter – like filling up your car with premium fuel and taking it to a spa.
Use of Quality Oil and Filter
Oil furnace heat exchangers are the heart of your heating unit, so you must make sure they work well. Quality oil and filter are the best ways to do this.
Good oil minimizes wear and tear of machine parts. A good filter also keeps the furnace clean and stops dirt and debris from building up. Plus, quality oil and an efficient filter reduce energy costs.
You need to choose the right type of oil and filter for your furnace. Read the manufacturer’s instructions carefully, and don’t mix different oils, as they can cause harm.
My friend used poor-quality oil for many years. He had regular maintenance checks, but it was too late as the damage was done. So, prevention is better than cure.
Remember to check your oil tank and valve – or you’ll feel the heat!
Monitoring Oil Tank and Valve
Monitoring your oil tank and valve is key to maintaining an oil furnace heat exchanger. Here’s a quick table to help you with that:
| Aspect | Description |
| Oil Tank Level | Check oil levels regularly. Refill when needed |
| Tank condition | Check for rust or corrosion |
| Oil filter replacement | Change oil filters to keep the system clean |
| Valve checks | Make sure valves are sealed to avoid fuel leakage |
Plus, look for leaks around the storage tank. Remove any debris near the furnace. Doing all this helps extend the life of the exchanger and prevents costly repairs. Fun Fact: A recent study found that 85% of heating failures are due to a lack of maintenance and inspections. Good luck with your oil furnace heat exchanger. And if all else fails, light a candle and huddle for warmth!
Conclusion
Cleaning the oil furnace heat exchanger is essential for a safe and efficient heating system. HVAC technicians should inspect and clean the primary and secondary heat exchangers, combustion chamber, flue pipe, and chimney annually. The deposits left by combustion gases reduce the efficiency of heat transfer, increasing fuel consumption, causing flame damage, and posing a risk of carbon monoxide leaks.