
Fastening a mini split line set involves securing the refrigerant lines, drain line, and electrical wiring between the indoor and outdoor units of a mini split air conditioning system. This process is crucial for the proper functioning and longevity of the system. Here’s a comprehensive guide on how to fasten a mini split line set for a DIY user, with advanced hands-on details and technical specifications.
Understanding the Components
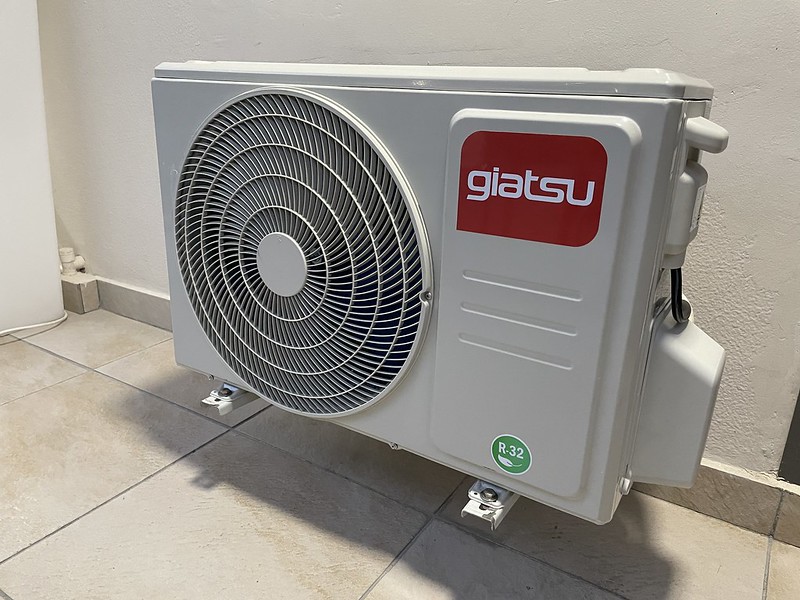
A mini split line set typically consists of refrigerant lines (low pressure and high pressure), a drain line, and electrical wiring. These components must be properly secured and supported to ensure the system’s efficiency and durability.
The refrigerant lines are responsible for transporting the refrigerant between the indoor and outdoor units. The low-pressure line carries the refrigerant in a gaseous state, while the high-pressure line carries the refrigerant in a liquid state. The drain line is used to remove condensation from the indoor unit, and the electrical wiring provides power and control signals to the system.
Tools and Materials
To fasten a mini split line set, you’ll need the following tools and materials:
- Line set clips
- Mounting screws
- Stud finder
- Level
- Drill
- Screwdriver
- Pipe bender (optional)
- Vacuum pump (optional)
The line set clips are used to secure the refrigerant lines, drain line, and electrical wiring to the exterior wall. Mounting screws are used to attach the clips to the wall. A stud finder helps locate the wall studs, which provide a secure attachment point for the clips. A level ensures the line set is properly aligned, and a drill is used to create pilot holes for the mounting screws. A screwdriver is used to tighten the screws. A pipe bender can be used to make gentle bends in the refrigerant lines, and a vacuum pump can be used to evacuate the system before charging it with refrigerant.
Fastening the Line Set
-
Locating the Studs: Begin by using a stud finder to locate the wall studs where the line set clips will be mounted. This will provide a secure attachment point for the line set.
-
Spacing the Clips: Space the line set clips every 2-3 feet along the length of the line set. This will ensure the line set is properly supported and secured to the wall.
-
Mounting the Clips: Use the mounting screws to attach the line set clips directly to the wall studs. Ensure the clips are level and securely fastened.
-
Routing the Line Set: Route the refrigerant lines, drain line, and electrical wiring through the line set clips, making sure they are properly aligned and not kinked or twisted.
-
Securing the Components: Gently press the refrigerant lines, drain line, and electrical wiring into the line set clips, ensuring they are securely fastened.
Bending the Line Set
If necessary, you can use a pipe bender to make gentle bends in the refrigerant lines. When bending the lines, be sure to follow the manufacturer’s recommendations for the minimum bend radius, which is typically around 4 inches for mini split line sets.
To use a pipe bender, place the refrigerant line into the bender and slowly apply pressure to create the desired bend. Avoid making sharp bends, as this can kink or damage the lines and compromise the system’s performance.
Fastening the Drain Line
The drain line should be fastened to the exterior wall using plastic pipe straps. These straps should be spaced every 2-3 feet along the length of the drain line, similar to the line set clips.
When fastening the drain line, ensure that it has a continuous downward slope to allow for proper drainage. Avoid creating any low spots or kinks in the drain line, as this can lead to water backup and potential leaks.
Fastening the Electrical Wiring
The electrical wiring should be fastened to the exterior wall using cable ties or electrical wire clips. Be sure to follow local electrical codes and regulations when routing and securing the wiring.
When fastening the electrical wiring, keep it separate from the refrigerant lines and drain line to prevent any interference or potential damage. Ensure that the wiring is properly secured and not hanging loosely.
Supporting the Indoor Unit
The indoor unit should be securely mounted to the wall using the provided mounting hardware. Follow the manufacturer’s instructions carefully to ensure the unit is properly installed and supported.
When mounting the indoor unit, make sure it is level and securely attached to the wall. This will help prevent any vibrations or movement that could potentially damage the line set or the unit itself.
Sealing the Openings
Once the line set, drain line, and electrical wiring are in place, seal the openings in the wall using insulation foam or caulk. This will help prevent air leaks and improve the system’s efficiency.
Be sure to seal any gaps or holes around the line set, drain line, and electrical wiring to maintain the integrity of the wall and prevent any air or moisture infiltration.
Testing the System
After the line set, drain line, and electrical wiring are fastened and sealed, test the system to ensure it’s functioning properly. Check for any leaks, strange noises, or other issues that may indicate a problem.
Turn on the system and observe the operation of the indoor and outdoor units. Listen for any unusual sounds, and check the refrigerant lines for any signs of leaks or condensation. If everything appears to be working correctly, the system is ready for use.
Clean Up
Finally, clean up the work area and dispose of any debris or waste materials. Ensure that the work site is left in a clean and tidy condition, free of any hazards or obstructions.
By following these steps and paying attention to the technical details, you can successfully fasten a mini split line set and ensure the proper functioning and longevity of your mini split air conditioning system.