
Table of Contents
To tackle the issue of your tankless water heater beeping, let’s delve into the problem and why it requires prompt attention. We’ll start by explaining why your tankless water heater is beeping and then discuss the importance of addressing this issue promptly. Understanding the issue and taking swift action is crucial to ensure the optimal functioning of your tankless water heater.
Tankless water heater beeping
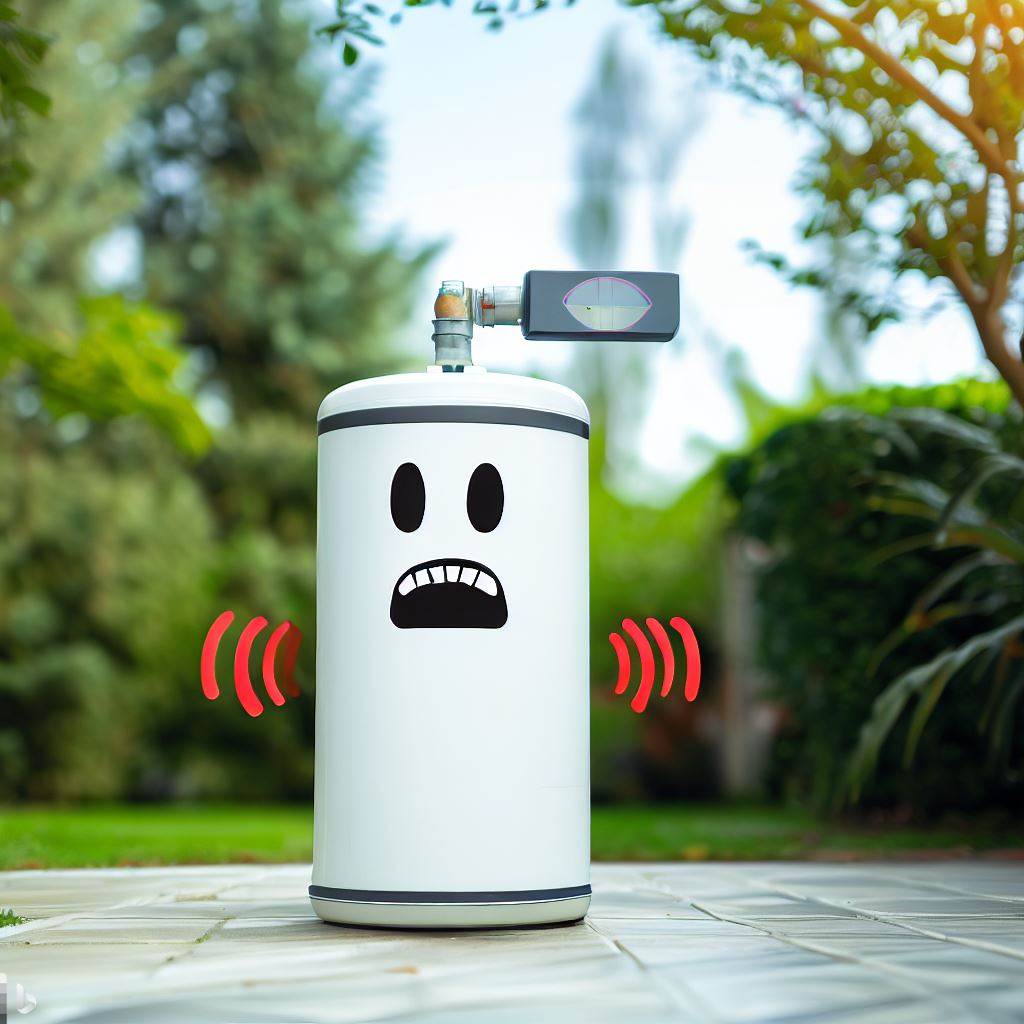
Tankless water heaters often beep, leaving homeowners confused. It’s an indicator of an issue that needs to be addressed. Sediment or mineral deposits in the unit could cause the alarm. Cleaning and flushing it regularly can help prevent this.
Condensation in the venting system could also make it beep. Proper installation and regular inspection of the venting system can help fix this. Low gas pressure or insufficient gas supply can also cause it. Check if the gas flow and pressure meet the manufacturer’s specs, and if not, a plumber or gas company can help.
Electrical problems like faulty wiring or malfunctioning components can trigger the beeping too. Regularly inspect internal and external wiring connections. A licensed electrician can diagnose and repair electrical faults.
Some models have specific error codes corresponding to different issues. Consult the user manual to figure out these codes. Understanding them will help identify and address the problem quickly.
Importance of addressing the issue promptly
Beeping is like Morse code, but for appliances. It doesn’t help you understand – instead you just get left feeling annoyed. It can make you feel technologically inadequate.
Addressing issues quickly is essential; it’s key for the smooth operation of any system. Delaying can lead to negative outcomes, such as decreased productivity and quality, as well as a loss of customer trust. By tackling issues quickly, organizations can reduce disruption and maintain a positive image.
To address issues promptly means to act right away when problems occur. This includes finding the root cause, creating a solution, and implementing it quickly. This proactive approach helps organizations stop small issues from becoming large problems.
Addressing issues quickly shows a commitment to customer satisfaction. Customers want fast resolutions. When they get them, they know the company values their time and cares about providing great service.
Also, it can create a culture of responsibility within an organization. When people understand the value of quick issue resolution, they become more proactive in spotting and reporting problems. This helps organizations catch and fix issues before they become larger.
Here’s an example of the importance of prompt issue resolution. A renowned tech firm experienced a sudden crash in their online platform due to a software glitch. They acted quickly – identified the root cause, developed a fix, and restored full functionality within hours.
Beeping Of Tankless Water
To understand why your tankless water heater is beeping, let’s dive into the section ‘Understanding the Beeping’ with its sub-sections: ‘Common reasons for tankless water heater beeping’ and ‘Explaining error codes and what they mean.’ These sub-sections will provide you with insight into the potential causes of the beeping and help decipher any error codes displayed, all in order to find a solution to the issue at hand.
Common reasons for tankless water heater beeping
Beeping from your tankless water heater can be startling. But, understanding the common causes can help you chill. Here are a few of the reasons why they beep:
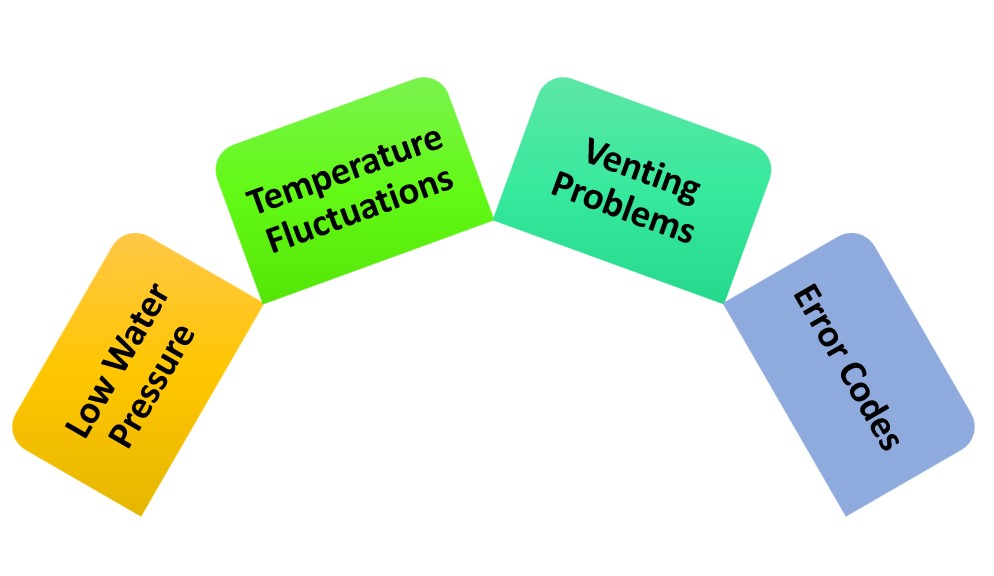
- Low Water Pressure – Clogged filters or faulty pressure relief valve could be to blame.
- Temperature Fluctuations – Unstable temperature can trigger a beep.
- Venting Problems – Obstructions or poor ventilation can set off an alert.
- Error Codes – Some heaters have codes that beep to indicate malfunctions.
Each case may be unique, so it’s best to get help if the beeping persists. To avoid further trouble, act fast and call an expert. Then, you can have uninterrupted hot showers – and a mind at ease!
Overheating
Overheating can be a scary thing in electronic devices. Too much heat can cause failure or permanent damage. To stop this, it’s important to know why it happens and take action.
A reason is bad ventilation. When components heat up, they need to cool quickly. Poor airflow and blocked vents are a problem. Make sure the device has good air flow and no blocks.
Another cause is heavy use. When a device runs a lot or for too long it gets hotter. More heat and bad cooling can lead to overheating. Monitor and don’t overdo it.
Outdated or broken cooling systems can also be the issue. Fans and heat sinks can wear out. Regular maintenance and check ups can keep them in shape.
In 1990, a computer maker had a big problem. The cooling system was blocked, making the computers heat up too much. Many customers lost data and had to return their computers. It was a costly mistake.
To avoid problems, it’s important to be aware of the causes and consequences of overheating. By taking precautions, users can keep their devices cool.
Low water flow rate
Do you have low water flow rate in your home? It can be frustrating and result in inadequate water supply. It can also lead to decreased efficiency of appliances and indicate an underlying plumbing problem. Understanding the reasons behind a low water flow rate is key.
Interesting, the issue of low water flow rates dates back to ancient civilizations. People used aqueducts and irrigation systems to manage and optimize water systems. This knowledge has been crucial in modern advancements.
By familiarizing yourself with possible causes and solutions, you can mitigate inconveniences while appreciating our access to clean water today.
Sensor malfunction
Sensor malfunction is when a sensor fails or works incorrectly, giving wrong readings or no data. This can affect systems that rely on sensor inputs, harming their performance and reliability.
Examples of sensor malfunctions include:
- Temperature sensor not detecting changes in temperature
- Pressure sensor displaying incorrect readings
- Motion sensor making false detections or not detecting movement
- Light sensor not measuring light intensity accurately
- Proximity sensor failing to detect nearby objects
It’s important to consider what could be causing these malfunctions. Electrical interference, physical damage, or software glitches can all be factors. Furthermore, regular calibration and maintenance help to avoid malfunctions.
It’s essential to understand sensor malfunctions to be able to fix them and ensure optimal system performance. Identifying problems and preventive measures minimizes disruptions caused by faulty sensors and allows reliable data collection and analysis.
Explaining error codes and what they mean
Error codes can be perplexing and frustrating. But, don’t fear! We’ll unravel their mysteries. Error codes are like a language between humans and machines. Each code has a meaning. To decode them, we must pay attention to every detail. We must analyze the numbers and letters. Then, we can identify the issue and take action.
Here are some tips for dealing with error codes effectively:
- Document each code and the issue. With this record, patterns may emerge and we can anticipate problems.
- Get help from online forums or teams. They offer expert knowledge and solutions. Also, this exposes us to other perspectives.
- Experiment and test remedies. We can learn from our mistakes and broaden our troubleshooting skills. Who needs a manual when you can just frantically press buttons and hope for the best?
Troubleshooting Steps
To troubleshoot the beeping issue with your tankless water heater, follow these steps. Check for water leaks as Step 1, then clean the inlet screen as Step 2. Next, check the water flow rate in Step 3 and reset the unit in Step 4. Verify the gas supply and pressure as Step 5, inspect the condensate line and drain in Step 6, and finally, consult the user manual or contact a professional in Step 7.
Step 1: Check for water leaks
Checking for water leaks is a must. It can save you damage and cash. Here’s a 3-step guide to help you out:
- Look for moisture around pipes: Have a peek under sinks, in basements, and near appliances like dishwashers or washers.
- Check the water meter: Turn off all taps and appliances that use water, then check the meter. If it’s still running, you may have a leak underground.
- Do a dye test: Put food coloring in the toilet tank and wait a few minutes. If the color appears in the bowl without flushing, you probably have a leaky loo.
Remember to inspect less obvious places such as crawlspaces and outdoor hose connections. Fixing leaks ASAP is important to avoid extra damage.
Inspecting the water supply line and connections
Inspecting the water supply and connections is a must do for smooth water flow. By looking at these components, you can spot any issues affecting water supply.
Follow these three steps to inspect water supply line and connections:
- Look for leaks: Check the entire length of the water supply line for any visible leaks. Check around joints, valves, or pipes for dripping or pooling water. If you spot any leaks, tighten connections or replace damaged parts.
- Test water pressure: Use a pressure gauge to measure the water pressure in your system. Compare it with the recommended pressure range for your area. Low pressure may mean a blockage or an issue with the supply line. High pressure could cause leaks or stress the connections.
- Examine fittings and seals: Check all fittings, such as couplings and elbows, for wear or damage. Make sure they are securely tightened and sealed. Damaged fittings or poor seals can cause leaks or impede water flow.
Also, pay attention to any unusual sounds coming from the supply line or connections. This could indicate underlying issues that need attention.
Checking the leak sensor
Inspecting the leak sensor is key to troubleshooting any system issues. Look for signs of damage, like cracks or corrosion. Check for water buildup in the area – a sign of current or past leak. Securely connect the wiring and test the alarm if there is one. Lastly, pour some water on it to test it out.
Regularly checking your leak sensor is important for long-term efficiency and cost-effectiveness. Neglecting it can lead to major damage and compromise safety precautions. So, take action to protect your equipment and avoid future hassles. Give your plumbing a spa day – check your leak sensor!
Step 2: Clean the inlet screen

- To keep your inlet screen running smoothly, always clean it regularly. Here’s how:
- Switch off the power supply to avoid any electric mishaps.
- Locate the inlet screen. It’s usually near the water source.
- Carefully remove the protective cover.
- Gently rinse the inlet screen under running water. Clean all areas thoroughly.
- Inspect for damage – like cracks or tears. If you spot any, replace the inlet screen.
- Reassemble everything and check if it works.
Step 3: Check the water flow rate
Checking water flow rate is essential when solving system issues. Here’s a guide to do it right!
- Step 1: Check the pressure. Turn on the faucet and look at the force. If it’s too weak or too strong, it may indicate a flow rate problem.
- Step 2: Use a flow meter. Attach it to the system and record the water volume in a set time. That’ll give you an exact measure of the flow rate.
- Step 3: Compare with standards. Look up industry standards or product specs to know what’s considered an acceptable rate. Compare your results with the standards to see if there’s a problem.
Remember, clogged pipes or faulty valves can alter results and hinder troubleshooting. So, check them first.
Minimum flow rate requirements
Minimum flow rate demands are indispensable in fixing problems. These requirements decide the least amount of flow essential in a system to guarantee ideal functioning. To comprehend this better, let’s inspect the following table:
| Item | Flow Rate (gpm) |
|---|---|
| Pump A | 10 |
| Pump B | 15 |
As seen in the table, Pump A requires a minimum flow rate of 10 gallons per minute (gpm), while Pump B needs at least 15 gpm. It is vital to meet these demands to dodge any troubles with the system.
To avoid such issues, it is essential to make sure the minimum flow rate requirements are met. Regular monitoring and upkeep can help spot any differences and permit timely adjustments or fixes if required. Don’t ignore these requirements, as neglecting them could have serious repercussions for your system.
Clearing blockages or clogs
- Assess the extent of the blockage or clog. Is it minor or severe?
- If minor, use a plunger. Create suction and pump up and down to remove the obstruction.
- For stubborn cases, try a plumbing snake or auger. Insert it, rotate clockwise, and gently push forward.
- If neither works, dismantle part of the plumbing system to access and remove the blockage, but consult a plumber first.
Seek professional help for major blockages or clogs. Common causes include hair buildup, soap residue, food particles, and tree root intrusion.
Step 4: Resetting the unit
Resetting units can solve tech issues. Here’s a step-by-step guide:
- Power off – locate the power button, press it.
- Disconnect cables – power cords, HDMI cables, other peripherals.
- Wait a few mins – give time for the unit to fully power down.
- Press & hold reset button – usually at back or bottom. Use a pen or paperclip and hold for 10 secs.
- Power on – reconnect cables & press power button.
This should help reset & fix technical issues. If not, consider professional support. Resetting clears temporary data & settings. It can fix software glitches & conflicts, network connectivity, or compatibility with external devices.
Steps to reset different models
Resetting different models can be tricky. Here’s a guide to make it easier!
1. Identify the model of your device. This info is usually on the back or bottom. Knowing the model is important, ’cause each has its own reset process.
2. Locate the reset button. It’s usually a small hole or button with a “reset” label or circular arrow symbol. It’s usually found on the back or side.
3. Take a paperclip or pin and press and hold the reset button for 10 seconds. Steady pressure, but not too much force.
4. After 10 seconds, release and wait for the device to restart. This may take a few moments.
5. Once it restarts, it should be reset to factory settings.
6. Set up your device again like it’s brand new.
7. Test it to make sure all settings have been restored and any issues resolved.
Remember, these steps vary slightly depending on the model.
Pro Tip: Before resetting, back up any important data or files. Now you can reset different models without hassle or confusion!
Step 5: Check the gas supply and pressure
- Inspect the gas connections.
- Check for any loose or damaged parts.
- Verify that the gas supply is sufficient.
- Examine the pressure regulator for irregularities.
- Measure gas pressure with a gauge.
- Test each gas appliance one-by-one.
- Be alert for potential safety hazards.
- Don’t delay; take proactive steps to check your gas supply and pressure!
- For optimal performance and safety, make sure everything is in order before it’s too late!
Unclogging your condensate line may lead to a DIY water park in your basement – how exciting!
Step 6: Inspect the condensate line and drain
Inspecting and maintaining the condensate line and drain is essential in troubleshooting. This helps guarantee proper functioning of the system and prevents issues related to drainage.
Four steps to inspect and maintain the condensate line and drain:
- Visually examine the line for any clogs or blockages. Look out for dirt, debris, or algae growth.
- Carefully clear any clogs or blockages with a pipe cleaner or a small brush. Don’t damage or bend the line.
- Check the drain pan for leaks or cracks which may cause water accumulation. Replace the drain pan if needed.
- Test the condensate pump (if applicable) by pouring water into it. Repair or replace the pump if necessary.
Neglecting maintenance can result in major issues. Inspecting and maintaining your condensate line and drain can save you from costly repairs.
Step 7: Consult the user manual or contact a professional
Some important details to consider:
- User manuals often include warranty, safety & maintenance info.
- Professionals have expertise to identify underlying causes.
- Provide accurate & detailed descriptions when seeking help.
Prevention and Maintenance Tips
To ensure your tankless water heater functions flawlessly, follow these preventative and maintenance tips. Regular maintenance is vital for preventing issues. Water quality and filtration play a crucial role in the heater’s performance. We’ll also explore recommended practices to maintain optimal functionality. By implementing these suggestions, you can ensure a longer lifespan and uninterrupted hot water supply from your tankless water heater.
Regular maintenance to prevent issues
Regular maintenance is key to avoiding issues and keeping systems and equipment running smoothly. Following regular maintenance practices can help you avoid costly repairs and downtime. Here are five must-know tips for staying on top of regular maintenance:
- Inspections: Check all equipment, systems, and components regularly to spot any signs of wear or potential issues. This way you can address them quickly before they cause major problems.
- Clean and lubricate: Cleaning and lubricating moving parts of machinery and equipment can prevent friction and increase their performance. Regularly clean filters, vents, and other components to keep everything running optimally.
- Check for leaks: Look for leaks in pipes, hoses, seals, or valves, as they can cause serious damage if not taken care of right away. Regularly inspect your plumbing, hydraulic systems, and other relevant areas.
- Test safety features: Test safety features like smoke detectors, fire extinguishers, emergency exits, alarms, and sprinkler systems to ensure they’re working, in case of an emergency.
- Records: Keep a detailed record of all maintenance activities. This will help you track the frequency of inspections and repairs done on each piece of equipment or system.
Remember that different equipment or systems may require special maintenance procedures. To make sure you’re doing the best for your equipment, always check manufacturer guidelines or get professional help when needed.
Importance of water quality and filtration
Water quality and filtration are key for a safe, healthy environment. Clean water is essential for living life, from drinking to cooking and bathing. Without proper filtration, water risks contamination with dangerous substances.
Filtration removes impurities and particles like bacteria, sediment, and chemicals, making water safe to consume. This also improves the taste and eliminates potential health risks.
In addition to improving water quality, filtration extends the life of plumbing systems and appliances. This is because it prevents the buildup of minerals and sediments that can cause clogs or damage. By reducing deposits, filtration systems save money and energy.
Recommended practices for maintaining optimal performance
Regular maintenance is a must! Schedule inspections and servicing to spot any potential issues before they get worse. Plus, keep the system clean and free of dust. That way, it won’t get overheated.
Also, make sure to update software often. Updates often contain bug fixes and performance upgrades. And don’t forget to backup your data regularly. That way, you can protect it if something goes wrong.
It’s important to follow recommended maintenance practices. Otherwise, you risk facing huge financial losses and damaging customer trust.
Troubleshooting steps
Troubleshooting is a process for solving problems. Here’s what to think about:
- Identify the issue. Gather info and look at the symptoms.
- Make a guess and try different solutions.
- Check the results to figure out what worked, and why.
- Record the steps you took and how you fixed it.
These steps help with technical issues. But, it takes patience and attention to detail. You may even stumble on something while trying new ideas.
Tech Radar says 70% of issues can be solved with a simple restart. This shows why it’s important to try basic solutions first.
If your issues keep coming back, it may be time to get help. Don’t just rely on self-help books.
Importance of professional assistance if the issue persists or recurs
When an issue keeps happening, it is essential to get professional help. Experts have the knowledge and experience to tackle the problem and provide solutions.
Their know-how ensures they can find out what is causing it. They can also stop it from getting worse. Trusting professionals is key in such cases.
Specialists have a lot of expertise in their fields. This lets them spot things that others may not see. With careful analysis, they can create methods that work for each person. Doing this stops the issue from returning.
Getting help from experts gives access to the latest diagnostic tools and treatments. This allows for a full examination of the issue. As a result, the diagnosis is more accurate and the treatment more effective. When an issue keeps happening, it is even more important to use these advances.
Experts also give ongoing support and advice. They provide information on managing symptoms and long-term health. This lets individuals stay in control of the situation while getting expert advice when needed.
Frequently Asked Questions
Why is my tankless water heater beeping?
There could be several reasons why your tankless water heater is beeping. It could be due to overheating, a system issue, an error message, or a water leak. A beeping sound is usually an indication that something is wrong, and it’s important to address the issue promptly.
What does it mean when my tankless water heater beeps?
A beeping sound from your tankless water heater usually indicates a problem or a fault in the system. It could indicate issues such as a water leak, an overheating problem, a blocked water supply line, or an error code requiring troubleshooting. Consult your user manual or contact a professional plumber to diagnose and fix the problem.
How can I fix the beeping issue with my tankless water heater?
The solution to fixing the beeping issue with your tankless water heater depends on the specific cause. However, some general troubleshooting steps include checking for water leaks, ensuring the water pressure is at the required level, cleaning the inlet screen, and inspecting the vent system for any blockages. If the problem persists, contact a professional plumber for assistance.
Can hard water cause my tankless water heater to beep?
Hard water can potentially cause beeping issues with your tankless water heater. Hard water contains high levels of minerals, such as calcium and magnesium, which can lead to scale buildup in the system. This scale buildup can affect the performance of the water heater and trigger beeping alerts. Regular maintenance and descaling can help prevent this issue.
Why does my Rinnai tankless water heater beep?
A Rinnai tankless water heater may beep due to various reasons, such as low flow rate, a clogged inlet screen, an issue with the heat exchanger, or an error code indicating a malfunction. Consult the manufacturer’s guide or contact a professional technician to identify the specific cause and resolve the beeping problem.
When should I call a professional plumber for my beeping tankless water heater?
If you have followed the troubleshooting steps in your user manual and the beeping issue persists, it is recommended to call a professional plumber. They have the expertise and experience to diagnose the problem accurately and provide the necessary repairs or maintenance to ensure your tankless water heater is working safely and efficiently.
Conclusion
To wrap up, let’s go over the key points and actions you should take regarding the beeping issue with your tankless water heater. First, I’ll provide a brief summary of the troubleshooting steps discussed earlier. Then, I’ll explain the importance of seeking professional assistance if the problem continues or repeats. Time to put your knowledge into practice and consider seeking expert help when needed.