
Table of Contents
To ensure your water heater functions properly, it’s crucial to understand the significance of a lit pilot light. Without it, you may encounter issues such as no hot water or insufficient heating. Don’t worry, I’ll explain why a water heater pilot light is crucial and guide you on how to address it if it refuses to ignite.
Key Notes
- A common cause for a water heater pilot not lighting is a lack of gas supply. This can be due to a closed gas valve, a depleted gas supply, or a problem with the gas line.
- Another possible cause is a faulty thermocouple, which is a safety device that detects whether the pilot flame is lit. If the thermocouple is not functioning properly, it may not allow the gas valve to open and the pilot to light.
- A dirty or clogged pilot tube can also prevent the pilot from lighting. This can be caused by debris or sediment buildup in the tube, which restricts the flow of gas.
- In some cases, the pilot assembly itself may be faulty or damaged. This can occur due to wear and tear over time or from a malfunctioning component within the assembly.
- It is important to ensure that the water heater is properly maintained and serviced regularly to prevent issues with the pilot light. This includes cleaning and inspecting the pilot assembly, checking the gas supply, and replacing any faulty components.
- If troubleshooting steps do not resolve the issue, it is recommended to contact a professional plumber or technician to diagnose and repair the problem. Attempting to fix a water heater without proper knowledge and experience can be dangerous and may cause further damage.
The importance of a water heater pilot light
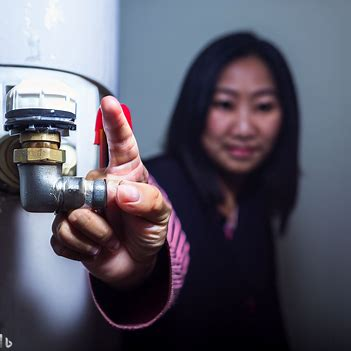
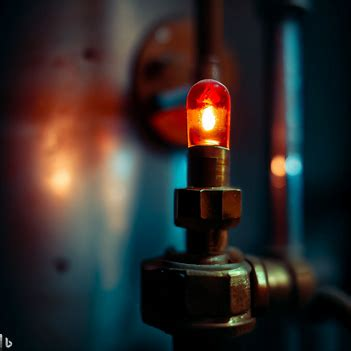
A water heater pilot light is an important part of a water heating system. It serves as the ignition source for the main burner. Without it, the water heater won’t work.
The pilot light starts the heating process. When you turn on the hot water faucet, it lights up the gas in the burner. This produces a flame that heats the water in the tank. The flame stays lit unless there’s a problem or you turn it off.
You need to light the pilot light manually when installing or relighting it. You can use a matchstick or an ignition button, depending on the model.
Some newer water heaters don’t have a pilot light. They use sparks or hot surface igniters to ignite the gas burner directly.
Remember to maintain and inspect the pilot light regularly. If there are issues with the flame or it often goes out, get a professional technician to check it.
Common Causes of Pilot Light Failure
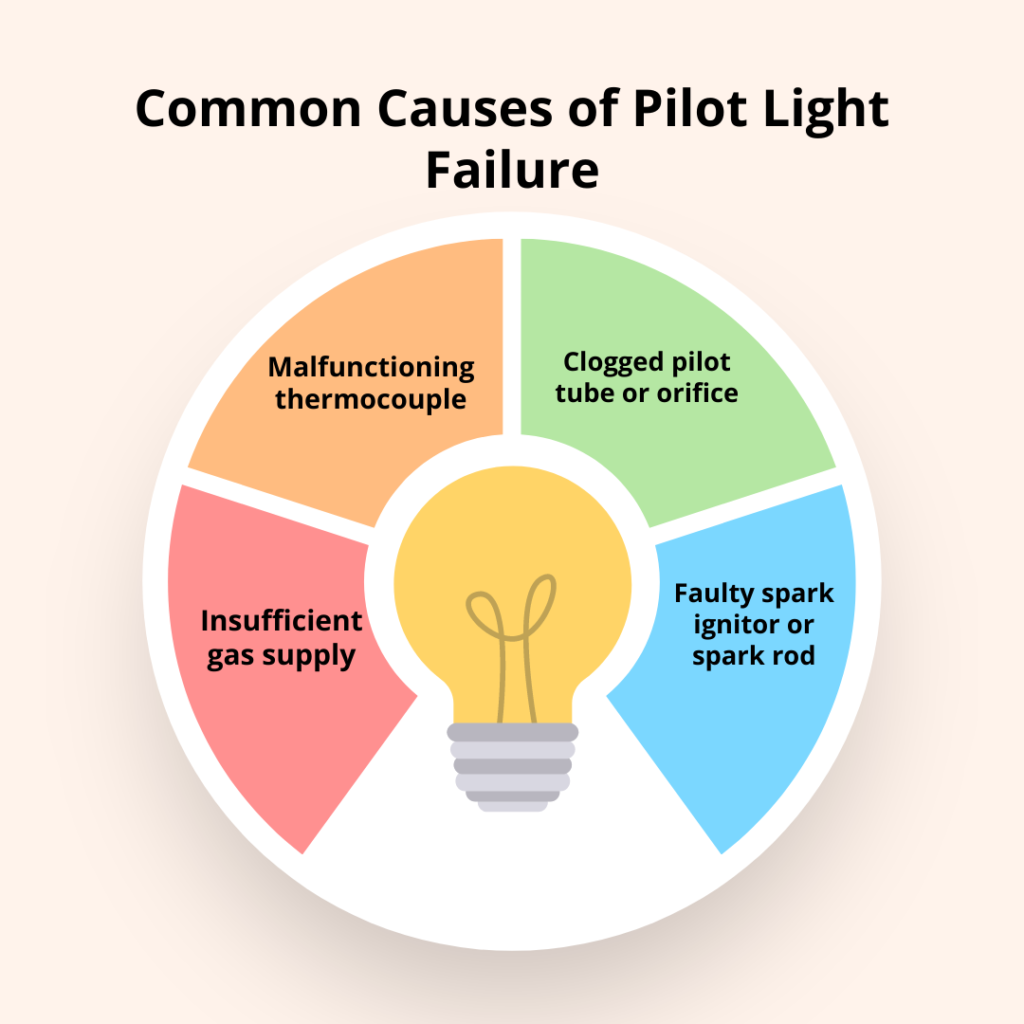
To troubleshoot common causes of pilot light failure, here are potential solutions for insufficient gas supply, malfunctioning thermocouple, clogged pilot tube or orifice, and faulty spark ignitor or spark rod. Understand the possible culprits and follow the outlined steps to address each issue effectively.
Insufficient gas supply
If your pilot light goes out, don’t blame it on ghosts – it’s likely due to gas line issues. Obstructions caused by dirt, rust, or insects can restrict the flow of gas. The gas valve can also be shut off or partially closed. Low gas pressure can also prevent ignition. Faulty gas meters can misread and record inaccurate levels. Leaks can also deprive the pilot light of sufficient gas. Certain appliances may have safety features that shut off the gas supply if abnormal activity is detected.
To prevent issues, check your gas lines and have them professionally cleaned. In 2007, a residential building experienced frequent pilot light failures due to an undersized gas pipe; this was resolved after the city inspected and upgraded the infrastructure. By addressing insufficient gas supply, homeowners can troubleshoot and ensure efficient operation.
Possible issues with the gas line or gas control valve
Issues with the gas line or valve can cause the pilot light to fail. To stay safe and avoid issues:
- Check for leaks or misaligned pipes, which require professional attention.
- Clean debris or corrosion from the gas line regularly.
- Have the gas control valves inspected.
- Replace a faulty thermocouple.
- Adjust gas pressure as needed.
- Make sure all connections are secure.
Get regular check-ups from a licensed technician—don’t wait for bigger problems like heat loss or potential hazards! Take action now!
Malfunctioning thermocouple
The thermocouple – a small but mighty device that helps keep the pilot light lit. It senses the heat from the flame and signals the gas valve to stay open. But, when it becomes faulty, the pilot light won’t light.
The issue could be dirt or debris build-up on the thermocouple’s surface. Or, it may not be positioned correctly in relation to the pilot flame. Wear and tear can cause deterioration, leading to an inefficient signal sent to the gas valve.
Fortunately, replacing the thermocouple is fairly inexpensive and easy to do! It usually costs around $20-$30 and requires basic tools and minimal expertise.
Explanation of the thermocouple and its role in keeping the pilot light lit
A thermocouple is essential for keeping a pilot light’s flame burning continuously. It generates a small electric current when heated, to confirm the flame is still present and keep the gas valve open. Without this safeguard, the pilot light would go out, leading to potential gas leaks and malfunctioning of the appliance.
It’s important to know how a thermocouple is constructed. Usually, it’s two different metals joined together, with a pilot flame burning at one end. The heat from the flame heats the thermocouple, creating an electric potential, which tells the gas valve to stay open.
But thermocouples can face issues. Dirt or debris on its surface can stop heat transferring properly. It can also become loose or misaligned due to heating and cooling cycles, meaning the flame’s heat isn’t reaching the junction. Age can also weaken the metal components, reducing its ability to make enough electric current. Corrosion of chemicals can speed this up.
Regular maintenance and inspection of thermocouples is needed for them to work right. Cleaning them with gentle solvents can help. If all attempts fail, it’s best to get professional assistance.
Faulty pilot lights can result in dangerous situations. Unburned gas can be hazardous and put appliances and people in danger.
Clogged pilot tube or orifice
A clogged pilot tube or orifice is a common cause of pilot light failure. Debris, like dust and dirt, can block the passage of gas through the tube or orifice. Here are five important facts to consider:
- Debris builds up: Over time, debris accumulates in the tube or orifice, blocking the flow of gas.
- Restricted gas flow: This clog reduces the amount of gas reaching the pilot light, leading to weak or nonexistent flames.
- Difficult ignition: With the limited gas supply, it’s hard for the pilot light to ignite.
- Safety risks: Clogged tubes and orifices impede appliance performance and are hazardous. Insufficient gas flow can create incomplete combustion and release dangerous gases.
- Regular maintenance: To avoid clogs and keep the pilot light functioning, clean and maintain the tube or orifice regularly.
Plus, some gas appliances have built-in mechanisms that detect clogs and shut off the gas supply. This safety feature prevents potential accidents.
Jake, an HVAC technician, encountered a furnace with a faulty pilot light. After inspection, he found a tiny insect had built a nest in the pilot tube, blocking the flow of gas. Jake cleared the obstruction and cleaned the tube and orifice. When he lit the pilot light again, warmth filled the room.
This story shows how small blockages can impair an appliance’s performance and why maintenance is essential. Cleaning the pilot tube or orifice may sound challenging, but it’s nothing compared to finding a new roommate for your pilot light!
Steps to clean the pilot tube or orifice
Clean your pilot tube to keep your pilot light working properly. Neglecting it can cause failure and unsafe conditions. Here is how:
- Turn off the Gas Supply. Find the valve and turn it clockwise until tight.
- Remove and Clean the Pilot Tube or Orifice. Take it off with a wrench or pliers. Look for dirt, debris, or blockages. Use a brush or air to clean both ends.
- Reassemble and Test. Attach it back, turn on the gas supply, and relight the pilot light. Check that the flame is steady and blue.
Regular maintenance is important. Clean your pilot tube at least once a year or when you notice weak flame. Take proactive steps to ensure safety and efficient operation. Don’t wait – clean your pilot tube now!
Faulty spark ignitor or spark rod
A faulty spark ignitor or spark rod can be the cause of pilot light failure. This component creates a spark to ignite the gas, keeping the pilot light lit. Let’s take a closer look at common causes.
- Dirty or Damaged Components: Dust, dirt, or debris on the spark ignitor or spark rod can stop sparking and ignition. Plus, physical damage to these parts can hamper their function.
- Electric Connection Issues: Poor electrical connections between the spark generator and the ignitor or rod can disrupt the flow of electricity needed for the spark. This could be from loose wires, corroded contacts, or faulty wiring.
- Malfunctioning Spark Generator: The spark generator itself may be defective, resulting in inconsistent sparking or complete failure. This could be from internal component failure or wear and tear.
Pro Tip: Regular maintenance and cleaning of ignition components can help prevent issues. It’s best to consult a professional technician for repairs or replacements for optimal performance and safety.
Troubleshooting steps for a faulty spark ignitor or spark rod
When your pilot light won’t come on, it could be the spark ignitor or spark rod. To fix this, follow these steps:
- Check power: Make sure it’s plugged in and that the circuit breaker didn’t trip.
- Inspect components: Look for damage or wear on the ignitor and spark rod. Frayed wires and corrosion can mean it’s time to replace them.
- Clean up: Remove any dirt or debris from the ignitor and spark rod. It’ll help them work better.
- Test connections: Use a multimeter to make sure the electrical connections of the ignitor and spark rod are working. No continuity means they may need replacing.
It’s always best to be safe when dealing with gas appliances. If you’re not sure how to fix it, get a pro.
Remember, pilot light failure is not new. In 1977, an aircraft had multiple failures during a flight, caused by faulty spark rods. Since then, technology has improved the reliability of pilot lights, but failures can still happen for various reasons.
Troubleshooting and Solutions of your water heater pilot not lighting
To troubleshoot and solve the issue of your water heater pilot not lighting, follow these steps with the sub-sections as solutions: a step-by-step guide to relighting the pilot light, how to check and adjust gas pressure if needed, tips for cleaning a dirty or soot-covered thermocouple, instructions for cleaning the pilot tube or orifice, and what to do if the spark ignitor or spark rod fails to produce a spark.
Step-by-step guide to relighting the pilot light
Let’s relight the pilot light on your appliance! Follow these easy steps to get it done safely and efficiently.
- Spot the pilot light. It’s usually near the burner assembly or control panel. Check the manual if you’re in doubt.
- Turn off the gas supply. Safeguard yourself while relighting. Find the shut-off valve or use the main gas valve for your home.
- Let any residual gas dissipate. Make sure there are no pockets of gas that could ignite.
- Now it’s safe! Find the pilot light control knob or button. Press and hold it in while using a long-reach lighter to light the flame.
- Hold the knob or button for around one minute after lighting. This allows proper heat distribution and stabilization before you let go.
Be careful and follow these instructions closely. Relighting your pilot light will be a breeze with these tips!
How to check the gas pressure and adjust if necessary
Checking and adjusting the gas pressure is a must for a secure and efficient system. Here’s a guide to help you do it properly.
- Turn off all gas appliances connected to the system and make sure the gas supply valve is closed.
- Locate the pressure test port, typically near the gas meter or regulator.
- Attach a manometer to the test port and open the isolation valve slowly.
- Observe the manometer reading. Compare it with the manufacturer’s recommended range. If the pressure is out of the acceptable range, adjustments are needed.
To reduce pressure:
Turn down the regulator adjustment screw in small increments until you reach the desired pressure level.
To raise pressure:
Turn up the regulator adjustment screw in small increments until you get the desired pressure level.
Remember to close the isolation valve after completing adjustments and carefully remove the manometer from the test port.
Also, inspect your gas system regularly for any leaks in the fittings or connections.
I personally experienced a drop in my gas stove’s performance. After following these steps, I discovered that the gas pressure was too low due to a blocked regulator adjustment screw. With a quick adjustment, my stove was back to maximum functionality, highlighting how frequent checks can avoid problems and potential safety risks.
Cleaning the thermocouple is a tough job, but someone has to do it.
Tips for cleaning the thermocouple if it is dirty or covered in soot
Clean the thermocouple! It’s essential for proper functioning and to prevent malfunctioning due to dirt or soot buildup. Here are five easy steps:
- Turn off gas supply. Avoid potential accidents or injuries.
- Find the thermocouple, usually near the pilot light. Maybe remove a panel or cover.
- Gently blow compressed air onto the thermocouple to remove debris or soot.
- Use a soft-bristled brush or toothbrush to scrub away any dirt. Avoid abrasive materials.
- Reassemble and turn on the gas supply. Relight the pilot light. Test that the flame is steady and consistent.
Clean the thermocouple regularly for optimal performance and safety. The NFPA study showed that failure to maintain and clean gas appliances causes home fires worldwide. Plus, cleaning the pilot tube or orifice is like sticking a tiny brush into a tiny hole – fun!
Instructions for cleaning the pilot tube or orifice
Cleaning the pilot tube or orifice is an essential task for your equipment. To make it easier, here’s a guide!
- Turn off the gas supply – it’s important for your safety.
- Locate the pilot tube or orifice – it’s usually a small metal tube that connects to the gas burner.
- Remove any debris – use a brush or compressed air. Clean thoroughly.
- Check for blockages – insert a small wire probe carefully.
- Reassemble and test – then turn on the gas supply. Test by lighting the pilot flame.
Remember to maintain your equipment and clean the pilot tube or orifice regularly. It’ll extend its life and improve efficiency. Don’t miss out on this simple yet vital task – it’s an investment in reliability!
What to do if the spark ignitor or spark rod is not producing a spark
- If your spark ignitor or rod isn’t producing sparks, don’t worry – there’re steps you can take:
- Ensure the power supply is connected correctly.
- Check for any damage or wear on the ignitor/rod.
- Inspect wiring between it and the control unit.
- Clean it off if needed.
- Maintenance and cleaning can help prevent issues in the future too.
Let me tell you a story. My friend John was prepping for a BBQ, but his grill ignition wouldn’t work. So he continued without it. But when he tried turning off the gas, there was an explosion! This shows how vital it is to fix ignition system issues quickly. And no improvising dangerous alternatives either!
Prioritize safety, take care of your ignition system, and remember: if the troubleshooting doesn’t work, blame ghosts! They have a rep for causing technical glitches.
Safety Precautions when dealing with water heater pilot issues
To ensure your safety when dealing with water heater pilot issues, it’s crucial to take necessary precautions. Start by turning off the gas supply before attempting any repairs to avoid potential gas leaks. Additionally, handle gas lines and propane with caution to prevent accidents. If you’re unsure or uncomfortable with the repair process, it’s wise to consider hiring a professional plumber or HVAC technician for assistance.
Importance of turning off the gas supply before attempting any repairs
Safety first – always turn off the gas supply before attempting any repairs! It’s important to remember that gas leaks can cause fire hazards and even explosions. Here’s a 3-step guide:
- Locate the gas valve: It’s usually near the gas meter or on the appliance itself. Turning off the valve will stop the flow of gas and minimize risk.
- Ventilate the area: Open windows and doors to ventilate. Gas leaks emit harmful fumes, like carbon monoxide, which can be dangerous when inhaled.
- Use appropriate tools and techniques: Follow the advice of professionals or appliance manuals. This will ensure you handle the repairs correctly and reduce accidents/damage.
Remember:
- No open flames or smoking near potential gas leaks.
- Keep flammable materials away from repaired appliances.
- If you smell gas or suspect a leak, evacuate and call emergency services.
Home Advisor states that not turning off the gas supply before repairs can lead to serious accidents and even death. So, prioritize safety first and stay safe!
Cautionary measures for handling gas lines and propane
When it comes to gas lines and propane, extreme caution needs to be taken. Three key measures to keep in mind are:
- Inspect gas lines regularly for any signs of damage or wear. Cracks or leaks can lead to dangerous situations, so timely detection is a must.
- When handling propane cylinders, store them upright in a well-ventilated area, away from sources of heat or ignition.
- Never try to fix or modify gas lines or propane equipment yourself. Always seek professional help to avoid accidents and guarantee proper maintenance.
Moreover, one minor mistake can have major consequences when dealing with gas lines and propane. Therefore, remaining attentive all the time is essential.
This is highlighted by an unfortunate experience a family had while camping. A faulty gas line caused a fire near their tent. Fortunately, they had followed safety protocols and were able to flee without harm. This shows how important it is to inspect and handle gas lines and propane responsibly.
By considering these safety measures, we can protect ourselves and others from disasters related to gas lines and propane. Taking shortcuts with DIY skills can be risky, so it’s best to hire a professional plumber or HVAC technician to keep your home safe.
When to consider hiring a professional plumber or HVAC technician
When it comes to plumbing or HVAC repairs, experience is a must. DIY attempts can cause costly repairs and even worse – floods or electrocution. Professionals are trained to quickly diagnose and fix any issues that arise. Plus, they provide warranties on their workmanship.
Safety should always be top priority when dealing with plumbing or HVAC systems. Professionals have the knowledge to reduce the risk of accidents or injuries.
Time is also a factor. Professionals can get the job done quickly, saving you both time and frustration.
Lastly, hiring a professional can save you money. They have access to specialized equipment and materials that may not be readily available to you. So, repairs can be completed more efficiently and effectively.
Conclusion
In order to wrap up the discussion on what would cause a water heater pilot not to light, let’s conclude by recapping the main causes and solutions for this issue. Additionally, I’ll provide some final tips to help you maintain a properly functioning pilot light. Understanding these key points and following the suggested maintenance practices will ensure that you can troubleshoot and address any problems with your water heater’s pilot light effectively.
Frequently Asked Questions
1. What would cause a water heater pilot not to light?
A water heater pilot may not light due to several reasons. Some common causes include a problem with the gas supply, a faulty thermocouple, a dirty pilot tube, or a malfunctioning gas control valve.
2. I can’t get my water heater pilot to light. What should I do?
If you’re unable to light the pilot on your water heater, start by checking if the gas line is open and the gas control valve is turned on. If the gas supply is fine, try cleaning the pilot tube and thermocouple rod to remove any debris. If the problem persists, you may need to replace the thermocouple or contact a professional for further assistance.
3. Why is my water heater pilot not lighting even after following the instructions?
There could be several reasons why the pilot light won’t light even after following the instructions. Common reasons include insufficient gas pressure, a faulty ignition system, or a defective gas valve. It may be necessary to consult a professional plumber or technician to diagnose and fix the issue.
4. What should I do if the pilot light won’t light on my water heater?
If the pilot light won’t light on your water heater, try the following troubleshooting steps:
- Make sure the gas supply is turned on.
- Check the pilot tube and thermocouple for debris and clean if necessary.
- Ensure the gas control valve is functioning properly.
- If everything seems fine, the thermocouple might be faulty and needs to be replaced.
- If you’re unsure or uncomfortable handling the repairs, it’s best to call a professional for help.
5. What are the common causes of pilot light problems in water heaters?
Common causes of pilot light problems in water heaters include a malfunctioning thermocouple, a clogged pilot tube, a faulty gas valve, or a problem with the gas supply. These issues can prevent the pilot flame from staying lit or lighting up in the first place.
6. Should I attempt to fix the pilot light issue on my water heater myself?
While some pilot light issues can be resolved through simple troubleshooting, it’s essential to prioritize safety. If you’re unsure of how to troubleshoot or fix the problem yourself, it’s best to call a professional plumber or technician. They have the necessary knowledge and tools to diagnose and repair the issue safely and efficiently.