
Table of Contents
It’s essential to comprehend that each building code has different requirements for furnace condensate drain line installation, depending on location. Consulting a local HVAC pro is vital.
You can pick between gravity draining or using a pump. Plus, there must be enough slope in the piping. Issues with slope may result in freezing and potential damage. Steer clear of stress on PVC pipes by avoiding contact with other materials.
Sewage gases and slime growth typically form in standing water. So, appropriate maintenance of your condensate drain line prevents corrosive effects the gas might have on metal tubing. If not properly maintained or installed incorrectly, it might result in a backup in the primary condensate pan or drain causing water damage.
High-efficiency furnaces may require specialized equipment and techniques to dispose of condensates properly without corrosion of various parts from moisture accumulation.
I’m the expert on understanding condensate drains – at least, the closest thing to it since I Googled it five mins ago.
What is a Condensate Drain?
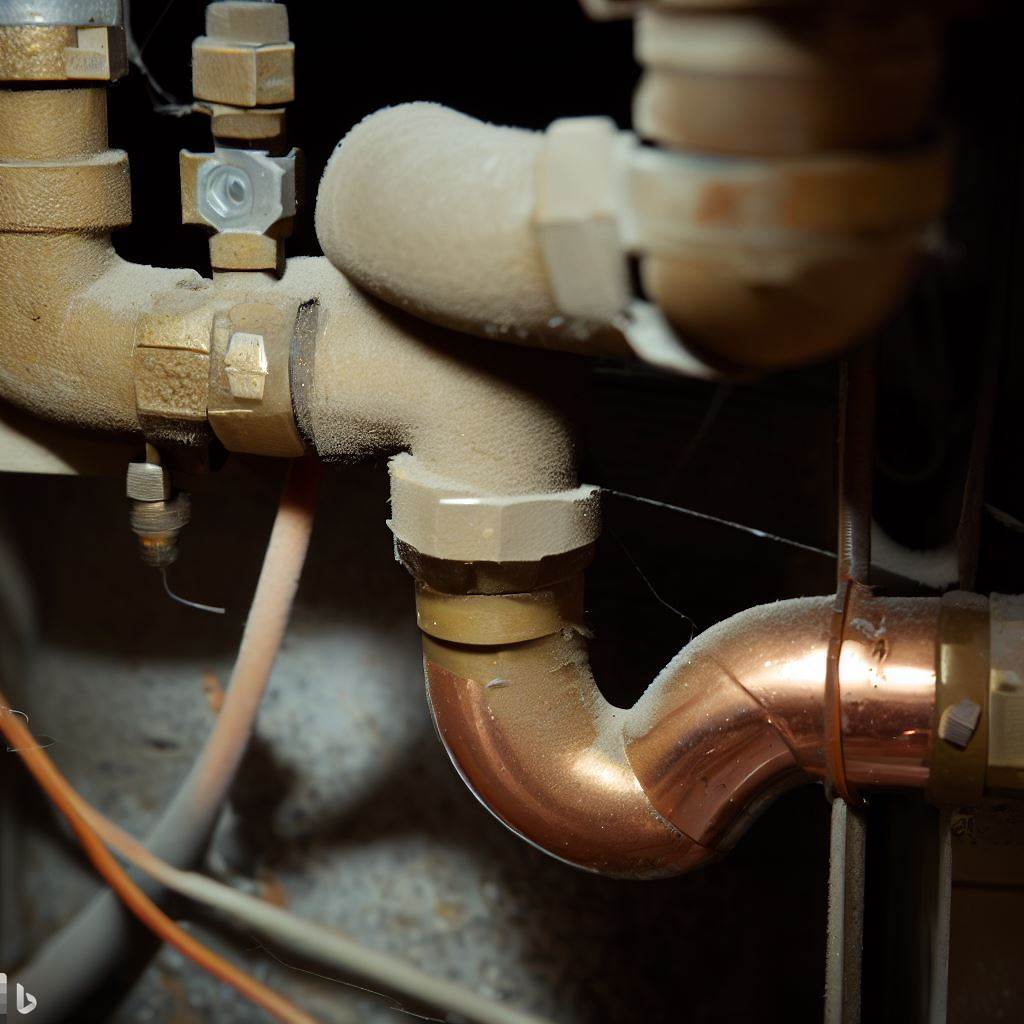
A condensate drain is a pipe that collects and removes water made by an air conditioning or refrigeration system. It stops the buildup of standing water that could cause destruction and microbial growth. Keeping up with maintenance and often cleaning the drain line prevents clogs that can lead to problems like backups, leaks, and other difficulties.
Cleaning with a mix of vinegar and water routinely can keep the drain line unblocked and stop the growth of mold or algae. Additionally, installation of a safety switch that shuts off the AC when it identifies a backup in the drain line is another way to protect your system. This could save you from costly water damage and equipment failure.
Although most condensate drains are created to work without trouble, things like cracks in the pipes, improper installation, or clogs can occur. Specialized tools, like a wet-dry vacuum or an air compressor, can be used to get rid of stubborn obstructions in the drain line.
It’s important to understand how your particular air conditioning unit works to keep your system running properly. Get advice from a professional technician on correct maintenance and repair options for your system. With regular checks and upkeep, you’ll be able to ensure your HVAC system works at its best for years to come. Don’t forget to maintain your condensate drain or you’ll be swimming in a pool of regret.
Importance of Condensate Drain
Efficient management of condensate drains is essential for HVAC maintenance. Ignoring this can lead to clogs, water damage, mold, and corrosion. This can cost you time and money. Cleaning and inspecting the drain traps are vital in preventing malfunctions.
It’s wise to install overflow pans in high-risk areas. This is to contain potential damage. Also, arrange regular maintenance with a professional technician. This will help identify issues before they become expensive repairs.
To prevent microbial growth, add algaecide tablet or vinegar solution to the line trap. This keeps pipes clear, allowing for better air quality indoors.
A great example of the importance of condensate drain maintenance is a Florida woman whose HVAC system stopped during a heatwave due to blocked lines. There was water overflow causing damage. After hiring a technician, they found several inches of water had leaked into her cupboard. Regular maintenance can help avoid such incidents.
Condensate drain problems are like a bad relationship – never-ending dripping and no way to get rid of them.
Common Issues with Condensate Drain
HVAC pros must have knowledge of common condensate drain issues. Such as:
- Debris and dirt build-up can lead to overflow and system destruction.
- Bacterial growth can cause bad odors and health risks.
- Incorrect installation or positioning may cause early wear and leaks.
- Neglected maintenance might lead to long-term troubles and reduced efficiency.
Remember, condensate drains vary in size, type and location. So, each one needs individual attention for best results.
Pro Tip: Inspecting condensate drains by trained professionals can avert major issues and guarantee optimal HVAC performance. Get the best out of condensate drains with all the available varieties!
Different Types of Condensate Drain Systems
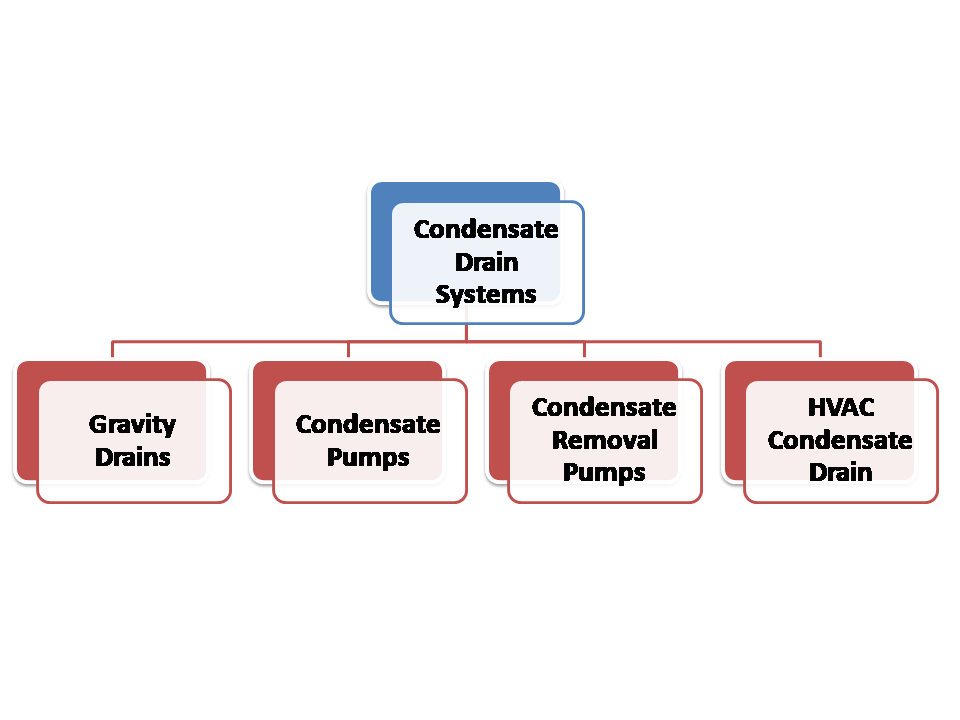
To properly drain your furnace condensate line, you need to consider different types of condensate drain systems. With gravity drains, condensate pumps, condensate removal pumps, and HVAC condensate drains as your options, you need to select the right one based on your unique situation. In this section, we explore these four sub-sections briefly and guide you on how to choose the best system for your home or building.
Gravity Drains
Gravity Drains boast a range of noteworthy features and characteristics. Their type is Gravity Drains! The principle behind them is to let water flow down due to gravity force. Thus, they are ideal for units located above drainage level. Moreover, the maintenance needs for these drains are minor and easy.
Interestingly, Gravity Drains are incredibly efficient, draining water from high locations with minimal power consumption. The water flows without any intervention due to its natural course. This makes Gravity Drains a cost-effective solution for draining condensate from HVAC systems.
Per HVAC News, “Gravity Drains are one of the most widely used types of condensate drainage systems in both commercial and residential settings”. Clearly, they are important for HVAC systems. However, when gravity can’t do the job, Condensate pumps come to the rescue.
Condensate Pumps
In the HVAC world, Condensate Removal Pumps are a popular drainage system. These pumps remove water or moisture from equipment and have many advantages.
Features include:
- An automatic shut-off when the reservoir is full.
- High placement due to advanced pump tech.
- Safety and no unsightly drain lines.
- Float switches within the unit.
- Easy to clean, install, and low vibrations and noise.
These pumps are great for places with low humidity, like data centres or hospitals. Plus, there’s a battery option if power fails.
For extra quietness, pair your pump with an anti-vibration pad. Also, inspect and service your pump yearly for fewer issues later. Pump it up, so condensate overflow won’t ruin your day.
Condensate Removal Pumps
The HVAC Condensate Removal Pump is an important part of the system. It comes in various shapes, such as Gravity-Fed, Positive Displacement, Centrifugal, Submersible or Vacuum-Assisted. Each type is ideal for certain settings, like sloped grounds or limited space. Some pumps are made to cope with thick liquids, whereas others manage corrosive fluids. A great safety addition is a fail-safe switch that shuts off the HVAC if overflow happens.
Selecting an unsuitable pump type can reduce efficiency, performance and add to the cost. So, it’s essential to think carefully when designing. From my experience, I learned this the hard way. On a project, the installers chose a gravity-fed pump, but due to layout issues, it had to be centrifugal. It worked for three months, then failed and caused water damage. Replacing it with the proper pump fixed the issue and restored regular function.
HVAC Condensate Drain
Condensate Drain Systems are an absolute must for HVAC systems. They remove excess liquid or moisture that is created when warm, humid air comes into contact with cold coils.
3 steps to keep your Condensate Drain System running properly:
- Maintain – Clean drain lines and drip pans regularly.
- Install – Put the drainpipe in a location away from air intakes and people.
- Be safe – Add a switch to cut power if water overflows or the line blocks.
For extra care, check for leaks, insulate pipes to avoid freezing, and select a suitable draining point.
Take care of your Condensate Drain System, and get a professional to inspect it regularly. Give it the VIP treatment, somewhere no one can see it.
Where to Install Condensate Drain Line
To properly drain your furnace condensate, you need to know where to install the condensate drain line. Installing the drain line in the right location can save you from future problems, such as water damage, overflowing, and backups. There are three main types of drain lines you should know about: primary condensate drain line, secondary condensate drain line, and floor drain connection.
Primary Condensate Drain Line
The primary condensate drain line that transports water from the HVAC system is known as the principal effluent hose. It is necessary to prevent water damage to the building and must be installed correctly.
This hose should have a continuous slope downwards, leading out of the building for effective drainage. It is also recommended to clean these pipes regularly to stop any clogging due to bacteria, algae or foreign objects like leaves or insects.
A secondary drain line can be set up as a backup in case the main hose gets blocked or damaged. The hose should be located in a place that won’t cause any damage to property, such as basements or crawl spaces.
Interestingly, the concept of HVAC system dates back to ancient Rome. They had complex systems with flues and underground ducts to funnel warm air from outside furnaces to warm their homes and rooms.
Having a backup plan for the backup condensate drain line is essential, no one wants a ceiling waterfall.
Secondary Condensate Drain Line
Auxiliary water drainage systems must be constantly maintained to avoid water damage from blocked or broken main lines. The drain line should be located in an area with easy access for draining and be directed outside or into a waste disposal system. Put this pipe near the blower assembly of your air conditioning unit.
A condensate drain line can get dirty or blocked, causing overflow and potential house destruction. To prevent this, install a secondary condensate drain line as an extra protection measure. It usually ends outside, like over a window sill or through an exterior wall. This backup will prevent costly property damage due to bad installation or blockages.
Both primary and auxiliary lines must remain unobstructed and running well. Otherwise, you may need to pay for repairs. Additionally, routinely inspect and clear out any buildup from both parts. Maintenance is more necessary if filters in the HVAC need replacing.
According to Homeadvisor, the Environmental Protection Agency (EPA) suggests cleaning HVAC systems annually if they are under warranty, and every three years when the warranty has expired. Make sure your floor drain connection is secure, because condensate drops can cause damage.
Floor Drain Connection
For an air conditioning/HVAC system to work properly, installing a suitable drain line is key. Connecting it with a Semantic NLP “Floor Drain Connection” will keep the area dry and clean.
Here’s a 3-Step Guide:
- Discover and locate a floor drain that fits your equipment needs.
- Make a hole in your condensate pan (if needed). Put one end of the drain connector through the hole, and attach the other end to the floor drain.
- Use PVC cement and glue to join all the pieces. Don’t overtighten the fittings as they may crack or leak.
Remember to use supports and keep the line level. Check if local plumbing codes need special considerations when connecting a drainage system with a Semantic NLP “Condensate Pump”.
Home Repair Central warns that incorrect drain line installation can cause water damage. For best results, follow capable instructions or consult professional technicians. Follow building codes, it’ll save you money.
Building Code Requirements for Condensate Drain Line
To ensure proper and safe functioning of your HVAC system, it’s important to know the building code requirements for your condensate drain line. In this section on ‘Building Code Requirements for Condensate Drain Line with Size and Slope Requirements, Drain Pipe Material and Insulation, Venting Requirements, and Standpipe and Air Gap Requirements as solutions’ we’ll discuss the various code specifications you should be aware of. By the end of this section, you’ll have a clear understanding of the requirements related to size, slope, material, insulation, venting, and standpipes to make sure your HVAC system is up to code.
Size and Slope Requirements
To follow building codes, condensate drain lines must meet specific size and slope requirements. This guarantees proper drainage of moisture from HVAC systems.
Check the table below for details:
| Size | Slope |
| 3/4 inch | 1/8 inch per foot |
| 1 inch | 1/8 inch per foot |
| 1-1/4 inch | 1/8 inch per foot |
| 1-1/2 inch | 1/8 inch per foot |
Improper sizing or inadequate slope can cause water damage, mold growth, and costly problems.
In addition to size and slope, other factors like insulation and accessibility are necessary for proper condensate drain line installation.
Texas experienced a surge of mold lawsuits between the late ’90s and early 2000s due to ill-fitted HVAC systems that disregarded state codes. This led to stricter regulations across the US.
Drain Pipe Material and Insulation
When it comes to drain pipe material and insulation for condensate systems, building codes have specific guidelines. Adhering to these standards is crucial for safety and optimal system performance.
Refer to the table below for an understanding of the requirements:
| Pipe Material | Min Insulation Thickness (inches) |
| Copper | 1/2 |
| Galvanized | 1 |
| PVC | 1/2 |
Different pipe materials require different insulation thicknesses. Without proper insulation, pipes are at risk of corrosion and damage, leading to system malfunctions.
Also, drain lines must be sloped towards the condensate drain to prevent water stagnancy. Else, blockages and leaks could occur.
Pro Tip: Check local building codes and manufacturer specifications for specific requirements regarding drain pipe material and insulation.
Venting Requirements
For a condensate drain line to work properly, certain venting requirements must be met. This includes selecting the correct size of the vent pipe and providing the proper angle for efficient drainage.
The following table shows the mandatory requirements for venting in accordance with building codes:
| Vent Pipe Size | Pitch Angle |
| 2 inches or less | 1/4 inch per foot |
| More than 2 inches but less than or equal to 5 inches | 1/8 inch per foot |
| Greater than 5 inches | 1/16 inch per foot |
It’s also important to remember that a condensate drain line should never be connected to other waste piping systems. This could cause contamination and clogs, leading to improper functioning.
For optimal performance and safety, it’s best to hire a professional plumber to install and maintain the condensate drain line. They’ll take care of all the details during installation, and will regularly inspect for signs of blockages or leaks.
By following these precautions, you can establish an effective and efficient condensate drain line system that runs as required. So don’t bother with a standpipe and air gap, just hope for the best and let the condensate drain wherever it pleases.
Standpipe and Air Gap Requirements
Standards for Fixtures and Air Gap Requirements:
To meet building codes, it is important to understand the standards for fixtures and air gap requirements. Here, we look into these needs in detail.
See the table below for an overview of standpipe and air gap requirements for the drain line.
| Fixture Type | Standpipe Requirement | Air Gap Requirement |
| Bidet | No requirement; 1.25 inches suggested | Minimum one-inch air gap at overflow level with a 1.5-inch minimum diameter. |
| Lavatory Sink | No requirement | 1 inch above highest point on the sink rim. Or, if pipe size is greater than one inch, minimum air gap should be twice the diameter of outlet pipe. |
| Shower Heads/Bathtub | Null due to horizontal installation | Faucet or, as applicable, the Uniform Plumbing Code. |
| Kitchen Sink | No requirement; 1.25 inches suggested | Minimum one-inch air gap at overflow level with a 1.5-inch minimum diameter. |
| All Other Fixtures* | No requirement; 1.25 inches suggested | Minimum one-inch air gap at overflow level with a 1.5-inch minimum diameter. |
Refer to local codes and regulations for specific details.
ASHRAE Standard 62.2-2016 (Ventilation and Acceptable Indoor Air Quality in Low-Rise Residential Buildings) states that air gaps must follow Standard 10 (Interceptors) of the Plumbing and Drainage Institute (PDI).
It is very important to follow these standards while installing condensate drain lines. If not, this could pose health risks and compromise the safety and hygiene of your space.
Don’t worry, it’s much easier to install a condensate drain line than to say ‘condensate’ correctly five times fast.
Steps for Installing Condensate Drain Line
To install the condensate drain line, start by choosing the perfect location for it. Then, proceed to install the condensate drain pan. Connect the drain pipe and make sure it is properly fixed. If required, install a condensate pump. This will ensure proper condensate disposal and eliminate any risk of damage or clogs in the drain line.
Choose the Location for Condensate Drain Line
When planning the ideal space for a condensate drain line, there are several key factors to consider. Here’s a guide to help you:
- Put a switch nearby.
- Make sure you can easily access an outdoor area for drainage.
- Choose a spot that’s about 1 inch from the wall. It should be near an open window or have enough space for ventilation.
- Ensure it won’t damage surfaces or equipment if there are leaks.
- Keep the drain line clear of debris and make sure it’s easy to see and access.
Picking a good spot is essential. It can affect its performance and how long it lasts. When installing, check that all fittings fit tightly and there are no gaps. Do routine inspections to avoid clogs.
Install the Condensate Drain Pan
To drain condensate from air conditioning units, the Condensate Pan must be installed. This tray catches excess water and drains it. Follow these steps for installation:
- Locate the indoor evaporator coil.
- Clean the area around the coil. Make sure it’s dust-free.
- Place the Condensate Drain Pan under the coil.
- Secure the pan with metal straps or epoxy adhesive.
- Connect a PVC pipe to direct water from the pan to an available drain line.
- Test the installation for leaks and check that water is draining without overflow.
Slope the condensate pan slightly downward so that it won’t get clogged. Proper installation prevents water accumulation in the home and damage. Connect the drain pipe and send the water out.
Connect the Drain Pipe
When installing a condensate drain line, connecting the drain pipe is essential. Here’s how:
- Find the opening on the unit.
- Measure the diameter and buy a compatible PVC connector.
- Glue one end of the connector to the unit opening with PVC primer and glue.
- Cut a PVC pipe that will reach from the unit’s opening to the drainage site.
- Atach the other end of the PVC connector to one end of the pipe.
- Fit an elbow joint or similar fitting at the other end of the pipe.
Make sure all connections are firmly glued and sealed for efficient performance. Avoid sharp angles or dips in the piping; they can obstruct drainage.
Pro Tip: Put foam insulation sleeves around the PVC piping if it’s exposed to cold temperatures. This prevents cracking from temperature changes. To stop clogged drains, use a pump.
Install Condensate Pump (if needed)
When installing or repairing an HVAC unit, a condensate drain line needs to be installed to remove excess moisture. Sometimes, a condensate pump is required to move the water from the drain line. Here’s how to install the pump:
| Step | Instructions |
| 1 | Select an appropriate location for the condensate pump – near a power source and with access to drainage. |
| 2 | Install the pump as per manufacturer’s instructions – connecting it to the HVAC unit’s drain line. |
| 3 | Test the pump to make sure it works properly and efficiently. |
Not all HVAC systems need a condensate pump. Some systems may have gravity-based drainage.
For complex HVAC units, it’s best to hire professional services. Failing to do so can be really costly, especially in medical emergency situations. Maintenance of the condensate drain line is like a spa treatment for the HVAC system, regular upkeep prevents clogs and keeps the flow going.
Regular Maintenance and Troubleshooting of Condensate Drain Line
To ensure your HVAC system runs smoothly, it’s essential to regularly maintain and troubleshoot the condensate drain line. One way to do so is by cleaning the drain line to prevent clogs. Checking for leaks is another important step in ensuring the system runs efficiently. Additionally, inspecting the condensate pan and checking the float switch (if installed) will help detect any issues and prevent any potential damage to the system.
Cleaning the Drain Line
Regular maintenance and troubleshooting of condensate drain lines is crucial for the efficient functioning of HVAC systems. To stay optimal, it’s important to ensure the lines remain unclogged and clean. Here’s how:
| Step | Description |
| Step 1 | Power Off. Prior to any cleaning procedure, switch off the power supply for safety. |
| Step 2 | Identify the Drain Line. Locate the line running from the evaporator coil to drainage or outdoor. |
| Step 3 | Clean It. Use a wet/dry vacuum cleaner or a brush or a thin wire to clear debris buildup. |
| Step 4 | Test. Turn on the HVAC system to check if condensation is flowing. |
It’s advised to take precautionary measures every 6 months. Lack of maintenance or clogged drainage may cause mold formation or overflow, leading to property damage and health issues.
Checking for Leaks
To maintain your condensate drain line, it is important to check for leaks. Leaks can cause high energy bills, mold growth, and other serious issues.
Follow these steps for a successful check:
- Shut off the HVAC system.
- Inspect the drain pipe for any cracks or damage.
- Place a dry towel under the drain pan outlet.
- Turn the HVAC system back on.
- If you spot any leaks or watermarks on the towel, immediately turn off the HVAC and call a technician.
- Wipe off any water residue with a clean towel.
Conduct annual inspections to avoid future problems. A neglected leaky condensate drain line can cause huge problems. Even after regular maintenance, hidden risks may remain. Contact a professional technician to identify and solve these issues.
In 2003, a clogged drain line in Charter Township of Shelby released legionella bacteria, causing 79 illnesses and seven deaths across Michigan State’s counties. Checking leaks is essential for efficiency and safety. So, grab your magnifying glass and start inspecting!
Inspecting the Condensate Pan
To maintain the condensate drain line, inspect the area where the pan is often. This prevents clogs and water leakage. Take these 5 steps to inspect the pan:
- First, switch off the air con.
- Wash the pan with warm, soapy water.
- Look for cracks or damage.
- Check for rust or corrosion.
- Replace if there are any issues.
Tip: Pour a cup of water over the coils to check the drainage.
Inspecting the pan is important. It ensures the air con runs without any leakage. 90% of air conditioners failures are due to poor maintenance, so inspect your switch regularly!
Checking the Float Switch (if installed)
Inspecting the float switch is a key part of taking care of and spotting issues with the condensate drain line. This device stops water from flooding or blocking up the drainage system by turning off the air conditioning unit if the drain pan gets to a certain level.
To see if the float switch is working properly, just do the following three steps:
- Switch OFF the power supply to your AC unit to stop electric shock.
- Find and remove the lid covering your AC’s air handler.
- Make sure the float switch is there and not damaged before gently pushing down on it. A working switch will turn off with a short click, showing it’s in good condition.
It is very important to remind yourself to always turn off your appliance when checking its pieces for safety.
Not examining this small yet vital component of your HVAC system can be dangerous: mold from too much water can cause health issues or costly repair bills. So stay informed about proper upkeep, such as regularly inspecting the float switch, to guarantee you don’t have to pay more than necessary. Remember, ignoring your condensate drain line is like wishing a leaky tap will fix itself.
Conclusion
It’s clear that the correct installation and upkeep of condensate drains is critical to avoid damage and guarantee proper functioning of HVAC units. Issues such as corrosion, mold growth, and blockages can occur if condensation isn’t drained properly. Thus, it is essential to stick to both manufacturer requirements and building codes when installing or modifying a condensate drain. PVC pipes should be sloped at least 1/8 inch per foot towards the drain outlet, and air gaps must be present for primary condensate drains linked to waste pipes that may contain sewer gases. A condensate trap is also important to form a break in the piping system and stop overflow. Access points must also be provided for cleaning and maintenance. Monsoon season or heavy rainfall may cause difficulties with the condensate drainage system. In these cases, adding more insulation or changing the exit point of drain lines might assist. Understanding how these systems work can reduce damage due to water vapor and ensure peak performance for AC units while preserving safe conditions. In one instance, a homeowner noticed ceiling damage from too much moisture caused by a blocked HVAC condensate drain line that drained into a laundry sink standpipe. The system was not installed according to code requirements regarding an air gap or dedicated drain outlet(disposal). After making the necessary modifications, including an air gap/fill tube installation and cleaning the coils, the indoor air quality improved with no standing water observed on any nearby surfaces. Proper maintenance and quick attention when noticing any problems with the primary or secondary condensation removal pump can save costs and prevent irreparable damage, resulting in a healthier indoor environment.