
Table of Contents
A faulty thermostat can stop your furnace from working, leading to cold winter woes. It can disrupt the airflow of heating and cooling systems, causing you grief. If you have a problem with air or heat linked to airflow, your thermostat might be failing.
Before calling an HVAC specialist, there are steps you can take. Check if it has batteries and replace them if needed. Examine if any wiring is disconnected. Secure the cover by tightening screws, if loose.
A thermostat of a furnace
If all fails, call a professional service for help. Replacing a faulty thermostat is easy for experienced technicians. New thermostats come with features for greater control over comfort and energy efficiency. Your broken thermostat may cause trouble, but its symptoms are as clear as a broken fuse light.
Symptoms of a bad thermostat
To identify thermostat issues with your furnace and ensure a comfortable temperature in your home, you need to be able to recognize the common symptoms of a bad thermostat. Inaccurate temperature readings, short cycling, and lack of heat or cold air are the primary ones. In the following subsections, we will discuss each of these symptoms and provide solutions to help fix the issue.
Short cycling
Short cycling is when your thermostat causes your HVAC system to repeatedly turn on and off in a short time. This leads to energy wastage, discomfort and damage.
Signs of a bad thermostat include
- your home feeling too warm or cold
- Weak air blowing from the vents, accompanied by clicking noises.
Multiple factors can cause short cycling. For example, incorrect wiring between your thermostat and heating/cooling system, or a dirty air filter blocking airflow over the evaporator coils. Clean or replace filters regularly to prevent this.
According to the US Department of Energy, investing in a programmable thermostat can save up to 10% on annual heating and cooling bills. So, if something isn’t working right with your HVAC unit, call a professional straight away!
Inaccurate temperature readings
A broken thermostat can mean temperature problems, making your home uncomfortable. These come from inaccurate readings. The thermometer might not show the right temperature, leading to system inefficiencies and energy wastage. You can tell something’s wrong when indoor temperatures differ from the thermostat.
The wrong room temperature means your heating and cooling systems won’t work properly. This leads to wasting energy and difficulty with a comfortable environment. It also means your HVAC system has to work harder, causing breakdowns and high bills.
In 1970, NASA suffered a problem during its Apollo 13 mission. The two thermostats controlling cabin heat failed. This caused rising temperatures and many issues with onboard systems that use water. The crew had to work hard to solve the problem millions of miles away from Earth. It took six days to find a temporary solution for air quality.
Lack of heat or cold air
Thermostat: that small thing that lets us control the heat or cold air in our homes. But, what if it stops working? No more heat or cold. This could mean there’s an issue with the thermostat circuit or wiring. Malfunctioning thermostats can be a bummer for those living in cold climates. It’s important to know the signs.
Do you feel cold, sweaty or uncomfortable, even after turning the heater or cooling system on? It could be the thermostat. Poorly functioning thermostats can’t communicate with heating and cooling systems, so they don’t start up. This means the thermostat can’t sense the right temperature, making your home uncomfortable.
Not having a properly calibrated thermostat can be severe. Low and high temperatures from a malfunctioning thermostat can cause hypothermia and hyperthermia.
Troubleshooting a bad thermostat
To troubleshoot a bad thermostat with thermostat issues causing trouble with your heating system, checking the batteries, wiring, and thermostat settings are key solutions. This part will explore these sub-sections of thermostat problems in detail. By knowing these thermostat failure solutions, you can save energy, stay comfortable in your home, and avoid calling HVAC services for simple thermostat problems.
Checking the batteries
When your thermostat isn’t working, check the batteries first. Here’s how:
- Take off the cover.
- Find the battery compartment and remove the batteries.
- Look for corrosion or leaks. Clean with a cotton swab dipped in vinegar if you spot any.
- Put in fresh batteries and make sure they’re aligned properly.
If your thermostat needs both electricity and batteries, changing just the batteries won’t help. Call a pro in such cases.
Keep an extra set of batteries ready. That way, you can quickly replace them when needed and avoid any temperature-related emergencies. Have a backup plan – just in case.
Checking the wiring
When troubleshooting a bad thermostat, inspecting the wiring is key.
- Ensure all connections are secure and no wiring is exposed.
- Check wire terminations for corrosion or looseness that could affect performance.
- To test continuity, use a multimeter and check voltage is within the right range.
- Replace any faulty wiring immediately to get the thermostat working again.
Inadequate or damaged wiring can ruin the thermostat’s operation. Inspecting the wiring is an important step to work out what’s stopping it from working. If not sure how to examine the hardware or don’t have the right equipment, ask a professional technician. Chewed-up wires from rodents cause faulty wiring and can lead to fire risks. Regularly check all wiring connected to thermostats to avoid serious repairs or injuries.
Doing maintenance early helps prevent bigger problems later. Regular upkeep ensures correct functioning and longer device life, saving you money.
Checking the thermostat settings
The thermostat is an important part of any HVAC system. It sets the temperature in a space. Checking it can help you find out what’s wrong with your HVAC. Here’s how to check it in five easy steps:
- See if the mode is set correctly for heating or cooling.
- Verify that the fan is on auto so it only runs when needed.
- Make sure the temperature setting is comfortable.
- Replace old batteries, as they cause issues.
- Check there are no errors in the scheduling or temperatures programmed.
Sometimes, things like eroding wires or damaged cooling systems need repair by an HVAC technician.
Did you know you can control your modern thermostat from your phone? Regularly checking your thermostat settings can keep you comfy and save money.
When to call for professional service?
To ensure that your heating system is working properly, you need to make sure that your thermostat is functioning correctly. If you are experiencing issues with your HVAC system and have tried troubleshooting thermostat problems, it may be time to call for professional service. In this section, we will discuss when to consider thermostat replacement, HVAC system repair or replacement, and the benefits of working with affiliates like Supertech and HB Home Service Team.
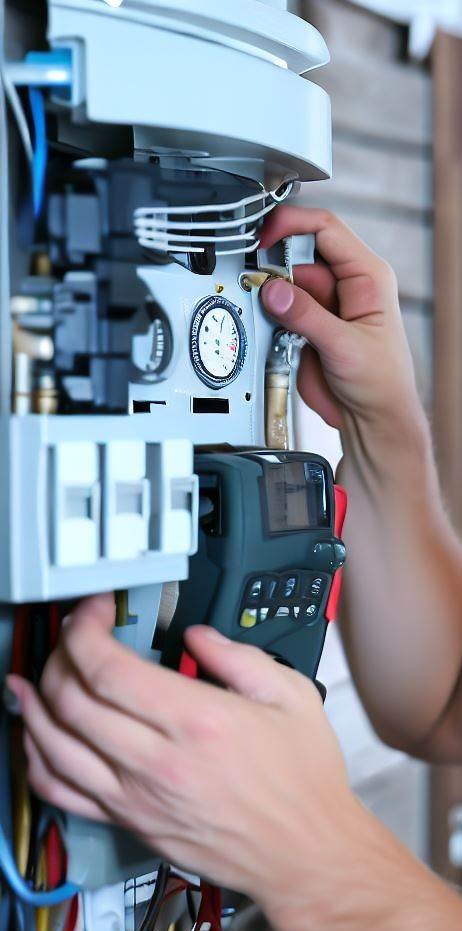
A professional inspection of a thermostat of furnace
Thermostat replacement
To replace the thermostat, you must:
- Locate your circuit breaker and turn off the power in the area.
- Unscrew the wall plate of the existing thermostat and disconnect wires.
- Connect wires of the new thermostat according to its instructions and screw in its wall plate.
- Restore power to the circuit breaker and turn on the unit. Program it as per manufacturer’s specs, including Wifi if required.
- Test the functionality to check if everything is working properly.
Be careful while replacing the thermostat, as mistakes may lead to malfunctioning heating or cooling.
Before purchasing a new thermostat, factors such as compatibility with your HVAC system, modern features, and lower running costs should be considered.
Lastly, an expert service technician should be called if you’re unsure about replacing the thermostat. The right company will provide trustworthy products, professional installation with zero errors, and ensure complete customer satisfaction.
HVAC system repair or replacement
Having a functional HVAC system is essential for comfort. But over time, due to age or insufficient care, it can break down. It’s important to know if repair or replacement is needed.
Signs that your HVAC system needs attention are:
- It doesn’t cool or heat as well
- Unusual sounds come from it.
Call experts to inspect and diagnose. If repairs are regular and costly, you may need to replace the whole system.
Act fast when you think there’s an issue. Neglecting small issues can cause major damage, requiring costly repairs or a full replacement.
Supertech and HB Home Service Team affiliates
Call the Supertech and HB Home Service Team affiliates when you have a home service issue. They can save you money and time. Get help for issues that you can’t solve yourself – especially for safety or legal reasons. Qualified technicians handle HVAC maintenance, plumbing repairs, electrical rewiring, and pool equipment repair.
HomeAdvisor found that 80% of homeowners had a home repair issue in the last year. Don’t wait – call the professionals. Forgo the YouTube tutorial – your house could burn down!
Steps for replacing a thermostat
To replace your old or faulty thermostat with a new one, follow these simple steps for a hassle-free solution: Turning off power to the unit, Removing the cover and old thermostat from the wall, Wiring the new thermostat, and Attaching the new thermostat to the wall. These four subsections will guide you through the process of installing the new thermostat and ensure that your heating and cooling equipment works efficiently.
Turning off power to the unit
It’s essential to turn off power before replacing a thermostat. To guide you, here are five steps:
- Locate the circuit breaker box that controls the thermostat.
- Open the box, and find the breaker that powers the heating or cooling system.
- Flip the switch of the circuit breaker to the OFF position.
- Check if there’s still power by trying to change the settings. If there’s no response, power is off.
- If there’s still power, flip other breakers until you disconnect the power supply.
Some thermostats may have battery backups. Therefore, remove all batteries for extra safety. Also, never work on electrical components without proper training or certification – hire professionals for critical parts replacement.
Removing the cover and old thermostat from the wall
- Switch off the power supply to avoid electric shocks.
- Gently pull off the cover from its base.
- Use a screwdriver to unscrew and remove the mounting plate.
- Disconnect all wires from the backplate.
- Carefully dispose of the old thermostat following guidelines.
- Use a cloth or brush to clear away any debris before attaching the new thermostat.
- Be aware of different wiring configurations.
- Take steps with ease to avoid damages.
- You’re ready to wire the new thermostat – don’t get electrocuted!
Wiring the new thermostat
After taking off the old thermostat, wiring the new one can be intimidating. But it’s not as hard as it looks. Here’s a step-by-step guide to help with wiring the new thermostat.
- Switch off the power to your HVAC system by turning off the breaker and make sure it is off.
- Remove the cover plate of your old thermostat. This reveals its wiring connections.
- Take a photo or write where each wire was attached. Label them with their corresponding letters (e.g., R, G, Y, W).
- Gently detach the wires from their terminals by pulling them out.
- Attach each wire to its terminal on the new thermostat by pushing them in until they click into place. Check the photo/notes from step 3 to confirm they’re all in the right spot.
- Snap the new thermostat’s cover plate back on. Turn on power to your HVAC system.
Different thermostats have different methods of attaching wires. Terminal designations also vary, so read and follow manufacturers’ instructions carefully.
Choose a new thermostat compatible with your HVAC system. It should have features like programmable temperature settings, Wi-Fi for remote control and monitoring etc. If you need help, call an experienced electrician or HVAC professional.
Attaching the new thermostat to the wall
To install a spanking new thermostat, fastening it to the wall is super important. Here’s the ‘how-to’:
- Tighten the screws that came with your new thermostat onto the backplate.
- Align the backplate with the holes in the wall and secure it using screws or anchors if necessary.
- Once that’s done, slide the thermostat’s faceplate onto the backplate and use extra screws to hold it in place.
Making sure that your thermostat is level and properly fastened is crucial to avoid any accidental removal or damage. Before attaching the new thermostat, use a level tool to guarantee an even installation.
Tips for maintaining a thermostat
To maintain the efficiency of your heating system with a properly functioning thermostat, you can follow a few tips for better results. Keeping the thermostat in a good position, regularly cleaning the unit and its wires, and keeping the surrounding area free from obstructions are some basics that can help. Read on to understand the importance of these subsections and how they might help you avoid HVAC service calls.
Keeping the thermostat in a good position
Maintaining a thermostat is key for home heating and cooling. It’s equally important to keep it in the right position.
- Put it away from direct sunlight and drafts, and in a central location for proper airflow.
- Don’t put anything close, such as furniture or curtains.
- Keep the surrounding area clear of dust and debris so the thermostat can sense the temperature accurately.
- Calibrate it regularly to stay efficient.
Smart thermostats are now a thing! AI systems learn your heating/cooling preferences over time. This helps optimize energy and comfort, while saving money on bills.
Regularly cleaning the unit and its wires
To keep your heating and cooling system functioning efficiently, it’s super important to clean your thermostat regularly. If not, it can lead to inaccurate temperature control and increased bills. So, here’s what to do:
- Switch off the breaker or remove the fuse from the furnace or air handler.
- Uncover the thermostat and vacuum with a soft brush.
- Detach the wires without touching them.
- Clean visible dirt with cotton swab soaked in rubbing alcohol.
- Check for loose connections or damaged wires.
- Put back the cover and restore power.
If you have pets, you should clean your thermostat each month. Pet hair and dander can clog filters and affect accuracy.
If you see an unresponsive touch screen or blank display after cleaning, don’t panic. Reset your thermostat by pressing the reset button (if available) or turning off power at the breaker for 30 seconds.
Keeping the surrounding area free from obstructions
- Maintain your thermostat! Clear the space around it. No large furniture or objects blocking the vents. This prevents damage and allows you to monitor the temperature accurately.
- Keep heat-generating items far away. Placing them near the thermostat can lead to inaccurate readings and energy waste.
Remember: maintain your thermostat for accurate readings and efficient energy use. Keep your home cozy and your bills low with these thermostat tips.
Conclusion
Having a bad thermostat is not good. It can cause your furnace to malfunction. This leads to temperature troubles, short cycling, and more. If you have issues with your HVAC system, you must call experts. You could use services like HB Home Service Team, Super tech, or other reliable companies. Before replacing batteries, cover, or screws, check for any wiring faults or device positioning issues. When getting a new thermostat, make sure it fits your heating system needs and comfort preferences.