
Table of Contents
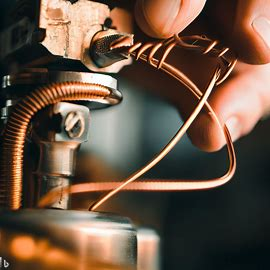
A thermocouple is a device made up of two different metals, joined together at one end. It senses the heat of the pilot flame and maintains its temperature, so the gas water heater can keep running properly. This is done through the Seebeck effect – when the difference in temperature between the hot flame and cooler junction creates an electric current. This voltage keeps the gas valve open, supplying fuel for heating.
But over time, thermocouples wear out from the extreme temperatures and eventually fail. If your water heater doesn’t ignite or keeps switching off, it’s likely that the thermocouple needs replacing. To do this, shut off the gas supply and disconnect it from both ends: the burner assembly and gas control valve. Then attach a new thermocouple.
Key Takeaways
- 1. A thermocouple is a crucial component in a water heater that helps to ensure the safe operation of the appliance.
- 2. The thermocouple works by generating a small electric current when exposed to the heat of the pilot flame.
- 3. This electric current is used to keep the gas valve open, allowing the pilot flame to stay lit.
- 4. If the pilot flame goes out, the thermocouple cools down and stops generating the electric current, causing the gas valve to close and preventing gas from leaking into the water heater.
- 5. Regular maintenance and cleaning of the thermocouple is important to ensure its proper functioning and prevent issues with the water heater.
- 6. If the thermocouple is faulty or damaged, it should be replaced by a professional to avoid any potential safety hazards.
- 7. Understanding how a thermocouple works can help homeowners troubleshoot and diagnose problems with their water heater more effectively.
Cleaning the thermocouple might help solve some issues without needing a replacement. First, turn off the gas supply, disconnect the old thermocouple, and use fine-grit sandpaper or steel wool to remove any dirt or carbon buildup. Pay special attention to the metal joints. Once cleaned, reattach firmly.
To test the thermocouple’s functioning correctly, you don’t need any special tools. Just remember to be extra careful, as you’ll be dealing with natural gas and an open flame. Turn off the gas supply and pilot light. Then disconnect the thermocouple from the control system and use a multimeter to measure its electrical current. A working thermocouple should read around 25-35 mV.
Think of a thermocouple as the water heater’s very own detective – constantly sniffing out any funny business in the pilot light!
What is a Thermocouple?
To understand what a thermocouple is and how it works on a water heater, let’s dive into its description and function. A thermocouple, a crucial component in a water heater, serves the purpose of detecting and regulating the pilot light’s temperature. By converting heat into electrical voltage, it ensures that the pilot light stays lit and allows for the safe operation of the water heater.
Description and function of a thermocouple in a water heater
A thermocouple is a vital part of a water heater. It has two metal wires joined at one end, forming a junction. Heat makes this junction create an electromotive force (EMF) and voltage. As the temperature rises, so does the voltage.
The thermocouple is used as a safety feature. A small flame from the pilot light hits the tip of the thermocouple. This heat makes the junction create EMF, which keeps an electrical circuit closed. This lets gas flow to both the pilot and main burner.
But if the pilot light goes out, the heat is gone. This causes a big drop in voltage output and shuts off the gas supply. Without a thermocouple, you can’t tell if the pilot light is on or off. This could result in gas leaks or other dangerous situations. So it’s important to inspect and maintain the thermocouple for efficiency and safety.
How Does A Thermocouple Work on a Water Heater?
To understand how a thermocouple works on a water heater, let’s dig into the details of its role in the ignition process. We’ll explore how this small but crucial device detects heat and generates an electrical current to keep the gas flowing. Additionally, we’ll provide you with a step-by-step guide on how to test a thermocouple on a water heater, helping you troubleshoot any potential issues with ease.
Explanation of the thermocouple’s role in the ignition process
A thermocouple is an essential part of a water heater’s ignition process. It’s a safety feature that detects the pilot flame. When it’s on, it produces a little electric current to keep the gas valve open, so the burner can heat the water. If the pilot light is out, the thermocouple will spot the lack of heat and immediately shut off the gas supply to avoid potential leaks.
The thermocouple includes two metal wires linked at one end. When the junction of these wires is exposed to heat (the pilot flame), it produces a voltage that can be measured. This voltage is then used to keep the gas valve open, allowing continuous heating. The metal wires are chosen for their ability to generate voltage at low temperatures.
A key point about thermocouples is that they don’t need an outside power source. This makes them reliable and efficient in many situations. Plus, they act as a safety measure, shutting off the gas supply if the heat from the pilot flame is not detected.
Testing a thermocouple on a water heater is like playing a game of ‘Is it hot or not?’. Except, instead of Justin Timberlake, you might get a cold shower.
Step-by-step guide on how to test a thermocouple on a water heater
Lucy’s water heater was giving her the cold shoulder! To figure out why, she needed to test the thermocouple. Here’s how:
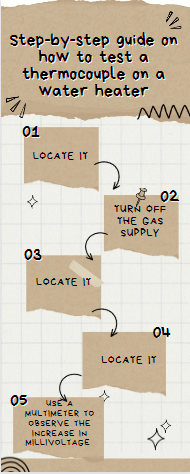
- Locate it. It’s usually near the pilot light and connected to the gas valve.
- Turn off the gas supply – safety first!
- Remove the access panel covering the pilot and burner assembly.
- Using a wrench, disconnect the thermocouple from the gas valve. Note how it’s attached to reconnect it later.
- Use a multimeter to measure millivolts. Connect one end to the thermocouple tip, and the other end to any metal part of the water heater.
- Relight the pilot light and observe the increase in millivoltage when heating up the thermocouple with a lighter.
To get the most out of this test, familiarize yourself with the brand specifications of different types of multimeters. Just like relationships, regular maintenance of the thermocouple is key!
Maintenance and Troubleshooting of a Thermocouple
To ensure the optimal performance of your water heater, understanding the maintenance and troubleshooting processes regarding a thermocouple is essential. Cleaning a thermocouple on a water heater and replacing a faulty thermocouple are the solutions we will explore. By following these two straightforward steps, you can address common issues and keep your water heater functioning efficiently.
Cleaning a thermocouple on a water heater
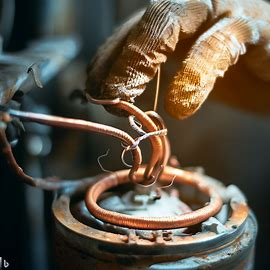
- Turn off the gas supply.
- Locate the thermocouple near the pilot light.
- Remove and clean the thermocouple with a cloth or brush.
- Reinstall and test.
Note: some thermocouples may need to be replaced if they are damaged. Consult a professional if necessary.
Pro tip: regularly inspect and clean thermocouples as part of maintenance. Don’t get burnt – fix that thermocouple!
Replacing a faulty thermocouple on a water heater
Time to swap out the faulty thermocouple on your water heater? Here’s a step-by-step guide to help you with the replacement:
- Safety First: Locate the gas supply valve near the water heater and turn it off.
- Out with the Old: Unscrew the fittings/brackets holding the old thermocouple in place, and detach it from the pilot light assembly.
- In with the New: Connect the new thermocouple to the pilot light assembly and secure it with any necessary fittings/brackets.
After that, you can turn the gas supply back on and test if your water heater is working with the new thermocouple. But if you’re uncomfortable or unsure, it’s best to seek professional help.
Did you know? HomeServe USA Corp shares that around 20% of household energy is used to heat water. So regular maintenance is key for optimal performance and energy efficiency. Don’t let a faulty thermocouple ruin your day – replace it and save money!
Common Issues and Solutions Related to Thermocouples in Water Heaters
To address common issues related to thermocouples in water heaters, let’s dive into the potential problems and their solutions. First, we’ll discuss thermocouple failure and its causes. Understanding why a thermocouple may fail is crucial for troubleshooting. Next, we’ll explore safety measures and precautions when dealing with thermocouples. These precautions ensure your well-being and prevent any accidents or mishaps during maintenance or replacement.
Thermocouple failure and its causes
Thermocouple failure is a common issue in water heaters. To understand it, we need to know its causes.
Corrosion is a major one. Over time, the contact between the thermocouple and the pilot light can become corroded. This causes poor heat transfer, thus leading to thermocouple failure.
A faulty pilot light is another cause. If it produces insufficient heat or goes out frequently, the thermocouple may not generate enough voltage to keep the gas valve open. Thus, the water heater shuts off unexpectedly.
Improper installation can also lead to thermocouple failure. If the thermocouple is not in the right alignment with the flame or if it is too far away from the pilot light, it may not be able to generate enough voltage.
Regular maintenance and cleaning can help prevent thermocouple failure. Keeping the area around the pilot light clean helps optimize the pilot light and the thermocouple.
The Journal of Energy Efficiency in Buildings conducted a study. It showed that proper maintenance and regular inspection of thermocouples can increase their lifespan. Investing time in regular check-ups can save time and money on repairs or replacements.
Safety should always come first when it comes to thermocouples. Don’t forget, “safety first” is another way of saying “keep your eyebrows“.
Safety measures and precautions when dealing with thermocouples
When dealing with water heaters, thermocouples are a must! Here are five key points to remember for safety:
- Turn off the gas supply before touching the thermocouple.
- Wear protective gear like gloves and goggles.
- Let the thermocouple cool down before touching it.
- Use gentle force when taking it out or putting it in.
- If in doubt, consult a professional.
Don’t forget to make sure you get the correct replacement part for your model. And check up on your water heater often to prevent any problems. Being proactive pays off! Now you can confidently enjoy the thrilling world of thermocouples in water heaters – it’s electrifying!
Frequently Asked Questions
1. How does a thermocouple work on a water heater?
A thermocouple is a device that detects the presence of a flame in a gas water heater. It consists of two different metal wires joined together at one end. When the pilot light is on, the flame heats up the junction of the wires, creating a small electrical current. This current signals the control system to keep the gas valve open and maintain the pilot light.
2. What does a thermocouple do in a hot water heater?
A thermocouple acts as a safety device in a hot water heater. Its main function is to detect the presence of a flame. If the pilot light goes out, the thermocouple cools down, causing the electrical current to stop. This triggers the control system to shut off the gas flow, preventing the risk of a gas leak.
3. How long does a thermocouple last on a water heater?
The lifespan of a thermocouple can vary, but on average, it lasts between 3 to 5 years. Over time, constant exposure to heat can cause wear and tear, leading to its eventual failure. Regular maintenance and cleaning can help prolong its lifespan.
4. How do you replace a thermocouple on a water heater?
To replace a thermocouple on a water heater, follow these steps:
- Turn off the gas supply and shut off the water heater.
- Disconnect the thermocouple from the gas control valve by unscrewing it.
- Remove the other end of the thermocouple from the pilot assembly.
- Attach the new thermocouple by screwing it into the gas control valve and the pilot assembly.
- Tighten the connections securely.
- Turn on the gas supply and relight the pilot light.
5. How do you test a thermocouple on a water heater?
To test a thermocouple on a water heater, you can use a multimeter:
- Turn off the gas supply and shut off the water heater.
- Disconnect the thermocouple from the gas control valve.
- Set the multimeter to measure resistance (ohms).
- Hold one probe of the multimeter to the copper lead on the thermocouple and the other probe to the steel casing.
- If the meter shows a small resistance value (around 25-30 ohms), the thermocouple is functioning properly. If it shows infinite resistance, the thermocouple needs to be replaced.
6. How do I clean a thermocouple on a water heater?
To clean a thermocouple on a water heater, follow these steps:
- Turn off the gas supply and shut off the water heater.
- Disconnect the thermocouple from the gas control valve.
- Use fine-grit sandpaper or emery cloth to gently clean the end of the thermocouple.
- Ensure that all corrosion or dirt is removed, and the surface is clean.
- Reconnect the thermocouple to the gas control valve and tighten it securely.
- Turn on the gas supply and relight the pilot light.
Conclusion
The thermocouple is a crucial part of a water heater. It’s a safety mechanism that senses the pilot light. If the light goes out, the thermocouple shuts off the gas. This is the Seebeck effect at work – two different metals connected at one end form a junction. Heat applied to this junction produces an electrical current. This current keeps the gas valve open and the pilot light on.
Thermocouples can wear out over time. This can cause pilot light failures or even a complete shutdown of the water heater. But replacing the thermocouple is straightforward. My colleague recently did it himself with a kit from a home improvement store.
He shut off the gas and cooled the water heater. Then he took off the cover plate, disconnected the old thermocouple, and attached the new one. He re-connected the ends and fastened them securely. Finally, he turned on the gas and lit the pilot light. Thankfully, it stayed lit and hot water flowed again.