
Table of Contents
Understanding Wood Furnace.
Building a wood furnace can be intimidating. But, with the right info and tools, it’s possible! Here are some tips and steps on how to build your own wood furnace.
- Gather materials: tank, pipe fittings, angle iron, door hinges, latches, circulator pump, exhaust fan, insulation material, etc.
- Find a spot close to your house for the outdoor wood furnace. Create a base with angle iron pieces.
- For the combustion chamber, use scrap metal pieces or cut-out sheet metal. Make an insulated firebox with air vents. Put another piece of metal above the exhaust stack.
- Add doors on each end of the firebox using hinges and latches. Use circulating pumps to move hot water through pipes.
- Have a protection plan in place to stop overheating and accidental damage.
- For healthy airflow, have sufficient air inlets in the combustion chamber.
- Put the exhaust four feet over the roof eave height.
Wood furnaces have been around for years. People used them to heat spaces before electricity and fuel oil.
Materials Needed
To build a wood furnace with a tank, angle iron, hinge, pipe fittings, and damper, you need specific materials. The tank will serve as the firebox and water boiler, and the angle iron will provide support. Hinges and pipe fittings will help with installation, while the damper controls the temperature. In this section, we’ll discuss these materials in further detail to help you build your wood furnace efficiently.
- Tank
- Angle Iron
- Hinge
- Pipe Fittings
- Damper
Tank
Constructing a tank requires reliable materials that ensure stability and longevity. Get high-quality metal sheets for the tank’s exterior and interior lining to prevent corrosion. The thickness of these sheets depends on the required volume capacity. Plus, get an appropriate welding kit with wire, a MIG gun or stick holder, and a helmet.
Outlets made from brass or stainless steel must be secured firmly to the tank base for easy access. Buy gaskets and bolts for sealing leaks and enabling fluid movement through the tank. Finally, purchase a durable paint coating material to protect the tank from UV rays and rust.
Safety first – wear thick gloves and masks and secure components with L-angles during construction.
Angle iron is a must. It’s the backbone of many sturdy structures and a bane for clumsiness.
Angle Iron
Angle iron is an L-shaped metal, versatile in construction. It gets its name from its “L”-like cross-section. You can use it for support frames, roof structures, and other architectural projects.
Let’s look at angle iron’s properties. Here’re some critical details and dimensions you need to know:
| Dimension | Value |
| Thickness | 1/8″ – 3/4″ |
| Length | Up to 20 feet |
| Width | 2″ – 6″ |
| Weight/foot | .75 – 11.25 lbs. |
Angle iron comes in galvanized, aluminum, stainless steel, and plain steel. Its resistance to corrosion depends on its material. It can be easily cut and welded to create a structural frame, as required.
Recently, we used angle iron for a large outdoor sign board. We were short on time, but this material simplified the design process.
Hinge
Hinges are key for any door to open and close with ease. Pick wisely, considering factors like weight, size, and material. Stainless steel, brass, and nickel are popular options for durability. You may need heavy-duty hinges if your door is exposed to harsh conditions or lots of use. They can be hidden or exposed, depending on the look you want. Ancient civilizations used bronze hinges in elaborate designs! So when selecting your hinge, think about size, weight, material, and aesthetics. With this knowledge, you can confidently pick the right one for you.
Pipe Fittings
Pipe fittings are essential for plumbing systems, connecting sections of pipes, and controlling, regulating, and directing the flow of fluids. To learn more, check out the table below:
| Type | Function |
| Elbow | Changes direction |
| Tee | Connects 3 pieces |
| Coupling | Joins 2 pipes |
| Union | Like coupling but can be disconnected |
| Reducer | Connects different diameters |
| Cap | Covers pipe end |
More types and variations exist depending on requirements. When selecting pipe fittings, consider the size, material, type, and pressure of the fluid. Also, ensure that all fittings are correctly installed as per manufacturer instructions.
High-quality materials like brass or stainless steel are best for durability and longevity. Plus, having spare fittings on hand helps make repairs easier when needed.
By being mindful of selection and installation, you can ensure long-lasting and trouble-free plumbing systems. And don’t forget – dampers are here to absorb your tears and regulate airflow!
Damper
Do you need a ‘Damper’, a device used in HVAC systems to reduce noise and vibration? You need to know your type of ventilation system and the size of the ductwork. Here’s a table for reference:
| Type | Size (inches) | Material |
| Volume | 6 | Steel |
| Zone | 10 | Aluminum |
Dampers come in round, square, or rectangular shapes. You can choose manual or automatic depending on your needs and budget. Professional installations are necessary for safety and optimal performance. Specialized installation kits can access inaccessible areas for installation or maintenance.
My friend learned a lesson the hard way. He ordered a damper online without considering his system requirements. It was causing harm and was not compatible with his system. He had to order another one after consulting an expert and paying double what he initially planned. Moral of the story – prioritize expertise over convenience when it comes to durable equipment like Dampers.
Building the Firebox
To build the firebox for your wood furnace, you will need to follow several steps closely. Start by cutting the tank to the right size and then adding the angle iron frame. After that, you need to weld the hinges and air inlet in place. The final step is installing the damper and heat chamber to complete your project.
Cutting the Tank
Marking? Let’s do it! Put marks on the tank to decide the size and shape of the firebox.
Time for cutting! An angle grinder or plasma cutter should be used to make the cuts according to the markings.
Sanding? Smooth the rough edges of the cuts with sandpaper or a grinding disk.
Cleaning? Get rid of any debris and metal sludge inside the tank.
Welding? Join plates and components together. Safety measures are a must! Remember to wear protective gear, have proper ventilation, and take expert advice. And, don’t forget to clear out any fuel or combustible materials beforehand.
Ready to get started? Start building your firebox with cutting, welding, sanding and cleaning steps! Shape up with some angle iron to your firebox frame!
Adding the Angle Iron Frame
Construct a solid-angle iron frame to form the foundation of your firebox. Do this in three easy steps:
- Measure and cut the angle iron to the length and width of your firebox base.
- Weld the pieces together for a sturdy frame.
- Secure the frame on the firebrick base with masonry screws.
For extra strength, add support braces between the angle iron pieces. Weld or bolt them for added stability.
Did you know hot-rolled steel angles have a higher yield strength than other shapes? This makes them the perfect choice for constructing strong structures like fireboxes.
If you’re looking for a hot date, welding the hinges and air inlet is sure to get things heated up!
Welding the Hinges and Air Inlet
Crafting a firebox requires finesse in welding hinges and air inlet. Here’s a 3-Step Guide to help you out:
- Pick a metal sheet of 1/8 inch thickness for your hinges and air inlet.
- Use a measuring tape to guide the placement of your hinges and air inlet. Mark spots for accuracy.
- Begin welding them into place using proper welding techniques. Be careful not to damage other areas.
Sealing the hinges and the air inlet is critical. Otherwise, there may be leaks leading to inefficiency in maintaining heat levels.
Pro Tip: Double-check that all welds are tight and free from any gaps or spaces. This ensures maximum safety and functionality. Good luck!
Installing the Damper and Heat Chamber
Follow these 3 steps to install a damper and heat chamber in your firebox:
- Drill a hole for the damper to fit snugly.
- Secure the damper to the wall using screws and a screwdriver.
- Place the heating chamber below the damper so smoke can flow from the fire.
Create enough space between the heat chamber and your grill grates. This prevents burning and ensures better cooking. Clean the damper and heat chamber regularly to prevent buildup.
Pro tip: Use high-quality materials when constructing any part of your firebox. This prevents unnecessary repairs in the future. Now let’s make some steamy magic with our guide to building the Water Boiler!
Building the Water Boiler
To build a wood furnace for heating water, you need a water boiler, pipe fittings, circulator pumps, and a combustion chamber. In this section, I will walk you through the process of building a water boiler. I will cover the sub-sections of adding pipe fittings for water inlet and outlets, installing a circulator pump and thermostat, as well as welding the combustion chamber and exhaust pipe.
Adding Pipe Fittings for Water Inlets and Outlets
To get your water boiler running right, pipe fittings are a must! Here’s the how-to:
- Pick the right size pipe fittings for your pipes.
- Mark where you want it connected. Then use a drill to make a hole.
- Attach a nipple with threaded joints. Tighten them with pliers or wrenches.
- Slide the pipe fitting into the hole and secure it with a wrench.
- Connect the tubing from the boiler to the new fitting.
Keep the water flowing with no leaks! Good quality brass or steel fittings will prevent any corrosion clogs. Check for leaks before connecting the freshwater supply.
Follow these steps and you’ll have your house heated and hot water running with no problems! Who knew relationships could be easier than installing a pump and thermostat?
Installing Circulator Pump and Thermostat
Installing a circulator pump and thermostat is essential for a working water boiler. They ensure the temperature and circulation of water through pipes. Here’s a 3-step guide:
- Mount the pump on the return line pipe using a flange. Place it between sections of hot and cold water.
- Wire the pump to a power source. Be careful to avoid electrical hazards.
- Install the thermostat on the supply line, near the outflow of hot water. It senses when temperatures drop and increase heat again.
Knowledge or consultation with an electrician is needed for wiring equipment to electrical power. Also, according to Terry Love’s Plumbing & Remodelling website, a good circulator pump can last 20-30 years with proper maintenance. Who needs a spa when you can get a full-body sweat session welding the combustion chamber and exhaust pipe?
Welding the Combustion Chamber and Exhaust Pipe
Welding is an essential task for constructing the water boiler. Patience, precision, and the right tools are all keys to doing it correctly. To assist you, we’ve made a 4-step guide for welding the combustion chamber and exhaust pipe.
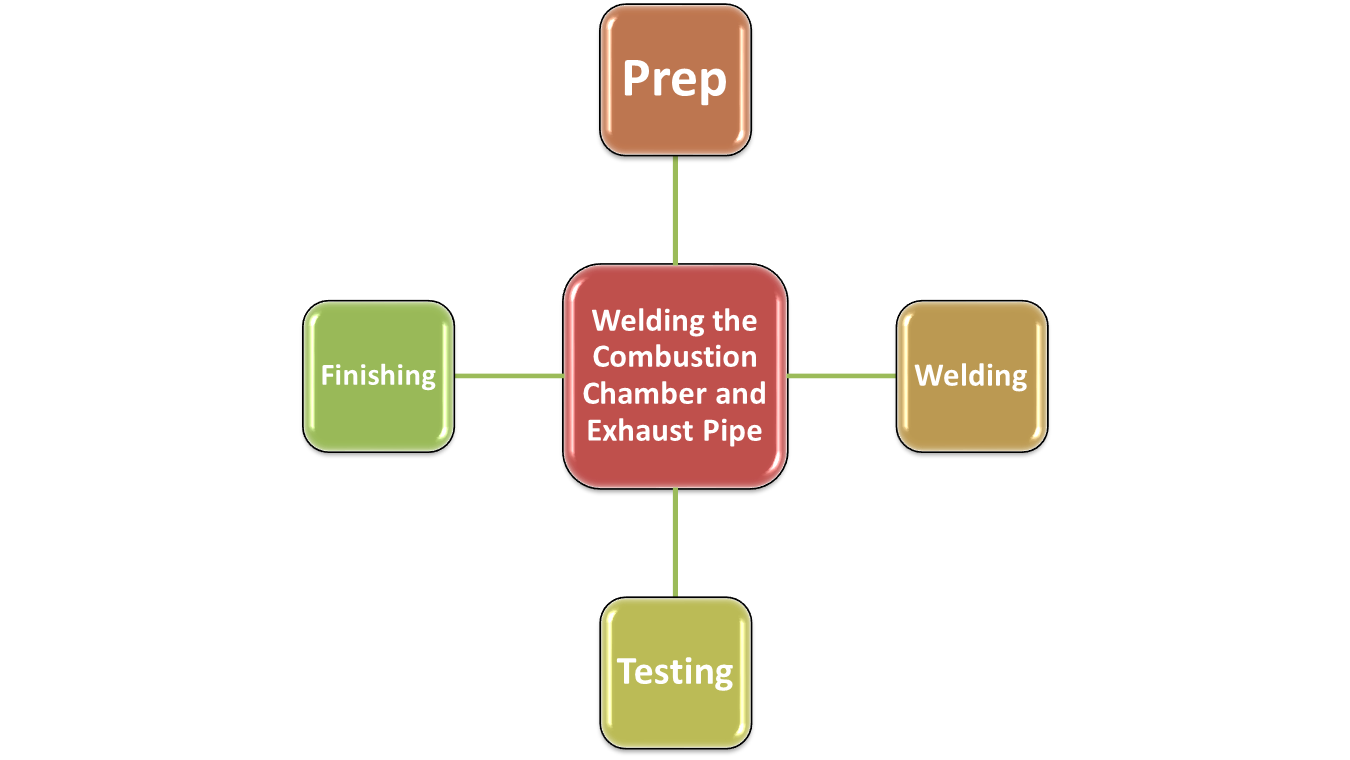
- Prep. Clean the surfaces you’re welding with no debris or dirt. Put the pieces in the right spot and secure them with clamps. Make sure they’re straight and level first.
- Welding. Start with tack welding at different points along the seam. Then use MIG or TIG for a strong bond. Aim for a steady flow of metal, not leaving any gaps or burns.
- Finishing. Check your welds with a visual inspection for any cracks or problems. Use grinders, sanders, or other finishing tools to take care of splatter or extra metal.
- Testing. Test the work with pressure, but not more than half the hydrostatic burst pressure.
Important: Don’t rush the welding process. Poorly done welds can cause safety issues during operation. Wear gloves and goggles throughout.
Pro Tip: Take breaks in-between sessions. Too much heat can damage your final product while welding combustible materials like fuel tanks and insulation. Ready for the outdoor furnace?
Building the Outdoor Furnace
To build an outdoor wood furnace, you need to connect the firebox and water boiler, add a protection plan confirmation plate, install the stack and roof, and focus on insulation and airflow control. Start by drilling a hole at the bottom of the tank, set the scrap piece in the center, and cut the shaft. Use angle iron and hinges to connect the firebox and water boiler and add a protection plan confirmation plate on the side. Install the stack and roof to exhaust the heat and add insulation for better airflow control.
Connecting the Firebox and Water Boiler
Connecting the firebox and water boiler of an outdoor furnace requires a few precise steps. Here’s a guide to help you:
- Measure and cut openings for both. Align them perfectly.
- Install the firebox. Use high-temperature silicone to seal any gaps.
- Place the water boiler above the firebox. Put heat exchanger coils inside.
- Cut two holes on either side, slightly higher than the coils. These are inlet/outlet ports.
- Connect ports to the heating system with appropriate pipes.
- Create an airtight seal using insulation.
Be careful when completing this process – rushing or cutting corners can lead to leaks or insufficient heating.
Ensure proper ventilation to prevent carbon monoxide buildup. Follow all local codes and regulations related to combustible appliance installations.
Use high-temperature-resistant materials for insulation. Choose copper or brass pipes over plastic, to prevent potential cracks and leaks.
Position components close together – not too close, as too much heat can damage nearby parts. Test everything before use, especially if you’re new to building an outdoor furnace. And don’t forget the confirmation plate – it’s important!
Adding Protection Plan Confirmation Plate
To guarantee your outdoor furnace is covered, it’s essential to add a protection plan confirmation plate. Here are the steps:
- Get the plate and tools needed.
- Choose a spot on the furnace that’s visible.
- Clean it with soap and water, then let it dry.
- Peel off the backing from the adhesive side.
- Place the plate on the cleaned area and press firmly.
- Check that it’s level and secure.
Adding this confirmation plate will ensure your furnace has coverage in case of manufacturer defects or workmanship errors. Be sure to register your number with your manufacturer for quick customer support if needed.
A homeowner once forgot to add the plate after installation, leading to hassle when they needed repairs. Don’t make the same mistake! Adding the plate can save you stress, time, and money.
Installing the Stack and Roof
For a safe and long-lasting outdoor furnace, installing the stack and roof requires careful attention. Here’s how:
- Measure the height of the stack, making sure it’s at least three feet above the furnace. Cut the stack pipe and attach it to the flange with stainless steel fasteners.
- Cut a hole for the chimney cap and cover it with mesh. Install the section of single-wall or insulated chimney pipe.
- Create a frame design by attaching four posts together vertically for each corner. Secure them with screws and bolts. Cut two framing beams and place them above the posts according to best roofing practices.
Also, use insulation material inside the chimney cap and roof space to reduce heat loss. To add extra safety, install a spark arrestor. This is especially important if your area has strict regulations regarding burning fires outside.
By following these steps, you can be confident in having a safe and low-maintenance outdoor furnace experience for years to come!
Details on Insulation and Airflow Control
For optimal efficiency and heat retention, insulation and airflow control are key. Ceramic fiber or refractory wool is the best for withstanding high temps. A damper system helps regulate airflow and avoid waste of fuel.
Internal and external insulation is a must for furnace walls to keep heat in. An outdoor furnace will be your ticket to savings and a cozy warmth. So don’t miss out on this chance to make your property toasty – build one today!
Let’s light up the furnace and banish the winter chill. Invite the neighbors too, they may want to join in the thrill!
Conclusion
Wrap up your guide to building a wood furnace and feel proud of yourself! It takes time and effort but will be worth it. Remember to always keep safety in mind. Pay attention to details like the combustion chamber and inlet air, plus, add a circulator pump for efficiency. A water boiler is essential to avoid running out of hot water.
Did you know Marcus Ashley invented the first outdoor wood furnace in 1984? His invention changed the way we use fuel oil and set us on a path to using eco-friendly fuels that don’t compromise our needs.
If you follow the guide, you’ll have an awesome DIY wood furnace that keeps you warm while saving you money. With proper care and maintenance, it can last for years or even decades with minimal repair or replacement. Enjoy the satisfaction of your handmade wood furnace!
Building a wood furnace is a great way to get into DIY projects.