
Table of Contents
Introduction
When dealing with a faulty thermostat, it’s important to know how to bypass it. This involves connecting two specific wires. Locate the thermostat cover plate and remove it. Don’t remove any wires that are attached. Look for the two-thermostat wires – red and white. Twist them together – red with the common wire, white with the white connection.
Next, use jumper cables to connect both ends of the twisted wires. This’ll complete an electrical circuit, and automatically turn on the furnace’s blower and heating component. Then, switch on the furnace’s power source. Adjust the temperature or wait 30 seconds to see if heat activates.
Be aware that this process requires accurate wiring codes, due to different systems, components and configurations. It’s a great way to save time and money before seeking professional help, but be careful – accidents can happen!
In an emergency – cold nights or unavailable repair services – this procedure can be really useful. Plus, you may even get a six-month cost compensation option, depending on product reviews or ads.
Understanding the Thermostat and Its Components
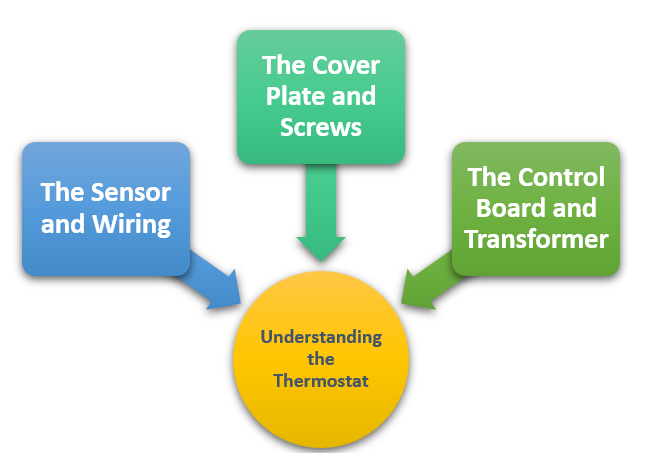
To understand the thermostat and its components with the sub-sections – the control board and transformer, the sensor and wiring, and the cover plate and screws- as solution briefly. You may face many problems with your heating or AC system, and a faulty thermostat could be one of them. Knowing the components of the thermostat and how they work will help you troubleshoot the problem and bypass the faulty component. In this section, we will walk you through the various components of a thermostat, including the control board and transformer, the sensor and wiring, and the cover plate and screws.
The Control Board and Transformer
The Central Processing Unit and Power Supply of the Thermostat work in tandem. Their job? Providing control and power.
The Control Board and Transformer are a key part of the thermostat system. Their purpose? To regulate voltage and current that flows through the circuit.
Modern thermostats boast digital control boards. They can regulate temperature more accurately compared to mechanical controls. Plus, they provide remote access via a smartphone or Wi-Fi network. Giving users greater control over their heating and cooling systems!
Wouldn’t it be great if humans could be as sensitive as the thermostat sensor? Maybe then, relationships wouldn’t get so heated.
The Sensor and Wiring
The Thermostat’s Sensing Mechanism and Cabling are essential for keeping a comfy room temperature. The Sensor recognizes the air temperature, while the wiring transfers info to the Controller. It’s important to measure the gap between the Thermostat and Hot/Cold Sources before setup.
A friend recently told me a story about how a wrong Thermostat positioning caused higher electricity bills. The Sensor was above a gas fireplace which radiated heat, making the Thermostat demand cooling regularly.
Why pay for a handyman when you can use cover plate screws to hold up the Thermostat?
The Cover Plate and Screws
The hidden bits of a thermostat are veiled in either plastic or metal material, secure with screws. Here are some details about this essential part, covering plates and screws:
- Cover plates guard and give a nice look.
- Thickness and quality act as protection from bumps and knocks.
- Screws come in various sizes, firmly held with nuts and bolts.
- A snug fit between backplate and cover plate is necessary to prevent air leaks and false temperature readings.
- Cleaning these parts keeps their fit intact & accuracy in temperature regulation.
On top of this, modern cover plates come with amazing features such as Wi-Fi, touch screens and voice commands.
From simple wall-mounted boxes to sophisticated digital devices with fancy designs – thermostats have come a long way!
If your thermostat isn’t working? Time to get it fixed, before your house turns into a steam room or a freezer!
Diagnosing a Faulty Thermostat
To diagnose a faulty thermostat, identifying issues with temperature control, checking for power and wiring issues, and troubleshooting common problems are the solutions that come to mind. It’s crucial to understand the temperature issues before bypassing the thermostat, so identifying issues in this area should be your first priority. Then, ensuring the heating system has power and checking the wiring for any loose connections or damage will help you narrow down the problem. Finally, troubleshooting common issues like a broken faceplate or faulty component can help you get your HVAC system up and running quickly.
Identifying Issues with Temperature Control
Temperature control is necessary for comfort and safety. Malfunctioning equipment, improper insulation, or a faulty thermostat can cause problems. A faulty thermostat can lead to temperature fluctuations, leading to unpleasantness or even health problems like hypothermia or hyperthermia.
Signs of a faulty thermostat? Inconsistent readings, no power on or off when needed, or unresponsive buttons.
Check the wiring system too. Damaged wiring between the HVAC unit and thermostat? Erratic cooling or heating levels. Check wiring connections, they may have been eaten by pests.
Examining all these details can help diagnose a faulty thermostat. A skilled technician can make an accurate repair recommendation.
My old place had temperature inconsistencies. Upon investigation, I found the thermostat installed improperly – leading to inefficient work. Replacing it fixed the problem. So if you’re feeling powerless, check your thermostat! No need for shivering like a polar bear.
Checking for Power and Wiring Issues
Verifying Power & Wiring Diagnostics for a Thermostat is key. Without power, it won’t work at all. Here’s a 3-step guide to ensure you get it right:
| 1. Check the breakers. Have any trip switches been tripped? If so, turn it off & back on. |
| 2. Check wires. Make sure they’re connected firmly. Vibrations can cause them to become disconnected. |
| 3. Check voltage. Use a multi-meter to measure 24V AC output between “R” & “C”. |
Any electrical work carries risk. If you’re not comfortable, get help from a pro. Remember to turn off your HVAC system before diagnosis. This prevents damage & further electrical issues.
A pro should also provide guidance on where the control wires run through walls after installation.
To sum it up: Fixing the thermostat requires detective work but with less suspense and more googling. Power supply is critical for it to work properly.
Troubleshooting Common Problems
Issues with heating or cooling systems can be tricky. Solving them yourself can save you money. To diagnose common thermostat problems, here are four steps:
| Step | Action |
| 1 | Check the power source – plugged in and fresh batteries? |
| 2 | Reset the thermostat – try rebooting it. |
| 3 | Inspect wiring – inaccurate readings or improper operation can be caused by faulty wiring |
| 4 | Check compatibility – is the thermostat compatible with your HVAC system? |
Thermostats can show problems such as faulty readings or temperature control issues. Find troubleshooting guides in user manuals or get professional help. If all else fails, try replacing the thermostat. Get a quality product that meets your needs.
By figuring out thermostat problems, you can prevent heating and cooling system weaknesses and ensure efficient energy consumption. If only other responsibilities were as easy to bypass as a faulty thermostat!
Bypassing the Thermostat
To bypass your thermostat on your furnace, with the sub-sections focusing on turning off the furnace and disconnecting power, removing the thermostat and faceplate, identifying the terminal connections, connecting the jumper cable, and turning the furnace back on and testing. These steps will guide you on how to solve a faulty thermostat or heating problem by yourself without the need for any professional services.
Turning Off the Furnace and Disconnecting Power
Forget thermostats! Ready to get crazy? Grab a sledgehammer and let the DIY temperature control begin!
But before you go ahead, it is important to turn off your furnace and disconnect the power. Here’s a 4-step guide:
| 1. Switch off your thermostat. |
| 2. Locate the switch in your circuit breaker box that controls your furnace. |
| 3. Flip the switch to turn off the power supply. |
| 4. Remove the control panel cover and find the switch or button for disconnecting power. |
Safety is key here. Handle all electrical connections with care, as carelessness could lead to short circuits or electric shocks. Plus, according to the National Fire Protection Association (NFPA), heating equipment was one of the leading causes of home fire deaths between 2012-2016.
Removing the Thermostat and Faceplate
Disconnecting the Thermostat and its cover Plate is the initial step to bypassing the device’s control. It’s easy to detach from the wall, just follow these four steps:
- Shut off power to the device using your home’s circuit breaker or unmount it from the wall.
- Look out for screws that hold the faceplate and unscrew them with a screwdriver.
- Carefully pull the faceplate away from its hinge or clips until it’s fully removed.
- Finally, remove any screws that are keeping the thermostat base to detach it from its wires(for Older models)
It’s essential to protect the faceplate and internal components when Removing a Thermostat and its Covering Plate.
Also, taking off this important component of heating/cooling regulation is an old trick used by people trying to go around their house’s temperature restrictions. But, this shortcut comes with risks and side effects.
Home repair companies have reported widespread accidents like electrical fires and gas leaks in many areas due to tampering with or discarding Thermostats without professional support.
Identifying the Terminal Connections
To identify the terminal connections, understand the system’s components. Refer to the table below.
| Component | Terminal Connectivity |
| Thermostat | R (power) and W (heating control |
| Furnace | R (power), Y (common), G (fan), C (common),W(heat). |
| Air Conditioner | R (power), Y (cooling control), G (fan control), C (common). |
Be careful when bypassing components! It can damage the system or hurt you. Get help if you’re unsure.
For thermostat modifications, seek an HVAC professional. Upgrading to a programmable one can save energy. But why rely on pros when you can get creative and start a small fire in your own home?
Connecting the Jumper Cable
To connect the thermostat and HVAC unit without changing the temperature settings, ‘Jumper Cabling’ is a technique. You don’t need an expert for this. Here’s how to do it:
| 1. Switch off the power supply to both the HVAC system and thermostat. |
| 2. Remove the cover of the thermostat to find the wiring terminals. |
| 3. Take a wire and insert it into the R terminal of the thermostat. |
| 4. Now, insert another wire into the G terminal. |
| 5. Put everything back together, then turn your system on. |
This way, you can bypass your thermostat while keeping the temperature steady in your house. It’s only for temporary use, otherwise, it may cause harm or the system won’t work right.
Plus, smart thermostats are designed with algorithms to detect your schedule and adapt accordingly. Nest Learning Thermostats can save 10-12% on heating bills and 15% on cooling expenses annually.
So, better switch the furnace on before your toes turn colder than a penguin’s behind.
Turning the Furnace Back On and Testing
To turn on your furnace, locate the switch or circuit breaker and switch it back on. Set the thermostat to a temperature higher than the current room temperature. Listen for any sounds of the furnace igniting and heating. If you don’t hear any noises, there may be an issue with the pilot light or ignition system that requires further inspection. Check the vents for warm air.
Remember, some furnaces need more maintenance after being off for a while. And for optimal performance, regular maintenance is key.
Alternative Methods for Bypassing the Thermostat
To bypass a faulty thermostat on your furnace with the help of a multimeter, a jumper cable, and a screwdriver, you can proceed with three different methods: using a multimeter to test wires, creating a manual switch for heating and cooling, or installing a replacement thermostat. Each of these sub-sections provides a solution to your broken thermostat problem, so you can continue to enjoy a comfortable temperature in your house without delay.

Using a Multimeter to Test Wires
If you want to check wires with a multimeter, here’s what to do:
- Turn off the power in the circuit.
- Select the resistance setting on the multimeter. Connect the meter’s test leads to the switch terminals.
- If you get a reading of resistance, then it’s working. No resistance means an open circuit – no electrical connection between two points on the wiring.
- To test AC voltage, place one probe on any wire and the other probe on a ground wire or screw. If the results aren’t normal, this could indicate problems with contacts in the circuit or faulty components that need replacing immediately.
Remember to consult the multimeter’s manual for the specific settings. Also, always use insulated gloves and non-conductive shoes when doing electrical work. Test your heating or cooling system to avoid burning it out. Try it now! Who needs a thermostat when you can switch between sweating and shivering?
Creating a Manual Switch for Heating and Cooling
For those who prefer manual control of their HVAC system, or want to adjust settings based on different room temperatures, here’s a crazy way to do it:
| Step | Instructions |
| 1 | Turn off power at the breaker box |
| 2 | Find the thermostat wiring behind the thermostat. |
| 3 | Take the red and white wires from the wiring and strip their ends |
| 4 | Connect these wires to a SPST switch. |
| 5 | Mount the switch near your thermostat using screws or tape |
| 6 | Turn on the power, and test the switch by flipping it on or off |
This method has been used for decades as an alternative to programmable thermostats, especially in older homes with outdated wiring systems. Let’s hope your DIY thermostat replacement goes better than your last Tinder date!
Installing a Replacement Thermostat
Replacing a thermostat? There are many ways to go about it! Here’s a step-by-step guide.
- Switch off the power supply.
- Remove the old thermostat’s cover.
- Unscrew the attached wires.
- Install the new thermostat and attach the wires according to their labels.
- Secure the new thermostat’s cover and switch the power back on to check if it works.
Be aware that different thermostats may have different installation instructions, and not all of them work with all HVAC systems. It’s best to ask a professional or check the manufacturer’s guidelines for further details.
Also, make sure to put the new thermostat in the right spot, according to the instructions.
Fun fact: The first programmable thermostat was invented way back in 1883! Warren S. Johnson, an American engineer, created it for classrooms. He also founded Johnson Controls. If you’re feeling adventurous, try out these alternative thermostat bypass methods!
Conclusion
To wrap up this article, allow me to provide you with some final tips and recommendations regarding bypassing a thermostat on a furnace. Throughout this process, you may encounter some roadblocks and obstacles, so here are some helpful pointers to keep in mind. Additionally, if you are looking for specific parts or services, I recommend checking out our product reviews and affiliate links. It’s important to remember that to maintain a healthy furnace, regular HVAC system maintenance is crucial. Finally, before we conclude, let’s review our legal disclaimers and compensation disclosure.
Tips for Home Hacks and DIY Repairs
If you want to increase the comfort and livability of your home, here are some helpful tips for hacks and DIY repairs.
- Reuse items as décor or storage.
- Fix small appliance issues with online tutorials.
- Use drywall tape and spackle for tiny wall holes.
- Repaint your walls for a facelift.
- Go for energy-efficient lighting and appliances.
- Keep gutters in good condition to avoid water damage.
Remember to check for any pipe or faucet leaks too. Fixing these promptly can stop bigger issues occurring later.
It’s interesting that using things at home for repairs is an ancient practice. In the 17th century, pioneers had to be creative and use their common sense. They passed this skill to later generations, motivating modern-day DIYers.
For the best products and services, follow our affiliate links. You won’t regret it!
Product Reviews and Affiliate Links for Services and Parts
Product evaluations and affiliate connections are essential for making informed purchasing decisions. Pros include easy access to reliable goods. Knowing buying patterns through customer feedback allows modifications.
Cons may include biased reviews pushing clients to buy & fraudulent reviews leading to unverified purchases.
It’s critical to create unbiased evaluations based on individual experiences. Verified affiliate links let customers purchase products & earn revenue for websites. Authentic user experience guides toward legitimate product details. This leads to better-tailored choices for customers. Missing out on verified items may lead to unsatisfactory substitutes. Therefore, verify the products before listing them. Follow credible reviewers for truthful opinions before purchasing. The only thing hotter than a well-maintained HVAC system? The maintenance technician!
Best Practices for HVAC Systems and Regular Maintenance
To optimize an HVAC system, follow these steps:
| Step | Description |
| 1 | Establish a maintenance schedule. Check filters, coils, blower wheels, belts, bearings, and other components periodically. |
| 2 | Replace air filters often. This optimizes air quality and removes contaminants from the cooling coils or heating elements. |
| 3 | Inspect the ductwork for leaks or blockages. This ensures maximum airflow and a healthy indoor environment. |
| 4 | Record performance assessments. This helps validate repairs and makes future inspections easier. |
In addition, hire registered professionals to keep manufacturer warranty terms and extend the HVAC system’s life cycle.
The 1900s marked the beginning of better residential management systems featuring mechanical heating processes designed for human comfort and humidity control. Nowadays, HVAC systems are more complex and focus on efficiency, reducing carbon footprints, and providing enhanced services.
Legal Disclaimers and Compensation Disclosure
This section is all about disclosing legal disclaimers & compensation. We have to understand that this article is just for information purposes, not as legal advice. Any action taken is at your own risk.
We do get payment from some of the products or services mentioned here. But, we only suggest products & services that are advantageous to readers. Receiving payment doesn’t affect our recommendations; the opinions are our own.
We follow FTC guidelines about bloggers & publishers disclosing affiliate relationships. We also tell you if there are any potential conflicts of interest from partnerships or affiliations with companies in this article.
Read the terms & conditions from third-party products & services before you buy. We don’t accept liability for any troubles from the products & services mentioned here.
It’s very important to carry out research before you buy a product or service mentioned in this article. Sources you can trust can help you with legal queries.
A reader told us about her experience with a product from one of our articles. She found it helpful but had billing problems. We investigated & gave her resources to fix the billing issues with that company.