
Table of Contents
Limit Switches
Limit switches are an essential component of a furnace system and play an important role in keeping it running safely and efficiently. Knowing all about them is key. Here’s what you should know.
Types:
- Fan Limit Switches
- High Limit Switches
- Combination Switches
Function:
Turn off the power supply when temperatures get too high.
How to Test:
Use a continuity tester or an ohmmeter.
Key Issues:
Clogged air filters or overheating.
Voltage Drop:
Should be 0 volts.
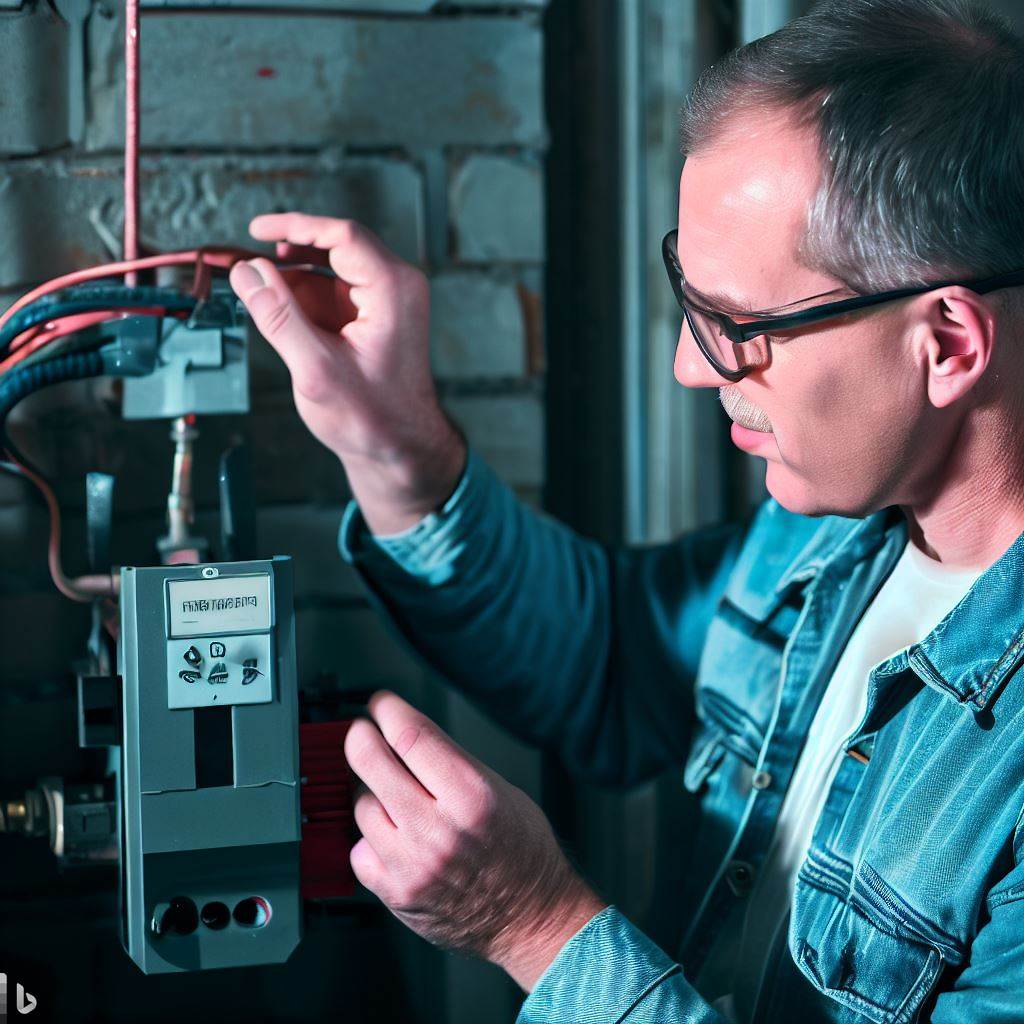
Now let’s look at how limit switches work. These mechanical devices automatically shut down the furnace when temperatures in the plenum area (the burner housing where warm air is produced) become too high. Two types of limit switches are used together: fan limit switch and high limit switch.
The fan limit switch turns on or off the blower motor based on the temperature setting inside the heat exchanger. A high-limit switch monitors the temperature inside the plenum and shuts off the furnace if it reaches its preset value, to avoid damage caused by overheating or an explosion.
Pro tip: Look out for any signs that your furnace’s limit switch may be malfunctioning and get it checked by an HVAC professional before replacing it yourself. Stay safe and warm this winter season!
Types of Limit Switches
To understand the different types of limit switches with fan limit switch, high limit switch, and combination switch as solutions, you need to know the distinct features that each offers. A fan limit switch can monitor and control the operation of the blower motor, while a high limit switch can protect from overheating. A combination switch is a safety device that shuts down the burner housing or the entire furnace in case of any mechanical or electrical damage. In this section, we will briefly introduce these sub-sections to help you understand these types of limit switches better.
Fan Limit Switch
High Limit Switches are essential components for various industrial usages. They detect the presence or absence of an item, such as a mechanical part, container, or equipment. Fan Limit Switch is one type that serves an important role in HVAC systems.
In HVACs, Fan Limit Switches control the furnace blower fan. They feature adjustable settings to control the temperature and blower speed. Moreover, they offer safety by preventing overheating and shutting down the furnace if it gets too hot.
Fan Limit Switches come in various forms – electromechanical and solid-state. Each type has unique features for specific applications. For example, electromechanical switches are robust and durable, making them suitable for rough environments with exposure to oil or coolants.
The Fan Limit Switch dates back to the 1950s when Robertshaw Controls Company first showcased its fan-limit controls for gas furnaces. Since then, these devices have experienced tremendous advancements, and now they are critical components in modern HVAC systems.
High Limit Switch
High Limit Switches can be classified into three types according to their construction, temperature range, and application.
Type one is the Bimetallic Switch. It is made up of two dissimilar metals and has a temperature range of -50°C to +200°C (-58°F to +392°F). Often used in HVAC systems, boilers, and water heaters.
The Fixed Temperature Switch is made up of electrical components and can reach temperatures from -75°C to +425°C (-103°F to +797°F). It is commonly found in ovens and furnaces.
The Electronic Switch is microcontroller-based and can reach temperatures from -40°C to +150°C (-40°F to +302°F). It is usually used in medical equipment and automotive applications.
These switches are independent of other control systems, which makes them invaluable. If a control system fails, the High Limit Switch will cut off the power supply when certain temperatures are reached, thus preventing dangerous situations.
Combination switches are great for when you need more than just an on/off switch. They are like a Swiss Army Knife for electronics!
Combination Switch
Combination switch – a device that can do two or more functions in one go. It’s a convenient way to save on the number of devices you need.
Types of combination switches and their functions:
- Limit switch with solenoid valve – control limit and regulate flow.
- Limit switch with time delay relay – control limit and delay operation.
- Limit switch with selector switch – control limit and select function.
Various sizes and shapes of combination switches make them suited to different applications. Cost, function, and environment all play a role in choosing the right one.
Regular inspection and maintenance are key to ensure proper functioning. Faulty combination switches may cause machine breakdowns or compromise safety.
An engineer once told of how a manufacturing company saved money by using combination switches. By having one device for multiple functions, they cut down on installation costs, wiring, and maintenance.
Signs of a Faulty Limit Switch
To identify a faulty limit switch in your furnace quickly and accurately, you need to know what signs to look for. In this section, we will discuss how to recognize the most common symptoms of a malfunctioning limit switch: unit shutting off too soon, blower motor running continuously, and overheating of the furnace. Each sub-section will shed light on the possible causes of the issue and help you diagnose the problem.
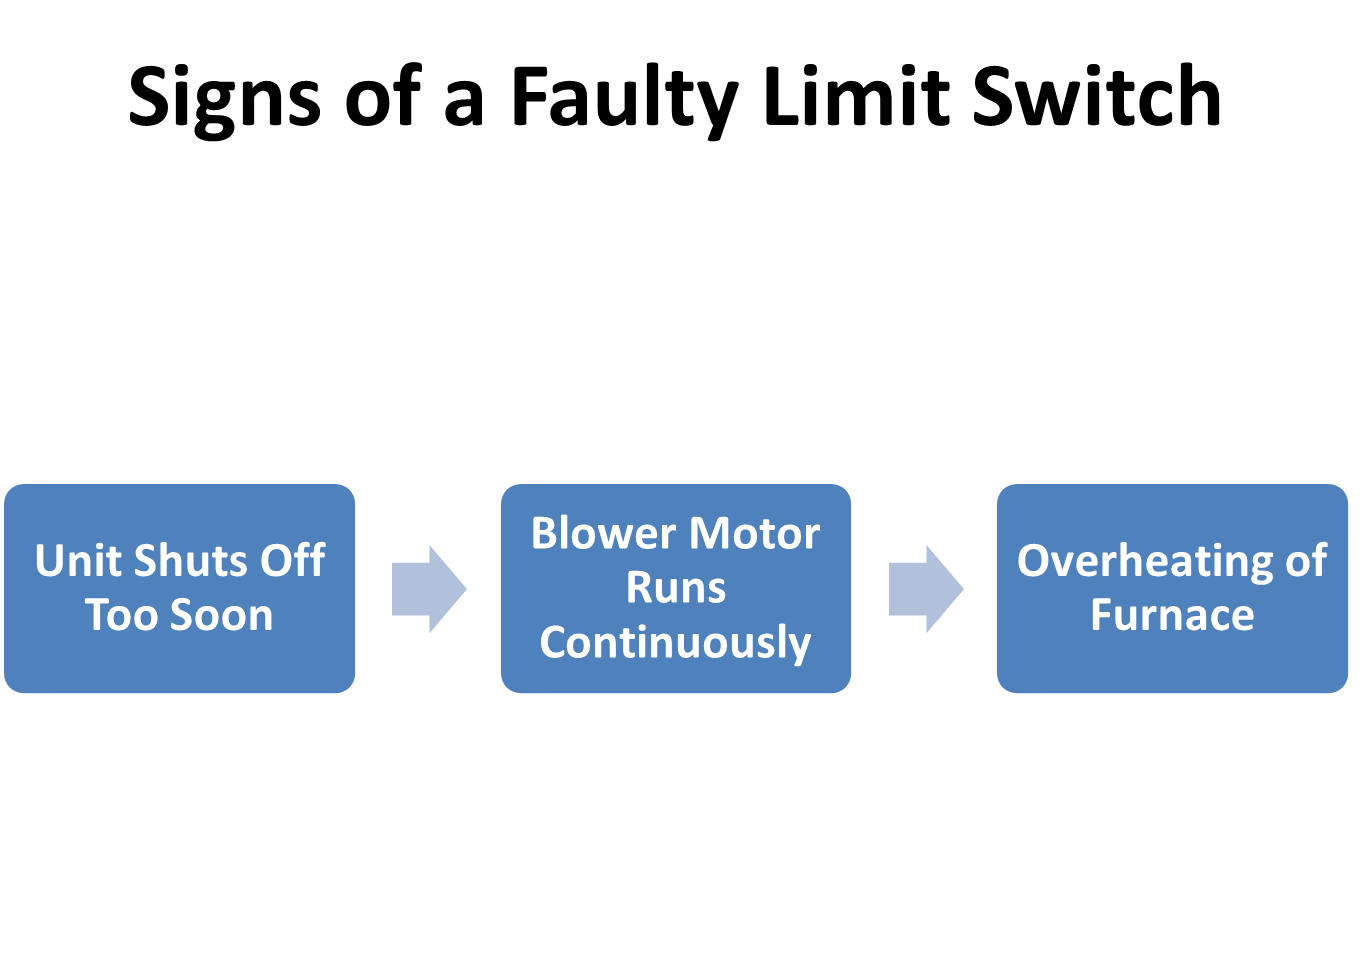
Unit Shuts Off Too Soon
Is your unit shutting off too soon? Could be a faulty limit switch. This could cause airflow issues, high energy bills, and safety hazards. Identifying and fixing the root cause is essential.
The main telltale sign of a broken limit switch is an early shut-off. You might also hear strange noises from inside the unit. Keep in mind, other things can contribute to shutdowns too. Clogged air filters or thermostats that don’t work right, for example.
If you think your device has a bad limit switch, get help from a pro. Delaying this could have serious consequences. Electric gas furnaces may even explode! So, act fast.
Blower Motor Runs Continuously
A faulty limit switch is often signaled by a blower motor that won’t stop running. It tells the furnace when to turn the fan on and off as it regulates the temperature. Without it, the furnace won’t know when it’s reached your desired heat, so it stays on.
This problem not only disturbs your comfort but also makes your heating system work harder, leading to higher energy bills and damage to the parts. It can also make the air quality worse due to a lack of air movement and increased pollutants.
If you see this, contact an HVAC technician for inspection and repair. Trying to fix it yourself is a risk – you could get an electric shock or damage the furnace even more.
HVAC.com states that a broken limit switch can cause your heat exchanger to crack, which can cause carbon monoxide leaks – potentially deadly. So it’s important to act quickly to keep your home safe and cozy. Don’t be stuck with a tepid furnace – why not have a roaring blaze instead?
Overheating of Furnace
The furnace is the heart of any heating system, and if it overheats, it can be disastrous. Look out for signs like temperature regulation issues and strange noises coming from the furnace.
A limit switch malfunction can cause overheating. Don’t delay taking action! It could be related to a clogged air filter or dirty condenser coils. Clean them yourself, but contact an HVAC pro for complex repairs.
Ignoring furnace heat issues can be costly. HGTV experts state that “failure to maintain and address known problems can lead to system failure or costlier repairs later on“.
In conclusion: be aware of signs of a faulty limit switch-related overheating. Prevent costly consequences by seeking professional help and getting regular maintenance.
Steps to Check the Limit Switch
To check the limit switch on a furnace with the above-listed sub-sections, you need to turn off the power and remove the cover to locate the switch. Once you locate it, you need to remove wires from the terminal and use a continuity tester or multimeter to check the proper setting and preset value. To test the switch’s functionality, try a jumper test.
Turn Off Power
Before checking the limit switch, turn off the power! To do this safely:
- Disconnect all power sources
- Switch off the circuit breakers
- Disconnect multiple breakers if necessary
- Tag or label each breaker
- Check for power with a voltage tester.
This is essential for your safety and to avoid any damage. Plus, an electric shock can be deadly. OSHA reports that electrical hazards are common and often lead to fatalities, injuries, and financial losses. So get ready to dance – err, strip down – for safety!
Remove Cover
For some, removing the cover of a device can be a tricky job. But, it is a must for checking the limit switch. Follow these steps to take it off:
- Find the screws that hold the cover in place.
- Unscrew each one with a screwdriver.
- Carefully lift the cover and put it aside.
Check the limit switch for any visible wear or damage. Handle all parts with care to avoid any more harm.
Remember that different models need different processes to take off their covers. So, always check the manufacturer’s manual before starting.
Back in 1918, engineers had a problem with their machines not stopping when objects hit them. After investigating, they found out that faulty limit switches were the cause. This led to inventing modern-day limit switches which are now essential components in many industrial machines.
Finding the limit switch is like tracking down Waldo, except the switch isn’t wearing a striped shirt and glasses.
Locate the Limit Switch
To find the limit switch, first, locate the control panel of your equipment. This is where all electrical components are.
- Access the control panel by removing any covers.
- Look for a small electronic device with wires connected to it – that is the limit switch.
- Read the owner’s manual or search online on how to remove/replace a limit switch.
- Use a multimeter to test if the switch works.
- If it’s broken, take note of the model number and get a replacement.
It’s important to be knowledgeable on how to use multimeters. These are essential tools when detecting machine issues. Be careful when handling electrical equipment.
Pro Tip: When removing a limit switch, remember where it was placed. In case you need to put it back or replace it. Disconnect wires from the terminal with caution.
Remove Wires from the Terminal
To check the limit switch, one must carefully take out the wires from the terminal. Follow these steps for safety:
- First, turn off the power supply by unplugging it or shutting off the circuit breaker. This is to stop electric shock.
- After that, use pliers to take out all wires from the limit switch terminal. Do not pull them out with your bare hands as it can damage the wire or terminal.
- Next, look at the arrangement of the wires and remember how they were connected before taking them out. This will help when reconnecting them.
- Finally, once done checking or maintaining the limit switch, put the wires back in their respective terminals securely. Make sure they are tightened well.
Being careful when taking out wires from the terminal is vital because one wrong move can harm not only the switch but also yourself or the people around you. Also, always double-check connections before turning on the power supply to avoid any accidents or malfunctions.
Overall, taking out wires from a limit switch may seem easy but it requires accuracy and caution for successful results. Follow these steps when handling any device with a limit switch to prevent any problems in the future.
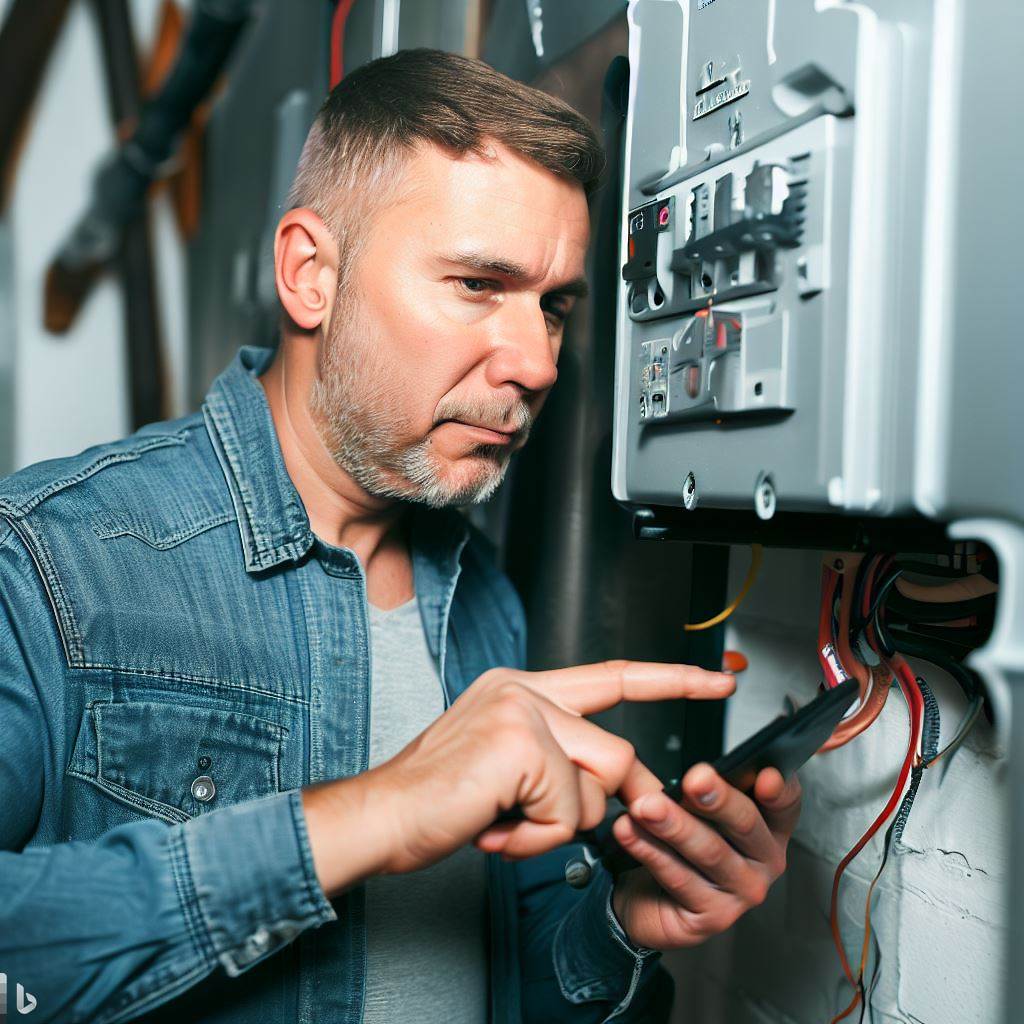
Use Continuity Tester or Multimeter
Troubleshooting your limit switch? A continuity tester or multimeter can help. Here’s the process:
- Turn the power off and disconnect the wiring from the switch.
- Set the tester to check for continuity.
- Touch one probe to one terminal, and another probe to another terminal. If a beep is heard or a “closed” indication is seen, then there’s continuity and the switch is working properly.
- Check the manufacturer’s instructions for different switch types.
- Visually inspect the switch for signs of damage, such as cracks or debris buildup.
- Did you know limit switches were invented in 1932? They were used in cars to control automatic transmissions. Now, they are used as safety devices to prevent equipment from exceeding certain limits or traveling too far.
- Make sure your limit switch isn’t ‘off’ like your ex’s phone number.
Check for Proper Settings and Preset Value
Checking that limit switches are correctly set up is key. Here’s how:
- Identify Switch Type: Know which switch you’re using – each one needs different settings and preset values.
- Verify Settings: Read the manufacturer’s instructions carefully and make sure they meet your equipment’s specs.
- Test Switch: After confirming the settings are alright, run a test to make sure your equipment functions as expected.
Remember, correctly setting up a limit switch ensures accuracy and prevents machine downtime. Neglecting these details may lead to malfunctions during production, resulting in lost revenue or worse. So, make sure to follow the steps outlined above!
Try a Jumper Test
Limit switches are used to control machinery movement and stop it from going beyond a certain limit. If the switch is faulty, it can lead to serious damage and put operators at risk. A jumper test can be used to troubleshoot it.
To do the test:
- Disconnect all power sources.
- Disconnect wires on both sides of the switch.
- Connect the wires with an insulated wire or paper clip. Turn the machine on and see if it runs correctly. If it does, replace the faulty switch.
Remember to do the following when performing a jumper test:
- Power sources must be disconnected.
- Use an insulated wire or paper clip.
Regular maintenance is important. It can save you costly repairs and production time. Identifying problems early, like a malfunctioning switch, protects your bottom line.
Although repairs take time, neglecting maintenance can result in more downtime and affect operations. Check machinery regularly and do simple tests like this one for smooth running. Time to switch out that faulty limit switch!
How to Replace a Faulty Limit Switch?
To replace a faulty limit switch in your furnace, start by turning off the power. Then, remove the old, defective limit switch before installing a new one. Be sure to reconnect the wires properly, and check for proper operation before restoring power to your unit. This five-step process, including Turn Off Power, Removing Faulty Limit Switch, Install New Limit Switch, Reconnect Wires, and Check for Proper Operation, ensures an easy and safe solution to your furnace issues.
Turn Off Power
Prioritize safety when replacing a faulty limit switch! Off the power first – that’ll prevent electrocution and damage.
Here’s how:
- Find where the power’s coming from – circuit breaker or outlet.
- Turn off the circuit breaker or unplug the device.
- Test with an electrical tester or turn on the appliance to confirm there’s no power.
- If no electricity, replace the faulty switch; else, repeat steps 1-3 and get professional help.
Wear gloves and other protective gear for extra safety. One switch and you’re done! Fun fact: Thomas Edison had 1,000+ patents in his lifetime (Biography.com).
Remove Faulty Limit Switch
- Disconnect the power source and locate the faulty limit switch.
- Gather the tools needed, such as pliers and screwdrivers.
- Unscrew any bolts or screws holding the faulty limit switch in place.
- Pull the switch out carefully taking care not to damage any other parts around it.
- Discard the faulty switch.
- Make sure to replace it with a compatible switch that is appropriate for your machine’s model.
For future repairs, inspect and maintain your machine’s parts. Prevention is cheaper than fixing issues after they arise. These small actions will help keep your machine running smoothly and effectively, thereby increasing its lifespan. It’s time to switch out the old for the functional.
Install New Limit Switch
Replacing a faulty limit switch can be nerve-wracking, but with the right kit and instructions, it’s a breeze! Here’s how in 3 steps:
- Locate the faulty switch
- Disconnect all attached wires, unscrew and remove the old switch
- Align the new switch with the mounting bracket and secure it with screws, then reconnect the wires by their labels
Before installation, check if the new switch is compatible with your device or machinery to avoid any issues. Peter Arnostrup invented the first mechanical switches back in 1856 when he needed to prevent machines from overheating. Now, switches are used across many industries around the world. Now it’s time to get detective-like and connect the wires like a game of electrical Sudoku!
Reconnect Wires
Replace a faulty limit switch with ease! Follow these 5 simple steps for a secure connection:
- Identify the wire connectors and remove them from the old switch.
- Match wires to their positions on the new switch.
- Insert each wire into its connector, making sure it’s secured.
- Double-check all connections to make sure they’re inserted and tightened.
- Turn on the power and test the new switch.
Beware of mishandling electrical currents – it can be dangerous! Especially if you’re not familiar with electrical components.
A poor connection can lead to additional damage or cause safety hazards. Ensure an accurate flow of current by properly conducting this step. Wear gloves while replacing switches for your safety.
Don’t miss out on money-saving opportunities! Follow these simple steps to handle the task and get back to enjoying functioning appliances. Replace the limit switch and get your productivity back up!
Check for Proper Operation
To check if your limit switch is working properly, follow these Steps:
- Turn off the power source.
- Check for visible signs of damage.
- Clear any blockages.
- Use a multimeter to test voltage.
- Inspect contacts for wear and tear.
- Ensure the lever arm is aligned with the actuator mechanism.
Also, make sure you replace your faulty limit switch with genuine replacements from a reputable manufacturer. This guarantees better reliability and longevity. Here’s something to consider: Power Engineering International Magazine states that faulty limit switches are one of the main causes of motor failure. So, neglecting your limit switches will limit your options – not in a great way.
Importance of Regular Maintenance of Limit Switches
To ensure the smooth operation of your furnace, regular maintenance of limit switches is essential. Regular maintenance can prevent any potential problems that might arise in the future. Checking the air filter, cleaning the heat exchanger and blower, checking the gas valve and burner housing, and monitoring temperatures and voltage drop are some solutions that can help keep your furnace in top condition. Let’s dive deeper into each of these sub-sections and explore their benefits.
Checking Air Filter
An air filter is a must-have for limit switches. It stops particles from clogging the device’s action. Check the air filter’s state for ideal limit switch performance. Do this:
- Check often: Inspect and clean air filters every three months or as per manufacturer instructions.
- Be careful while cleaning: Use proper cleaning agents. Don’t harm the fibers or change their shape.
- Replace if need be: A dirty or broken air filter may need replacing to stop obstruction and other component damage.
- Better results: Cleaning an air filter often leads to improved performance and higher longevity.
Neglecting limit switches’ air filter maintenance can lead to malfunction. This leads to equipment downtime and cost rise.
Limit switches have come a long way since Harold P. Brown invented them in 1932. Back then, they operated through electromagnetism. Today, they use PLCs for automated operation, with little human input. Yet, routine servicing is still essential for proper operation, even with modern technology.
Cleaning a heat exchanger and blower gives your HVAC system a spa day. But without the soothing music and cucumber water.
Cleaning Heat Exchanger and Blower
Clean the heat exchanger and blower for efficient HVAC system functioning. Regular maintenance helps optimize performance and avoid costly repairs.
- Cut off the HVAC power supply to be safe.
- Take off the access panel to reach the heat exchanger. Use a soft brush to dust off debris from its fins.
- Vacuum the blower motor and its blades with a brush attachment. Be careful not to damage any wires or parts.
Regular maintenance of the heat exchanger and blower improves indoor air quality and reduces energy costs. Cleaning filters on time prevents clogging that can reduce airflow and efficiency.
Per NIST, regular maintenance of HVAC systems can save up to 30% in energy costs per year. Avoid spoiling a dinner party with a faulty gas valve and burner housing. Even a rainy day barbecue can be ruined!
Checking the Gas Valve and Burner Housing
Regular maintenance of limit switches is a must for smooth mechanical system operations. Of the many components that need maintenance, the gas valve and burner housing are especially important for safety and efficiency. Here’s how to inspect them:
- Shut off the power supply to the system.
- Remove the cover plate on the gas valve. Unhook it from the gas line.
- Clean burner housing with a soft brush or vacuum. Get rid of dirt and debris build-up.
- Check burner jets for clogs or damage.
- Re-attach all parts. Restore the power supply and run a test cycle.
No abrasive cleaners or materials when cleaning! Neglecting these components can lead to malfunctions, burnt-out motors, or explosions. Look for signs of wear and tear that can cause hazards. If you smell chemicals like formalin, stop use immediately.
My friend once neglected heater maintenance and smelled an acrid smell in his home. A professional technician found corrosion on both burners and gas leakage. Emergency repairs were done. To prevent this from reoccurring, regular maintenance is scheduled.
Maintenance is important. Neglecting it can be costly. To avoid bad surprises, maintain your system now. Keep an eye on the temperature and voltage drops. Don’t let your equipment go up in smoke!
Monitoring Temperatures and Voltage Drop
Maintaining limit switches efficiently calls for monitoring temperatures and voltage drops. This is key to ensuring the switches work effectively. Below is a table demonstrating the data to keep track of:
| Data Monitor | Importance |
| Temperature levels | High temps could cause switches to malfunction. |
| Voltage drop | Low voltage can hinder switch performance and harm motors. |
To make sure switches do their job, it’s important to vigilantly monitor both temperature and voltage. It’s essential to keep accurate records for reference and performance analysis. Adhering to these guidelines will guarantee sustainability.
There was once an unfortunate accident at a ski resort because of poor limit switch monitoring. A broken switch caused the chairlift cable to detach, injuring several skiers. This mishap could have been prevented with proper maintenance.
Don’t attempt to fix limit switches yourself – you might get caught in an on/off cycle of DIY misery. Instead, call a professional.
When to Call a Professional for Repair?
To ensure the safety and optimal functioning of your furnace, it is crucial to know when to call a professional for repair. In this section on checking a limit switch on a furnace, with the sub-sections of damaged or worn out limit switch, damage to the circuit or probe, maximizing the efficiency of the system, and dealing with high-pressure problems, we will provide you with tips on the potential issues you may encounter and the best course of action to take.
Damaged or Worn Out Limit Switch
When it comes to home repairs, a damaged or worn-out limit switch can cause issues. It helps regulate the heating and cooling system. If you notice frequent cycling or inadequate heating/cooling, it’s time to call in an expert.
The table below shows how a faulty limit switch can affect your system:
| Symptom | Possible Cause | Professional Needed? |
| Frequent cycling | The limit switch stuck closed | Yes |
| Insufficient heating/cooling | The limit switch stuck open | Yes |
| The fan fails to shut off | Faulty setting in the limit switch | Yes |
| Fan runs constantly | Damaged relay switch | Yes |
Attempting to repair the limit switch yourself is risky and can cause more damage. A professional has the know-how and tools to fix any underlying issues.
Moreover, failure to fix or replace a faulty limit switch can lead to higher energy bills and early wear and tear on your system.
Plus, if left unrepaired for too long, the limit switch can fuse into place permanently, forcing you to replace both the part and other parts of the system – incurring more costs.
So, when it comes to fixing a damaged or worn-out limit switch, don’t try it yourself; call in an experienced professional instead.
Damage to the Circuit or Probe
When there is harm to the circuit or probe, you must recognize when to seek out the expert repair. This promises the machine works optimally and reduces the risk of more damage.
A chart can help evaluate common symptoms and their related actions. For example, when the circuit board has a smoky smell or blackened spots, it may need replacement. If the probe is having off readings or no signal at all, recalibration or replacement could be necessary. Also, issues such as corrosion and dirt buildup will require cleaning to fix.
It is also essential to mention that attempting repairs without proper comprehension and tools may cause more damage. It is safest left to people with experience, particularly with sensitive electronic parts.
Pro Tip: Preventative maintenance of electrical equipment can significantly decrease the amount and cost of repairs in the long run. Efficiency is key, but remember to give your system a pause now and then – even machines require some rest.
Maximizing the Efficiency of the System
Maximize efficiency with three steps:
- Schedule maintenance with a pro
- Invest in filters & replace them
- Use a programmable thermostat
These simple measures save energy & money.
But systems may still break down. In such cases, call a pro to diagnose the problem. Attempting repairs yourself may cause injury and more damage.
A friend learned this the hard way – when their AC malfunctioned on a hot summer day. Despite their handy skills, they caused more damage. This shows why it’s best to leave it to pros with years of experience.
Prioritize maintenance & invest in quality components. This ensures that your system runs efficiently while saving energy bills. In high-pressure situations, don’t be a hero – call a pro!
Dealing with High-Pressure Problems
High-pressure issues can be a major headache for homeowners. When should you call a professional? If you hear strange noises from your pressure regulator, or if your water is too hot or cold, it’s time to take action. A professional can look into the issue and provide the right solution.
To dodge high-pressure issues, it’s key to invest in a quality regulator. Insulate your water heater to keep the water temperature stable and reduce the risk of high-pressure problems. Make sure all plumbing fixtures are well installed and get maintained regularly.
Be alert and watch out for signs of trouble. Even small problems can get out of hand fast if left unattended. By taking preventive steps and seeking help when needed, you can stay confident about your home’s plumbing system.
Conclusion
As a furnace owner, you must check and maintain your limit switches for safe and effective operation. Neglect can cause issues like overheating, damage, and even safety dangers.
To check the switch, use a continuity tester or ohmmeter to make sure it’s closed when the temperature is lower than the preset value. Also, inspect air filters to avoid blockages that could cause extra pressure and damage. It’s important to understand the different types of limit switches in your furnace. Knowing each one’s setting and how it works helps you spot potential problems. And, you must know how to replace a faulty switch safely.