
Table of Contents
Key Takeaways
- 1. Installing a hot water heater in a trailer requires careful planning and consideration of the available space and power source.
- 2. Before starting the installation process, it is important to gather all the necessary tools and materials, including the hot water heater unit, pipes, fittings, and insulation.
- 3. The first step in the installation process is to shut off the water supply and drain the existing water heater, if applicable.
- 4. Next, the old water heater should be removed, making sure to disconnect all the necessary connections and safely dispose of it.
- 5. The new hot water heater should be positioned in the desired location, ensuring that it is level and securely mounted.
- 6. The water and gas or electric connections should be carefully made, following the manufacturer’s instructions and local building codes.
- 7. Once the connections are made, it is important to test the hot water heater for any leaks or malfunctions before fully securing it in place.
- 8. Proper insulation should be added to the pipes and tank to prevent heat loss and improve energy efficiency.
- 9. Regular maintenance and inspection of the hot water heater should be performed to ensure its optimal performance and longevity.
- 10. It is recommended to consult a professional or seek guidance from experienced individuals if unsure about any step of the installation process.
Adventurous travelers and nature-lovers! Don’t overlook the importance of a hot water heater in your trailer. It’s essential for a comfortable living experience on the road.
First, choose the type of heater that best meets your needs: tank-style or tankless. Consider each one’s pros and cons before deciding.
If you plan to install the heater yourself, start by locating the existing one. Look for an access panel on the exterior or a dedicated utility space inside. Then, turn off all power sources and shut off gas and water supplies.
Disconnect existing connections to the old heater and remove it from its mounting brackets. Inspect the surrounding area for any damage or wear and clean out any debris or sediment.
Now, for the exciting part: installing the new hot water heater! Position it into place and secure it. Connect the necessary gas lines and electrical wiring.
Reestablish power and turn on water supplies. Check for leaks or irregularities in the system by performing a visual inspection and running water through it for a few minutes.
There you go! Installing a hot water heater in a trailer can be easy – and then you can focus on becoming a singing superstar.
Understanding the Requirements for Installing a Hot Water Heater in a Trailer
Installing a hot water heater in a trailer requires understanding certain requirements. These include the type and size of the water heater, gas or electric connections, venting requirements, and installation location. Here are the key points to consider:
- Type and Size: Choose between a tank or tankless water heater based on your needs and available space. Consider the gallon capacity for tank water heaters and the flow rate for tankless ones.
- Gas or Electric Connections: Determine whether your trailer has a gas supply or if you need an electric water heater. Gas-powered water heaters require a gas line and proper ventilation, while electric ones need access to a power source.
- Venting Requirements: Gas-powered water heaters need proper venting to remove combustion byproducts. Ensure that your trailer has a vent duct or a way to safely exhaust the fumes outside.
- Installation Location: Identify a suitable location for the water heater. It should be easily accessible for maintenance and service. Make sure there is enough space around it for proper airflow and venting.
Additional details to consider include the water supply lines, drain valve, control housing, and pressure relief valve. These components ensure proper functioning and safety.
Pro Tip: Consulting a professional or following manufacturer guidelines can help ensure a safe and efficient installation of a hot water heater in your trailer. Research and gather the necessary information – because winging it and hoping for the best only works in romance novels, not when installing a hot water heater in a trailer.
Research and gather the necessary information
For installing a hot water heater in a trailer, researching and gathering information is essential. Doing so ensures a safe and efficient process. Here are the steps for this:
- Identify the Trailer Specifications: Establish the details of your trailer, such as size, weight, and plumbing system. This will help you pick a suitable hot water heater for your trailer.
- Explore Hot Water Heater Options: Investigate different types of hot water heaters, including tankless, storage tank, or heat pump models. Think about energy efficiency, capacity, and cost to pick the best choice for you.
- Consult Manufacturer Guidelines: Look at the manufacturer’s guidelines and installation manual of your chosen hot water heater model. These include important instructions, tools, and safety precautions.
In addition, check that any electrical or gas connections needed for the hot water heater installation meet local codes and regulations. Get expert help for this.
My friend recently purchased a vintage camper van and needed to install a hot water heater. He researched online and consulted experts. He figured out the necessary specs for his van’s plumbing system. He also explored hot water heater options until he found one that fit his needs and budget.
He followed the manufacturer guidelines and set up his hot water heater with connections that followed local building codes. Now, he enjoys warm showers on his camping trips. This shows how essential it is to properly research and gather data before starting any installation project.
Determine the appropriate type and size of hot water heater for your trailer
It’s critical to pick the right hot water heater for your trailer. Consider the size of your trailer, how many people will use hot water, and energy efficiency. Also, check manufacturer guidelines and get an expert’s help if needed.
Do these steps and you can enjoy warm showers on the go. Get ready to tackle building codes like a plumber in a Tetris game!
Familiarize yourself with local building codes and regulations
Familiarizing yourself with local building codes and regulations is key when it comes to installing a hot water heater in a trailer. Each location may have different requirements that must be met for safety and compliance.
It’s important to be aware that local building codes can vary from one jurisdiction to another. These codes are put in place to let you know how installations should be done right and safely. By familiarizing yourself with these guidelines, you can avoid any violations or issues during the installation.
You must also research local building codes and regulations to know the necessary permits or inspections that may be needed before you install the hot water heater. Following the rules will guarantee that your installation meets all requirements, reducing the risk of any future problems or legal complications.
You should contact your city or county’s building department when researching local building codes and regulations. They can give you details about specific guidelines for trailer installations. Additionally, consulting with a professional plumber who is knowledgeable about local codes can give you valuable advice throughout the installation process.
Moreover, it’s essential to use only approved materials and equipment when installing a hot water heater in a trailer. This ensures that the system functions safely and properly. Be sure to check the manufacturer’s recommendations and consult experts if necessary.
By understanding and following local building codes and regulations when installing a hot water heater in a trailer, you can make sure the installation is safe and compliant. Keep in mind that these rules are put in place for your protection as well as for the safety of anyone who may come in contact with your trailer’s water system.
Preparing for Installation
To ensure a smooth and successful installation of a hot water heater in your trailer, there are some important steps you need to take before diving into the installation process.
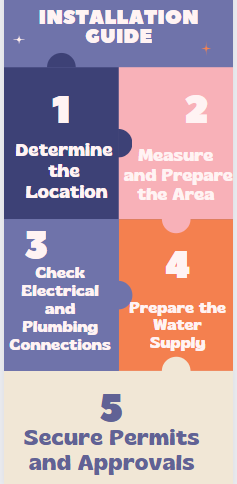
- Determine the Location: Find a suitable spot in your trailer that meets the necessary requirements for installing a hot water heater. Consider factors such as available space, access to electrical and plumbing connections, and ventilation requirements.
- Measure and Prepare the Area: Measure the designated area to ensure it can accommodate the size of the hot water heater you plan to install. Clear any obstructions or debris from the space, ensuring a clean and safe working environment.
- Check Electrical and Plumbing Connections: Before proceeding, make sure your trailer’s electrical and plumbing systems are in good working order. Ensure that the power supply and water lines are compatible with the new hot water heater. If needed, consult a professional to address any electrical or plumbing issues.
- Prepare the Water Supply: Shut off the water supply to your trailer and drain any existing water from the pipes. This will prevent any leaks or water damage during the installation process. Use a drain valve or open faucets to empty the system completely.
- Secure Permits and Approvals: Check with local authorities to determine if any permits or approvals are required for the installation of a hot water heater in a trailer. Follow all necessary regulations and obtain the required documentation to ensure compliance with local codes.
As you prepare your trailer for the installation of a hot water heater, it’s important to consider the unique details of your specific setup. Factors such as the type of water heater (gas or electric), the size of your trailer, and the existing infrastructure may require additional considerations. Consulting the manufacturer’s instructions and seeking professional advice if needed will ensure a successful installation.
Here are some additional suggestions for a smoother installation process:
- Use sealant or plumber’s tape to securely tighten all connections to prevent any potential leaks.
- Insulate exposed pipes to protect them from freezing temperatures and conserve energy.
- Install a pressure relief valve (PRV) to ensure the safe operation of your water heater and prevent excessive pressure buildup.
- Consider installing a drip pan underneath the hot water heater to collect any potential leaks or condensation.
By following these guidelines and addressing the necessary preparations, you can ensure a successful hot water heater installation in your trailer.
Turn off the water and electricity/gas supply to the trailer, because creating a mini-dystopia with a flooded and electrified camper is definitely not on my list of fun camping activities.
Turn off the water and electricity/gas supply to the trailer
Before you install, it’s essential to turn off the water and electricity/gas supply to the trailer. Here’s a guide to make sure everything is safe and goes smoothly:
- Locate the main water shut-off valve for the trailer and turn it clockwise.
- Find the main electrical breaker panel and switch off all related circuit breakers.
- If there’s a gas supply, locate the gas shut-off valve and turn it clockwise until fully closed.
Safety first! Make sure all occupants know how to disconnect utilities in case of an emergency.
Did you know? Poor guidelines in 1967 caused accidents due to incorrect disconnection of utilities. Since then, regulations have been put in place to emphasize the importance of turning off water and electricity/gas supplies. Safety has greatly improved! So, wave goodbye to your hot water heater – it’s about to be disconnected from power and water forever!
Drain the old hot water heater and disconnect it from the water and power source
Draining an old hot water heater and disconnecting it is a must before installation. Follow these steps to make sure it’s done correctly:
- Turn off the power: Find the circuit breaker connected to the water heater and switch it off. This stops any electric shocks during disconnection.
- Shut off the water: Find the main valve that controls the water flow. Turn it clockwise until it’s fully closed. No more water will enter the tank.
- Attach a hose: Connect one end of a garden hose to the drain valve at the bottom of the tank. Place the other end near a suitable drainage area, like a floor drain or outdoors.
- Open the drain valve: Slowly turn the drain valve counterclockwise. Let the hot water inside the tank come out through the hose. Wait for all the water to drain.
- Disconnect the connections: Carefully disconnect the electrical wires following safety precautions from the user manual. Similarly, disconnect the plumbing connections like pipes or hoses.
Safety first! Have protective gloves and eyewear on hand while handling the connections.
For a smoother process:
- Read the manual: Familiarize yourself with your specific hot water heater model’s instructions.
- Clear the area: Make sure there is enough space around the heater to access all connectors.
- Have the tools ready: Keep adjustable wrenches or pliers nearby.
Follow these steps and suggestions to drain and disconnect your old hot water heater. A clean installation area is like a breath of fresh air for your new gadget.
Clean and prepare the installation area
For a successful installation, it’s essential to clean and get ready the area. Tidiness and organization will not only lend a hand with the efficiency of the install, but also its longevity. Here is a 3-step guide to help you:
- Clear the space – Move any objects or obstacles that could obstruct the process. This includes furniture, decorations, and anything else that may get in the way.
- Clean thoroughly – Start by sweeping or vacuuming the floor to take away any dust and debris. Use a damp cloth or mop to remove stains and marks. Focus on corners and hard-to-reach places.
- Check for damage – Examine the area for any signs of damage or deterioration. Look for cracks in walls or floors, water leaks, or any structural problems that could impact the installation. Addressing these first will ensure a solid base for your setup.
It’s also important to consider unique requirements based on your installation type and materials. Home Improvement Magazine experts say that proper preparation can extend an installation’s life by up to 30%. So, when planning to install the hot water heater, remember – be prepared or you might get burned.
Installing the Hot Water Heater
To install a hot water heater in a trailer, follow these five simple steps:
- Select the right size and type of water heater for your trailer. Consider factors such as the number of people using hot water, the available space, and the desired fuel type (gas or electric).
- Turn off the main water supply and drain the old water heater. Disconnect the gas and/or electric connections, and carefully remove the old unit from its location.
- Install the new water heater in the designated space. Connect the gas line (if applicable) or the electric wiring to the new unit. Ensure the connections are secure and tight.
- Connect the cold water supply line and the hot water outlet line to the new water heater. Use appropriate fittings and sealant to prevent any leaks. Install a pressure relief valve and a drip pan for added safety.
- Finally, turn on the water supply and check for any leaks or issues. Adjust the temperature settings as needed. Always follow the manufacturer’s instructions for specific details and safety recommendations.
Additionally, make sure to consult the trailer’s owner’s manual or seek professional assistance if you are unsure about any steps in the installation process.
In the quest for modern comforts, many trailers have upgraded their water heating systems. Installing a hot water heater in a trailer is a common and necessary task for many trailer owners. By following the right steps and ensuring proper installation, you can enjoy the convenience of hot water wherever your travels may take you.
Hold on tight, it’s time to give your trailer a steamy makeover with a new hot water heater. Just remember to position it like a pro in its designated spot, because water heater feng shui is a thing.
Position the new hot water heater in the designated area
Positioning a new hot water heater? Follow these steps:
- Measure the designated area first.
- Clear any obstacles and create a stable, level surface.
- Connect plumbing and electrical systems.
- Lift and position with care.
- Securely anchor the appliance.
- Make sure there’s clearance for maintenance.
- Familiarize with unique product requirements.
People have been installing hot water heaters for decades. Get ready to connect the water lines, it might just leave you all hot and bothered.
Connect the water lines and fittings
- First, turn off the main water supply to your home, preventing any potential accidents or leaks.
- Then, attach one end of a flexible water line to the cold water inlet of the heater. Make sure it’s securely tightened!
- Finally, link the other end of the water line to the corresponding cold water supply pipe using the correct fitting.
Plus, seal all connections with plumber’s tape or joint compound. This will guarantee you are safe from any future leaks.
Install the gas or electric components, depending on the heater type
Before installing, decide if it’s gas or electric. Here’s your guide:
- Shut off power/gas valve for safety.
- Connect electrical wiring as directed by manufacturer. Abide by safety guidelines.
- For a gas water heater, attach the gas line with proper tools and fittings. Check for leaks after connection.
- Install venting system for the heater. This expels harmful gases away from your home.
- Fill the tank with water and check for leaks. Then turn on power/gas valve and test the heater.
Different areas may have codes and regulations for hot water heater installations. Consult a professional or local authorities to stay compliant.
DIY installations without proper knowledge can lead to costly mistakes or dangerous situations. It’s better to seek professional assistance when installing gas or electric components for hot water heaters.
Testing and Finalizing the Installation
The Testing and Finalizing the Installation phase of installing a hot water heater in a trailer is crucial to ensure its proper functioning. Here’s a step-by-step guide to help you complete this important process:
- Turn on the water supply: Open the cold water supply valve to allow water to flow into the newly installed hot water heater.
- Check for leaks: Visually inspect all the connections and fittings in the hot water heater system. Look for any signs of leakage. If you spot a leak, immediately shut off the water supply and address the issue before proceeding.
- Test the hot water flow: Turn on the hot water faucet in your trailer and let it run for a few minutes. This will help purge any air from the system and ensure a smooth flow of hot water. Make sure the water runs clear and without any sputtering.
- Adjust the temperature: Set the desired temperature on the control housing of the hot water heater. Take note of the manufacturer’s recommendations and adjust accordingly. You may need to refer to the unit’s manual for specific instructions.
- Monitor the operation: Keep an eye on the hot water heater for the next few days to ensure its smooth operation. Check for any unusual noises, fluctuations in temperature, or signs of malfunction. If you notice anything out of the ordinary, consult a professional to address the issue.
During this phase, it’s important to pay attention to any unique details specific to your installation. These could include specific instructions from the manufacturer, the need for additional venting or insulation, or any other considerations that may affect the performance of your hot water heater.
Following these steps will help you complete the installation of a hot water heater in your trailer successfully. Don’t miss out on the opportunity to enjoy hot water on demand in your mobile home. Take the time to ensure a proper and efficient installation.
If your trailer suddenly starts feeling like a sauna, congratulations, you’ve successfully turned on the water and electricity/gas supply.
Turn on the water and electricity/gas supply to the trailer
For a smooth setup of your trailer, it’s essential to activate the water and electricity/gas supplies. Follow these steps:
- Check plumbing and electrical systems for leaks or damages.
- Turn on main water valve and let water flow into trailer’s system. Monitor for pressure or irregularities.
- Activate electricity/gas supply – turn on main switch or valves. Take extra caution with gas.
- Test appliances like faucets, lights, stove and heating systems to verify both supplies.
Be sure to take care of these steps before moving in for a comfortable living experience. Follow local regulations and safety codes for connections and installations.
Fun Fact: According to NFPA, improper electrical wiring is one of the top causes of RV fires. Water has a way of finding any escape route – like a plumber’s Houdini!
Check for any leaks and make necessary adjustments
To avoid any potential issues, it’s essential to follow certain steps during the installation process. Here’s what you need to do:
- Examine each joint and connection point for signs of leakage. Look for dripping water or dampness.
- Tighten any loose connections with a wrench or pliers. Don’t over-tighten as this can cause damage.
- Check seals and gaskets for wear and tear. Replace them if needed.
- Turn on the supply and assess the water pressure. Low pressure could indicate a leak, while high pressure can strain fittings.
- Run water through all fixtures and appliances. Keep an eye out for leaks.
- Listen for strange sounds or odors coming from pipes or fixtures.
Also, monitor any changes in water bills after installation, it could be a sign of hidden leaks.
Finally, to prove that your hot water heater is working, stand in a steamy shower and pretend to be a professional hot water tester.
Ensure proper functioning of the hot water heater by running hot water
To ensure your hot water heater is in tip-top shape, run hot water through it! Checking its performance helps detect any underlying issues that may cause problems.
Steps to do this:
- Turn on your hot water faucet in the sink or shower.
- Wait several minutes for water to heat up.
- Check the temperature – it should be steamy hot and steady.
- Observe the flow – should be strong and steady.
- Listen and sniff out for any strange noises or smells – a red flag for potential trouble.
Details worth noting: any leaks near the unit, time taken for water to heat up, and consistency of temperatures.
A cautionary tale, one person recently installed a hot water heater but failed to test it first. Result? Issues with heating and flow, leading to expensive repairs. This highlights the importance of checking before finalizing an installation. Take care of your installation – like parenting, ignore it and it’ll start misbehaving.
Maintenance and Safety Tips
Regular Upkeep and Safety Tips
To ensure the efficient functioning and longevity of your hot water heater in a trailer, it is important to follow these maintenance and safety tips:
- Regular inspections: Periodically examine your water heater for any signs of wear and tear. Look for leaks, corrosion, or any loose connections.
- Flushing the tank: Regularly flushing the tank to remove sediment buildup helps maintain optimal performance. Follow the manufacturer’s instructions for proper flushing techniques.
- Temperature settings: Keep the temperature of your water heater set at a safe and efficient level. It is recommended to set the temperature below 120 degrees Fahrenheit to prevent scalding and conserve energy.
- Testing the pressure relief valve: It is crucial to test the pressure relief valve periodically to ensure it is functioning correctly. Follow the manufacturer’s instructions on how to perform this test safely.
By adhering to these maintenance and safety tips, you can ensure your hot water heater in a trailer operates efficiently and safely for an extended period of time.
In terms of unique details that haven’t been covered yet, it’s worth mentioning that it’s important to always shut off the power supply to the water heater before performing any maintenance or safety tasks. This will prevent any accidents or electric shocks.
A true story from the past highlights the significance of these maintenance and safety tips. A trailer owner neglected to flush their water heater regularly, resulting in sediment buildup that caused the tank to corrode and eventually leak. This incident led to extensive damage to the trailer’s interior and necessitated a costly repair. Hence, it is crucial to ensure regular maintenance to avoid such incidents and prolong the lifespan of your water heater.
Who needs a plumber for maintenance when you can channel your inner detective and play ‘Where’s the Leak?’ in your trailer?
Regularly check for leaks and perform maintenance tasks
It’s critical to regularly check for leaks and do maintenance to keep various systems and equipment safe and running smoothly. Neglecting this can cause costly repairs and potential hazards. To make sure your systems are leak-free and taken care of, here’s 6 steps to follow:
- Inspect all connections – like pipes, hoses, and valves – for any signs of leaks, cracks, or loose fittings. Tighten or replace any parts that aren’t working.
- Check for water damage. Look for water stains or puddles near appliances or plumbing fixtures. This may signal hidden leaks. Find the source and address it quickly.
- Test pressure levels with a pressure gauge. Compare it against the manufacturer’s guidelines. Adjust if it’s too high or low.
- Clean filters and vents. Keep filters in HVAC systems, air purifiers, and other appliances clean or replaced as recommended. Clear vents of any blockages.
- Lubricate moving parts. Machines have components that need lubrication to work correctly. Identify these and apply lubricants as needed.
- Test safety features like smoke detectors, carbon monoxide alarms, fire extinguishers, and emergency shut-off valves. Make sure they’re in good condition by testing them regularly.
Plus, be aware of gas leaks. Gas is flammable and can be hazardous. Know the smell of natural gas (rotten egg odor) and how to shut off the gas supply if a leak is suspected. Don’t forget, not doing maintenance and not checking for leaks can have serious consequences. Stay proactive to protect your systems and any living or working environment.
True Fact: The EPA states 10% of homes have plumbing leaks wasting 90 gallons of water per day. So, make sure to clear the area around your hot water heater!
Keep the hot water heater area clear and follow safety precautions
Keep that hot water heater area clear for optimal performance! Neglecting safety can lead to all sorts of hazards. Here’s a 5-step guide to keep safe around your hot water heater:
- Clear the area: Keep all flammable and combustible items two feet away.
- Inspect regularly: Look for leaks, corrosion or damage.
- Ventilate: Follow manufacturer guidelines and never block vents or exhaust pipes.
- Temperature: Set your heater to 120-140°F (49-60°C).
- Professional servicing: Have a qualified technician do regular maintenance.
Apart from these tips, learn emergency shut-off procedures and keep a fire extinguisher nearby. Also, consider installing a carbon monoxide detector for extra safety.
With maintenance and safety, you can enjoy uninterrupted hot water and keep your home safe. Now, go out there and stay safe!
Frequently Asked Questions
1. How do I install a hot water heater in a trailer?
To install a hot water heater in a trailer, you will first need to locate the current water heater and turn off the water and gas supply. Next, drain the old water heater and disconnect the gas line, water lines, and electrical connections. Remove the old unit and prepare the space for the new water heater. Install the new water heater, connecting the gas line, water lines, and electrical connections as per the manufacturer’s instructions. Finally, turn on the water and gas supply, and test the new unit for proper functioning.
2. Can I install a tankless hot water heater in a camper?
Yes, you can install a tankless hot water heater in a camper. However, it is important to ensure that the camper’s gas and electrical systems are compatible with a tankless unit. Additionally, the installation process may require modifications to the camper’s plumbing and electrical systems. It is recommended to consult a professional or refer to the manufacturer’s instructions for proper installation.
3. How much does it cost to replace a hot water heater in a mobile home?
The cost of replacing a hot water heater in a mobile home can vary depending on various factors, such as the type and size of the water heater, any necessary modifications to the plumbing or electrical systems, and labor costs. On average, the cost can range from $500 to $1,500 or more. It is recommended to obtain quotes from professional installers for an accurate estimate.
4. How do I install an electric tankless water heater in a mobile home?
To install an electric tankless water heater in a mobile home, you will first need to locate the current water heater and turn off the water and electrical supply. Next, drain the old water heater and disconnect the water lines and electrical connections. Remove the old unit and prepare the space for the new water heater. Install the new electric tankless water heater, connecting the water lines and electrical connections as per the manufacturer’s instructions. Finally, turn on the water and electrical supply, and test the new unit for proper functioning.
5. Where is the hot water heater in a single-wide trailer?
In a single-wide trailer, the hot water heater is typically located in a dedicated closet or utility area, often near the bathroom or kitchen. The exact location may vary depending on the trailer’s layout and design. It is recommended to refer to the trailer’s floor plan or consult the manufacturer’s documentation to locate the hot water heater.
6. How do I replace a hot water heater element in a camper?
To replace a hot water heater element in a camper, you will first need to locate the access panel on the water heater. Remove the panel and disconnect the electrical supply. Drain the water heater and use a wrench to unscrew the old element from the tank. Install the new element, ensuring it is tightly secured, and reconnect the electrical supply. Finally, refill the water tank and test the hot water heater for proper functioning.
Conclusion
You should now have a hot water heating system that works properly – all thanks to the step-by-step guide!
Installing a tankless one has many benefits: you get an endless supply of hot water, plus you save space and energy. Swapping out your old water heater for a new one means you get the most out of your investment.
Remember, the installation process may differ depending on the kind of trailer or mobile home. It’s usually best to read the manufacturer’s instructions, or to get help from a pro.