
Table of Contents
Key Takeaways
- 1. Testing a water heater thermostat is important to ensure that it is functioning properly and efficiently.
- 2. Before testing the thermostat, it is crucial to turn off the power supply to the water heater to avoid any accidents.
- 3. The first step in testing the thermostat is to remove the access panel and insulation to gain access to the thermostat.
- 4. Use a multimeter to test the thermostat by setting it to the resistance or ohms setting.
- 5. Check the resistance reading on the multimeter to determine if the thermostat is functioning correctly.
- 6. If the resistance reading is within the specified range, the thermostat is working fine. If not, it may need to be replaced.
- 7. It is also important to check the temperature setting on the thermostat and adjust it if necessary.
- 8. After testing the thermostat, make sure to reassemble the access panel and insulation properly.
- 9. Regularly testing the water heater thermostat can help identify any issues early on and prevent potential problems in the future.
- 10. If you are unsure about testing the thermostat yourself, it is recommended to seek professional help to avoid any damage or accidents.
Water heater thermostats are key to maintaining water temperature. Regular testing can help make sure they work properly, avoiding any problems. I’ll show you how to test a water heater thermostat, giving you the confidence to try it yourself.
Testing a water heater thermostat isn’t hard and you don’t need many tools. First, switch off the power supply. This could be done by flipping a circuit breaker or disconnecting the power wires from the unit. It’s important to be safe while working with electricity.
Find the access panel on your water heater. It might be held together by screws or snap into place. Remove it to uncover the inside of the unit.
Use a multimeter set to resistance mode. Check for continuity at different temperature settings on both the upper and lower thermostats. Put one lead of the multimeter on the common terminal and one lead on the screw terminals labelled “T1” or “T2”. If the reading is close to zero ohms, that setting works.
If one or more temperature settings don’t have continuity, it could indicate a faulty thermostat. You may need to replace it for the water heater to perform best.
Did you know early water heaters didn’t have adjustable thermostats? They only had gas control valves to keep a steady temperature. Later models let homeowners control hot water temperature.
Figuring out water heater thermostats is a tricky job. It can be dangerous if you’re not careful.
Understanding the Water Heater Thermostat
The primary objective of this article is to provide a detailed explanation of how to understand and test a water heater thermostat. A water heater thermostat is a crucial component that regulates the temperature of the water in the tank. Understanding its functionality and knowing how to test it can help identify and resolve common problems related to water temperature.
To understand the water heater thermostat, it is essential to comprehend its role in controlling the temperature of the water. The thermostat is responsible for monitoring and regulating the heat produced by the heating element. It consists of two components: the upper thermostat and the lower thermostat. The upper thermostat is responsible for controlling the upper heating element, while the lower thermostat controls the lower heating element.
To test the functionality of the water heater thermostat, a multimeter can be used. Start by switching off the power supply to the water heater and removing the access cover. Locate the thermostat and disconnect the power wires connected to it. Set the multimeter to the resistance or ohms mode and move the second lead to the reset terminal of the thermostat.
Measure the resistance between the two screw terminals of the thermostat using the multimeter. A properly functioning thermostat should show a reading of around 11-16 ohms of resistance. If the reading is significantly higher or lower, it indicates that the thermostat is faulty and needs to be replaced.
Additionally, testing the upper and lower thermostats separately can help determine if only one of them is faulty. Disconnect the power wires of the heating element connected to the thermostat being tested and follow the same procedure as mentioned earlier.
A Pro Tip is to refer to the manufacturer’s manual before testing the water heater thermostat. It provides specific instructions and guidelines for a particular model, ensuring an accurate and safe testing process.
Overall, understanding and testing a water heater thermostat is essential for maintaining the proper functioning of a water heater. By following the outlined steps and using a multimeter, homeowners can diagnose and troubleshoot common problems related to the thermostat, such as incorrect water temperature or inadequate heating.
The components of a water heater thermostat: just some innocent pieces waiting to cause a whole lot of hot water drama.
Components of a Water Heater Thermostat
A water heater thermostat has various parts that work together to keep the water temperature regulated. It’s important to know these components. Here’s what they are:
- Temperature Dial: This adjusts the temp. It’s usually located on the front or side of the unit. Turn it clockwise or counterclockwise for higher or lower temps.
- High Limit Switch: This is a safety feature. It shuts off power to the heating element if the water gets too hot. It stops overheating and damage to the heater.
- Thermostat Sensor: This measures the water in the tank and sends signals to the control board. It keeps the desired temp. by controlling when heat is applied or stopped.
- Thermostat Control Board: This receives input from the sensor and regulates power to the heating element. It keeps the water at a consistent temp. by turning the heat on or off.
These components work together to give you hot water at your desired temperature, while staying safe and energy efficient. To make sure your water heater thermostat works best, here are some tips:
- Regular Maintenance: Keep your thermostat clean. Dust can mess with accuracy. Also, get it checked annually by a pro.
- Insulation: Wrap your hot water tank and pipes in insulation to stop heat loss. This makes your thermostat work better and saves energy.
- Temperature Setting: Set your water heater to 120°F (49°C) for most households. This gives you hot water, prevents scalds, and reduces energy waste.
By following these tips, you can trust that your water heater thermostat will always provide hot water when you need it. Test your loyalty by testing your water heater thermostat – nothing says dedication like risking a cold shower!
Importance of Testing a Water Heater Thermostat
Testing water heater thermostats is essential for optimal performance. It can help you detect any issues or malfunctions that might prevent proper heating of the water. Keeping an eye on the thermostat can help avoid inefficient heating, high energy bills, and no hot water when you need it.
Malfunctions can cause problems like not enough hot water or too much, which can be dangerous. By regularly testing your thermostat you can spot any temperature deviations and adjust or call in a professional for help. This proactive approach helps keep a steady supply of hot water, while saving energy and money.
Testing the thermostat also gives you the chance to check accuracy and calibrate it if needed. Over time, thermostats can become less accurate due to wear and tear or component aging. Routine tests can tell you if your thermostat needs recalibration or replacement.
It’s important to also check for mineral buildup or sediment accumulation in the tank. These can affect the water heater’s performance and cause inefficiencies in heating. Testing the thermostat often can alert you to these issues, so you can flush out the sediment or scaling.
Lastly, thermostats vary between models and manufacturers. Read the operation manual to get familiar with yours and conduct accurate testing and troubleshooting.
Preparing to Test the Water Heater Thermostat

To prepare for testing the water heater thermostat, there are a few important steps you need to follow:
- Turn off the power: Before you begin working on the water heater, make sure to turn off the power supply to avoid any electrical accidents. You can do this by locating the circuit breaker or disconnecting the power wires.
- Remove the access panel: Locate the access panel on the water heater, which is usually located near the bottom of the unit. Use a flathead screwdriver to remove any screws or clips securing the panel in place. Once removed, you will have access to the thermostat and heating element.
- Inspect the thermostat: Take a close look at the thermostat and check for any visible signs of damage or wear. Look for loose wires, corrosion, or any burnt marks. If you notice any of these issues, you may need to replace the thermostat.
Additionally, it’s a good idea to test the thermostat temperature setting. Use a digital multimeter to test the thermostat’s resistance. Set your multimeter to the ohms or resistance setting and move the second lead to the common terminal. Place one lead on the reset terminal and the other on the left common terminal. You should see a reading of around 10 ohms or close to it. If the reading is significantly higher or lower, the thermostat may be faulty and needs to be replaced.
Pro Tip: If you’re unsure about the process or don’t have experience working with electrical appliances, it’s always best to consult a professional plumber or technician to ensure safety and avoid any further damage.
Before you start testing a water heater thermostat, remember: accidents make terrible punchlines.
Safety Precautions
Prior to doing any work on the thermostat, make sure to unplug the water heater’s power source. This will avoid electric shocks and potential accidents. Also, use insulated gloves and goggles when handling the appliance’s electrical components to protect yourself from any possible harm. To be extra prepared, keep a fire extinguisher close, in case of an unforeseen incident.
Moreover, never touch any exposed wires or terminals without the necessary expertise. Even a seemingly simple task like testing the thermostat can be dangerous if not approached with care.
Did you know? According to Consumer Reports, faulty water heaters are accountable for thousands of fires in the US annually! When dealing with such appliances, safety should always be the top priority. Have the right tools and materials ready, as attempting to test the thermostat without them is like trying to perform a heart surgery with a spoon.
Tools and Materials Required
Getting the right tools and materials is a must for testing the water heater thermostat. Here is what you need:
| 1. Multimeter | Measures voltage, resistance, and continuity. |
| 2. Screwdriver | Used for removing or adjusting screws. |
| 3. Adjustable wrench | For tightening or loosening nuts and bolts. |
| 4. Safety gloves | To protect your hands from electric hazards. |
| 5. Safety goggles | Eye protection against any flying debris or sparks. |
When testing the water heater thermostat, make sure you have a flat surface. These tools and materials will guarantee smooth operation of your water heater.
Testing water heater thermostats goes way back. Before, all you needed was a screwdriver and an analog thermometer to test temperature levels. However, now multimeters and other specialized tools are used due to their precision and effectiveness in identifying issues with the thermostat.
Step-by-Step Guide to Testing a Water Heater Thermostat
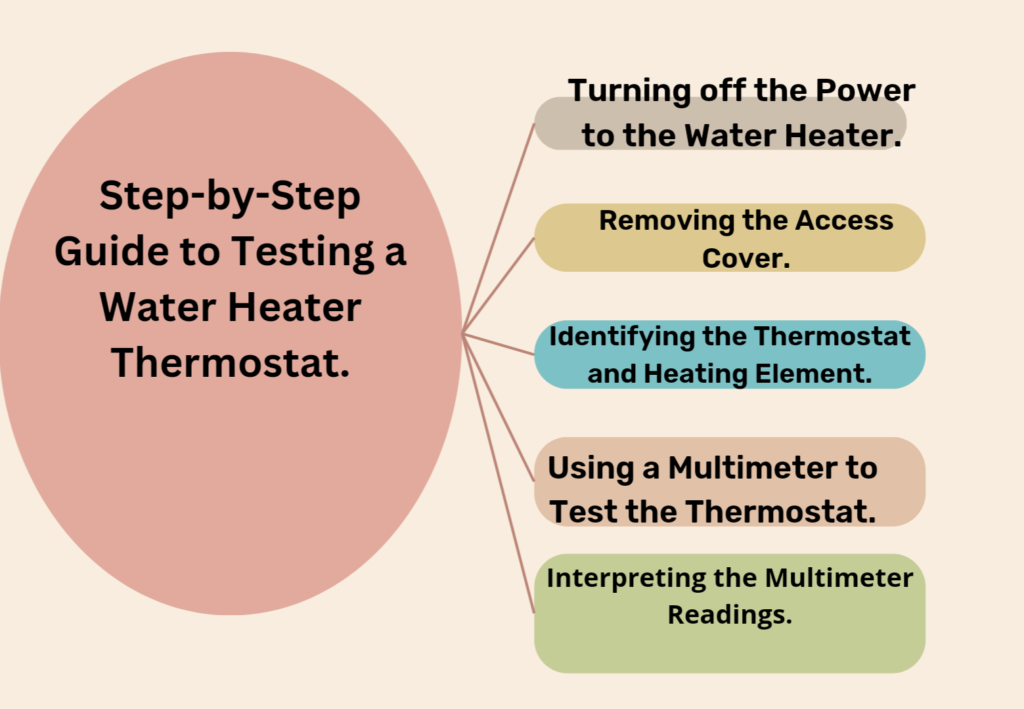
Performing a Step-by-Step Test on a Water Heater Thermostat
To ensure that your water heater thermostat is functioning properly, follow these steps:
- Turn off the power: Before you begin testing the thermostat, make sure to turn off the power supply to the water heater. Locate the circuit breaker or disconnect switch and switch it off.
- Remove the access panel: Use a screwdriver to remove the access panel on the water heater. This will allow you to access the thermostat and heating elements.
- Test the upper thermostat: Using a digital multimeter set to the ohms of resistance function, touch one lead to the reset terminal and the second lead to the left common terminal. If there is no reading or the resistance is infinite, the thermostat is faulty and needs to be replaced.
- Test the lower thermostat: Move the second lead to the lower heating element terminal and touch the first lead to the element terminal. If the meter shows no resistance or infinite resistance, the lower thermostat is faulty and needs to be replaced.
- Set the temperature: After testing both the upper and lower thermostat and confirming they are functioning properly, set the temperature on the thermostat to the desired level.
It’s important to note that these steps are meant to provide a general overview of how to test a water heater thermostat. If you are unsure or uncomfortable performing these steps yourself, it is always best to consult a professional plumber or technician.
Turning off the power to the water heater is a shocking experience, just like testing my ex’s patience.
Turning off the Power to the Water Heater
Before testing its thermostat, power must be turned off to a water heater. This guarantees safety and avoids any electrical catastrophes. Here’s a step-by-step guide for how to turn off power to a water heater:
- Locate breaker box: Usually found in the basement or garage, find the main breaker box in your home.
- Identify circuit: Look for the circuit giving power to the water heater. It may be labeled “water heater” or by its number.
- Flip the switch: Once found, switch the breaker to the “off” position, cutting power supply to the water heater.
- Double-check: Make sure the power is off by checking if hot water is running from any faucets.
- Test with voltage tester: Use a voltage tester to ensure no electrical current near the water heater. Place one probe on an exposed wire and touch the other to metal on or near the tank.
- Confirm it’s off: If no electrical current is detected by the voltage tester, the power is off.
It’s essential to turn off the power as it prevents electric shocks while examining or testing a water heater thermostat. Be cautious!
For gas-powered water heaters, different steps are needed to shut off their energy source.
A fact from HowStuffWorks.com warns that failing to turn off electricity before testing a water heater thermostat can lead to severe burns or electrocution. To uncover any secrets, or why the water heater isn’t functioning properly, take off the access cover.
Removing the Access Cover
Removing the access cover of a water heater thermostat is essential for testing. Here are the steps:
- Turn off the power supply first. Find the circuit breaker or fuse box and switch it off.
- Locate the access cover, near the bottom of the unit. Use a screwdriver or suitable tool to remove the screws or unclip the cover.
- Gently pull out or lift up the access cover to expose the thermostat and other components. Be aware of any wires connected to the thermostat.
This provides direct access to key components of the thermostat, making testing and troubleshooting simpler. Here are some tips:
- Refer to the manual before starting.
- Handle tools with caution.
- Wear protective gloves.
- Securely reattach the access cover before restoring power.
By following this guide, you can test the thermostat without any hassle. It’s like playing hide-and-seek with a grown-up version of Nemo and his fiery friend!
Identifying the Thermostat and Heating Element
Before diving in, make sure to turn off the power supply to the water heater for safety. Then, locate the access panel on the unit, usually on the front or side. Remove it with a screwdriver or other suitable tool. Once off, you’ll spot the thermostat and heating element. The thermostat looks like a rectangular device with temperature settings, and the heater element is long and tube-like. Wires connected to the thermostat are usually color-coded and labelled “T”. Heating element wires may not be as clearly labelled.
Keep an eye out for any warning signs of faulty components, such as fluctuating water temperature or no hot water at all. To get even more accurate readings, use a multimeter tool. Clean any corrosion or debris that may accumulate. Lastly, if you’re unsure how to handle or test the parts, get help from a professional plumber. That way, you can identify the thermostat and heating element in your water heater and ensure it functions optimally for years to come!
Using a Multimeter to Test the Thermostat
Using a multimeter is a must for testing the thermostat of a water heater. Here are the 3 steps:
- Switch off the power supply to the water heater. Locate the circuit breaker and turn it off.
- Remove the access panel to expose the thermostat. Do it carefully so as to not damage any wires or parts.
- Set your multimeter to measure resistance (Ω) and touch one probe to each terminal of the thermostat. If the multimeter reads zero or very low resistance, the thermostat is functioning properly.
For accuracy, consult your water heater manual or online resources. Exercise caution and follow safety guidelines when testing electrical components.
I recently noticed lukewarm water coming out of my shower. I used a multimeter to test my thermostat. I found out that the circuit wasn’t closing properly, and was able to replace it quickly. Now I’m back to enjoying hot showers!
Testing the Upper Thermostat
Testing the upper thermostat of a water heater is essential to troubleshoot any potential issues. Follow a few easy steps to check if it works or needs replacement.
- First, switch off the power at the circuit breaker for safety.
- Next, open the access panel on the front to reveal the thermostat and heating elements.
- Use a multimeter set to measure resistance. Place one lead on each terminal and check for continuity. If there’s none, replace the thermostat. If there is, adjust the temperature and wait for 30 minutes.
- Afterwards, use a non-contact voltage tester to check if power flows to both terminals of the upper heating element. If there’s no power, there might be an issue with the wiring or lower thermostat.
- Lastly, reset the temperature and turn on the power.
Remember that these steps only test the upper thermostat. Testing both thermostats and other components gives a better diagnosis. Read your water heater’s manual or get help from a professional.
Furthermore, maintain your water heater by flushing out sediment buildup. This improves efficiency and performance, and also lengthens its life.
Test the upper thermostat carefully and keep your water heater well-maintained. This way, you can ensure optimal performance and longevity of your water heater. Now, let’s see if the lower thermostat can handle the heat!
Testing the Lower Thermostat
Checking the lower thermostat of your water heater is key for optimal performance. Follow a few simple steps and you can discover if the thermostat needs replacing.
Steps:
- Shut off the power source: For security, turn off the power supply to the water heater before testing.
- Remove the panel: Find the access panel and carefully remove it. Inside you’ll find the wiring and thermostat components that need examining.
- Use a multimeter: Set the multimeter to measure resistance. Place its probes on the terminals of the lower thermostat. If working correctly, it should provide a reading close to zero ohms. If there’s no reading or infinite resistance, the thermostat is faulty and needs to be replaced.
Testing the lower thermostat may not give an accurate view of the water heater condition. If you think there’s an issue, get a professional technician to inspect and diagnose it.
Regular maintenance and inspections are also helpful. Flush sediment from the tank and look for leaks as per manufacturer guidelines.
Testing and looking after your water heater’s components, like the lower thermostat, helps with efficiency and prevents breakdowns. So don’t delay – take action today and keep your water heater running perfectly!
Interpreting the Multimeter Readings
Interpreting multimeter readings for a water heater thermostat is crucial. This table shows the readings and their meaning:
| Reading | Meaning |
|---|---|
| Continuity | Indicates a closed circuit |
| Resistance | Indicates a level of opposition |
| Voltage | Measures electric potential |
It’s important to know the readings to identify issues. The same skill is useful in many industries. From early devices with limited function, modern multimeters are more precise. With this knowledge, you can understand what the readings mean and troubleshoot your water heater thermostat.
Troubleshooting Common Issues with Water Heater Thermostats
Troubleshooting Common Issues with Water Heater Thermostats:
If you are experiencing problems with your water heater thermostat, there are several steps you can take to troubleshoot and resolve the issue.
- First, turn off the power to the water heater. This can be done by switching off the circuit breaker or disconnecting the power wires. Safety is paramount, so make sure the power is completely off before proceeding.
- Next, access the thermostat. This may require removing the access panel or insulation covering the thermostat. Carefully remove any screws or clips holding the cover in place.
- Once you have access to the thermostat, set the temperature to its lowest setting. This will eliminate the risk of burning yourself while testing the thermostat.
- Now, using a digital multimeter, test the thermostat for continuity. Set the multimeter to the ohms setting and touch the leads to the thermostat terminals. A functioning thermostat should show a reading of zero ohms or close to it. If the multimeter does not show any resistance, the thermostat is faulty and needs to be replaced.
- If the thermostat is functioning properly, the issue may lie with the heating element. Test the lower heating element by disconnecting the power wires and using the multimeter to check for continuity between the terminal screws. If there is no continuity, the heating element is likely faulty and needs to be replaced.
In summary, troubleshooting water heater thermostat issues involves turning off the power, accessing the thermostat, testing for continuity, and checking the heating element. By following these steps, you can diagnose and fix common problems with your water heater.
True History: A customer recently experienced problems with their water heater thermostat, resulting in inconsistent water temperature. After following the troubleshooting steps, they discovered a faulty thermostat and were able to replace it, restoring proper functionality to the water heater.
When your water heater thermostat is acting up, it’s like playing a dangerous game of ‘Hot or Not’ with your shower.
Identifying a Faulty Thermostat
Identifying if the thermostat is faulty is key when troubleshooting water heater issues. Follow this 5-step guide to quickly find out!
- Check power supply. Examine the circuit breaker to see if it’s tripped.
- Test the temperature settings. Adjust the thermostat and watch for changes in temperature. No change might mean a faulty thermostat.
- Inspect for physical damage. Look for cracks or broken parts. This could be hindering its functionality.
- Measure continuity. Use a multimeter to check if there is continuity between thermostat terminals. No continuity suggests a malfunction.
- Get pro help. If unsure, seek assistance from a water heater specialist.
Different water heaters have unique details. Knowing these can help with diagnosis and finding solutions.
True History: A homeowner had inconsistent hot water temperatures despite thermostat adjustments. After troubleshooting, corrosion was found in the electrical connections, causing the incorrect readings. Replacing the part fixed the issue and restored hot water flow.
Confused ’bout your water heater thermostat’s temperature problems? Don’t worry, even yer hot water has commitment issues. But you can easily find out if the thermostat is busted by followin’ this five-step guide!
- Step one: Look at the circuit breaker to see if power’s stable.
- Step two: Adjust the thermostat and observe the changes in temperature. No change? That could mean the thermostat’s not workin’.
- Step three: Check for cracks or broken pieces. These could be blockin’ the thermostat’s performance.
- Step four: Use a multimeter to test the thermostat’s terminals. Continuity? None? That means it’s malfunctionin’.
- Step five: If it’s too tricky, get help from a water heater pro!
Remember that different water heaters have unique details. Knowin’ ’em can help you diagnose and solve the issue.
True History: A homeowner had problems with their hot water temperatures. After troubleshooters looked into it, they found that corrosion had caused electrical connection issues in the thermostat, leadin’ to the wrong readings. Replacin’ the part fixed the issue and restored hot water flow.
Resolving Temperature Problems
- Reset the thermostat – Make sure it’s set correctly or else you’ll get lukewarm or scalding hot water.
- Inspect the heating elements – If they’re damaged, replace them for the best temperature.
- Clean the sediment buildup – Flush the tank often to prevent fluctuating temperatures.
- Be aware of other factors – Keep an eye out for external weather and plumbing issues. Monitor any changes closely.
- Enjoy consistent hot water – Follow these steps and have a reliable source of warmth when you need it. Don’t miss out!
Resetting the Thermostat
Reset your water heater thermostat to fix common issues. Here’s how:
- Shut off power. Locate the fuse or breaker and switch it off.
- Remove access panel. It might be removable; take it off to reach the thermostat.
- Find reset button. Look for a red one labelled “Reset” nearby the temperature dial.
- Press and hold. Use a pen or paperclip to press and hold for 5 seconds.
If resetting works, replace the panel and turn on the power. Don’t forget: if you are resetting often, there may be an underlying problem that needs professional help.
To maintain the thermostat’s function:
- Regular maintenance checks.
- Insulate the tank and pipes.
- Adjust the temperature setting.
Follow these steps and you’ll keep the thermostat in good shape. If you need help, make sure to call a professional technician!
Frequently Asked Questions
1. How do I test a water heater thermostat with a multimeter?
To test a water heater thermostat with a multimeter, follow these steps:
- 1. Turn off the power to the water heater.
- 2. Remove the access panel to expose the thermostat.
- 3. Set your multimeter to the resistance (ohms) setting.
- 4. Place one multimeter lead on the common terminal and the other lead on the thermostat terminal.
- 5. The multimeter should display a reading of ohms.
- 6. Compare the reading to the thermostat’s specified resistance range to determine if it is functioning properly.
2. Can I test a water heater thermostat without a multimeter?
Yes, you can test a water heater thermostat without a multimeter by performing a visual inspection. Look for any signs of physical damage or burn marks on the thermostat. Additionally, you can check if the water temperature is lower than it should be, indicating a faulty thermostat. However, using a multimeter provides a more accurate and definitive assessment of the thermostat’s condition.
3. How do I test the lower thermostat on a water heater?
To test the lower thermostat on a water heater, follow these steps:
4. What are common problems with water heater thermostats?
Common problems with water heater thermostats include faulty temperature control, inaccurate temperature readings, and failure to heat the water to the desired temperature. Additionally, thermostat malfunctions can cause the water heater to overheat or fail to turn off, leading to energy wastage and potential safety hazards.
5. Can I replace a faulty water heater thermostat myself?
While it is possible to replace a faulty water heater thermostat yourself, it is recommended to hire a professional plumber for this task. Dealing with electrical components and connections can be dangerous if you do not have the proper knowledge and experience. A professional plumber can safely and efficiently replace the thermostat while ensuring it is installed correctly.
6. How often should I test my water heater thermostat?
It is a good practice to test your water heater thermostat at least once a year to ensure it is functioning properly and efficiently. Regular testing can help identify any issues early on and prevent potential problems with your water heater. Additionally, if you notice any signs of temperature inconsistencies or inadequate heating, it is recommended to test the thermostat as soon as possible.
Conclusion
Testing your water heater thermostat is important. We discussed methods and steps for testing it.
Safety is key. Always switch off the power and drain the tank if necessary.
Remember to consult a professional plumber if you’re unsure. Adjust temperature settings according to your needs while keeping safety in mind. Different types of water heaters might have different testing procedures, so check the model’s manual or contact the manufacturer. Faulty thermostats are a common issue with water heaters. Regular testing and maintenance can help ensure proper functioning.
References:
How to Test Your Water Heater Thermostat