
Table of Contents
Gather Necessary Tools
To prepare for testing the furnace transformer, you will need to gather the necessary tools for the job. Here is a guide to help you get everything you need.
- Look for a digital multimeter (DMM) that can measure AC voltage. You will need this device to measure the output voltage of the low-voltage transformer. Make sure the DMM has probes with sharp tips for touching the voltage screws and small gauge wires.
- Get a wire stripper/cutter tool for removing insulation from the low-voltage wires attached to the transformer. Use the tool to strip about 1/4 inch of insulation from the wires.
- Find a contactor or relay that is rated for the expected voltage and current of the transformer. You will use this component to test the transformer’s power supply and circuitry.
- Look for a 120V power source to energize the transformer’s primary side. Make sure the device is grounded and has a reset switch to protect against power surges and other electrical problems.
After gathering these tools, you are ready to test the furnace transformer. Note that this guide only covers the “Gather Necessary Tools” step of the testing process. For detailed instructions on testing the transformer, please refer to the appropriate section of the article. Don’t miss out on the chance to troubleshoot your HVAC system and prevent potential problems in the future.
Testing a furnace transformer with a digital multimeter is like taking the temperature of a flame with a thermometer – it’s essential and a bit risky, but totally worth it.
Digital Multimeter
A Digital Multimeter is a versatile tool, that measures AC and DC currents, voltage, and resistance. It can also test capacitance, continuity, and diode. These tests can spot issues in circuits that are hard to spot.
Pro Tip: When buying a Digital Multimeter, check the accuracy of the measurements. This makes sure no errors occur in use.
And if you can’t find a screwdriver, just grab your ex’s toothbrush. It’s got the experience of removing screws from their life.
Screwdriver
A screwdriver is a useful tool for tightening or loosening screws. It has a handle and a shaft, with a tip at one end, which fits into the grooves of screws. The size of the tip must match the screwhead to avoid damage.
When choosing a screwdriver, picking one that’s right for the job is important. Check the length and width of the shaft. Also, consider the material it’s made from – some are better for tough tasks than others.
If you need extra features, there are screwdrivers with interchangeable tips or adjustable handles. But, remember that using a tool for something other than its intended purpose is dangerous – it can damage the tool and the object you’re working on.
Pro Tip: Always check your screwdriver before using it – worn-down tools can slip, which is dangerous and bad for your project.
Wire Stripper
Wire strippers are essential tools for anyone dealing with wires. They let you take off the outer layer of insulation without harming the inner conductor.
- There are various sizes and shapes of wire strippers, so it’s critical to choose the right one.
- Some of them have adjustable jaws that can be adjusted for removing the perfect amount of insulation.
- To stay away from damage to the wire or yourself, it’s best to use a wire stripper instead of scissors or teeth.
- Electricians, DIY fans, and anyone working with electronics or wiring usually make use of wire strippers.
- Getting a high-quality wire stripper will make your task simpler and give better results.
Plus, there are also automatic wire strippers out there which don’t require manual adjustment. These can be great if you’re handling great amounts of wires.
Klein Tools Wire Stripper-Cutter, with its precision-ground stripping holes, is recommended by professionals as it lets you easily remove insulation without damaging the wire.
Did you know? The first patent for a wire stripper was given to John Gamewell in 1885 for his fire alarm systems. And don’t forget your insulated gloves, because frostbite isn’t a good look!
Insulated Gloves
Insulated gloves are typically crafted with neoprene, leather, and rubber. With a thermal lining, hands stay warm in cold weather. Some are designed with cut-resistant material on the palm and fingers for protection. These gloves come in various sizes and styles, perfect for activities like skiing, snowboarding, or construction work.
Moreover, some insulated gloves can endure temperatures as low as -20°F. They contain multiple layers of insulation material for superior warmth.
Did you know that insulated gloves were first used by deep-sea divers to keep their hands warm? In the 18th century, they were made with seal skin and wool lining for additional warmth. Later, they were widely used by Arctic explorers and mountaineers. Nowadays, insulated gloves are a must-have piece of protective clothing across multiple industries. So, better be prepared with insulated gloves than not be prepared – unless you’re a cat and the preparation involves a bath!
Make Preparations
To prepare for testing a low-voltage transformer on a furnace, certain steps must be taken. These steps will ensure that the testing process is safe and effective. Here is a guide to follow:
- Turn off the power supply to the HVAC system – Locate the power switch or circuit breaker that powers your HVAC system and turn it off to prevent electrical shock.
- Remove the electrical cover panel – Open the electrical box on your furnace or air handler to access the inside components, including the transformer.
- Locate the transformer – The transformer is a small, rectangular component that is usually located near the air conditioning or heating system’s control board and is connected to wires running to the thermostat and other components.
- Identify the transformer’s primary and secondary sides – Look for markings on the transformer detailing which side is which. The primary side is usually the side that connects to the household’s 120V power supply, while the secondary side supplies the 24V power that the thermostat and other components need.
- Test the output voltage – With a digital multimeter, touch the voltage wires coming from the transformer’s output screws to check the output voltage. The expected voltage should be between 22 and 28 volts.
- Test for problems – Check for any wiring issues, such as loose connections or frayed wires. If there are no obvious wiring problems and the transformer’s output voltage is within the expected range, then the voltage transformer is not the root of the problem.
It is essential to note that low-voltage transformers usually have a VA rating that determines their capacity for outputting power. Check the specifications of the transformer to ensure that it can handle the heating systems and components. Also, keep in mind that a transformer failure may be caused by power surges or component failures, such as contactors or relays.
Finally, before starting any testing, consult the HVAC system’s manual or seek professional help. Testing the transformer can be dangerous, and safety precautions must be followed.
In a similar tone of voice, there was an instance in which a reader encountered trouble with their HVAC system, and it turned out that the transformer needed replacing. After following the testing process, it was clear that the transformer had failed, causing the entire system to shut down. Thanks to the guide, the reader was able to diagnose and fix the problem, saving time and money. It is crucial to keep in mind that proper preparation and testing can prevent costly repairs and ensure the safer functioning of the HVAC system.
Unplugging it worked for my ex, but let’s be safe and turn off the power before testing the furnace transformer.
Turn off the Power
Prior to any electrical repair, safety measures are paramount. One of the most important steps is switching off the power. Here’s a 6-step guide:
- Locate the breaker box inside or outside your home.
- Switch off the main switch or trip the circuit breaker related to your work area.
- If uncertain about which breaker corresponds, plug in a lamp and switch off each breaker until you find the correct one.
- Once found, keep the switch in ‘off’ mode until the job is done.
- If your home is an older model without circuit breakers, locate the fuse box and unscrew all fuses related to your work area. Put them away safely before starting work; afterward, return them carefully.
- After repairing, turn on all switches or replace fuses slowly and double-check if everything works correctly before resuming normal activities.
Extra safety precautions are essential when dealing with electricity. Wear rubber gloves and other protective gear when handling live wires.
Despite minor electrical repairs, enlisting a professional electrician is recommended. An experienced electrician will ensure secure connections, free from fire risks, and maximum throughput efficiency. Before beginning, removing the furnace door can cause a lot of dust and grime to be unleashed.
Remove the Furnace Door
Before you make sure your heating system runs efficiently, it’s important to remove the furnace door. Here are the steps to do it safely:
- Step 1: Switch Off Power.
Turn off the power to the unit, to prevent any electrical accidents. - Step 2: Locate and Unscrew Latches.
Find the latches that hold the furnace door in place. Unscrew them using a screwdriver or wrench. - Step 3: Lift and Remove the Door.
Lift the door and remove it from its hinges. Place it down gently, to avoid any damage.
Be sure to keep track of all screws, bolts, and other small parts. This will stop them from getting lost.
To get the most out of your heating system, clean out any dust or debris, and check for signs of wear or damage. Regular maintenance can increase the furnace’s lifespan and save you money on repairs.
Locate the Transformer
When setting up electrical systems, it’s important to know where the transformers are. They adjust voltage levels, so it’s key to find them before starting. Here’s a four-step guide on how to do this:
- Look at Power Line Poles – Check for poles alongside the power lines. The transformers are usually on top.
- Locate Substations – If there are no visible poles, look for substations in the area. These industrial buildings contain transformers that control electricity distribution.
- Check Above-Ground Boxes – Some transformers are in metal boxes mounted to walls or above ground. Search outdoor areas or utility rooms near buildings.
- Search Underground – Transformers may be in chambers underground by roads or sidewalks…
It can be hard to locate newer model transformers, as they’re small and often hidden. To stay safe when installing or repairing, use protective gear like rubber gloves and shoes. And always turn off the power source first.
Disconnect Wires from the Thermostat
The thermostat is a must-have for the HVAC system. Disconnecting its wires can be hard, but proper prep and attention can make it easier.
Step-by-step guide:
- Safety first: Turn off power to the main HVAC system.
- Remove the cover: Unscrew and take off the front cover with a screwdriver.
- Label and remove each wire: Put labels on each wire with masking tape or separate bags. Then use pliers to pull out each wire from its terminal. Gently tug until it comes free.
- Check for any loose connections: Clean all wires and terminals of dust or debris.
Remember this: Some digital thermostats may have more than one removable section, with wires disconnected at different times.
I helped a friend with his air conditioning issue, by disconnecting the wires from his old thermostat and installing a new one. By following the same steps, we got the job done without damaging anything. Test voltage to stay safe – it’s better than not being prepared!
Test the Voltage
Testing the voltage outputted by the low-voltage transformer is crucial to ensure the proper functioning of your HVAC system. When the thermostat calls for heating or cooling, the furnace transformer provides power, and if it fails, the heating system would not start. Here are the steps to test the voltage outputted by your transformer:
- Locate the Transformer: The transformer can be found in the control box or electrical box of your furnace. Ensure the device is not connected to any power source before accessing the transformer.
- Measure the Output Voltage: For this step, you will need a DMM (Digital Multimeter) set to AC mode with a maximum range of at least 50V. Identifying the primary and secondary sides of the transformer is necessary. The 120V power source feeds the primary along with a common wire, and the secondary side generates 24V power, usually indicated by labeling on the output screws. Placing the multimeter’s probes on the secondary, as well as the common wires, should give the expected results of 24V. If the output voltage is below expected, the transformer may require replacement.
- Test the Transformer: Turn on your HVAC system and test the voltage again. If the voltage drops in one or more zones when the heating or cooling is triggered, the transformer may have a problem. The voltage drop below 23V indicates the transformer failure.
It’s also worth noting that transformer failures may result from power surges, which can occur in electrical circuits. Inspectapedia suggests automatically filtering the electrical circuit to prevent similar issues from occurring in the future.
Lastly, ensure that you perform these testing procedures with proper caution to avoid electrical shock or damage to the equipment.
Don’t wait until it’s too late. Test your transformer today to ensure your HVAC system is working at its best.
Testing the input voltage is like taking your temperature before going to the doctor – it’s an essential first step.
Test the Input Voltage
Testing input voltage is key when plugging in a device. Here’s how to do it properly:
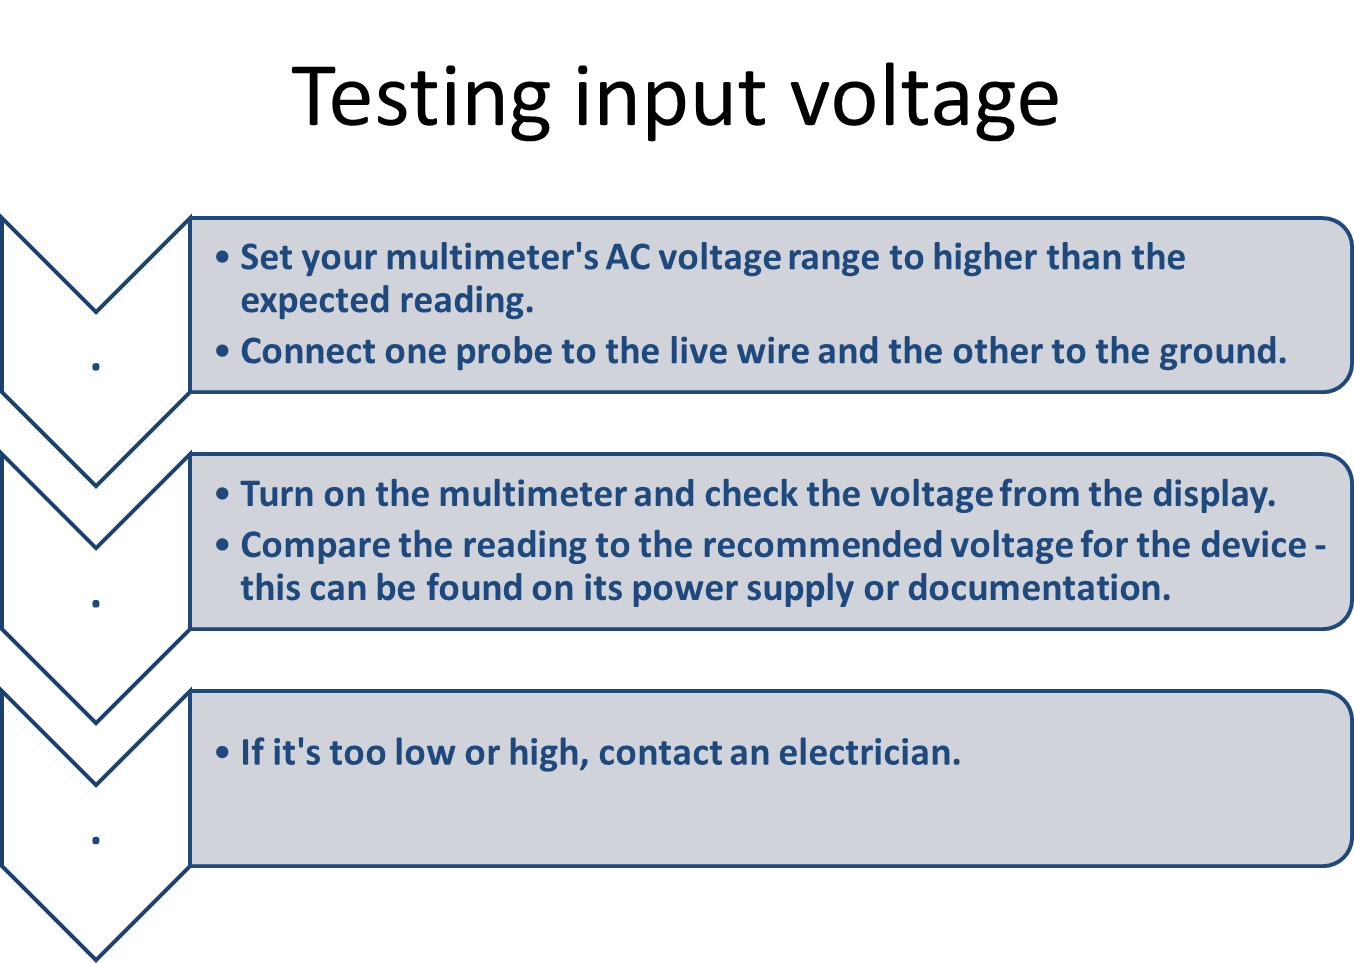
- Set your multimeter’s AC voltage range to higher than the expected reading.
- Connect one probe to the live wire and the other to the ground.
- Turn on the multimeter and check the voltage from the display.
- Compare the reading to the recommended voltage for the device – this can be found on its power supply or documentation.
- If it’s too low or high, contact an electrician.
It’s essential to note that electronic devices should only operate within their designed voltage range. Otherwise, damage or injury may occur.
David Bothamley from Electrical Exam Academy emphasizes that “voltages are regulated worldwide”.
Remember to issue a warning before testing, to keep shocks at bay!
Test the Output Voltage
Testing voltage is a must when working with electric circuits and devices. Here’s a guide to test output voltage:
- Turn off and unplug the device from the power source.
- Identify the positive and negative leads of the multimeter.
- Connect the leads to the terminals of the device or circuit.
- Select the DC voltage setting that matches the device’s expected output voltage.
- Turn on the device and check the reading on the multimeter display.
- Confirm the voltage is within the range specified for the device or circuit.
It’s vital to take safety measures – like rubber gloves, safety glasses, and being in a dry area – when handling electric equipment as it can lead to serious injury or death. Testing voltage is also used to find out what is causing malfunctions in electronic devices.
In 1882, Nikola Tesla stumbled upon alternating current while experimenting with high-frequency currents in the Parkhurst station laboratory in New York City. This discovery led to AC generators and Transformers that enabled electricity to be transmitted over long distances. Let’s hope the transformer secondary isn’t emitting too much voltage!
Test the Transformer Secondary
Transformers are a must-have in electrical systems. Checking the secondary voltage? Crucial! Let’s look at how to do it.
Test Type: Open Circuit Test – Disconnect the primary side from the line and measure the voltage and current.
Test Type: Short Circuit Test – Short the secondary side with an ammeter in series, and connect the primary side to a power source.
Trained professionals only! Plus, keep things like temperature and load in mind to assess the transformer’s performance.
Time to take action: Schedule a professional examination and testing of your transformer system. Don’t let faults or outdated tech cause harm or money loss. Check that your electrical system is up to scratch and stay ahead of potential issues.
Get ready to feel the shock of your life as we test the primary – just make sure you’re grounded first.
Test the Transformer’s Primary
Testing a transformer primary is key to guaranteeing optimal performance. Here’s how to do it in five steps:
- Disconnect the transformer from any electrical source.
- Use a multimeter to measure the resistance of the primary winding. Ensure it matches the manufacturer’s specifications. Alternatively, calculate it using ohms law.
- If you’re testing an auto-transformer, you can adjust the voltage. On the other hand, isolation transformers can’t so ensure accurate readings.
- Check if wiring is short-circuited using an Ohmmeter. Connect one lead to the frames’ unpainted metal part. Connect the other lead to a green grounding wire. The minimum rating should be 500V AC.
- Monitor inrush current – it affects the system’s electrical capacity and safety systems.
Keep in mind that testing the primary can also affect secondary functions. Think about this when analyzing your readings and calculations.
Remember: transformer tests and repairs should only be done by trained personnel. Let’s get to work and find out if the transformer is working – or just hope for the best!
Determine If the Transformer is Working
Determining the Functionality of the Transformer
To ensure that the transformer is operating correctly, several tests can be done to determine if it is working properly. These are steps that can be taken to assess the performance of the transformer.
- Check the Output Voltage
The output voltage of the transformer can be checked using a digital multimeter to verify whether it meets the required voltage. To do so, touching the DMM leads to the transformer output screws to measure the voltage. If the voltage reading is below the expected voltage, there might be a malfunction in the transformer’s secondary or primary side. - Check the Low Voltage Wires
Check to see if the low voltage wires are receiving 24V AC power from the transformer. You can use a thermostat or a Nest device to turn on the HVAC system, and then measure the voltage using a DMM. If the voltage reading is low or absent, it might be due to a broken wire or other component. - Check the Amperage
The amperage of the transformer can be inspected using a clamp multimeter. The transformer VA rating can be used to determine how much current the transformer should draw. A high amperage reading might indicate a problem with the transformer or another component in the electrical circuit.
It is crucial to keep in mind that the output voltage will drop when there is a load on the low-voltage side. Furthermore, older transformers may see a voltage drop over time.
For better performance of the transformer, ensure that the electrical circuit for the HVAC system has a filtering device for power surges. Additionally, avoid touching the wires or components inside the electrical box without turning off the power supply. It is advised to call a professional for complicated troubleshooting.
Make sure your voltage doesn’t drop like a bad beat at a poker game, check it regularly.
Check for Voltage Drop
When it comes to a transformer, it’s essential to check for voltage drop. This helps identify any issues. Here’s a 4-step guide:
- Turn off the power & disconnect the load from both sides of the transformer.
- Measure & record the voltage level at both input terminals with a multimeter.
- Measure & record the voltage level at both output terminals with a multimeter.
- Compare recorded values. If the difference is more than 10%, there may be a problem.
Regular maintenance includes voltage drop checks. This can extend the transformer lifespan & prevent unwanted equipment failure.
I’ve seen faulty transformers cause serious damage to electrical equipment. An old manufacturing facility had failed to perform maintenance checks. Result: expensive machinery was damaged beyond repair, due to insufficient power delivery from faulty transformers. Conduct voltage drop checks to avoid similar issues! If a transformer survives a power surge, it’s either a superhero or a really great machine.
Check for Power Surge
Time to inspect the transformer for failure! Check if there are any sudden power disturbances or voltage spikes. Observe if any switches or fuses have blown out. Analyze if any physical damage is caused due to shock or lightning strikes. Examine if any electronic appliances connected to the same source are working and escalating current. Troubleshoot if low-quality cables are decreasing conductivity & causing unexpected surges. Investigate if any unauthorized connections are causing shorts or overheating.
Consult with a local electrician & electricity distributor for further diagnostics. Ensure the transformer is rated for connected devices & follow installation guidelines. Inspect it periodically for signs of wear & tear. That way, you can avoid future electrical issues & prolong its life span.
Check for Transformer Failure
Transformers are essential for power systems, and their failure can cause massive disruptions. To be sure a transformer is working, follow these steps:
- Eyes on! Visually inspect the transformer for damage or leaks. This will help spot any issues that caused the failure.
- Check the output voltage with a voltmeter to make sure it meets the specs – indicating it is functional.
- Inspect the windings for signs of overheating or burning. If either is present, take the transformer out of service immediately.
- Use a megohmmeter to measure the resistance of insulating components between conductive parts – this is called the insulation resistance test.
- If all else fails, try a short-circuit test by connecting an ammeter and voltmeter across two leads of one winding. Apply a voltage to the other winding’s leads. The results will show if there are any shorts or other issues in the windings.
It’s important to note that these steps won’t always detect transformer failure completely. Consult an electrical pro for help.
For example, a power system had constant disruptions due to frequent transformer failures. After inspecting, stray currents were flowing through some transformers, overheating and failing. Proper grounding practices fixed the problem. Transformers may seem hard to fix, but finding the solution can be like finding a skyscraper-sized needle in a haystack!
Troubleshooting Transformer Problems
As an HVAC technician, understanding how to troubleshoot transformer problems is crucial for ensuring the smooth operation of heating and cooling systems. When the transformer is not functioning correctly, there can be a range of issues with low-voltage components, thermostat wires, and relays, affecting the overall performance of the system.
To test for transformer problems, start by disconnecting the power supply to the system and locating the transformer. Check the output screws and verify that the expected voltage is being produced. If you are not getting the expected voltage, use a digital multimeter to test the transformer’s primary and secondary sides.
Further, check for any loose connections or damaged wires that may be impacting the transformer output. It is also essential to inspect the heating system’s zones and components, including circulator pumps, zone valves, and flame sensors, which may draw too much current and cause the transformer to fail.
To avoid transformer failure, replace old Honeywell transformers with new ones, protect the electrical circuit by installing a power surge protector, and filter the line voltage. Taking regular notes, photographs, and recording the expected outputs will help you identify issues early on and save time in the long run.
Without proper knowledge of how to troubleshoot transformers, your HVAC system may operate at a lower efficiency, consume too much electricity, or even fail. Ensure you are testing the transformer and other system components correctly to avoid any problems.
My thermostat wires are like my exes, always causing problems and in need of good testing.
Check the Thermostat Wires
The wires of the thermostat in a transformer system are vital for keeping the building temperature stable. If these wires are broken or damaged, it can cause lots of problems. Here’s how to check them for any issues:
- Use a Screwdriver – Turn off the power and open the thermostat cover with a screwdriver.
- Inspect the Wires – Look at each wire connection, making sure they’re tight. If not, tighten them gently.
- Use a Multimeter – A multimeter can check that current is flowing through the wires.
Remember, some other heating problems might be mistaken for thermostat issues. So if you’re not sure, it’s best to talk to an HVAC expert.
Check the Electrical Circuit
When troubleshooting transformer problems, it is essential to start with the electrical circuit. To guarantee its proper performance, an extensive inspection of the circuit is mandatory. Here’s a straightforward 5-step guide to help you check your electrical circuit:
- Check all connections and wiring are securely attached.
- Use a digital multimeter to measure the voltage of the primary and secondary sides of the transformer.
- Look for physical damage, and signs of wear in wires or insulation that might be influencing secondary voltage output.
- If there are internal fuses, check for continuity using a multimeter.
- Examine all peripheral components such as fuses and contactors for visible signs of damage or overheating.
It’s worth noting that measuring the input and output voltages of your transformer can help detect problems. Also, always make sure all power sources are disconnected before inspecting inside components.
Pro Tip: Frequently examining your electrical circuits can prevent future complications and detect underlying issues early. Don’t forget to check your zone valves regularly too – it prevents any jealousy issues.
Check the Zone Valves
If your transformer is having problems, checking the zone valves is essential. These valves control heating and cooling in different parts of a building. Malfunctioning valves can cause issues for your transformer. To troubleshoot the zone valves, take these steps:
- Switch off the power supply to the transformer.
- Examine all zone valves for damage or wear and tear.
- Use a multimeter to see if the valve is getting and sending power.
- Repair or replace any faulty valves before turning the power back on.
Don’t manually force the valves open or closed as it could cause more damage. You should be aware that zone valves can get clogged with dirt or debris. Regular maintenance is vital for proper functioning. Pro Tip: If you still have issues with your transformer, ask for help from a licensed electrician. They have the knowledge and tools to fix complex electrical problems. Pro tip: If your flame sensor is on fire, get help immediately!
Check the Flame Sensor
Transformers may have trouble due to the flame sensor. To guarantee the good operation of transformers, it’s important to check the flame sensor regularly. Here’s how:
- Stop the power supply first.
- Spot the flame sensor probe and detach it.
- Look for any visible harm, such as breaks or bends.
- Scrub the probe with fine-grit sandpaper or emery cloth.
It’s essential to remember that inspecting the flame sensor is just one part of transformer maintenance. Regular cleaning and inspection are also necessary to stop issues in the future.
Pro Tip: If you’re uncertain about performing any maintenance on your transformer, it’s best to ask a professional. Safety should be the number one priority. Resetting the switch is like hitting snooze on a faltering transformer’s alarm.
Check the Reset Switch
Transformers are important devices that evenly distribute electricity. To dodge electric dangers, you should learn how to detect transformer problems. One way is to examine the reset switch.
Here’s a 4-step guide on how to assess the reset switch:
- Spot the reset button; it’s usually close to the circuit breaker.
- Push the button firmly. If doing it right, you’ll sense a ‘click.’
- If no clicking occurs, wait a couple of minutes before pressing it once again.
- If your transformer still doesn’t work, call an electrician for more assistance.
In addition, make sure there are no tripped breakers or fuses. Check the wiring and insulation to make sure everything is okay.
Pro Tip: Always guard yourself when handling electricity. Wear insulated gloves and goggles to avoid electrocution and eye injuries. If your transformer requires replacement, stay cool and transformer on!
Replacing the Transformer
Replacing the Low Voltage Transformer in Your HVAC System
In case of transformer failure or any other problem with the unit, replacing the low-voltage transformer in your HVAC system is an option. Here’s how to do it:
- Turn off the Power: Before you replace the transformer, ensure you have turned off all the power supply. Use a digital multimeter to check that no power is running to the wires.
- Disconnect the Wires: Remove the wires connected to your old transformer and note down the wiring connections, so you know which new wires go where.
- Connect the New Transformer: Mount the new transformer in place. Next, connect the wires to the new transformer and then power the system back on.
- Test It: Use a multimeter to measure the output voltage from the transformer. The expected voltage should be around 24vac. If the reading from the transformer is correct, move on to testing the thermostat. If not, troubleshoot the problem before you proceed.
It’s important to note that while replacing the transformer, keep the electrical circuitry of the HVAC system in mind. Ensure you understand the details of the component and how it connects to other parts like relays, compressors, zone valves, circulator pumps, and zone valves.
Don’t delay replacing a faulty low-voltage transformer as it can cause a power surge and damage the system. By following these steps, you can replace your low-voltage transformer and enjoy proper heating and cooling again.
Removing the transformer may seem daunting, but it’s nothing a little unplugging and unscrewing can’t fix.
Remove the Transformer
Removing a transformer from electronic devices is essential. Do it with caution. Understand the device’s tech specs for accurate removal. Follow these 6 steps:
- Turn off all power and disconnect from the wall outlet.
- Take off the outer cover with the right tools.
- Locate and identify the transformer. Refer to online resources or experts.
- Disconnect wires without damaging other components.
- Unscrew and remove from the socket.
- Clean up any residue or debris left behind.
Be careful. Use appropriate tools and protective gear. Dispose of it in an eco-friendly way. Reuse in another similar appliance too. Label wires, they said. Easy, they said. But a spaghetti bowl of confusion awaits!
Label the Wires
Before replacing the transformer, it’s key to label the wires. This’ll make connecting them back up simple.
- Switch off the power – First, make sure the power is off. To avoid shock and equipment damage.
- Identify wires – Discover each wire connected to the transformer and where they lead.
- Label wires – Use masking tape and a marker to label each wire with its connection point. Color coding can be useful too.
- Disconnect wires – Label the wires, then disconnect them by loosening or unscrewing the terminals. Notice any special connectors that may need extra handling.
For additional help, take pictures of the connections before removing them, and label both ends of longer wires.
It’s wise to consult your equipment’s manual, or a pro, if unsure about identifying or labeling any particular wire.
Electrical Engineering Journal discovered 33% of electrical fires in homes come from wrong wiring. Let’s hope this new transformer doesn’t turn into a Decepticon!
Install the New Transformer
Installing a new transformer can be tricky. But have no fear! Here are three steps to help you out:
- Make sure the power supply is off. This is critical for safety.
- Carefully remove the old transformer. Unscrew and disconnect any wires or cables.
- Position the new transformer. Attach wires and cables. Screw in tightly.
Remember, different transformers have different installation guidelines. Follow the instructions from your manufacturer.
Check all connections before switching on the power supply. Otherwise, you may damage the system or yourself.
Transformers require testing to prevent electrical disasters. So don’t forget to double-check!
Test the Transformer
Transformers are key parts of many electrical setups. To keep it running optimally, testing is a must. A table can record essential data during testing – like voltage, current, and other parameters for the transformer. So, using this method, you can make sure the transformer works properly while avoiding breakdowns.
Remember, different transformers need different test criteria. Relying on generic steps may not be enough. So, always follow the manufacturer’s instructions and test procedures.
Don’t let system failure happen due to an unchecked transformer! Regular maintenance with testing is essential to ensure electrical systems keep running. Make sure your transformers are in great shape by testing them as per industry standards and manufacturer directions.
Conclusion
Testing a furnace transformer? Key steps to follow!
- Check the input voltage. Make sure it’s correct.
- Use a digital multimeter to test the output voltage.
- If it’s too low, replace the transformer.
- Different transformers will have different voltages. A 24V transformer should have an output of 24 volts.
- Keep an eye out for any unusual readings or symptoms. Tripped breakers or blown fuses could indicate trouble.
- To prevent transformer failure, get surge protectors and line filters.
- Make sure your system is grounded and well-maintained too.
Follow these tips and take proper care of your HVAC system. Keep your furnace transformer running smoothly for years!