
Table of Contents
To understand why a water heater may not drain, let’s dive into the basics. A water heater drain is a crucial component that allows you to empty the tank, ensuring proper maintenance.
Regular water heater maintenance is essential to prevent issues. In this section, we’ll explore the definition of a water heater drain and highlight the importance of regular maintenance for optimal performance.
Key Takeaways
- A clogged drain valve is a common cause of a water heater not draining properly. This can occur due to sediment buildup or a faulty valve.
- Another possible cause is a blocked or kinked drain hose. It is important to ensure that the hose is free from any obstructions or bends that may prevent water from flowing out.
- A malfunctioning pressure relief valve can also prevent a water heater from draining. This valve is designed to release excess pressure, but if it is not functioning correctly, it can create a blockage in the draining process.
- In some cases, a faulty or damaged heating element can cause a water heater not to drain. This can occur if the element is corroded or if there is an electrical issue.
- Regular maintenance and flushing of the water heater can help prevent drainage issues. Flushing the tank annually can help remove sediment and prevent clogs in the drain valve.
- If a water heater is not draining properly, it is recommended to consult a professional plumber to diagnose and fix the issue. Attempting to fix the problem without proper knowledge or experience can lead to further damage or safety hazards.
Water heater drain
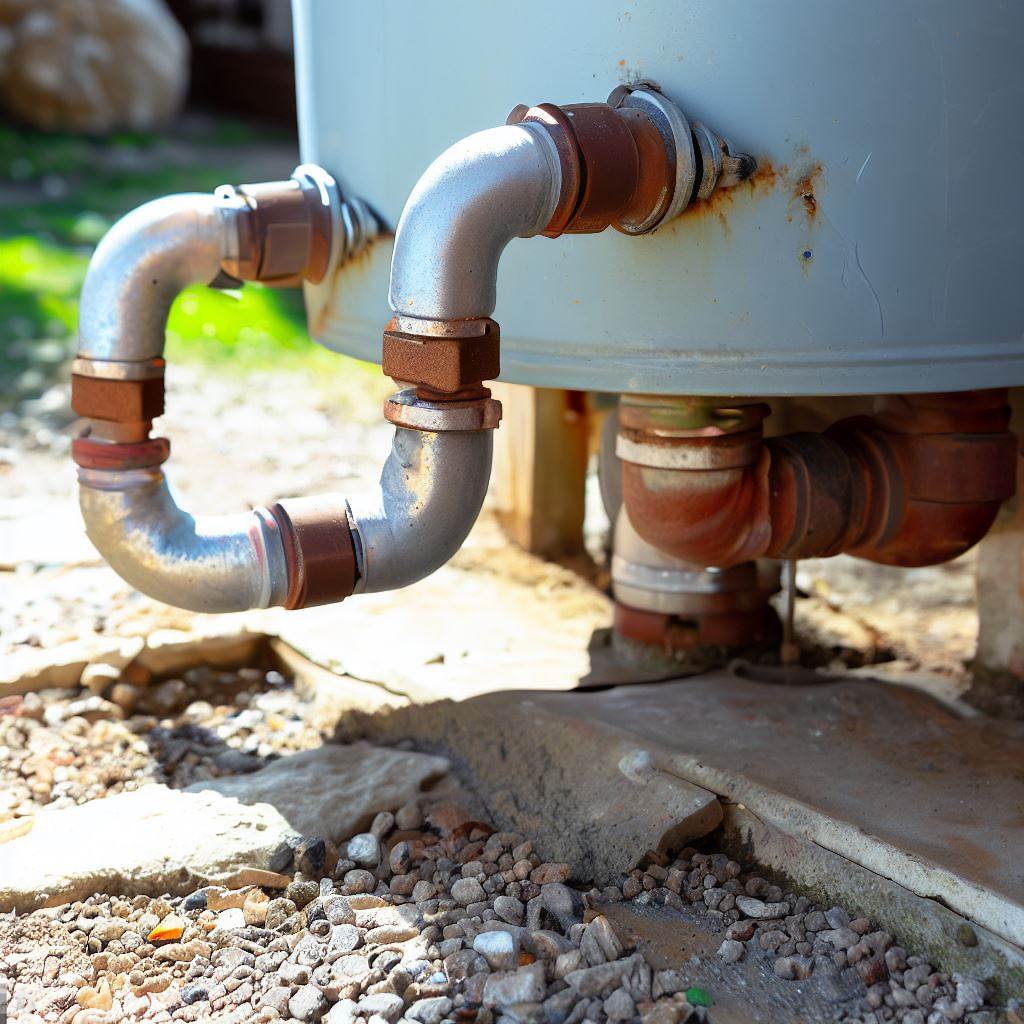
A water heater drain is important. It lets out sediment and debris. This stops clogs and makes the water heater last longer and work better.
Understand why this is important. Over time, calcium deposits and rust can form at the bottom of the tank. This insulation stops heat from getting to the water. This reduces efficiency and can cause damage to the parts inside.
To keep the water heater working, flush it out regularly. This removes sediment and helps the heat transfer better. It also saves energy.
Tips:
- Make a plan to flush out your water heater at least once a year.
- Turn off the power or gas before doing any maintenance.
- Connect a hose to the spout to make draining easier.
By following these tips, you save time, money, and hassle in the long run. Maintenance is key. It’s like flossing for your home – do it or regret it.
Importance of regular water heater maintenance
It’s essential to maintain your water heater regularly in order to keep it running optimally and for a long time. Neglecting this can lead to decreased heating efficiency, more energy use, and even safety hazards. To stay on top of things and keep your water heater in great shape, take note of these tips:
- Flush it periodically. This helps remove any sediment buildup that affects its efficiency. Plus, it increases heat transfer, reducing energy waste and prolonging your appliance’s lifespan.
- Check the anode rod. This sacrificial component attracts corrosive elements. Replace it if it’s deteriorated significantly.
- Monitor the temperature settings. Doing this ensures your water heater works within safe parameters. High temps not only waste energy but can also cause scalding or tank damage.
- Inspect for leaks. Catch potential issues early on. This prevents water damage and expensive repairs or replacements.
Also, newer models of water heaters have self-diagnostic features that alert you to any malfunctions. Plus, getting professional annual inspections is recommended to discover hidden problems.
To optimize your water heater maintenance, consider these:
- Install a pressure relief valve. This stops too much pressure from building up inside the tank, avoiding the risk of explosion or severe damage.
- Insulate exposed pipes. This minimizes heat loss during transportation, raising efficiency and reducing energy wastage.
- In areas with hard water, use a water softener. This prevents mineral buildup in the tank and on heating elements.
By following these tips, you can make sure your water heater runs efficiently and reliably. Regular maintenance not only saves you money but also gives you peace of mind. Start now!
Common Causes of a Water Heater Not Draining
To solve the problem of a water heater not draining, let’s explore the common causes. First, a clogged drain valve can hinder proper drainage. Secondly, sediment buildup in the water heater tank is another culprit. Lastly, there may be other possible causes and troubleshooting steps to consider. Let’s dive into each of these sub-sections to understand the solutions for a smoothly functioning water heater.
Clogged drain valve
Your water heater not draining? A clogged drain valve could be the culprit. It can prevent water from flowing, causing potential issues with your water heater. Here’s a 6-step guide to help you out:
- Safety first: Turn off the power supply.
- Locate the drain valve: It’s usually near the bottom of the tank. A brass or plastic valve with a handle or knob.
- Attach a hose: Connect one end of a garden hose to the valve. Make sure it’s tight.
- Open the valve: Turn knob counterclockwise or pull up on the handle. Hot water will start releasing from the tank.
- Flush out debris: Let the hot water flow through the hose for several minutes. This flushes out any sediment or debris that could be blocking the valve.
- Close and test: Turn the valve clockwise or push down on the handle firmly. Test by turning on your faucet. Hot water should flow properly.
Routine maintenance can also help prevent or resolve clogged valves. Sarah, a homeowner, experienced this issue when her shower lacked hot water. She discovered her water heater had a clogged drain valve. Following the steps, she was able to clear the blockage and restore her water heater’s functionality.
Clogged drain valves can be a common culprit behind water heaters not draining correctly. Follow the steps and perform routine maintenance to keep it running smoothly.
How the drain valve can get clogged?
A water heater’s drain valve can become clogged for various reasons. Minerals and debris may settle at the bottom of the tank over time, resulting in sediment buildup around the valve and obstructing its flow. Rust or corrosion can also cause flakes of rust or debris to accumulate and block the drainage path. Plus, if the water heater has been inactive for a while, the stagnant water inside the tank can contribute to clogging issues.
To keep things running smoothly, regular maintenance is key. Flush out the tank periodically to remove sediment and keep clogs at bay. Installing a sediment filter or using a water softener system can also help reduce mineral buildup and extend the water heater’s lifespan.
Steps to unclog the drain valve
Clogged drain valves can cause problems with water heaters. Here’s a guide to unclog it!
- Firstly, turn off the power supply to prevent any accidents.
- Secondly, attach a hose to the drain valve at the bottom of the water heater. Make sure the other end is placed where you want the water to drain out.
- Next, open the valve by turning it counterclockwise, allowing water and debris to flow out through the hose.
- Be patient! Let all the water empty out completely before closing the valve and disconnecting the hose.
Regular maintenance like flushing out your water heater can help prevent future clogs! Additionally, neglecting to clean the water heater’s drain valve can lead to decreased efficiency and a shorter lifespan. HomeAdvisor experts suggest regular maintenance for optimal performance and longevity of your water heater.
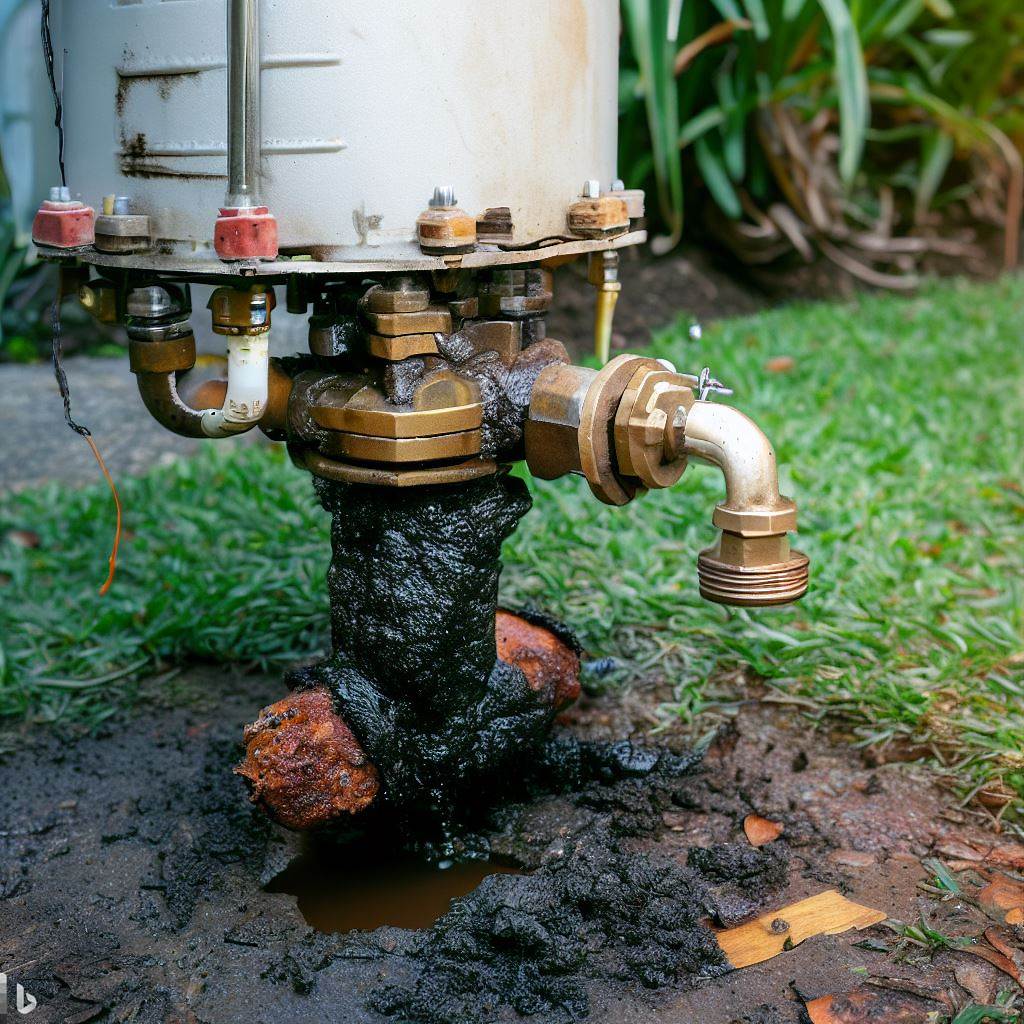
Sediment buildup in the water heater tank
Sediment in your water heater tank can cause issues. It is made up of minerals & debris from the water supply. As the water heats, the particles settle at the bottom of the tank, forming a sediment layer. This can cause problems:
- It reduces the efficiency of your water heater, as the layer acts as an insulator, stopping heat transfer & making it harder for the heating element to warm up the water. The water heater has to work harder and longer to reach & stay at the desired temperature.
- Also, sediment buildup can block or restrict drainage. Over time, the accumulation can clog the drain valve or pipes connected to the water heater. When you try to drain the tank, you may find difficulty or only small amounts of water draining.
Periodic flushing of the water heater can help. Drain a few gallons from the tank using the drain valve to flush out any debris.
One Texan homeowner experienced drainage issues due to sediment buildup. There was reduced hot water flow & a plumber found years of neglect led to a lot of sediment in the tank. After cleaning & flushing, the drainage issue was fixed & the hot-water system worked efficiently again.
Maintaining your water heater extends its lifespan, helps with energy efficiency, & gives you consistent hot-water. Address sediment buildup promptly with regular maintenance & professional help when needed, to avoid potential drainage issues & have reliable hot-water in your home.
How sediment buildup can affect the draining process?
Sediment buildup in a water heater can be a problem. It accumulates over time, settling at the bottom of the tank and clogging the drain valve. That stops efficient emptying and creates a thermal barrier, meaning the water heater has to work harder and use more energy.
Flushing is the answer! Connect a hose to the drain valve and let the water flow until it runs clear. Do this annually or biannually to keep your water heater working optimally.
Steps to remove sediment from the water heater tank
To get rid of all that sediment, follow these simple steps:
- Shut off the power supply to the water heater and let it cool down.
- Find the drain valve at the bottom of the tank and connect a hose to it.
- Put the other end of the hose in a suitable drainage area or a utility sink.
- Open the drain valve and let all the water out.
Once you do these things, your water heater will be free from sediment buildup.
Other possible causes and troubleshooting steps
- Verify if the drain valve is fully open by turning it clockwise. If partially open, it can hinder drainage.
- Clear any blockages in the drain pipe using a plumber’s snake or by breaking up debris with a garden hose.
- Check if the pressure relief valve is working properly. Test by lifting the lever and seeing if water flows freely from the discharge pipe.
- Look for sediment buildup in the tank, which can slow draining. If present, attach a hose to the tank’s drain valve and flush the sediment out.
- Make sure to shut off the main water supply to the heater before attempting any troubleshooting steps.
In case your drain valve is clogged, your water heater might be like all those ex’s love letters you can’t throw away.
Reverse flow or stuck debris in the drain valve
A water heater not draining? Reverse flow or stuck debris in the drain valve might be the cause. Here’s the scoop:
- Reverse flow happens when there’s an obstruction in the valve, making water flow back into the tank.
- Stuck debris like sediment or mineral buildup can block the valve and stop water from leaving.
- Reverse flow and blockage can reduce efficiency of the heater and cause damage if left alone.
- Regular maintenance like tank flushing or drain valve cleaning can help prevent these issues.
To fix the problem, inspect and replace any faulty or damaged drain valve parts. Proactive maintenance will decrease the chances of drainage issues.
Issues with the water supply valve or hot water faucet
Issues with the water supply valve or hot water faucet can be a major inconvenience when draining your water heater. Here are some possible causes:
- The water supply valve may be stuck or partially closed. Make sure it’s fully opened and turn it off/on a few times to remove debris.
- A single-handle faucet’s cartridge can wear out or clog, resulting in poor water flow. Check the manufacturer’s instructions for replacing the cartridge.
- Galvanized pipes in older homes can become corroded or blocked. Contact a plumber to inspect & replace deteriorated pipes.
- A faulty pressure regulator can restrict water flow. Have a licensed plumber assess & replace any faulty regulators.
- Sediment or mineral deposits can clog the hot water faucet aerator. Remove & clean it with vinegar or a descaling solution.
- New plumbing fixtures or appliances may require more water than your system can handle. Consult a plumber for upgrading your water supply lines.
Flush your hot water system at least once a year to prevent sediment buildup. Address any issues promptly to avoid further complications. Contact a plumber or take action yourself for a hassle-free experience.
Problems with the relief valve or gas supply (for gas water heaters)
If you possess a gas water heater and have drainage issues, it could be due to the relief valve or gas supply. These components are vital for the water heater to operate. A faulty relief valve can cause a build-up of pressure and hinder the draining process.
Also, the gas supply is necessary for heating the water inside the tank. If there are issues with the gas supply, such as a leak or an ill-connected line, it can hinder the performance of your water heater, including drainage.
Additionally, a malfunctioning gas control valve can also lead to drainage problems. This valve regulates the flow of gas into the burner assembly. If it does not open correctly, it can impede proper drainage.
Moreover, inadequate ventilation in the area where your water heater is located can impact its performance. Without proper ventilation, gases produced during combustion may not be expelled efficiently, resulting in decreased efficiency and potential drainage issues.
No matter the brand or model of gas water heater, many homeowners have faced similar issues with the relief valve or gas supply. Hence, drain your water heater like a pro with this step-by-step guide!
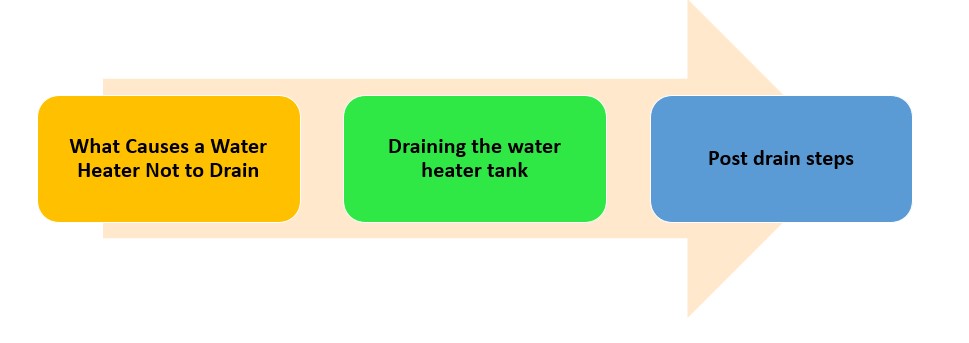
Step-by-Step Guide to Drain a Water Heater
To efficiently drain your water heater and tackle the issue at hand, let’s follow a step-by-step guide. Begin with the preparation phase, move on to draining the water heater tank, and finish with the post-drain steps. By following these outlined sub-sections, we will ensure a smooth process and address any potential problems that may arise.
Preparation
- Shut off the power to the water heater – either with a circuit breaker, or the corresponding switch.
- Turn off the cold water valve near the top of the heater.
- Test the pressure relief valve by lifting its lever and then releasing it – it should let some water flow. If not, replace it.
- Connect a garden hose to the drain valve at the bottom of the tank and place the other end in a drainage area or nearby floor drain.
- Open all hot water faucets to let air in, and for drainage.
- Double-check you have all the tools ready – like a wrench and bucket.
Turning off the power supply for electric water heaters
Powering down electric water heaters is a must before starting maintenance. Safety and avoiding accidents come first. Here’s a 6-step guide to assist you:
- Locate your electrical panel. It’s usually in the basement, utility room, or garage.
- Find the water heater breaker. Scan the circuit breakers and look for the one labeled for the water heater.
- Flip the switch. Move the water heater breaker to “off” to break the power supply.
- Double-check power interruption. Test hot water faucets in your home. No hot water equals no electricity.
- Take extra precautions. Put up a tag or note near the breaker box to remind everyone no power should be restored till it’s safe.
- Ensure proper grounding. Make sure your electric water heater is grounded. If not, call a pro.
Safety is key to prevent any harm or damage. Taking extra precautions increases safety and guards against potential hazards, like fires or electrocution. It’s better to be safe than sorry! Follow safety guidelines, be cautious, and get help if needed. Have fun and stay safe!
Turning off the gas supply for gas water heaters
Turn off the gas for gas water heaters? Absolutely! Here’s how:
- Locate the gas valve. It’s usually near the bottom of the water heater. It’s a knob or lever that controls the flow of natural gas or propane.
- Turn off the gas valve using a wrench or your hand. Turn the knob or lever clockwise to shut off the gas supply. Make sure it’s fully closed to prevent any leaks.
- Verify that the gas is off. Light a nearby burner on your stove or use a handheld electronic gas detector near the water heater. If the detector doesn’t pick up any gas, you’ve successfully turned it off.
- Leave the pilot light on (optional). If your water heater has a standing pilot light, you can opt to leave it on. But for extra caution, you can turn it off by following the manufacturer’s instructions.
- Drain the water heater. Now that the gas is off, you can start draining your water heater. Follow the appropriate methods outlined in this guide.
Remember, turning off the gas supply is key for safety. Follow these steps carefully, and you’ll have a smooth and safe process of draining your water heater.
Draining the water heater tank
- Cut off power supply: Before you start draining, switch off the power to the water heater. This is to avoid any accidents.
- Find the hose connection: Look for the drainage valve. It’s usually near the bottom of the tank. Securely attach a garden hose to it.
- Open drainage valve: Once the hose is connected, open the valve. This will release built-up sediment and minerals. Let all the water drain out via the hose. It might take a while to drain all the water, depending on pressure and sediment. When the water is all gone, close the valve.
Draining your water heater helps remove harmful sediment and make it work better. Neglecting this could lead to expensive repairs later.
For years, draining water heater tanks has been a common practice. This simple technique helps make it last longer and perform better.
Connecting a water hose to the drain valve is an art. Plumbers are experts at creating both pipe connections and emotional connections with their readers.
Connecting a water hose to the drain valve
Connecting a water hose to the drain valve is key to draining a water heater. This helps dispose of sediment and optimizes performance. Here’s how:
- Find the drain valve near the bottom of the tank.
- Set up a water hose long enough to reach an outdoor drain.
- Connect one end of the water hose to the drain valve securely.
- Place the other end of the hose over the drainage area or in a bucket.
Do these for safety and convenience:
- Turn off power first.
- Wear gloves and eye protection when handling hot water.
- Open a hot water faucet before draining.
- Monitor the drainage flow rate.
By following these steps and tips, you can easily connect a water hose to the drain valve. Enjoy the water fountain-like show while draining your water heater!
Opening the drain valve and allowing the water to flow
To drain your water heater, you must open the drain valve. This lets the water flow out, getting rid of sediments and keeping the system working properly.
- Look for the valve at the bottom of the tank.
- Attach a garden hose to it securely.
- Make sure the other end of the hose goes to a suitable place like a floor drain or outdoors.
- Gently turn the valve counterclockwise until you hear the water flowing through the hose.
Be careful when turning the valve – don’t rush. Keep an eye on the draining process and adjust if needed.
Draining the water heater has been done for years to get the best performance and a long lifespan. So say goodbye to those pesky sediments!
Flushing the tank to remove sediment
Flush your tank to keep your water heater efficient and going strong! Sediment buildup can cause problems, so here’s a step-by-step guide to help you flush it out:
- Turn off the power – for your safety.
- Locate the drain valve – likely plastic or brass, with a handle or knob.
- Connect a hose – one end to the drain valve, the other to an appropriate drainage spot.
- Open the pressure relief valve – to allow air in for proper drainage.
- Drain slowly – open the drain valve counterclockwise with pliers or a wrench. Allow the water to flow out until clear.
- Close valves and refill – once done, turn on cold-water supply and power to fill and reheat.
Tips:
- Flush yearly to prevent sediment buildup.
- Follow manufacturer instructions, wear protective gloves, and be cautious of hot water.
- If unsure, consult a qualified plumber.
By taking these steps, you’ll enjoy optimal performance and a longer lifespan – plus, avoid costly repairs or replacements!
Post-drain Steps
- After draining the water heater, do a few post-drain steps to keep it working.
- Close the drain valve to avoid leaks and maintain efficiency.
- Turn on the cold water supply valve. Wait till the air bubbles stop.
- Once full, reconnect the power or relight the pilot light.
- Remember to check for leaks or strange sounds after.
Closing the drain valve and disconnecting the water hose
When draining a water heater, closing the drain valve and disconnecting the water hose is key. Here’s how to do it:
- Locate the valve at the heater’s bottom. It usually has a handle or knob.
- Turn it clockwise to close. Use caution; hot water may be inside. Allow it to cool, if needed.
- After closing the valve, loosen connections or clamps to remove the hose. Safety is important; wear gloves and eyewear.
- Refer to the manufacturer’s instructions.
- Also, regular maintenance can extend its lifespan. Flush annually and do routine tasks.
Refilling the water heater tank
Refilling the water heater tank is essential for proper functioning. To do this, follow these steps:
- Turn off the cold water supply. Locate the shut-off valve near the top of the tank and turn it clockwise.
- Open a hot water faucet fully to relieve pressure in the tank.
- Connect a garden hose to the drain valve at the bottom of the tank.
- Open the drain valve to release the old water. Put a bucket or container under this area before opening.
- Refill the tank with fresh water. Wait until you see a steady flow of clear water from your hot water faucet before closing it.
Spitting noises may occur when air pockets are released. Refilling the tank helps remove sediment buildup and maintains optimal performance.
Neglecting this task can lead to reduced efficiency, higher energy bills, or even damage. Don’t miss out on the benefits of a well-maintained water heater system!
Relighting the pilot light for gas water heaters
Relighting the pilot light of a gas water heater is key for proper functioning. It’s not hard – just follow these three steps!
- Shut Off Gas Supply: Find the gas control valve and switch it to “off”.
- Access Pilot Light: Remove covers or panels that block the pilot light. You may need a screwdriver or wrench.
- Relight Pilot Light: Use a long-reach lighter or fireplace match to ignite the pilot light. Hold the reset button or knob for one minute – this keeps gas flowing and a steady flame.
Relighting the pilot light ensures proper operation and prevents issues like cold showers or no hot water.
In the 20th century, people moved away from wood-burning stoves and boilers and embraced gas-powered appliances with automatic ignitions. But the concept of relighting pilot lights has been around for decades – homeowners had to manually ignite gas appliances with matches or lighters.
Expert Advice for Preventing Future Drainage Issues
To prevent future drainage issues with your water heater, it’s essential to follow expert advice. Regular maintenance and flushing schedules, checking and cleaning the drain valve regularly, and monitoring water quality to address sediment buildup are crucial steps to ensure proper drainage. By implementing these solutions, you can keep your water heater functioning optimally and avoid potential clogs or blockages in the future.
Regular maintenance and flushing schedule
Inspect and clean drains regularly. Flush with hot water and vinegar/baking soda to break down residue. Use enzymatic cleaners once a month. Look out for slow drains or odors. Consider professional cleaning yearly. Educate yourself on proper disposal – no grease, oil, or food waste down the drain!
Also, don’t forget about hidden pipes and connections. Regular maintenance and flushing is key – don’t wait until it’s too late. Avoid costly repairs and inconveniences by taking action now!
Checking and cleaning the drain valve regularly
Checking and cleaning the drain valve regularly is important for stopping future drainage problems. This task keeps water flowing and stops blockages that can cause pricey repairs. Here’s a step-by-step guide to effectively check and clean the drain valve:
- Find the drain valve, which is usually near the bottom of your plumbing system.
- Shut off the water supply to your plumbing system to avoid any accidents or flooding.
- Use a wrench or pliers to turn the drain valve cap counterclockwise and take it off carefully.
- Look for debris, sediment, or mineral buildup in the drain valve. Clean it using a brush or cloth.
It’s worth noting that different systems may have various drain valve designs. Therefore, look at your system’s user manual for instructions tailored to your setup.
Apart from regular maintenance, there are some special points worth thinking about when checking and cleaning the drain valve.
For example, if you spot a lot of sediment or mineral buildup, you may need to flush out your entire plumbing system occasionally.
By following these steps and considering extra preventative measures like filters, you can make sure your drain valve stays clean and working, reducing the risk of drainage problems in the future.
Monitoring water quality and addressing sediment buildup
Keeping watch on water quality is a must for preventing drainage issues. Take these steps for better protection:
- Inspect water regularly to notice any signs of sediment buildup.
- Take samples and test the water’s chemical composition, pH levels and pollutants.
- Figure out potential sources of contamination, such as soil erosion, construction or industrial sites. Take action quickly.
- Put up erosion control techniques like buffers, silt fences or walls to stop soil erosion and lessen sediment runoff.
- Stick to a schedule for inspecting and cleaning drainage systems.
- Consider setting up filtration systems like stormwater ponds or bioswales to reduce sediment load and improve water quality.
Also, talk to experts in environmental engineering or hydrology for extra advice on monitoring water quality and dealing with sediment buildup.
Frequently Asked Questions
1. What causes a water heater not to drain?
A water heater may not drain due to a clogged or malfunctioning drain valve. Sediment and mineral deposits may accumulate over time, blocking the valve and preventing proper drainage.
2. How can I fix a water heater drain valve that is not working?
You can try using a stiff wire to clear any blockages in the valve. Insert the wire and gently push it back and forth to dislodge any sediment. Alternatively, you can replace the drain valve if it is damaged or beyond repair.
3. What should I do if the water heater does not drain even after opening the drain valve?
If the water heater does not drain, you can try connecting a garden hose to the drain valve and directing the water flow into a floor drain or outside. This reverse flow method can help dislodge any stubborn debris and facilitate drainage.
4. Can I use a water faucet to help drain the water heater?
No, using a hot water faucet to drain the water heater is not recommended. Opening a hot water faucet can create a vacuum and slow down the draining process. It is best to rely on the drain valve or the reverse flow method.
5. Are mineral deposits a common reason for a water heater not draining?
Yes, mineral deposits and sediment can accumulate at the bottom of the water heater tank over time. These deposits may clog the drain valve or obstruct proper water flow, causing the water heater not to drain effectively.
6. Should I seek expert advice if my water heater does not drain?
If you have tried the DIY methods mentioned above and your water heater still does not drain, it is advisable to seek expert advice. A professional plumber or technician can assess the problem accurately and recommend the best course of action for your specific situation.
Conclusion
Draining a water heater? Frustrating! Causes? Check! Faulty drain valve? Yep! Sediment build-up? Reverse flow of water? Mineral deposits clogging the drain valve? Clogged hot water faucet? Cold water supply? All issues to consider.
DIY solutions: Stiff wire, coat hanger, garden hose, bucket & hot water faucet. Expert advice? Advice not taken? Replace the drain valve. No relief valve? Don’t attempt repairs without guidance.
References :