
Table of Contents
Requirements for Water Heater Installation
Water heater installation requires meeting certain requirements to ensure proper functioning and safety. Here is an overview of the necessary factors to consider:
| Factors | Description |
|---|---|
| Permits | Check local codes and regulations to determine if a permit is required. |
| Certification | Hiring a certified plumber ensures the installation meets regulations and standards. |
| Cost | Plumbers may charge varying fees for water heater installation. Request quotes from multiple professionals. |
| Plumbing and Gas Supply | Adequate plumbing and gas supply lines are crucial for proper functioning. Consult a trained professional for installation. |
| Venting | Proper venting is crucial to remove exhaust gases. It is recommended to hire a professional for this task. |
| Electrical Connections | Knowledge of electrical wiring and connections is essential for electric water heaters. Hire a licensed electrician if necessary. |
| Water Lines | Water lines must be connected correctly, and any leaks should be checked and fixed. Use an adjustable wrench to make the connections. |
| Relief Valve | Installing a relief valve helps prevent excessive pressure buildup. Follow manufacturer instructions for proper installation. |
| Drain Pan | A drain pan helps prevent water damage in case of leakage. Consider installing one beneath the water heater. |
By following these guidelines and consulting professionals as needed, you can ensure a successful and safe water heater installation.
Choosing between electric or gas water heaters is like deciding between a mild shock or a fiery explosion for your morning shower.
Key Takeaways
- The first key takeaway is that installing a water heater requires several tools and materials. These include a water heater, a water heater stand, a pipe wrench, a pipe cutter, a tape measure, a level, pipe fittings, Teflon tape, a gas line, a vent pipe, and a flue baffle.
- The second key takeaway is that it is important to choose the right size and type of water heater for your needs. Factors to consider include the size of your household, the number of bathrooms, and your hot water usage patterns.
- The third key takeaway is that before installing a water heater, you should check local building codes and obtain any necessary permits. It is also recommended to consult a professional plumber to ensure that the installation is done correctly and safely.
- The fourth key takeaway is that the installation process involves several steps, including turning off the water and gas supply, draining the old water heater, disconnecting the pipes and gas line, removing the old water heater, installing the new water heater on a stand, connecting the pipes and gas line, and testing for leaks.
- The fifth key takeaway is that after the water heater is installed, it is important to properly maintain it to ensure its longevity and efficiency. This includes regularly checking the pressure relief valve, flushing the tank to remove sediment buildup, and inspecting the anode rod for corrosion.
Water Heater Options: Electric Vs. Gas
Electric and gas are the two main choices for water heaters. Let’s explore the details. Here’s a comparison table:
| Electric Water Heater | Gas Water Heater |
|---|---|
| Powered by electricity | Natural gas or propane |
| Lower upfront cost | Higher upfront cost for installation requirements like vents and gas lines |
| High energy efficiency | Lower energy efficiency than electric water heaters |
| Requires less space | Needs more space for vents and gas lines |
| May need larger electrical supply | Access to natural gas or propane line |
Electric water heaters are generally simpler to install since you don’t need extra connections for gas lines or ventilation. Gas water heaters may be cheaper in the long run if you already have access to natural gas or propane.
Tip: Consider factors like fuel sources and budget before you decide. Consult a professional plumber to get the best option for your home.
Remember: Choosing the right size water heater is like finding a partner – too small, and you’ll be cold and unhappy; too big, and you’ll be spending money fast.
Size and Capacity Considerations
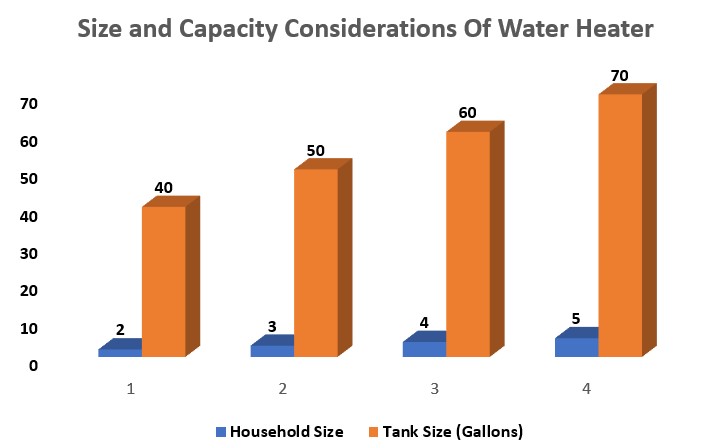
Finding the right size and capacity for your water heater is key to getting great performance and efficiency.
Use this table to get an idea:
| Household Size | Number of Bathrooms | Tank Size (Gallons) |
|---|---|---|
| 1-2 people | 1-1.5 | 30-40 |
| 2-3 people | 1.5-2 | 40-50 |
| 3-4 people | 2-2.5 | 50-60 |
| 4+ people | 2.5+ | 60+ |
These are just general recommendations – your needs may differ. Plus, there are other details to think about, like the recovery rate, insulation, and energy efficiency ratings. Consulting a pro can help you decide.
For the best water heater, try these tips:
- Insulation: Get an insulation blanket or a model with good insulation. This will cut heat loss and save energy.
- Recovery Rate: Choose a water heater with a high recovery rate if you use lots of hot water in quick succession.
- Energy Efficiency: Pick a model that meets industry standards e.g. ENERGY STAR. This lowers your carbon footprint and lowers costs.
Do all this and you’ll have the right size and capacity for your needs. You’ll also get great efficiency and performance.
Safety and Permit Requirements
Safety is key when it comes to water heater installation! Permits are a must, to comply with regulations and standards. Sizing, ventilation, materials, and wiring all need to be taken into account. Sizing must be appropriate for the household’s needs. Ventilation should guarantee no carbon monoxide buildup. Materials should only be approved ones, to prevent leaks. Wiring must adhere to local codes – hire a licensed electrician to be sure!
John didn’t get the required permits and tried to save money. During his first shower with the new unit, disaster hit: the oversized water heater malfunctioned and scalding hot water spilled out. John suffered severe burns and had to go through medical treatment!
Always prioritize safety and permits when installing a water heater. It’s worth it!
Tools and Materials Needed for Installation
For the installation of a water heater, you will need a number of tools and materials. Below is a list of the items you will need:
- Wrench (adjustable wrench is recommended)
- Pipe cutter
- Pipe wrenches
- Voltage tester
- Screwdriver
- Tape measure
- Pipe joint compound
- Plumber’s tape
- Garden hose
- Drill and appropriate drill bits
- Pipe insulation
In addition to these tools, you will also need the following materials:
- Water heater (either electric or gas)
- Water heater venting materials (such as stainless steel)
- Water heater tank (if applicable)
- Discharge pipe
- Relief valve
- Gas supply line (if using a gas water heater)
- Water lines (both hot and cold water supply)
- Ground wire
- Electrical wiring and connections (if using an electric water heater)
- Expansion tank
- Copper pipes or tubing
- Compression fittings or soldering materials (depending on your preference)
- Shutoff valve
- TPR valve (temperature and pressure relief valve)
- Anode rod (for protection against corrosion)
- Drain pan (for catching any water leaks)
These tools and materials will ensure that you have everything you need to properly install a water heater. It’s important to follow installation instructions provided by the manufacturer and comply with local building codes to ensure a safe and effective installation.
Basic Tools: Adjustable Wrench, Pipe Wrench, Pipe Cutter, Voltage Tester, etc.
Having the right tools for installation is key. Check out these must-haves:
- An adjustable wrench can be used to tighten and loosen nuts and bolts of different sizes.
- A pipe wrench is perfect for gripping and turning pipes. It has sharp teeth that provide a firm hold.
- A pipe cutter is needed to cut pipes precisely and without damaging them.
- A voltage tester is essential for electrical work. It lets you know if a circuit is live or not.
It’s also crucial to adjust the jaw size properly when using an adjustable wrench or pipe wrench. And make sure to secure the pipe firmly when using a pipe cutter.
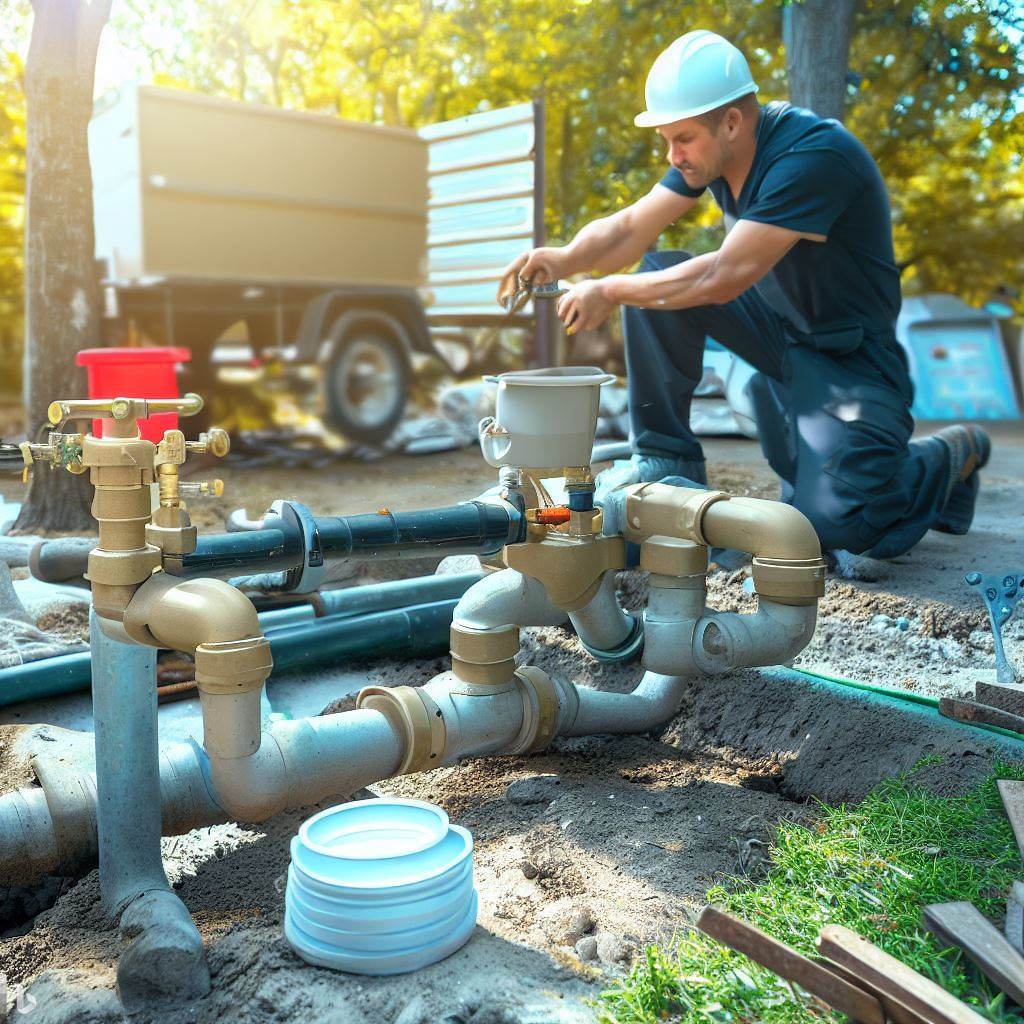
Additional Materials: Water Lines, Gas Lines, Compression Fittings, etc.
It’s essential to get additional materials for a smooth installation process – water lines, gas lines, compression fittings and lots more. Here’s a table with the materials and their uses:
| Material | Description |
|---|---|
| Water Lines | Carry water from main supply to outlets |
| Gas Lines | Transport natural gas to appliances |
| Compression Fittings | Join pipes securely, prevent leakage |
| Other necessary items | Wrenches, tape and other tools for installation |
When working with these materials, remember to measure and cut the water and gas lines precisely. High-quality compression fittings, too, will help avoid any leaks.
Step-by-Step Instructions to Install a Water Heater
- Check local building codes: Before beginning the installation process, research and familiarize yourself with the local building codes and requirements. These codes ensure the safety and proper installation of the water heater.
- Gather necessary tools and materials: Make sure you have all the necessary tools and materials on hand for the installation process. This may include an adjustable wrench, pipe wrenches, a pipe cutter, plumbing tape, compression fittings, and pipe joint compound.
- Prepare the plumbing: Before installing the new water heater, prepare the plumbing system. This involves shutting off the gas or electricity supply, disconnecting the water supply, and draining the current water heater.
- Position the new water heater: Carefully position the new water heater in the designated installation area. Ensure that it is on a stable surface and that there is sufficient space around it for ventilation and maintenance.
- Connect the water and gas supply lines: Connect the cold water supply line to the water inlet on the new water heater. Use plumbing tape and compression fittings to ensure a secure connection. For gas-powered water heaters, connect the gas line to the gas control valve using pipe joint compound and tighten with a wrench.
- Test and finalize the installation: After completing the necessary connections, carefully follow the manufacturer’s instructions to test the water heater’s functionality. Check for any leaks and ensure that the water heater is properly vented. Once everything is functioning correctly, you can finalize the installation by turning on the gas or electricity supply and adjusting the water temperature as desired.
It is important to note that water heater installation can be complex and may require the assistance of a licensed plumber. They have the expertise and knowledge to handle the installation process safely and efficiently. To ensure the proper functioning and longevity of your water heater, it is recommended to consult with a professional.
Follow these step-by-step instructions and enjoy the benefits of hot water for your everyday needs.
- Installing a water heater can be intimidating, but with the right info and tools, it’s doable.
- First, decide which type of heater you want. Options include gas tankless, electric, or traditional gas/electric tank-style.
- Then, get the materials needed like adjustable wrenches, pipe cutters, etc.
- Follow the manufacturer’s instructions carefully.
- Start by turning off power and closing the gas valve.
- Then, drain the current heater by connecting a hose to the drain valve.
- Disconnect any electrical or gas connections from the old heater too.
- Prep the plumbing by installing valves or expansion tanks that meet local code requirements.
- Then, connect cold-water supply lines and secure them.
- Follow safety precautions for the installation like local building codes.
- Make sure vents and exhausts are clear.
- And, ensure proper ventilation for gas-powered models.
- Before filling up the tank with water, double-check all connections for leaks.
- After the tank is full, reconnect power or gas line and light the pilot (if applicable).
- But, it’s best to hire a licensed plumber to ensure safety and compliance.
Disconnecting the Existing Water Heater
- Turn off the Power – Locate the circuit breaker or fuse box and switch off the power connected to the water heater.
- Shut off the Water Supply – Find the main water valve and close it up, to prevent any leaks or flooding.
- Drain the Tank – Connect a hose to the drain valve at the bottom of the water heater. Open this valve to let all water inside to drain out.
- Disconnect Electrical Connections – Disconnect any electrical connections leading to your existing water heater. Remember where each wire was connected for later.
- Disconnect Plumbing Connections – Use wrenches or pliers to loosen and remove any pipes or fittings attached to your current water heater. Avoid damaging these connections so you can reuse them later.
- Remove Old Water Heater – After disconnecting all connections, carefully lift and remove the existing water heater. Make sure there’s enough space and support.
- Safety First: Wear protective gear like gloves and goggles during this procedure.
- Consult Professional Help: If unsure, get help from a professional plumber.
- Proper Disposal: Contact local recycling centers or waste disposal to dispose of your old water heater responsibly.
- Follow all steps and suggestions with care and detail, for a successful disconnection.
Disconnecting the Electrical Connections
Disconnecting electrical connections is an essential part of the installation process. Follow these steps for a successful disconnection:
- First, ensure safety by turning off the power to the area you’re working in. This reduces the risk of electric shock.
- Locate the electrical connections to be disconnected. Carefully inspect and find any screws, bolts, or clips.
- Use a tool like a screwdriver or pliers to take out the fasteners. Apply steady pressure and avoid forcing.
- Gently pull apart the electrical connections. Be careful not to damage any wires or connectors.
Handle electrical connections with caution and precision to prevent accidents or damage. Remember to double-check if there is residual power with a voltage tester. For complex systems, it’s helpful to take photos or label the connections before disconnecting for easier reassembly.
Shutting Off the Water and Gas Supply
Before beginning installation, it’s important to shut off the water and gas supply. Here’s a quick guide to help you out:
- Find the water shut-off valve – usually near the main water meter or where the water enters your home. Turn it clockwise to close.
- Release built-up pressure – turn on faucets and flush toilets to drain remaining water.
- Locate the gas shut-off valve – look for a lever or handle on the gas meter or near gas appliances. Turn it perpendicular to the pipe to stop the flow.
- Ventilate the area – open windows and doors to let fresh air in and clear out any gas odors.
- Double-check for safety – use soapy water to check for gas leaks before proceeding.
Keep these extra tips in mind:
- Let everyone in your household know where the valves are.
- Shutting off both supplies is essential for installations and emergencies.
- Doing this lowers risks of leaks or accidents.
So, shut off both water and gas to prevent potential hazards. This will save you from harm, minimize damage, and guarantee a safe project.
Preparing the Plumbing System
Time to Prepare the Plumbing System! It’s key to have a smooth installation, so follow these four steps for success:
- Turn off the water supply. Find the main valve and switch it off. This will make sure nothing spills during the installation.
- Drain the pipes. Open all faucets and flush toilets to empty out any water. It’ll help to prevent any water damage or leakage.
- Remove old fixtures. Disconnect and take out any existing fixtures, like faucets or showerheads. Make sure to switch off any valves attached to them before removal.
- Check and clean the pipes. Look closely at all pipes for any damage or corrosion. Clear them out with pipe cleaners, so no blockages or debris will affect the new installation.
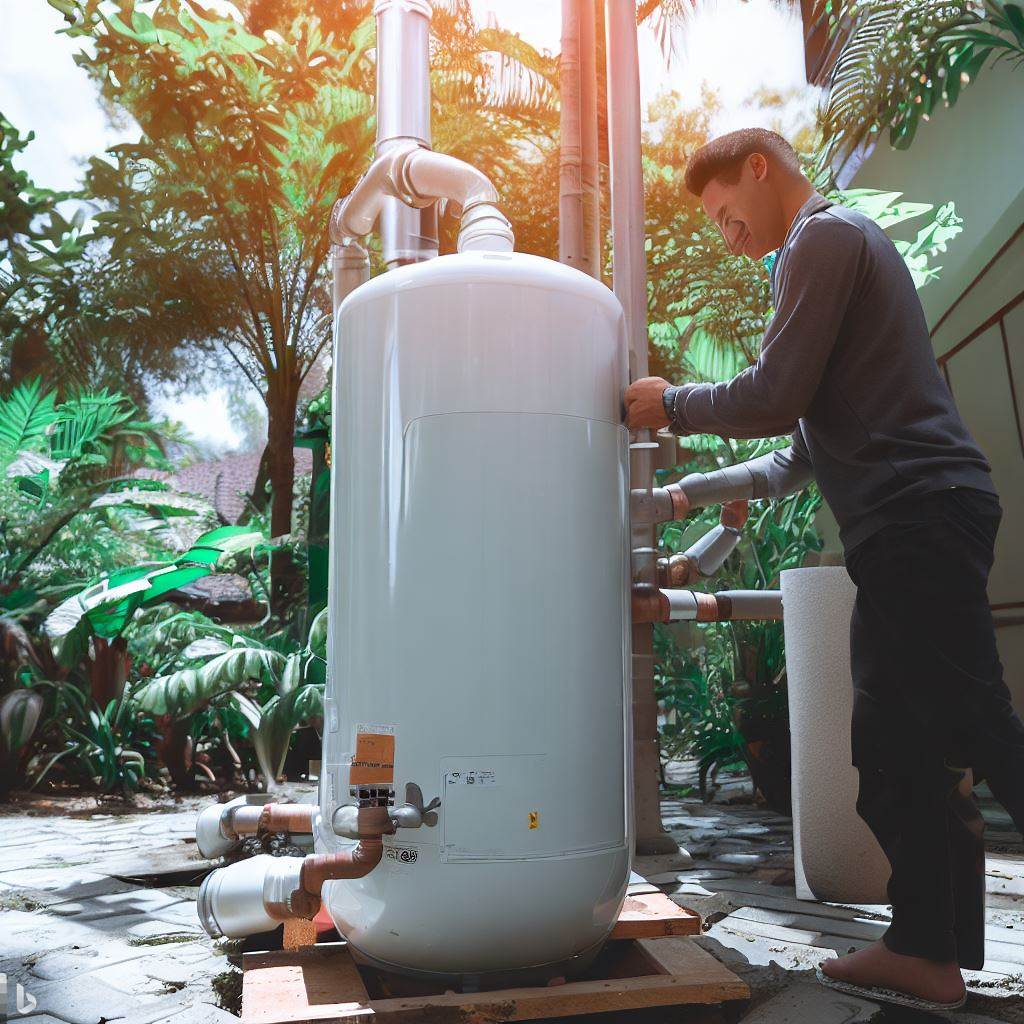
Mounting and Connecting the New Water Heater
It’s vitally important to install a water heater correctly. Here is a step-by-step guide to help.
- First, select an appropriate spot. It should be ventilated and free from flammables, with plenty of room for maintenance.
- Secure mounting brackets to the wall with screws or bolts. Check they are level and tight.
- Connect plumbing and electrical lines. Use the right fittings such as flexible connectors and Teflon tape. Follow the manufacturer’s instructions and adhere to local building codes.
Also, insulate exposed pipes to keep heat in and put a drip pan underneath to protect against leaks.
Testing for Leaks and Safety Checks
Testing for leaks and safety is essential during any installation process. By testing, potential leaks can be identified and addressed quickly, guaranteeing a safe environment. To perform effective testing, follow these five steps:
- Check connections – Inspect each connection point to make sure they are secure and sealed. Loose connections or gaps could lead to leaks or safety hazards.
- Pressure test – Use a pressure testing device to assess the system’s performance under different levels of pressure. Monitor for signs of leaks or irregularities.
- Inspect valves and fittings – Examine all valves and fittings for signs of damage or wear. Replace faulty components to prevent leaks.
- Bubble test – Apply soapy water on all potential leak points and look for bubbles forming. This indicates gas escaping from the system.
- Use electronic leak detectors – Employ advanced detectors to identify even the smallest gas leaks. Follow the instructions for accurate results.
Additionally, keep track of maintenance schedules and conduct regular inspections to detect any issues before they worsen. Preventive measures reduce the risk of accidents or malfunctions.
Troubleshooting and Common Issues
If you encounter any issues with your water heater installation, here are some common problems that may arise:
- Insufficient hot water: If you are not getting enough hot water, it could be due to a few reasons. Check the thermostat setting on your water heater and ensure it is set at the desired temperature. Additionally, sediment buildup in the tank can reduce efficiency, so flushing the tank periodically may help improve hot water production.
- Leaks: Leaks can occur in various areas of a water heater, such as around the connections, relief valve, or tank itself. Inspect these areas for any signs of moisture and address any leaks promptly. It is important to fix leaks quickly to prevent water damage and maintain the integrity of your water heater.
- Pilot light issues: For gas water heaters, a common problem is a pilot light that goes out frequently or won’t stay lit. This could be due to a faulty thermocouple or a problem with the gas supply. Checking and cleaning the pilot orifice and gas valve can often resolve this issue.
- Noisy operation: If your water heater is making unusual noises like popping or rumbling sounds, it may be a sign of sediment buildup in the tank. Flushing the tank regularly can help alleviate this issue and maintain efficient operation.
It is important to note that troubleshooting and resolving water heater issues may require technical knowledge and expertise. If you are unsure or uncomfortable with performing these tasks yourself, it is advisable to seek the assistance of a licensed plumber or professional technician.
In addition to these common issues, it is important to follow local building codes and regulations when installing or troubleshooting a water heater. These codes ensure that the water heater is installed safely and meets the necessary requirements. By adhering to these guidelines, you can avoid potential problems and ensure the longevity of your water heater.
It is always a good idea to consult the manufacturer’s instructions and guidelines for your specific water heater model for troubleshooting tips and maintenance recommendations. Following these instructions can help prevent issues and maintain the optimal performance of your water heater.
Dealing with Leaks or Water Pressure Problems
It is vital to take action quickly if you have water problems like leaks or low pressure. These can cause inconvenience and damage if left alone. Here are 6 steps to help fix them:
- Identify the problem. Where is the leak or pressure issue? Could it be a faulty faucet, pipe, or regulator?
- Turn off the main water supply. This will stop any further damage while you work.
- Look for visible damage – cracks, corrosion, or loose fittings. These show underlying issues.
- Repair or replace faulty parts. Use sealants on pipes. Install new faucets and pipes if needed.
- Test for adequate pressure. Turn on all faucets and showers. Adjust the regulator if needed.
- Regular maintenance. Inspections and maintenance checks are essential to prevent future problems.
Different properties may have different factors causing leaks or low pressure. Seek professional advice if needed.
Addressing Electrical or Gas Supply Issues
- Check power source! Ensure supply works right.
- Check circuit breakers + fuses for tripped switches/blown fuses.
- Inspect wiring. Look for signs of damage – frayed wires/loose connections. Repair/replace any issues asap.
- If steps don’t help, contact a pro! A qualified electrician or gas technician can diagnose and fix the issue.
Regular maintenance of electrical and gas systems is key to prevent future issues. Take care of them for optimal performance and fewer problems.
Do not handle electrical/gas supply issues wrong. It can lead to dangerous situations – avoid at all costs.
Maintenance and Safety Tips
For long-lasting performance and safety, maintenance and safety tips are essential. Follow them to avoid accidents, reduce downtime, and save repair costs.
- Inspections: Do regular inspections to detect any issues or malfunctions in your equipment. This proactive approach prevents problems from getting worse and costly repairs.
- Cleaning & Lubrication: Clean your equipment regularly to remove dirt, dust, or debris. Also, ensure proper lubrication of moving parts to reduce friction and wear, extending the life of your machinery.
- Training: Provide comprehensive training to all personnel operating the equipment. This includes teaching them safety protocols, emergency procedures, and proper handling techniques. Properly trained operators are key for accident prevention and functioning.
These tips protect workers and machinery and help achieve operational efficiency.
Frequently Asked Questions
What do I need to install a water heater?
To install a water heater, you will need the following:
- An adjustable wrench
- Water and gas supply lines
- Drain pan and drain valve
- Electrical wiring (if applicable)
- Pipe wrenches
- Pilot light and gas valve
- Relief valve
- Water lines and pipes
Do you need a permit to install a water heater?
Depending on your location, you may need a permit to install a water heater. It is always best to check with your local building codes and regulations to ensure compliance.
Can anyone install a water heater?
It is recommended to have a licensed plumber install a water heater. They have the knowledge and experience to ensure proper installation and compliance with building codes.
What do plumbers charge to install a water heater?
The cost of hiring a plumber to install a water heater can vary depending on factors such as location and the complexity of the installation. It is best to contact plumbers in your area to get accurate quotes.
What does it cost to install a water heater?
The cost of installing a water heater can vary depending on factors such as the type of water heater, location, and any additional work required. It is best to consult with a plumber or contractor for an accurate cost estimate.
How do I drain a water heater?
To drain a water heater, follow these steps:
- Turn off the power or gas supply to the water heater.
- Connect a garden hose to the drain valve at the bottom of the tank.
- Open a hot water faucet to relieve pressure.
- Open the drain valve and let the water drain into a suitable drainage area.
- Once the tank is empty, close the drain valve and remove the hose.
- Turn on the water supply and allow the tank to fill before turning the power or gas supply back on.
Conclusion
The cost of installation depends on factors like location, type of unit, materials, labor costs, and whether you’re replacing or installing new. Plumbers’ rates vary too. You can buy from stores like Lowe’s and pay for installation. The cost depends on their policies and your circumstances.
To install a water heater, follow the instructions with the unit model. Gather materials, disconnect old units, connect new ones, fill tanks with cold water, and adhere to code regulations. Doing these will ensure proper functioning.
References:
How to Install a Water Heater (with Pictures) – wikiHow
Water Heater Installation And Replacement Cost (2023 Guide) – Forbes Home