
Table of Contents
Check the Thermostat Of The Furnace.
When your furnace fails to turn on, the first step is to look into the thermostat for any issues.
The thermostat is the device responsible for controlling the temperature of your home and the furnace.
Begin by checking the thermostat settings to ensure they are set at the appropriate level for the time of day. If necessary, you may have to replace the batteries or clean the device to ensure its functionality.
If your thermostat settings are correct, proceed to check the fan settings. The thermostat fan should be set on “auto” mode to control the airflow through the furnace. If the fan is not set correctly, lukewarm air may blow from the furnace unit.
If you have a programmable thermostat, make sure it is scheduled correctly and that the settings match your heating system. If you notice a discrepancy, this may be the reason your furnace is not turning on.
Pro Tip: If you are unsure about how to check and adjust the settings on your thermostat, it’s best to call an HVAC professional for help. They can properly diagnose and troubleshoot any issues with your heating system, ensuring that your home remains warm and cozy all winter long.
Why bother hiring a professional when you can spend hours checking your thermostat settings yourself?
Make Sure the Settings are Correct.
Start by ensuring your thermostat is set right to get the best performance from your heating system.
Here’s a 4-step guide to confirm the correct thermostat settings:
- Check the temperature reading on the thermostat. Compare it to the temperature in your home.
- Adjust the temperature if needed. It should be within a degree or two of what is comfortable.
- Check that your programmable thermostat is set to heat at the right times.
- See if any ‘vacation’ mode settings on your programmable thermostat could be switched off.
Also, make sure nothing is close to the thermostat, like curtains or furniture blocking sensors. Check for drafts of cold air entering the room.
To get ready for winter, ensure all windows and doors seal completely. Invest in insulating material for ductwork and pipes around unheated areas of your house. This reduces energy loss and you save money on bills.
Finally, make sure your batteries are fully charged and your power supply isn’t as unreliable as your ex!
Check the Batteries and Power Supply Of The Furnace.
For optimal performance, examine the source powering your device.
Evaluation of the energy supply can prevent potential errors and keep you safe. Prioritize evaluating the power supply for troubleshooting electronic gadgets to avoid the recurrence of glitches.
| Inspect Physicality | Verify Source | Clean Battery Compartment | Plugging In |
| Check for loose wires, exposed cords, or discoloration. | Figure out if batteries or direct power currents are used. | Clean it before replacing the batteries. | Check if it’s plugged in correctly and snugly into a socket. |
Pro Tip: Utilize authorized power adapters and switch out defective cords quickly.
Before checking the power source, make sure your furry friend hasn’t mistaken the cord for a chew toy.
Check The Power Supply Of The Furnace.
After diagnosing the possible reasons behind your furnace not turning on, the next step is to check the power supply.
To do this, follow these 5 simple steps:
- Start by checking if the switch on the furnace unit is in the ON position. If not, flip the switch to ON and wait for the unit to start running.
- Next, check if the circuit breaker that controls the furnace is in the ON position. If it is tripped, switch it OFF first before turning it back ON.
- If the furnace still doesn’t turn on, check the fuse box to see if the circuit breaker serving the furnace has tripped. Replace the fuse with a new one of the same amperage rating.
- Inspect the front panel of the furnace to see if it’s securely fastened and properly closed. The safety feature won’t allow the furnace to run if the panel is not secured in place.
- Lastly, check the power switch at the side of the furnace and ensure that it is in the ON position.
If none of these steps work, consider calling a professional HVAC company for further troubleshooting.
Remember, neglecting to take care of your furnace can cause more serious problems and may lead to costly repairs or even damage to your heating system. Don’t hesitate to seek help to prevent issues from escalating.
Why bother with a therapist when you can just check the circuit breaker to fix your furnace, am I right?
Check the Circuit Breaker Of The Furnace.
Guaranteeing uninterrupted power is key!
Here’s a simple guide to ‘Audit the Circuit Breaker’:
- Find the main circuit breaker, usually at the top of the electrical panel.
- Check if it’s tripped or off.
- Flip the switch firmly back to the original position.
- Wait 30 seconds if it tripped due to high amperage.
- Verify other sub-circuit breakers connected to power-consuming devices.
Before any physical verification, ensuring electrical equipment gets adequate power is essential.
Pro Tip: Turn off power from the main source before working with electrical circuits. No power? Your computer becomes an expensive paperweight.
So, check if the power switch is visible like Waldo!
Check the Power Switch Of The Furnace.
To keep your device running, make sure its power supply is good.
Here’s a 4-step guide:
- Confirm the connection between the power source and the device. Ensure that the plugs fit snugly.
- Look for frays or splits in the power cord. If damaged, replace it right away.
- Check if the surge protector is on and properly connected.
- Check if there are any tripped circuit breakers or blown fuses in your home’s electrical panel.
Also, watch out for warning signs. These could be strange noises or smells coming from the machine.
Historically, many devices have broken due to power supply issues. For example, in 2012, Apple recalled millions of chargers due to overheating.
This emphasizes the importance of regularly checking your device’s power supply.
Check the Safety Switch Of The Furnace.
Ensure Safety with a Power Circuit Breaker!
It’s essential to check safety before operating a power tool. One of these steps is to make sure that the power supply has a circuit breaker or safety switch installed. This section will explain how to check and test it.
Follow these Five Simple Steps:
- Find the Safety Switch: Check if your tool has a built-in safety switch or circuit breaker.
- Identify Functionality: Read manufacturer instructions as some electronic tools need different configurations for the safety switch.
- Plug-in Power Source: Make sure you’ve plugged the tool into the recommended electrical source.
- Test: Turn on the equipment and test the circuit breaker or switch for any signs of malfunction.
- Reset: Reset the safety switch if it tripped during testing until it’s back to normal working conditions.
Don’t bypass or use unsafe alternatives when it comes to circuit breakers as they are designed for safety only.
Pro Tip: Inspect, and clean dust from external access points, and exercise each breaker regularly to keep this essential safety feature in good condition. This will help avoid lockouts due to fault oxidation build-up over long periods of downtime.
Why bother checking the ignition system when the power supply is already checked out? It’s like wearing a seatbelt while riding a unicycle.
Check The Ignition System Of The Furnace.
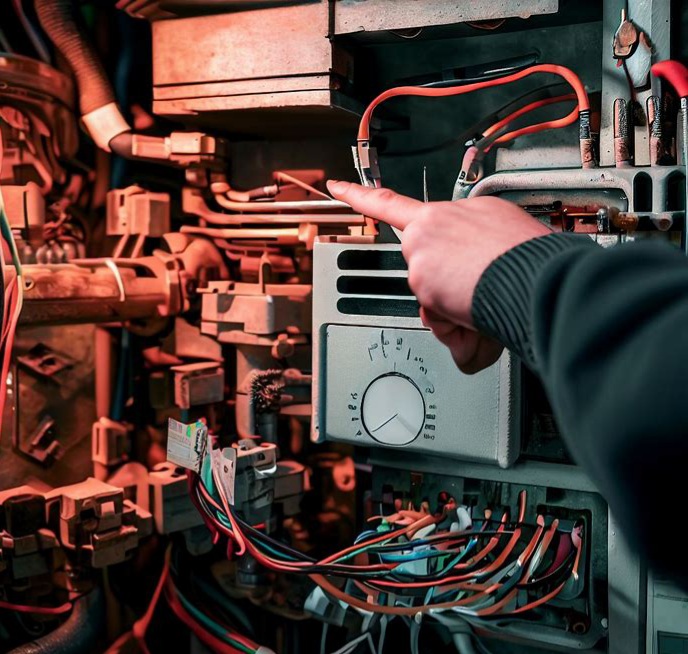
If your furnace is not turning on, it is important to check the ignition system. This is responsible for igniting the gas that heats the air in your home.
- First, check that the pilot light is lit, and if not, follow the manufacturer’s instructions to relight it.
- If the pilot light is lit but the furnace still won’t ignite, check the flame sensor and ensure it is clean and positioned correctly.
- Additionally, the ignition switch or capacitor may need to be replaced, and it is recommended to seek the help of an HVAC professional for this.
When troubleshooting the ignition system, it is crucial to turn off the power supply to the furnace before beginning any repairs. This can be done by turning off the power switch on or near the furnace unit, or by flipping the circuit breaker for the furnace. It is important to also check the air filter and clean or replace it if dirty, as a clogged filter can decrease airflow and lead to issues with the ignition system.
One unique detail to consider when troubleshooting the ignition system is the possibility of a tripped high-limit switch. This safety device is designed to turn off the furnace if it overheats or experiences a similar issue, and can sometimes be triggered by a dirty air filter or other issues with airflow.
In a true history, a furnace repair company was once called to a home where the furnace would not turn on. After checking the thermostat settings and other potential issues, the HVAC technicians discovered a faulty ignition switch that needed to be replaced. Once the ignition switch was replaced, the furnace was back up and running smoothly.
My furnace’s pilot light went out, but at least it didn’t take my will to live with it.
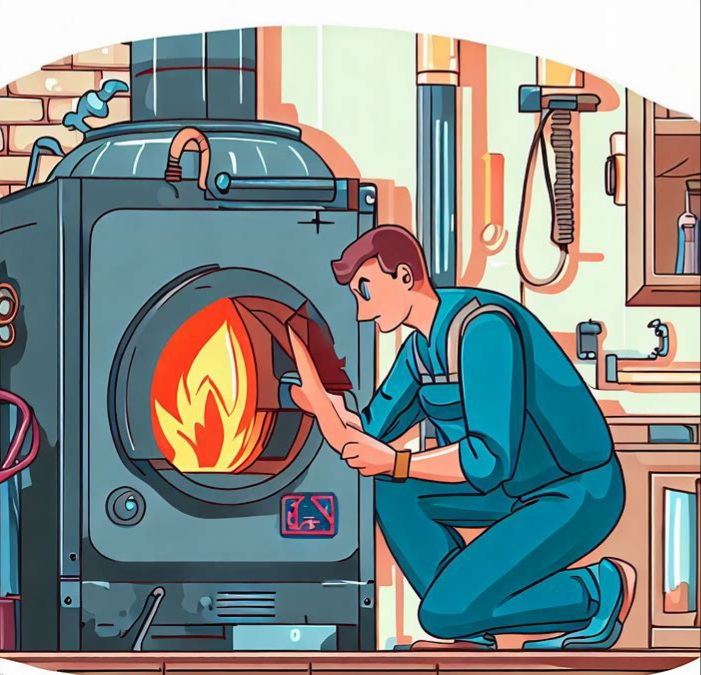
Check the Pilot Light Of The Furnace.
It is vital to examine the Flame Indicator when ensuring proper heating system function.
Here’s how to check the pilot light in several easy steps:
- Shut off the gas supply.
- Wait a few minutes until any gas dissipates.
- Discover the gas supply valve and switch on the pilot setting.
- Locate the pilot light chamber and take off its cover.
- Utilize a flashlight to check if there is a flame in the compartment.
- If there is no flame, light it with instructions from the manufacturer.
It’s important to listen for any strange noises or odors during the flame indicator check, as they could signal an issue with your heating system.
Did you know not all homes need a pilot light? Modern heating systems can use electronically-controlled ignitions, eliminating the need to monitor a separate pilot light.
One homeowner experienced a furnace problem due to dust and debris blocking access to their pilot light chamber- this caused their warming solution to be delayed for hours before fixing it with help from a pro.
Make sure your ignition sensor is working, because a defective one can leave you feeling more lost than Tom Hanks in Cast Away.
Check the Ignition Sensor Of The Furnace.
The ignition system is key for your vehicle running efficiently. Thus, analyzing the Ignition Sensor is a must!
Here’s a 3-Step guide:
- Locate the sensor on your engine.
- Use an ohmmeter to test its resistance levels.
- Replace the sensor if necessary.
CarMD.com found that faulty ignition coils and spark plugs often cause check engine lights.
So, make sure you haven’t parked on a landmine before checking for damage or wear!
Check For Damage Or Worn On The Furnace.
There are potential damages or wear that could disrupt the operation of your furnace.
To ensure that the furnace unit runs smoothly, there are several things to check:
- Check the heat exchanger for any cracks that could allow hazardous gas to leak and pose a serious threat to your family.
- Look for signs of wear on the blower motor or malfunctioning switches that could disrupt the airflow and its ability to circulate warm air.
- Inspect the air ducts for any damage or clogs that interfere with the proper flow of air throughout the space.
- Check the furnace ignition switch and safety switch for damages as these are crucial safety features that prevent potential hazards.
- Examine the wiring for any damage or lose connections that could affect the operation of the furnace ignition and other components.
Moreover, failure to address these damages or wear could lead to serious issues or damage to the furnace beyond repair. In worst-case scenarios, it could pose a threat to your family’s safety by causing fires or releasing harmful gases.
To avoid these issues, it is best to call an HVAC professional who can inspect the furnace unit and identify the root cause of the problem, be it wear or damage.
Scheduling regular check-ups can help you maintain your furnace system and avoid any potential problems.
Ensure the safety of your family and keep your furnace maintained and in top-performing condition by booking a furnace repair and maintenance service today.
All hail the mighty blower motor, without it we’d just be sitting in a cold and stagnant air cube.
Check the Blower Motor.
The blower motor is crucial for your car’s HVAC system. It pushes air around the cabin and keeps the temperature steady. Keep an eye on it, and inspect it regularly for any damage or wear.
Here’s how:
- Spot the blower motor under the dashboard on the passenger side.
- Check for any cracks or missing blades.
- Replace or repair if needed.
Be aware that even if you don’t see any problems, the blower motor may still be malfunctioning. If the airflow is weak or there are strange noises, call a pro.
A study by APRA shows that remanufactured blower motors are just as reliable as new ones.
So, if your furnace feels lonely, check the flame sensor to make sure it’s not just cold.
Check the Flame Sensor.
It’s key to inspect your heating system’s flame sensor regularly to keep it functional and safe. This part looks for a flame in the burner and shuts down the furnace if it doesn’t find one, stopping potential hazards.
Here’s a 5-step guide on checking it:
- Turn off the furnace and let it cool for 30 mins.
- Locate and remove the sensor from near the burner assembly.
- Look out for damage or dirt build-up like cracks or corrosion.
- Clean the sensor with a non-abrasive material like sandpaper.
- Reinstall the cleaned sensor and test its operation. Replace it if needed.
Note that flame sensors differ in design and location depending on the system model. So, check the manufacturer’s manual or get help from professionals. Also, some homeowners don’t check their sensors due to unawareness or complexity. But, it’s a cheap task that can stop emergencies and lengthen your unit’s life.
Flame sensors have been around since WWII for industrial use. But, only since the late 80s have they been required for residential furnaces by law for safety reasons.
Don’t forget to inspect the capacitor for any damage before you get zapped!
Check the Capacitor.
Inspect the Capacitor for any issues.
Follow these 6 simple steps to guarantee the well-being of your Capacitor:
- Pinpoint and find the Capacitor.
- Shut off all power sources.
- Look for any external damage on the Capacitor.
- Employ a multimeter to assess the Capacitor’s voltage, resistance, and capacitance levels.
- Set up a system to diagnose or replace if needed.
- Reactivate power and make sure it’s functioning correctly.
Moreover, examine for any leaking oil or liquid to determine if the Capacitor needs replacing.
A fact about capacitors is that they were utilized in early electronics and radios; going as far back as 1879 when Oliver Heaviside proposed their use in switching circuits. Since then, they’ve been used in almost every electric application possible, from student projects to military weapons tech!
Ensure your high limit switch isn’t reducing your high fun switch.
Check the High Limit Switch.
A high-limit switch is a component that stops your furnace from getting too hot. It cuts off electric power if something goes wrong, so you stay safe.
To check the switch, do these six steps:
- Turn off the power.
- Open the access panel.
- Look for corrosion or burnt parts.
- Change the switch if needed.
- Reset it and turn on the furnace.
- Call an HVAC tech if it fails.
Furnace malfunctions can be expensive and risky. Regular maintenance is key to avoiding problems.
Don’t forget to check the switch. A small issue today can mean a big danger tomorrow. Past incidents have caused massive destruction and loss of life.
So remember: Safety first – Always check your switch!
Check the Heat Exchanger.
For top performance, regularly assess the condition of your heat exchanger.
Here’s how:
- Turn off the power and disconnect.
- Clean the exterior.
- Look for cracks or corrosion in each tube.
- Check tube sheet surfaces for wear.
- Use professional equipment to test for leaks.
Keep a maintenance plan to avoid pricey repairs. Plus, regular inspections can help locate issues earlier, decreasing repair costs and downtime.
Pro Tip: Consult a professional if any issues arise during inspection; it could save you money in the long run.
Also, make sure you haven’t accidentally hooked up to a can of beans instead of the gas supply!
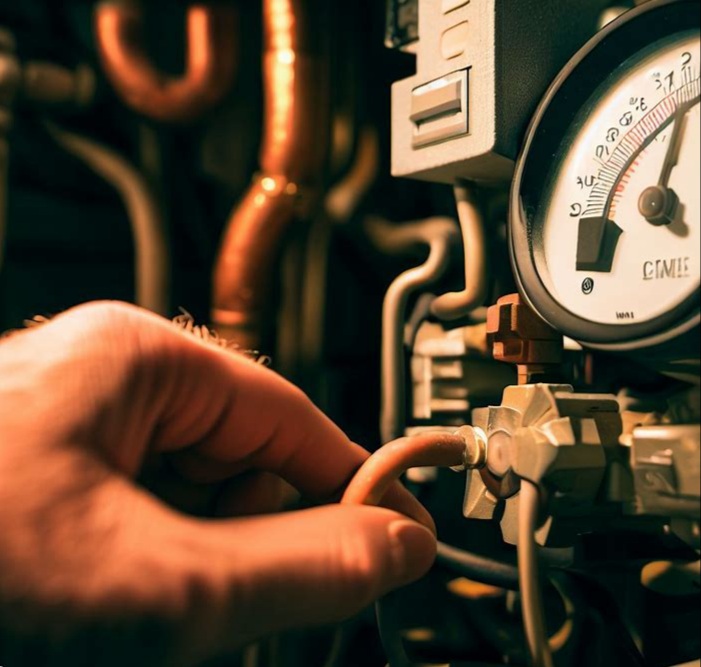
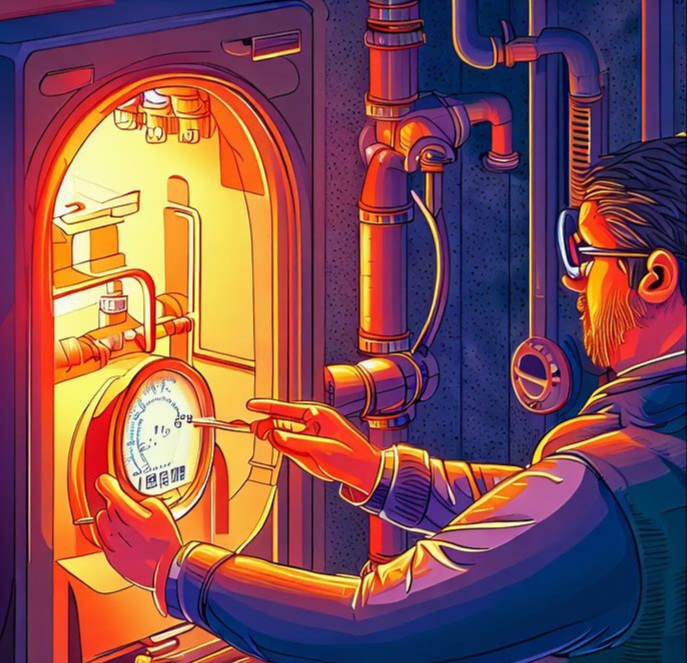
Check The Gas Supply Of The Furnace.
The furnace ignition switch is one of the most critical furnace components, and it is responsible for controlling the flow of gas supply into your furnace unit.
It is essential to check your gas supply before assuming any other furnace problems.
- Ensure the gas valve is in the ‘on’ position:The gas valve controls the gas flow into your furnace unit. If it is shut, your furnace will not produce heat. Check the valve knob’s position; it should be in the ‘on’ position.
- Check the gas line:Ensure that the gas line supplying gas to your furnace unit is on, and there are no obstructions.
Note: Check to see whether any of your other gas appliances are working. A lack of gas supply may suggest a problem with your gas provider.
- Inspect for gas leaks:If there is a gas leak, your furnace will not produce heat. Inspect your furnace unit and gas supply line for any gas leaks. If you find one, call your gas company or HVAC professional immediately.
In case your furnace is not producing heat even after checking the gas supply, it could be due to a faulty safety device or ignition system. The best thing to do is call an HVAC professional to evaluate and repair your furnace unit.
Last winter, one of my friends had a problem with their furnace not turning on. After trying to troubleshoot, they called a repair company. It turned out to be a gas supply issue. The gas company had to come out and turn on the main gas supply to the house.
The lesson learned was always to check if other gas-powered appliances are working and to contact your gas provider if you suspect a problem with the gas supply.
Without a working gas valve, giving your furnace a pep-talk will yield the same results as talking to a brick wall.
Check the Gas Valve.
Gas appliances require proper functioning valves.
Here’s a guide to checking yours:
- Locate the Gas Valve. Find the valve that controls gas flow.
- Ensure the valve is in an “on” position for proper flow.
- Turn on a gas appliance and observe the gas flow.
- If you smell sulfur, shut off all appliances & call a pro.
Safety is key when dealing with gas valves. Check them even if there are no signs of trouble. If you hear or smell anything unusual, call a technician.
Research reveals a 40% increase in natural gas-related accidents.
So, check those gas lines before your indoor barbecue turns into an outdoor bonfire.
Check the Gas Line.
Detecting gas leaks can be tricky, but it’s essential to check the gas supply for the safe functioning of home appliances.
Here are four simple steps to “Verify Gas Supply”:
- Turn off Main Valve: Find the main valve and switch it off.
- Check Appliances: Block incoming gas supply and inspect stoves, water heaters, etc.
- Check Emergency Shut-Off Valves: Confirm emergency shut-off valves provide full capacity flow.
- Switch On Main Valve: After inspections, turn on the main valve and recheck for leaks or malfunctions.
Safety checks must be done even if no problems are noticed with fuel lines. Neglecting safety measures can cause destruction, injury, and illness.
Utility companies respond to over 700 reports of natural gas leaks in North America. Homeowners and tenants should take preventative steps like regular checks of fuel lines and components.
Don’t forget to check air flow and filtration too; or else your home will be a stuffy, dusty nightmare.
Check Air Flow And Filtration Of The Furnace.
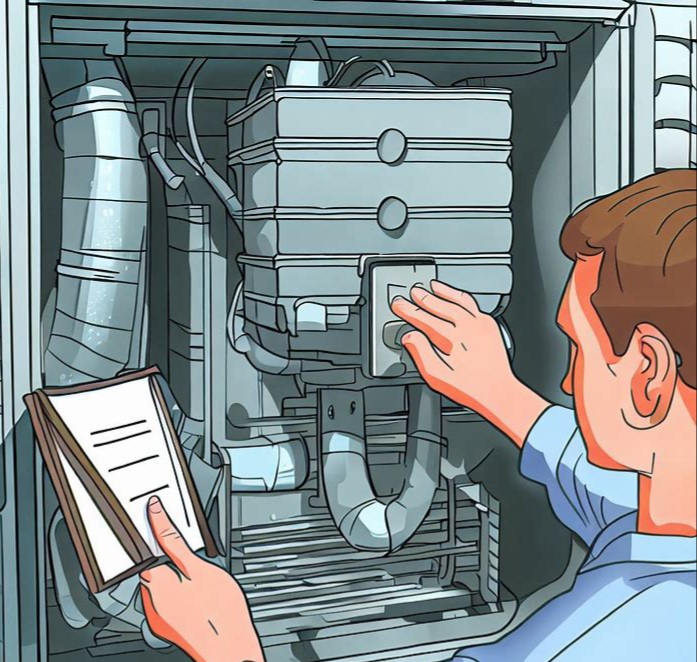
When it comes to diagnosing furnace problems, one of the first things to look at is the airflow and filtration system.
A lack of proper airflow can cause lukewarm air or even cause the furnace to stop working altogether.
To avoid this, follow these simple steps:
- Check the furnace filter: A dirty or clogged filter can restrict airflow and reduce efficiency. Make sure to replace or clean it regularly, according to the manufacturer’s recommendations.
- Clean the air ducts: Dust and debris can accumulate in the air ducts over time, making it harder for hot air to circulate through the system. Hiring a professional to clean these ducts once a year can help maintain proper airflow.
- Make sure the blower motor is working: The blower motor is responsible for pushing air through the furnace and into the home. If it’s not working, airflow will be greatly reduced. Check to see if it’s running or if any wires are loose or damaged.
- Check for blockages: Be sure no objects are blocking the air intake and registers. Blocked air flow can cause furnace ignition problems, safety device trips, and even damage to the heat exchanger.
Pro Tip: Installing a programmable thermostat can help maintain proper temperature settings, which can also help improve airflow and filtration. When in doubt, call in an HVAC professional to troubleshoot and repair any furnace issues.
I always forget to check my air filter, kind of like how I forget to floss; but unlike my teeth, my furnace won’t hate me for it.
Check the Air Filter.
Ensuring optimal airflow and filtration is key for your heating, ventilation, and air conditioning (HVAC) unit’s longevity. It’s essential to routinely check its air filter functioning.
Follow these five steps to check your HVAC unit’s air filter!
- Locate the filter compartment.
- Remove the metal or plastic cover.
- Carefully slide off the air filter’s clips or pull it out of its slot.
- Inspect the filter for dirt, dust, and debris. A dirty or clogged filter restricts airflow and affects efficiency.
- If needed, replace it with a clean filter of the appropriate size. Ensure it fits securely before reattaching the cover.
Regular cleaning boosts energy efficiency by up to 15%. It decreases energy costs in the long run. Don’t forget to check and replace filters every three months (or follow manufacturer instructions).
Neglecting this maintenance task increases the risk of costly repairs. Perform regular checks now to ensure optimum temperature control and avoid unnecessary expenses!
Your ducts are like the veins of your HVAC system; if they’re clogged, your home could suffer!
Check the Air Ducts.
It’s important to keep your HVAC system in top condition. Check the airflow and state of the filters.
Inspecting the air ducts is part of this. Here’s a guide:
- Turn off the HVAC system.
- Remove air vent covers.
- Use a flashlight to check for any damage or debris.
- Clean out any debris or dust using a vacuum with an extended hose.
- Consider hiring a professional duct cleaning service if needed.
- Securely reinstall all vent covers.
Dirty or clogged air ducts can lead to bad air quality and strain on the HVAC system. This causes it to work harder than needed and increases energy bills.
To prevent this, change air filters regularly and install high-efficiency filters which trap tiny particles like allergens and pollutants. Keep these factors in mind to get clean, efficient airflow throughout your home.
When checking the blower, don’t forget to give it a good blow. After all, it’s called a blower for a reason!
Check the Blower.
It’s critical to check the blower of your HVAC system for optimal performance.
Here are 3 points to note:
- Examine the blower wheel for any debris or damage.
- Clean or replace air filters regularly to avoid blockage and motor strain.
- Check for loose belts and pulleys that may reduce efficiency.
Filtration and airflow are linked to blower operation. Dirty filters or restricted airflow can put pressure on the motor, increasing energy bills and reducing the lifespan of the unit.
Look out for warning signs like strange noises or smells from the system. Ignoring these issues could lead to costly repairs.
A routine maintenance plan with a professional technician can save you time, money, and potential hazards.
Don’t wait too long! Troubleshoot now for better results.
Other Troubleshooting Steps For Furnace.
When troubleshooting furnace problems, there are other steps to consider if the basic steps do not fix the issue.
Here are some additional steps to take:
- Check the High Limit Switch: If the furnace overheats, the high limit switch automatically shuts off the burners. Wait a few minutes and try resetting the switch.
- Clean the Air Ducts: Dirt and dust buildup in the air ducts can obstruct airflow and cause lukewarm air to blow or no warm air at all. Clean the air ducts to ensure proper airflow.
- Inspect the Heat Exchanger: The heat exchanger transfers heat from the burners to the air. A cracked or damaged exchanger can cause a furnace malfunction. Call a professional to inspect and replace if necessary.
- Check the Wiring: Faulty wiring can prevent the furnace from running. Look for any signs of damage or frayed wires and call a professional if necessary.
By following these additional steps, a homeowner can increase the chance of fixing their furnace without the need for a professional.
However, if the issue persists, it is recommended to call in a professional HVAC technician to diagnose and repair any complex issues.
Why is my furnace not turning on? Maybe it’s just playing hide and seek with an obstruction.
Look for Obstructions.
When tech issues arise, it’s important to explore the cause. To mitigate the issue, use the “Look for Obstructions” approach.
Here are three steps to take:
- Check for any physical objects blocking your system.
- Clean and dust equipment.
- Check wires and cables for looseness or fraying.
It’s also essential to be cautious of power outages or sudden temperature changes. This will reduce the chances of obstacles arising.
To avoid further damage or delay, take proactive measures. Identifying and addressing issues quickly prevents future system failure and costly repairs.
Don’t let obstructions take over! Implement practical solutions to show your system you care.
Check for Loose Wiring.
Got an issue with a gadget’s performance? Loose wiring might be the culprit.
Check it out with these 6 steps:
- Switch off all connected power sources.
- Uncover internal electronic parts.
- Carefully inspect wires for weak points, exposed sections, or disconnected areas; don’t break anything!
- Give wire contacts a shine with a soft cloth or brush.
- Replace faulty sections with device-specific instructions.
- Close up again without over-tightening screws or bending wires.
But take care! Checking for loose wiring can be dangerous if you don’t know what you’re doing. If in doubt, get a pro electrician to help. Also, inspect accessible parts of the device every few months. That way, you can find and fix any dodgy wiring sooner, and keep your device running for longer. And always refer to owner manuals when replacing things.
If corrosion is present during the wire check, clean it with a fine-grit sandpaper. But if it’s still there after several cleans, it’s best to get a professional repair.
Carry out these steps regularly and you’ll reduce downtime, plus keep your electronics working at optimum levels.
It’s like cleaning a dragon’s lair; except you won’t get burned!
Cleaning the Furnace Unit.
To keep your furnace tidy and running well, do these steps:
- Turn off the power.
- Detach the access panel.
- With a soft brush, clean the blower and its surroundings.
- If needed, change the air filter.
- Vacuum out any dust or debris in the heat exchanger compartment.
- Fix the access panel, turn on the power, and test your furnace unit.
Don’t attempt these tasks if you don’t feel comfortable. Remember, a dirty furnace filter can lead to higher energy bills (Source: U.S. Department of Energy)!
Checking the front panel is a good start; it may not always work, but it’s worth a try.
Check the Front Panel.
The trouble with electronic devices and the front control panel? Consider these steps to diagnose and fix the problem:
- Verify all cords and cables are properly connected.
- Restart the device and observe if there are any error messages.
- If there is, refer to the device manual or manufacturer’s website for troubleshooting suggestions.
- Do a factory reset and monitor the front panel for improvements.
- Check for firmware updates or software upgrades.
- When nothing works, contact customer service or a technician for help.
You may also find a diagnostic mode on the front panel. It could provide more info about the device issue.
Don’t forget: You don’t have to do everything yourself. Ask for help when needed.
When To Call A Professional For Furnace.
When experiencing trouble with your furnace unit, it is important to troubleshoot the problem to the best of your ability before calling an HVAC technician.
However, if the issue is beyond your understanding or repair capabilities, it is time to seek professional assistance.
Attempting to fix the problem yourself can result in further damage to your furnace unit and can even lead to safety hazards.
To ensure your safety and the longevity of your heating system, it is recommended to call a professional if any of the troubleshooting steps fail or if you do not have the necessary tools or knowledge to fix the issue.
It is also advisable to seek professional help if your furnace ignition switch or safety feature malfunctions.
If you have already tried checking the thermostat settings, filter, power switch, circuit breakers, blower motor, flame sensor, pilot light, gas valve, and pressure switch, and the furnace still does not turn on or only produces lukewarm air, it is time to call an HVAC pro.
According to a study by HomeServiceChats, 64% of furnace problems require a professional repair company to fix the issue. Therefore, do not hesitate to call an expert in the field who can accurately diagnose and repair your furnace unit.
“It’s reassuring to know that my furnace has more safety devices than a nuclear power plant.”
Safety Devices and Features.
Safety is key! It’s essential to know about safety measures and precautions when dealing with any equipment or machinery.
These six devices and features are must-know:
- Emergency Stop Button.
- Safety Guards.
- Lockout/Tag-out Systems.
- Fire Extinguishers.
- Safety Equipment (e.g., goggles, helmets).
- Air and Noise Monitoring Devices.
Furthermore, you should wear proper clothing, maintain machines regularly, and avoid distractions while working. Neglecting safety steps carries serious risks. So, if you’re uncertain about anything related to workplace safety, don’t hesitate to call a professional for help.
The National Safety Council found that an employee gets injured at work every seven seconds.
If your furnace is louder than your in-laws, it’s time to dial a pro!
Furnace Repair and Replacement.
Furnaces are an important source of heat in many homes, so they must work properly.
When deciding to fix or replace a furnace, there are several things to think about, such as;
- The age.
- Repair history.
- Repair costs vs replacing.
A professional can help decide by assessing these factors.
Homeowners should also pay attention to any strange noises or smells coming from their furnaces. If there are rattling or whistling sounds or unusual smells while it’s running, call a professional right away.
For colder areas, furnaces need to be serviced twice a year: before and after winter starts. Even small issues can lead to bigger ones, so don’t wait! If you haven’t serviced it for a while or spot something strange, call a professional.
Don’t delay. Take action!
Troubleshooting with an HVAC Professional.
Complex mechanical systems, like HVACs, can have problems now and then. When talking to an HVAC specialist, make sure to clearly explain your symptoms. This will help them figure out the issue quickly and get it fixed efficiently.
It’s a good idea to schedule routine maintenance appointments to keep your HVAC system in good shape. This way, you can spot and solve small issues before they become bigger and costlier.
Sometimes it’s necessary to call in a pro. For example, if you have electrical or refrigerant problems. Don’t wait till it’s too late; contact a qualified technician straight away!
Preventative measures are key. If you think something’s wrong with your HVAC system, take action and get expert help.
Preventative Measures For Furnace.

As a homeowner, ensuring that your heating system is running smoothly is crucial to staying warm during the cold weather.
- One way to maintain your furnace unit is to regularly clean or replace the filters. This prevents a buildup of dust and debris that can cause damage to your furnace and decrease its lifespan.
- Another preventative measure is to invest in a programmable thermostat. This allows you to control the temperature settings in your home efficiently, saving energy and keeping your home comfortable. It also prevents your furnace from overworking and potentially causing damage.
- It’s important to have a professional HVAC technician inspect and service your furnace unit at least once a year. This ensures that all safety features such as the high limit switch and safety switch are functioning correctly and reduces the risk of any potential safety hazards.
- Additionally, paying close attention to the airflow from your furnace unit can give you an indication of any potential problems. If your furnace is blowing cold or lukewarm air, it may be a sign of a malfunctioning blower motor or ignition sensor.
According to experts, dirty air ducts could also cause furnace problems. They recommend having them inspected regularly to prevent any sudden damage or issues with your furnace.
It’s also important to take note of any unusual noises or smells coming from your furnace unit, as these could indicate a bigger issue that requires immediate attention.
In summary, preventative measures such as regular filter cleaning and investing in a programmable thermostat can increase the efficiency and lifespan of your furnace unit.
However, it’s important to have a professional HVAC technician inspect and service your unit at least once a year to ensure all safety features are functioning correctly and to address any potential issues before they become major problems.
Neglecting furnace maintenance is like skipping a dental check-up, it may seem fine for a while but eventually, you’ll pay the price.
Schedule Regular Maintenance.
To stay away from equipment harm, it’s key to maintain its quality.
This means scheduling inspections and maintenance regularly. Looking after the equipment can save money on repair bills in the future.
Here’s a 5-point guide:
- Decide a maintenance plan that suits the equipment’s usage.
- Assign individuals for inspecting.
- Make checklists for each item that needs examination.
- Arrange repairs if any faults are noticed.
- Record all inspections and repairs.
Aside from inspections, keeping track of costs related to equipment maintenance and fixes is very important. By having this info up-to-date, organizations can get a better idea of how much their assets cost in total.
A cautionary tale: A production company owner neglected to arrange regular maintenance for his machinery. This caused significant damage and unexpected shutdowns during production, leading to financial losses and lower productivity levels. He learned from his mistake and set up a strict preventive maintenance schedule. His equipment ran more efficiently and he saved money on costly repairs.
Save energy and cash by setting your thermostat. That’s what responsible adults do; not paying for unnecessary heating or cooling.
Use Programmable Thermostats.
Programmable Thermostats are the perfect way to control your home’s heating system. Set the temperature and save money, reduce energy waste, and optimize comfort levels.
The table below shows its features:
| Program Schedules | Smart Device Integration | Innovative Features |
| Organize the heating system with schedules throughout the day. Keeps the temperature comfortable when you’re home and saves energy when away. | Programmability makes it easy to integrate smart devices. Control your thermostat from anywhere with a smartphone. | Some Programmable Thermostats come with a touchscreen interface and occupancy sensors to self-adjust the heating according to room occupancy. |
Investing in this system improves energy efficiency while saving money.
Don’t wait to optimize your heating system; avoid those extra energy bills!
Keep the Area Around the Furnace Clean.
Maintaining the area around the furnace is essential for its optimal performance. A clean environment has better air quality and protects from fires and other hazardous incidents.
Clutter, cardboard boxes, and cleaning supplies can ignite when the furnace is hot. So, be sure to keep the area free of these items.
Frequent vacuuming and wiping down prevents dust accumulation, which could harm the furnace. Plus, it will save you repair costs!
Keep valuable items in secure cabinets instead of close to the furnace. This helps with safety in case of emergencies.
My colleague’s family found this out the hard way. They stored gasoline cans near their furnace and had an explosion. They lost many possessions in the house next to the furnace!
So, it’s important to take precautions like keeping a safe distance and secure storage.
Frequently Asked Questions.
Q1: Why is my furnace not turning on at all?
A: There could be several reasons for your furnace not turning on at all. Check the following potential issues:
- Is the thermostat set to the “heat” mode and at a temperature higher than the current room temperature? Is the circuit breaker or fuse for the furnace in your electrical panel tripped or blown? Check and reset or replace as necessary. Is the furnace switch (usually located near the furnace) turned on? Ensure it is in the “on” position. Is the furnace door properly closed? Some furnaces have a safety switch that prevents operation if the door is not securely shut.
- Is the gas supply turned on? Make sure the gas valve to the furnace is fully open.
- Is the pilot light or ignition system functioning? If you have a gas furnace, check if the pilot light is lit. If it’s an electronic ignition system, ensure it is operational.
Q2: Why does my furnace start but then immediately shut off?
A: If your furnace starts but then shuts off almost immediately, consider the following possibilities:
- Is the air filter dirty or clogged? A dirty filter can restrict airflow and trigger a safety feature that shuts off the furnace. Replace the filter if needed.
- Is the flame sensor dirty or malfunctioning? The flame sensor detects the presence of a flame and can cause the furnace to shut down if it fails. Clean the sensor or have it replaced if necessary.
- Is the condensate line blocked? If you have a high-efficiency furnace, a blocked condensate line can trigger a safety mechanism that shuts down the system. Clear any blockages or contact a professional for assistance.
- Is the pressure switch malfunctioning? The pressure switch ensures proper ventilation and can cause the furnace to shut off if it detects an issue. A faulty switch may require replacement.
- Is there an issue with the thermostat wiring? Faulty or loose wiring connections between the thermostat and furnace can lead to improper functioning. Check for any loose or damaged wires.
- Is the furnace overheating? An overheating furnace may shut off as a safety measure. Check for blocked vents, dirty blower motor, or malfunctioning limit switch. Ensure proper airflow and seek professional help if needed.
Q3: Why does my furnace produce no heat even though it’s running?
A: If your furnace is running but not producing heat, consider these potential causes:
- Is the gas supply interrupted? Check if the gas valve supplying the furnace is open. If it’s closed or partially open, turn it fully open.
- Is the pilot light or ignition system malfunctioning? If you have a gas furnace, check if the pilot light is lit. For electronic ignition systems, ensure they are working properly. If not, relight the pilot or have the ignition system serviced.
- Is the thermostat calibrated correctly? Check if the thermostat is accurately sensing the temperature and set it to the desired heat mode. Recalibrate or replace the thermostat if necessary.
- Is the air filter dirty or clogged? A dirty filter can restrict airflow and prevent proper heat circulation. Replace the filter to ensure efficient operation.
- Is the blower motor or fan malfunctioning? A faulty blower motor can hinder the distribution of heat. Inspect the motor and have it repaired or replaced if needed.
- Is the heat exchanger or burners dirty or damaged? Accumulated dirt or debris on the heat exchanger or damaged burners can impede heat transfer. Have a professional clean or repair them.
Conclusion:
If your furnace is not turning on, it’s important to systematically troubleshoot the potential issues. Start by checking if the thermostat is set correctly and if the circuit breaker or fuse for the furnace is tripped. Ensure the furnace switch is on and the gas supply valve is fully open. For gas furnaces, verify the pilot light or ignition system is functioning. If the furnace starts but quickly shuts off, clean or replace the air filter, check the flame sensor, clear any condensate line blockages, and inspect the pressure switch. If the furnace is running but not producing heat, confirm the gas supply, pilot light, thermostat calibration, air filter cleanliness, and the condition of the blower motor, heat exchanger, and burners. By addressing these possible causes, you can resolve many common issues and restore your furnace’s proper functioning. If needed, seek professional assistance for thorough diagnostics and repairs.