
Table of Contents
Cleaning my fan heater is essential! Not only for its looks, but also for its efficiency. Dust & debris can build-up inside, making it work harder and possibly leading to damage. Plus, a dirty fan heater can become a fire hazard!
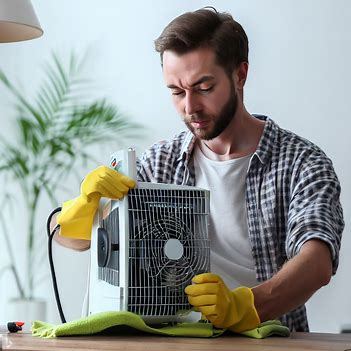
Safety first: unplug & turn-off the fan heater before cleaning. Wipe down the exterior with a soft cloth or paper towel. Then, use a vacuum with a brush attachment to gently clean the grill and vents.
For a more thorough job, use a damp cloth & mild soap on the exterior parts. Take caution not to let any water near the electrical parts or inside the casing. Allow the fan heater to dry fully before plugging it back in.
Cleaning my fan heater can improve its performance and enhance safety in my home. Removing dirt, dust and debris from the grill & vents will ensure optimal heat with no fire risks.
Importance of Cleaning a Fan Heater
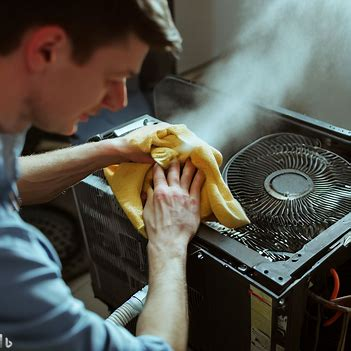
Unplug your fan heater from the power source. Wipe its exterior with a dry cloth or paper towel. Use a vacuum cleaner with a brush attachment to remove particles from hard-to-reach areas.
Next, remove the grill, if needed. Refer to manufacturer instructions. Clean both sides of the grill using a cloth or brush.
Cleaning the interior components requires expertise. Seek professional help or contact your manufacturer for guidance.
Remember to clean your fan heater regularly. This will ensure its longevity and performance. Plus, it can save you money on heating bills. Enjoy a safe and comfortable heating experience without worries!
You’ll need a vacuum cleaner, a cloth, and determination to clean your fan heater.
Tools and Materials Required
It’s essential to clean fan heaters. Here’s what you need:
- Cleaning cloth: Soft and free of abrasive materials.
- Vacuum cleaner: To get rid of dust in hard-to-reach areas.
- Paper towels: For wiping off moisture and cleaning solution.
- Mild cleaning solution: If the fan heater has sticky residue.
- Mask: To protect from allergens and particles.
Safety is key. Unplug the fan heater before cleaning and never use water or spray liquids directly on it. Plus, keep all distractions away. A little cleaning goes a long way!
Safety Precautions
When it comes to cleaning a fan heater, safety is key! Here are some things to keep in mind:
- Turn off and unplug the heater before beginning.
- Avoid using water or any liquid cleaners on the surface, as it can cause electrical damage or even electric shock.
- Use a soft cloth or paper towel to wipe away dust and debris. Make sure no moisture gets into the internal components.
- Vacuum with a brush attachment, if needed. This helps maintain proper airflow and prevents overheating.
Remember a few extra things while cleaning your fan heater.
Fan heaters have evolved over history. In the past, they lacked safety features, resulting in fires or electrical damage. Now, they have built-in mechanisms to minimize risks and ensure safer operation. Regular cleaning and following safety precautions can extend the heater’s lifespan and improve performance.
So, prioritize safety when you clean your fan heater!
Step-by-Step Guide: How to Clean a Fan Heater
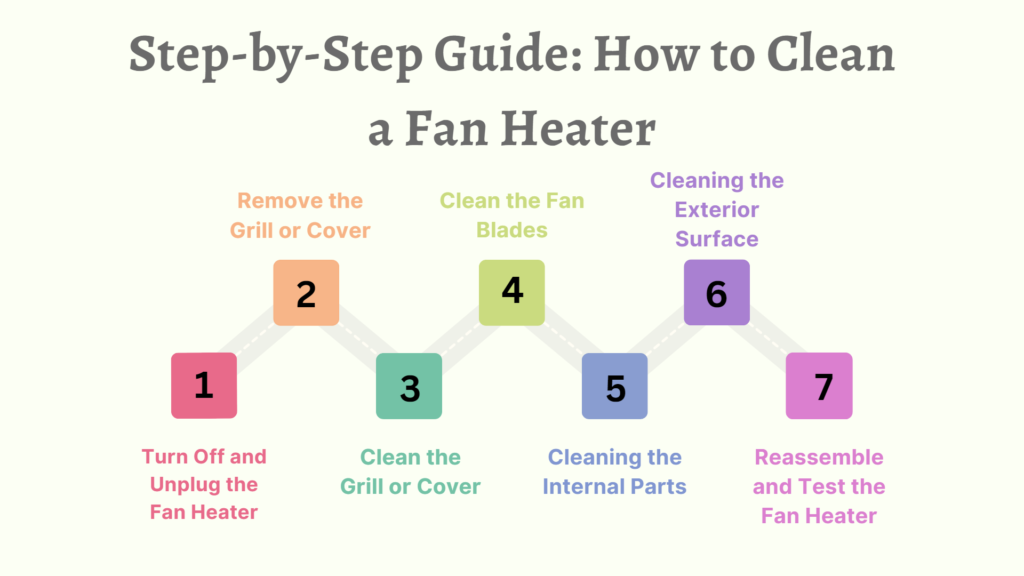
In this step-by-step guide, we will walk you through the process of effectively cleaning a fan heater, ensuring optimal performance and a clean living environment.
Step 1: Turn Off and Unplug the Fan Heater
When cleaning your fan heater, the first step is key! Turn it off and unplug it. This keeps you safe and the heater working longer. To do this:
- Find the power switch or dial and turn it to “off”. This cuts off the power supply.
- Unplug the fan heater from the socket. Pull out the plug gently, without yanking the cord.
- Wait a few minutes for any heat to die down before cleaning. This stops any accidental burns.
Now you can proceed with cleaning knowing the heater is safe. Cleaning regularly boosts its performance and extends its lifespan.
Remember: Not turning off and unplugging the fan heater before cleaning can lead to electric shock or damage. Always prioritize safety when cleaning electrics!
Step 2: Remove the Grill or Cover
For a thorough clean and great performance, you must remove the grill or cover of your fan heater. Here are four steps:
- Turn off and unplug the fan heater for safety.
- Find the screws or fasteners that keep the grill or cover in place. These are usually on the back or sides. Use a screwdriver or other tool to loosen and remove them.
- Once the screws are out, carefully lift off the grill or cover from the fan heater. Don’t force it, as it may be securely attached.
- Put the grill or cover aside and start cleaning the interior components of the fan heater.
Each fan heater model may have slight differences in how the grill or cover is attached. Check your product manual if needed. Be careful when handling fragile parts or components while removing the grill or cover. Take your time to avoid any damage.
Pro Tip: If you have difficulties, watch online tutorials or contact customer support for assistance specific to your fan heater model. Cleaning the grill or cover will make sure your fan heater looks brand new!
Step 3: Clean the Grill or Cover
Cleaning fan blades may sound easy, but it can be more challenging than it seems. Here are some steps to clean fan blades:
- Make sure the fan is turned off and unplugged before you start.
- Prepare a cleaning solution by mixing mild dish soap with water.
- Use a step stool or ladder to reach the fan blades safely.
- Take a damp cloth or sponge and gently wipe the fan blades, removing any dust or dirt. Be careful not to bend or damage the blades.
- If the blades are particularly dirty, you may need to use a soft brush or vacuum cleaner with a brush attachment to loosen the dirt.
- After cleaning, wipe the blades again with a clean, damp cloth to remove any residual cleaning solution.
- Allow the blades to dry completely before turning the fan back on.
Remember to always exercise caution when cleaning fan blades to avoid accidents or injuries. If you’re unsure or uncomfortable with the process, it’s best to seek professional help.
Step 4: Clean the Fan Blades
Cleaning fan blades is key to keeping your fan heater in top shape. This prevents dust and debris from clogging up the works, ensuring proper airflow and better performance. Here’s how to clean them up:
- First, shut off and unplug your fan heater. This’ll ensure safe cleaning.
- Then, take off the grill or casing. Check for screws, clips, and remove gently.
- Use a soft cloth or brush to wipe away dust. Be careful not to break the blades.
- Vacuum with brush attachment to get stubborn particles. Brush along each blade and around motor area.
- Reassemble and test. Make sure everything’s working.
Regularly cleaning your fan blades not only boosts efficiency, but also extends its lifespan. Plus, it prevents fire hazards and maintains optimal airflow.
Pro Tip: Wear a mask while cleaning to avoid breathing in particles.
Step 5: Cleaning the Internal Parts
Cleaning the internal parts of a fan heater is important to maintain its efficiency and lifespan. Here’s a guide to clean it effectively:
- Turn off & unplug the fan heater. Safety first!
- Remove the casing. Unscrew or unlatch it, based on the model.
- Clean with a cloth or vacuum. Get rid of dust, dirt and debris from the blades, heating element and other internal parts. Be careful not to damage any delicate components.
- Use compressed air for hard-to-reach areas. To get rid of dust and particles in tight corners and crevices.
- Reassemble and test. Put the casing back in place. Plug it in and turn it on to test it.
Regular cleaning is essential for optimal performance. A friend of mine neglected to clean their fan heater for months. The performance decreased, and eventually it stopped working. They had to spend money on repairs & replacements that could have been avoided with regular cleaning. Clean fan heaters are reliable and efficient!
Step 6: Cleaning the Exterior Surface
Cleaning the exterior of a fan heater is essential. Here’s how:
- Turn it off and unplug it. Safety first!
- Wipe away dust and debris with a soft cloth or paper towel. Be gentle!
- Use a vacuum cleaner with a brush attachment to clean hard-to-reach areas. On low setting, to avoid damage.
- For grills or vents, use a blower or compressed air canister. Gently blow away dirt and particles.
- Wipe with a damp cloth and let dry completely before plugging in and using again.
Clean both the interior and exterior of your fan heater. It’ll improve performance and help prevent overheating.
I neglected cleaning the exterior for a while and saw an immediate improvement after following these 5 steps. Regular cleaning is key for optimal functioning and longevity.
Finally, reassemble and test the fan heater. Proving you’re a responsible adult!
Step 7: Reassemble and Test the Fan Heater
- Place your fan heater on a flat surface in a ventilated area.
- Align the tabs and slots of the casing, press them together until they snap into place.
- Secure the grill by lining up the clips with the slots and pushing it in firmly.
- Plug in the heater and turn it on to check if it’s working.
- Listen for any strange sounds or smells during operation.
- Make sure all buttons and controls are functioning correctly.
- Don’t forget to clean your fan heater regularly. It’s essential for its performance and efficiency, just like sanity needs regular upkeep!
Additional Tips for Maintaining a Clean Fan Heater
Make sure your fan heater is always clean! Here are some tips to follow:
- Wipe down the outside with a damp cloth.
- Use a brush attachment and vacuum to clean the grill and vents.
- If it has a removable grill, wash it with warm soapy water and let it dry.
- Blow out dust inside for improved airflow.
- Deep clean if you notice strange smells.
Clean regularly to maintain optimal performance and extend its life. Plus, don’t forget to unplug before cleaning. Safety first! Now that you know how to clean your fan heater, you’ll always keep your space snug and your jokes sizzling.
Frequently Asked Questions
1. How do I clean a fan heater?
To clean a fan heater, start by unplugging it and allowing it to cool down completely. Use a damp cloth or paper towel to wipe the exterior surface and remove any dust or debris. For the grill and fan blades, you can use a vacuum cleaner with a brush attachment to gently remove the buildup. Be sure to clean the casing and other components as well.
2. How do I clean a bathroom heater exhaust fan and light?
Cleaning a bathroom heater exhaust fan and light involves removing the cover and using a brush or vacuum to remove any dust or debris from the fan blades and the surrounding area. Wipe the cover and other parts with a damp cloth or mild cleaning solution. Be sure to turn off the power before cleaning and follow the manufacturer’s instructions.
3. How do I clean a Dyson fan heater?
To clean a Dyson fan heater, first unplug the device and let it cool down. Use a damp cloth or soft brush to wipe the surface and remove any dust or dirt. For the fan blades, gently use a vacuum cleaner or a brush attachment to clean them. Avoid using water on the fan blades or the interior of the device.
4. How do I clean a Pelonis fan heater?
Cleaning a Pelonis fan heater involves unplugging the device and allowing it to cool. Use a soft cloth or brush to wipe the surface, including the grill and fan blades. For any stubborn dirt or debris, you can use a vacuum cleaner with a brush attachment. Avoid using water or liquid cleaners on the fan heater.
5. How do I clean a stove fan filter?
To clean a stove fan filter, start by removing it from the stove. Use a soft brush or vacuum cleaner to remove any loose debris. Fill a sink or basin with warm water and a mild detergent, and soak the filter for a few minutes. Gently scrub the filter with a brush before rinsing it thoroughly and allowing it to dry completely before reattaching it to the stove.
6. How do I clean a Mainstays fan heater?
To clean a Mainstays fan heater, begin by unplugging it and allowing it to cool. Use a soft cloth or vacuum cleaner with a brush attachment to remove any dust or debris from the exterior surface. For the grill and fan blades, you can use a soft brush or cloth to wipe them. Avoid using water or liquid cleaners on the unit.
Conclusion
Cleaning a fan heater is key to keeping it working well and lasting longer. To clean it and boost its performance, follow the steps here!
- Unplug the heater and let it cool.
- Wipe away any dirt from the outside using a soft cloth or paper towel.
- Use a vacuum cleaner with a brush attachment to clean the grill and components. Vacuum the grill carefully, focusing on hard-to-reach spots where dust can gather.
- Also check and clean the inside of the heater, after removing the casing (as per manufacturer instructions). Blow or use compressed air to remove any dust blocking the air flow.
- Keep the thermostat clean too. Dust or debris on it can mess with its accuracy, causing temperature fluctuations and poor heating. Gently clean it with a cloth or brush.