
Table of Contents
Key Takeaways
- 1. Regular maintenance is essential for keeping a tankless water heater functioning efficiently. Cleaning the unit at least once a year can help prevent mineral buildup and extend its lifespan.
- 2. Before cleaning the tankless water heater, it is important to turn off the power supply and shut off the gas or water supply to ensure safety.
- 3. The cleaning process involves flushing the unit with a descaling solution to remove mineral deposits. This can be done by connecting a pump and hoses to the water heater and circulating the solution through the system.
- 4. It is crucial to follow the manufacturer’s instructions and use the recommended descaling solution to avoid damaging the unit. Using vinegar or other homemade solutions may not be as effective and can potentially harm the water heater.
- 5. After the descaling process, it is important to flush the system with clean water to remove any remaining descaling solution and debris. This can be done by connecting hoses and running water through the unit until it runs clear.
- 6. Regularly cleaning the tankless water heater can help improve its efficiency and performance, as well as prevent potential issues such as reduced water flow or damage to internal components.
- 7. If you are unsure about how to clean your tankless water heater or if you encounter any difficulties during the process, it is recommended to consult a professional plumber or contact the manufacturer for guidance.
Tankless water heaters are a convenient and efficient way to provide hot water in your home. However, like any other appliance, they require regular maintenance to keep them running smoothly. In this article, we will discuss how to clean a tankless water heater in a step-by-step process to ensure its optimal performance.
To begin with, it is important to turn off the power and water supply to the tankless water heater before starting the cleaning process. This will ensure your safety and prevent any accidents. Once the power and water are turned off, you can proceed with the cleaning.
Firstly, locate the isolation valves on the cold water supply and hot water return lines. These valves will allow you to isolate the tankless water heater from the rest of your plumbing system. Close these valves to prevent any water flow into the water heater.
Next, you will need to connect a submersible pump to the cold water inlet and hot water outlet valves using hoses. Make sure the hoses are securely connected to avoid any leaks. Place the pump in a bucket filled with a solution of white vinegar and water, with a ratio of 1:1.
Once everything is set up, open the cold water inlet and hot water outlet valves to allow the vinegar solution to circulate within the tankless water heater. Let the solution run through the heater for about 45 minutes to an hour. This will help dissolve any mineral deposits or scale buildup within the heating elements and heat exchanger.
After the vinegar solution has circulated for the recommended time, turn off the power and water supply to the tankless water heater. Disconnect the hoses and drain the vinegar solution from the heater. You can do this by opening the cold water inlet and hot water outlet valves and allowing the solution to drain out through the drain valve.
Once the vinegar solution has been drained, you can flush the tankless water heater with fresh water. Connect a garden hose to the cold water inlet and open the hot water side of a nearby faucet to allow the water to flow through the heater. This will help remove any remaining vinegar residue and ensure the tankless water heater is clean.
To complete the cleaning process, reconnect the hoses to the cold water inlet and hot water outlet valves. Open the isolation valves to allow the tankless water heater to receive water again. Turn on the power and water supply to the heater and check for any leaks.
A tankless water heater is like a unicorn – it’s magical, efficient, and you’ll never find it in my house.
Brief overview of tankless water heaters
Tankless water heaters are a popular choice for those looking for an energy-saving and space-saving solution. They heat water on demand, no bulky storage tank needed. Here’s a quick overview of these innovative devices:
- Hot water on tap: Traditional heaters store a limited amount of hot water. Tankless models heat it as it passes through the unit. So there’s always hot water for showers, dishes, and laundry.
- Save energy and money: With tankless, power is only used when hot water is needed. This means lower bills and less environmental impact.
- Compact design: Tankless units are much smaller than traditional heaters, freeing up space in homes. They can be installed on walls or in tight spaces like closets or under sinks.
- Long-term durability: Properly maintained, tankless water heaters last up to 20 years. This means cost savings and less waste.
- Precise temperature control: With tankless, users can set the exact temperature they want. This prevents scalding accidents.
- Professional installation: Tankless water heaters are complex, so they need to be installed by qualified pros for optimal performance and safety.
Also, tankless units may have higher upfront costs due to installation. But, in the long run, the energy savings usually make up for it.
Pro Tip: In larger homes or buildings with high hot water demands, consider installing multiple tankless units. This will keep the hot water flowing without compromising performance. For a tankless water heater, give it a detox from time to time.
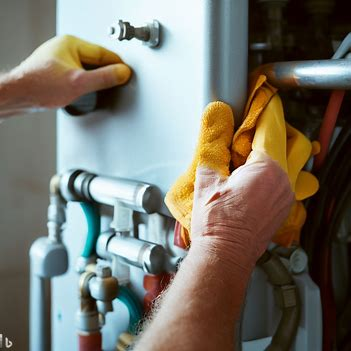
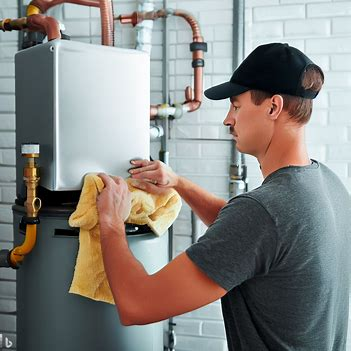
Importance of cleaning a tankless water heater
It’s essential to keep a tankless water heater clean for optimal performance and longevity. Regular cleaning removes mineral deposits and scale buildup, so you can enjoy efficient heating and a constant supply of hot water. Neglecting maintenance leads to reduced water flow, decreased heating capacity, and even damage to the heating elements or heat exchanger.
Safety first: Make sure to turn off the power and water supply to the tankless water heater. Next, locate and remove the filter. Clean or replace the filter regularly to prevent clogs.
Vinegar = your go-to cleaning solution. Connect a pump and hoses into a bucket filled with white vinegar. Circulate this solution through the inlet valve to flush out any mineral deposits or sediments. Flush your tankless water heater with vinegar at least once a year.
A homeowner neglected maintenance for several years. Mineral buildup caused heat exchanger blockage and overheating, leading to sky-high energy bills and costly repairs. This is why regular cleaning is vital for maximizing performance and avoiding costly repairs.
Preparation for the cleaning process of a tankless water heater

To ensure effective cleaning of your tankless water heater, follow these steps:
- Turn off the power and water supply: Before starting the cleaning process, turn off the power supply to the water heater. Locate the circuit breaker designated for the heater and switch it off. Next, turn off the water supply by closing the cold and hot water valves.
- Gather necessary tools and materials: To clean a tankless water heater, you will need a submersible pump, a gallon bucket, a garden hose, and white vinegar. These items will help flush out any mineral deposits and scale buildup that may be affecting the performance of your heater.
- Drain the water heater: Connect one end of the garden hose to the drain valve on the water heater and place the other end into the gallon bucket. Open the cold water inlet valve and let the water drain out completely. This step will help remove any remaining water from the heater.
It is important to note that different tankless water heater models may require specific steps for preparation. Therefore, always refer to the manufacturer’s instructions for your specific heater model.
For best results, it is recommended to clean your tankless water heater at least once a year. Regular maintenance will help prevent issues caused by mineral buildup and ensure the longevity of your water heater.
Gathering necessary materials and tools: The first step in cleaning a tankless water heater is to gather your supplies, because trying to clean it with just your good looks won’t get the job done.
Gathering necessary materials and tools
To prep for cleaning, gather the materials and tools you need. Here’s a guide to help:
- Checklist all cleaning supplies, like solutions, brushes, sponges, gloves, and buckets.
- See if any items can be reused or replenished.
- Research any special tools or equipment needed for particular tasks.
- Plan your shopping list using the checklist and make sure you have all items before starting.
- Organize materials and tools in an accessible way.
- Double-check the checklist before beginning.
It’s important to consider unique details when gathering materials and tools. For example, some surfaces need special solutions or tools to prevent damage. Refer to manufacturer instructions or get professional advice when unsure.
Using the right tools can make cleaning more effective and efficient (Source: American Cleaning Institute). Make sure you turn off the power and water supply before cleaning, or your broom might become a lightning rod and your mop a sprinkler system!
Turning off the power and water supply
Before starting to clean, power and water supply must be turned off. To help, here’s a guide:
- Find the main power switch or circuit breaker in your home. It’s usually in the electrical panel or fuse box. Turn it off to cut off electricity.
- To turn off the water supply, locate the main shut-off valve. It’s near the water meter or where the main water line enters your property. Turn it clockwise to stop the water flow.
- To verify they’re shut off, test outlets and faucets in various places.
Follow these suggestions for safety:
- Unplug all electrical appliances or devices before turning off power.
- Drain remaining water from faucets, pipes, and appliances after shutting off water.
- Have emergency lighting in case of unexpected blackouts.
Turning off power and water supply is important. It keeps you safe and helps you clean more easily.
Warning: Flushing the tankless water heater may make your pipes ask themselves why they exist.
Flushing the tankless water heater
To properly maintain your tankless water heater, it is important to regularly flush it. Flushing the tankless water heater involves removing mineral deposits and scale buildup that can affect its performance and efficiency. Below is a step-by-step guide on how to flush a tankless water heater:
- Turn off the power: Start by turning off the power to the tankless water heater. Locate the circuit breaker for the water heater and switch it off to ensure safety during the flushing process.
- Turn off the water: Locate the cold and hot water valves on the tankless water heater and close them to stop the water flow. This will prevent any water from entering the heater during the flushing process.
- Connect the hoses: Connect one end of a garden hose to the cold water inlet valve of the tankless water heater. Connect the other end of the hose to a nearby drain valve or a bucket to collect the flushed water. Ensure the hose is securely connected to avoid any leaks.
- Flush the tank: Open the hot water side of a nearby faucet to create an air gap in the plumbing system. Open the cold water inlet valve on the tankless water heater and let the water flow through the unit and out through the hose. This will flush out any mineral buildup or scale inside the heater.
- Drain the water: Once the water running from the hose appears clear, close the cold water inlet valve and disconnect the hose. Open the hot water side of the nearby faucet again to allow the water to drain from the tankless water heater. This will remove any remaining water from the unit.
Pro Tip: It is recommended to flush your tankless water heater at least once a year or more frequently if you live in an area with hard water. Flushing helps maintain the efficiency and longevity of your water heater.
By following these steps, you can effectively flush your tankless water heater and ensure it continues to provide you with hot water efficiently.
Flushing with vinegar: the bitter solution to your tankless water heater woes.
Step-by-step instructions for flushing tankless water heater with vinegar

- Turn off the power supply for safety.
- Shut the cold-water inlet and hot-water outlet valves to separate the water heater from the plumbing system.
- Connect a hose to the cold-water inlet valve. Place the other end in a drain or bucket.
- Open the pressure relief valve and nearby faucets.
- Turn on both valves to allow water to flow through the hose and flush out sediment or mineral deposits.
- Close the valves again.
- Mix a 50/50 solution of vinegar and water.
- Pour it into a container attached to the cold-water inlet valve with a hose.
- Turn on the valves for the vinegar solution to flow through the water heater for an hour.
- Dissolve any deposits inside.
- Flush your tankless water heater annually.
- Don’t buy cleaning solutions – just mix vinegar and water!
Mixing vinegar solution
Mixing vinegar solution is a must for flushing the tankless water heater. It gets rid of mineral deposits and keeps the heater working great. Here’s how to do it right:
- Measure: Check your manufacturer’s instructions and calculate the amount of vinegar you need. Generally, mix equal parts of vinegar and water. Use white distilled vinegar for success.
- Mix: In a container, blend the vinegar and water together. Make sure it’s big enough to hold the entire solution.
- Stir: Stir well until everything is mixed. Make sure the vinegar and water are even.
- For extra potency, some heat the vinegar before flushing. But, read your manufacturer’s guidelines carefully to avoid any trouble.
Vinegar solution not only removes mineral buildup but also banishes bad odors inside the tankless water heater.
It’s amazing how far back the use of vinegar for cleaning goes. Ancient civilizations like Romans used acidic solutions like vinegar for various tasks such as sanitation and cleaning. Through generations, vinegar has remained a go-to choice for taking care of appliances like tankless water heaters.
Connecting hoses and pump
To flush your tankless water heater, it’s essential to connect hoses and a pump. Here’s how:
- Turn off the power supply to the heater for safety.
- Attach a hose to each drain valve. Tighten them to prevent any leaks.
- Connect the other ends of the hoses to a pump. This will create pressure to flush out debris and sediment.
Note: Each tankless water heater may have different instructions. Refer to the product manual or manufacturer guidelines.
Be careful with hot water and use proper safety measures.
Flushing is key for maintaining your unit’s performance. It’ll extend the lifespan and improve energy efficiency, saving you money. So take action now and give your water heater the care it deserves!
Flushing the system with vinegar solution
Flushing your tankless water heater with a vinegar solution is essential! By doing this, you can remove mineral deposits and any other build-up that could reduce its efficiency. Here’s a 6-step guide to successfully flush it:
- Turn off the power.
- Close the cold water supply valve.
- Attach hoses to both hot & cold water service valves.
- Submerge hose ends in a container of vinegar & water.
- Open both service valves for 45 minutes.
- Turn off service valves, rinse hoses, & reattach.
Never skip this maintenance step! Flushing with vinegar annually will keep your tankless water heater running smoothly and extend its lifespan. Plus, you might just find the plumber’s lost wedding ring floating around in there!
Draining the vinegar solution
- Switch off the power supply to your tankless water heater
- Attach a hose to the drain valve at the bottom
- Place a bucket beneath the other end of the hose to collect the vinegar solution
- Open the drain valve and let the vinegar solution drain out
- Close the drain valve once done
- Flush the tankless water heater with cold water to remove any remaining vinegar residue
- While draining the vinegar solution, check for sediment or debris
- This step is crucial to extend the lifespan and efficiency of your tankless water heater
- Do not skip this step as it could result in costly repairs or early breakdowns
- Cleaning your tankless water heater is optional but highly recommended for better results
- Restore the power supply and ensure that everything is running smoothly
Cleaning the filter and heat exchanger of tankless water heater
To maintain the optimal performance of your tankless water heater, regular cleaning of the filter and heat exchanger is essential. Neglecting this maintenance task can lead to reduced efficiency and potential damage to your unit.
Step Guide for Cleaning the Filter and Heat Exchanger:
- Turn off the power and water supply: Before starting the cleaning process, ensure that the power to the water heater is turned off and the water supply is shut off. This step is crucial for your safety and to prevent any accidental water flow during the cleaning process.
- Remove and clean the filter: Locate the filter on your tankless water heater. It is usually located near the cold water inlet. Use a wrench or pliers to unscrew the filter housing and carefully remove the filter. Rinse the filter with water to remove any debris or sediment. If there are significant mineral deposits, soak the filter in a vinegar solution overnight to dissolve them. Rinse the filter thoroughly before reinstalling it.
- Flush the heat exchanger: The heat exchanger is responsible for heating the water in your tankless water heater. Over time, mineral deposits can accumulate and hinder its efficiency. To flush the heat exchanger, connect a submersible pump to the cold water inlet and place the pump into a bucket filled with a vinegar and water solution (1:1 ratio). Open the hot water side of a nearby faucet and turn on the pump. Let the solution circulate through the system for about 20 minutes to dissolve any mineral buildup. Afterward, disconnect the pump and flush the system with clean water to remove any remaining vinegar solution.
It is important to note that the cleaning frequency may vary depending on the mineral content in your water and the manufacturer’s recommendations. Regularly inspecting and cleaning the filter and heat exchanger will help maintain the efficiency and longevity of your tankless water heater.
True fact: According to a study conducted by the Water Quality Association, hard water can reduce the efficiency of tankless water heaters and increase energy consumption. Regular cleaning and maintenance can help mitigate the effects of hard water on your tankless water heater.
Removing and cleaning the filter requires more patience than waiting for your ex to text back, but it’ll give your tankless water heater a fresh start.
Removing and cleaning the filter
- Turn off the power supply to the system.
- Locate and remove the filter. It’s usually near the return air duct or behind a cover panel.
- Clean the filter with a vacuum cleaner or rinse it with water, if it’s washable.
- Make sure it’s completely dry before reinstalling.
- Place the filter back in its position, securely.
Pay attention when cleaning the filter. Look for signs of damage, like holes or tears. If you find any, you may need to replace it.
Ancient civilizations like Egypt and Rome knew the importance of clean air. They used simple filters made from materials like woven fabric or plants to purify their air. This knowledge is the foundation of modern HVAC systems.
Regular maintenance of the filter will improve air quality, and help your system last longer. Don’t forget this step!
Cleaning the heat exchanger
John, a homeowner, neglected his heat exchanger for years. The result? Decreased airflow and poor performance! After seeking professional help, he learned the importance of regular cleaning and vowed never to overlook it again. Now, he enjoys a comfy home with a functioning heat exchanger.
So, what steps should you take to maintain your heat exchanger’s cleanliness?
- Turn off the power. Safety first!
- Remove the casing. Note where the screws are.
- Inspect and brush away any dirt or debris.
- Wipe down all surfaces with warm water and mild detergent.
- Rinse off all residues with clean water or damp cloth.
- Reassemble and test the system.
Schedule routine professional maintenance checks too! Cleanliness is key for an efficient heat exchanger and a more comfortable home. Get ready to breathe life into your house!
Final steps and maintenance tips for tankless water heater
To properly maintain your tankless water heater and ensure its optimal performance, there are a few final steps and maintenance tips that you should consider.
Here is a step-by-step guide to help you with the final steps and maintenance tips for your tankless water heater:
- Perform regular flushes: Flushing your tankless water heater at least once a year helps remove any buildup of mineral deposits and maintains its efficiency. Follow the manufacturer’s instructions or consult a professional plumber to ensure you perform the flush correctly.
- Check the pressure relief valve: Make sure the pressure relief valve is working properly by testing it periodically. This valve helps prevent excessive pressure buildup in the water heater, which can lead to leaks or other problems. If you notice any issues, consider scheduling a service to have it inspected.
- Inspect the water inlet filter: The water inlet filter is responsible for preventing debris and sediment from entering your tankless water heater. Regularly check and clean this filter to ensure proper water flow and prevent any clogs or damage to the unit.
- Keep an eye on the water quality: If you live in an area with hard water, consider installing a water softener or using a water softening system. Hard water can cause mineral buildup inside the tankless water heater, reducing its efficiency and lifespan. By maintaining good water quality, you can extend the life of your tankless water heater.
In addition to the steps mentioned above, it is important to be mindful of other details for the proper maintenance of your tankless water heater. Pay attention to any unusual noises or changes in the performance of your unit, as these may indicate a need for professional servicing. Regularly check the gas or electric connections and make sure they are secure. Additionally, consider insulating the hot water pipes to reduce heat loss and improve energy efficiency.
Understanding the importance of proper maintenance, many homeowners have successfully extended the lifespan of their tankless water heaters by following these final steps and maintenance tips. By taking proactive measures and addressing any issues promptly, you can enjoy the benefits of a reliable and efficient hot water supply for years to come. When it comes to reassembling and turning on the water and power, just remember: it’s like putting the pieces of a puzzle back together, but with more electricity and potential water damage.
Reassembling and turning on the water and power
- Reassembling: Carefully put back all the components disconnected during maintenance. Follow manufacturer’s instructions or extra guidelines for proper reassembly.
- Turning on the water: Securely reassemble first. Then, open the main shut-off valve slowly to avoid pressure surges or pipe damage. Check for leaks or water flow irregularities.
- Turning on the power: Confirm no water leaks. Handle electrical connections with caution and follow safety protocols. Flip on the circuit breaker or switch to allow electricity to flow.
- Testing functionality: Test each component that needed maintenance to make sure they work properly. Look out for any signs of malfunctioning or strange noises.
- Every maintenance scenario may differ. So, consult experts if needed and observe necessary precautions.
Pro Tip: Label electrical connectors during disassembly. This can save time during reassembly and reduce confusion.
Leaks and Proper Functioning: Avoid an unexpected water surprise. Make sure your toilet works correctly.
Checking for leaks and proper functioning
As a responsible homeowner, it’s key to check for leaks often and make sure all systems are working as they should. Ignoring these things could lead to serious damages and costly repairs. To avoid this, here are some steps to take:
- Inspect all visible pipes for any signs of leakage or corrosion – like dripping water, damp spots, or mold growth. If you see anything out of the ordinary, don’t wait to act.
- Look at your faucets and toilets for leaks. If you hear dripping even when fully closed, your faucet’s probably leaking. To check your toilet, put a few drops of food coloring in the tank and wait 15 minutes without flushing. If you spot colored water in the bowl, you have a leak that needs fixing.
- Check hoses and connectors leading to appliances like washing machines and dishwashers. Make sure they’re fastened securely and don’t show signs of wear or tear.
- Examine your water heater for any leakage or malfunctions. It’s important to keep it at the right temperature too, to avoid scalding accidents.
- Last, use a pressure gauge (which you can get at a hardware store) to test your home’s water pressure. It should be between 40-60 psi (pounds per square inch). High pressure can damage pipes and appliances, while low pressure might mean blockages.
Don’t forget to schedule professional inspections and maintenance checks. This way, you’ll save yourself from disasters in the future. Don’t wait too long – make sure your plumbing stays in good shape!
Regular maintenance schedule and recommended practices
Regular maintenance is key for keeping your systems running smoothly. Follow the recommended practices and stick to a schedule! Here’s what tasks to do and how often:
| Task | Frequency |
| Cleaning vents and filters | Monthly |
| Checking for software updates | Weekly |
| Inspecting hardware components | Semi-annually |
| Testing system backups | Quarterly |
Monthly cleaning of vents and filters ensures optimal airflow, preventing dust from blocking performance. Checking for software updates helps protect against security issues and makes sure you can use new tech.
Inspect hardware components, like cables, connectors, and cooling systems, semi-annually. This helps keep things running longer and avoids unexpected breakdowns.
Don’t forget to test system backups quarterly. This keeps data safe and stops trouble if something bad happens.
Follow the schedule and other tips to get the best out of your systems. Don’t wait—avoid problems now! Go ahead and do it!
Frequently Asked Questions
Q1: How do I clean a tankless water heater?
A1: To clean a tankless water heater, you can follow these steps:
- Step 1: Turn off the power and water supply to the heater.
- Step 2: Connect a garden hose to the cold water inlet and another hose to the hot water outlet.
- Step 3: Open the hot water valve and pour white vinegar into the bucket.
- Step 4: Connect the hoses to a submersible pump and place the pump into the bucket.
- Step 5: Turn on the pump and let the vinegar flow through the heater for about an hour.
- Step 6: Disconnect the hoses, close the valves, and flush the heater with fresh water.
Q2: Can I clean a tankless water heater using vinegar?
A2: Yes, you can clean a tankless water heater with vinegar. Vinegar helps dissolve mineral deposits and scale buildup inside the heater. Follow the steps mentioned in the previous answer to clean the heater using vinegar.
Q3: Is it necessary to clean the filter of a tankless water heater?
A3: Yes, it is important to clean or replace the filter of a tankless water heater regularly. The filter prevents debris and sediment from entering the heater, ensuring proper water flow and preventing damage to the unit. Refer to the manufacturer’s instructions for guidance on cleaning or replacing the filter.
Q4: How often should I clean my tankless water heater?
A4: It is recommended to clean your tankless water heater at least once a year to maintain optimal performance and prevent mineral buildup. However, if you live in an area with hard water, more frequent cleaning may be required.
Q5: Should I hire a professional plumber to clean my tankless water heater?
A5: While you can clean your tankless water heater yourself, hiring a professional plumber for routine maintenance is a good idea. They have the expertise to thoroughly clean the heater, inspect for any potential issues, and ensure it is functioning efficiently. You can also schedule service with a plumber if you prefer professional cleaning.
Q6: How much does it cost to clean a tankless water heater?
A6: The cost of cleaning a tankless water heater can vary depending on various factors such as the plumber’s rates, location, and the complexity of the cleaning process. It is best to contact a local plumber to get an estimate based on your specific requirements.
Conclusion
Wrapping up, tidying a tankless water heater is an essential maintenance job that ought to be done routinely. Through following the steps given here, you can guarantee that your tankless water heater works perfectly and lasts a while.
- Routine cleaning of your tankless water heater helps get rid of mineral deposits and scale buildup, improving its efficiency and performance.
- Employing vinegar as a cleaning solution can efficiently dissolve mineral deposits and expand the lifespan of your tankless water heater.
- Flushing the system with vinegar and water clears away any sediment or debris that may have gathered with time.
- Sustaining good water quality by using a water softener or filtration system can also help keep damage to your tankless water heater at bay.
Plus, it’s worth noting that professional aid may be needed for more challenging cleaning tasks or if you’re not sure about certain steps. Always consult a professional plumber if you’re not sure about performing maintenance procedures yourself.