
Table of Contents
Cleaning a thermocouple on a water heater is essential. It senses the pilot flame. If it goes out, the thermocouple detects the temperature change, and shuts off the gas valve.
- Turn off the gas supply and let the unit cool.
- Remove the access panel and slide out the assembly.
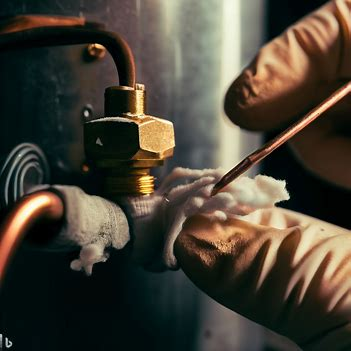
- Disconnect the burner supply tube.
- Detach the thermocouple from the pilot supply tube and gas control valve.
- Gently clean with emery cloth or sandpaper.
- Reassemble when dry.
Note: Cleaning should only be done if it’s dirty or faulty. If you think it’s bad, replace it instead.
The Thermocouple on a Water Heater
The thermocouple on a water heater is a vital part for safe and efficient operation. It’s a safety device that detects a flame present in the burner assembly. If the thermocouple detects the pilot light is out, it shuts off the gas to avoid possible gas leaks.
Purpose: To detect flame in burner assembly.
Location: Near pilot light.
Construction: Two metals joined at one end.
How it works: When heated by flame, one metal creates voltage, producing electric current.
Importance: Stops gas leaks & ensures proper functioning of water heater.
It’s essential to keep the thermocouple clean. Dirt, dust, and other particles can pile up, impeding its ability to detect flame. Here’s how to clean it:
- Turn off gas supply to water heater.
- Remove burner assembly.
- Clean thermocouple.
Cleaning a dirty thermocouple is like giving your water heater an essential therapy session.
Signs of a Dirty Thermocouple on a water heater and the Importance of Cleaning It
A grimy thermocouple can cause all kinds of issues with your water heater, so it’s vital to keep it clean. Here are some signs that point to a dirty thermocouple and why cleaning it is crucial.
- Pilot light won’t stay lit: A dirty thermocouple can stop the pilot light from remaining alight. This is because the thermocouple senses the heat of the pilot flame and keeps the gas supply open. If it’s all mucky, it won’t be able to generate enough electricity to maintain the gas flow, causing the pilot light to turn off.
- Inconsistent or no hot water: A dirty thermocouple can also lead to inconsistent hot water or none at all. When the thermocouple is covered in dirt or gunk, it may not sense the temperature of the water properly, resulting in swings in water temperature or no hot water.
- Not reaching desired temperature: If you find your water heater isn’t reaching the desired temperature, a dirty thermocouple could be the cause. The build-up on the thermocouple stops it from gauging when the desired temperature has been reached, making your heater work harder.
- Hard to get going: Another sign of a dirty thermocouple is having trouble lighting up your water heater. If you’re struggling to ignite the pilot light despite following all the right steps, chances are there’s dirt on the thermocouple messing with its operation.
- More fuel consumption: A dirty thermocouple causes your water heater to work harder than necessary, leading to more fuel consumption. This means you’ll end up paying more on energy bills if you don’t clean your thermocouple.
Cleaning your thermocouple is important as it ensures your water heater runs smoothly and prevents potential issues. These are some tips on cleaning:
- Shut off the gas supply: Before starting the cleaning process, make sure you turn off the gas supply to your water heater. This shields you from any accidents while cleaning.
- Take out the burner assembly: To get to the thermocouple, you have to remove the burner assembly. Read your water heater’s manual or manufacturer’s instructions to safely take out the assembly.
- Clean the thermocouple with emery cloth or steel wool: Gently clean the thermocouple with emery cloth or steel wool to get rid of any dirt or junk that might have built up on its surface. Be careful not to damage the delicate wires when cleaning.
- Reassemble the burner assembly and relight the pilot: After you’ve cleaned the thermocouple, put the burner assembly back together and relight the pilot light according to your water heater’s manual. Make sure everything is firmly in place before turning on the gas supply.
Regularly cleaning your thermocouple will help maintain its performance and keep your water heater running properly. By following these easy steps, you can extend the lifespan of your water heater and avoid unnecessary repairs or replacements. And before we jump into the messy task of cleaning the thermocouple, let’s make sure we don’t turn ourselves into human water heaters!
Safety Precautions Before Cleaning the Thermocouple on a water heater

Before cleaning your water heater’s thermocouple, take safety precautions! Here’s a 5-step guide:
- Shut off the gas supply. Find the gas control valve and turn it off.
- Cut the power. If electric, make sure to turn off the power.
- Let your water heater cool down. Hot components can cause burns.
- Gather tools: adjustable wrench, emery cloth, steel wool, brush.
- Wear gloves and goggles to protect yourself.
Safety first! Remember, don’t skip these steps for a successful cleaning process. Cheap therapy? Cleaning a thermocouple is way better!
Tools and Materials Needed for Cleaning the Thermocouple on a water heater
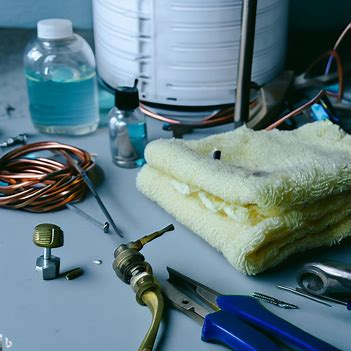
- Gather your tools and materials! You’ll need: Emery cloth or sandpaper, steel wool, a small brush, and an adjustable wrench.
- Don’t forget to turn off the gas supply using the gas control knob and wear protective gloves and eyewear.
If the thermocouple is severely damaged, you may need to replace it instead of cleaning it. In such cases, consult a professional plumber or technician.
And don’t forget to refer to the manufacturer’s instructions when performing maintenance on your water heater.
Fun Fact: Cleaning a dirty thermocouple can help improve its efficiency and extend its lifespan, according to a report by Amazon Services LLC Associates Program.
Step-by-Step Guide on How to Clean a Thermocouple on a Water Heater
Thermocouples play an essential role in water heaters, helping to keep the pilot light working properly. If dirty or worn out, malfunctioning can occur. Here’s a step-by-step guide for cleaning a thermocouple:
- Gather tools: adjustable wrench, emery cloth/sandpaper, steel wool, brush, screwdriver.
- Shut off the gas supply to the water heater. Find the gas control valve near the bottom of the heater and turn it “Off”.
- Remove the burner assembly from the water heater. Use an adjustable wrench to disconnect it from the gas and pilot supply tube.
- Inspect for dirt/debris buildup. Use a small brush to clean off any loose particles.
- Use emery cloth or sandpaper to rub both ends of the thermocouple. Clean every surface thoroughly.
- Scrub away stubborn stains/deposits with steel wool. Be gentle and thorough.
- Check for signs of damage or wear and tear. Consider replacing if faulty.
- Reassemble the burner assembly. Secure it with screws and reconnect gas supply tubes.
- Turn on the gas supply. Light the pilot light according to instructions and make sure it stays lit.
Pro Tip: Clean your thermocouple at least once a year. Regular maintenance will prolong the efficiency and lifespan of your water heater.
By following this guide, you’ll keep your thermocouple in optimal condition. Take safety precautions and consult a professional if uncertain.
Tips and Tricks for Proper Maintenance of the Thermocouple on a water heater
Maintaining your thermocouple is essential for optimal water heater performance. Here’s how to keep it in top shape:
- Clean Up: Dust and debris can build up on the thermocouple, so use a brush or compressed air to get rid of it.
- Inspect for Damage: Check for corrosion or damage. If you find any, replace the thermocouple to prevent further issues.
- Check Pilot Flame: The pilot flame should be blue and steady. A weak or yellow flame could mean a dirty or faulty thermocouple.
- Check Gas Supply: Low gas pressure can cause thermocouple malfunction, so make sure there’s an adequate supply.
- Adjust Position: Make sure the tip of the thermocouple is in the pilot flame, fully immersed for accurate readings.
- Test with Multimeter: Use a multimeter to test thermocouple functionality. Read manufacturer instructions first.
Plus, remember these tips:
- Don’t use abrasive materials like steel wool or emery cloth when cleaning; they can damage the surface.
- When reassembling, make sure all components are tightly secured to prevent gas leaks.
- Get a professional plumber if you’re unsure about doing repairs yourself.
Maintaining your thermocouple means a steady supply of hot water for your home. Do it regularly to keep it in good condition!
Frequently Asked Questions
1. How do I clean a thermocouple on a water heater?
To clean a thermocouple on a water heater, start by shutting off the gas supply and turning off the gas valve. Remove the burner assembly and use emery cloth or sandpaper to clean the thermocouple. Make sure to also clean any other dirty parts. Once cleaned, reassemble the burner and turn the gas back on.
2. Can I clean a thermocouple on a gas water heater?
Yes, you can clean a thermocouple on a gas water heater. Follow the same steps mentioned above to clean the thermocouple and other dirty parts. Cleaning the thermocouple can help resolve issues with the pilot light not staying lit or the water heater not producing hot water.
3. How do I replace a thermocouple on a water heater?
To replace a thermocouple on a water heater, start by shutting off the gas supply and turning off the gas valve. Remove the burner assembly and locate the thermocouple. Disconnect the thermocouple from the gas control valve and remove it. Install the new thermocouple and reassemble the burner assembly.
4. How do I clean a thermocouple on a Rheem water heater?
Cleaning a thermocouple on a Rheem water heater follows the same steps mentioned above. Shut off the gas supply, turn off the gas valve, remove the burner assembly, and clean the thermocouple with emery cloth or sandpaper. Make sure to clean any other dirty parts as well.
5. Can a dirty thermocouple cause problems with my water heater?
Yes, a dirty thermocouple can cause problems with a water heater. It can lead to issues such as the pilot light not staying lit or the water heater not producing hot water. Cleaning the thermocouple can help resolve these problems.
6. Where can I purchase a replacement thermocouple for my water heater?
You can purchase a replacement thermocouple for your water heater at local hardware stores or online. Websites like Amazon offer a variety of thermocouples that are compatible with different types and brands of water heaters.
Conclusion
Time to wrap it up! Cleaning a thermocouple on a water heater is not too tricky. Just follow the steps in this guide and you’ll be able to get it done easily.
Let’s take a look at the key points:
- Firstly, turn off the gas supply before starting any work – safety comes first.
- Then, access the burner assembly and locate the thermocouple.
- Remove dirt and debris with emery cloth or steel wool. Be careful not to damage the component.
- If it’s faulty, a professional plumber or technician should be consulted.
- If the thermocouple is already clean or new, but issues persist, it’s time to call for help. Ignoring problems can cause further damage and expensive repairs.
- To avoid such issues, make sure your water heater is maintained properly. Clean the burner assembly and replace faulty parts promptly.
- Don’t let water heater problems take over your life – take action now!