
Table of Contents
Introduction
Cleaning the inside of a water heater may seem daunting, but with a few simple steps, you can guarantee hot water stays clean and efficient. Here are some tips on cleaning the inside of a water heater safely and effectively.
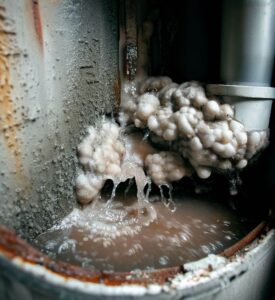
Why is it important? Over time, sediment and mineral buildup can accumulate at the bottom of the tank. This can reduce the efficiency of your water heater and lead to corrosion or leaks. Cleaning the inside removes the buildup and keeps things running smoothly.
- First, turn off the power and cold water supply to your water heater.
- Then, use the drain valve near the bottom to drain the tank. Connect a garden hose and flush out sediment with cold water until it runs clear.
- Another option is to dissolve mineral deposits with white vinegar or citric acid. First, drain the tank. Close the drain valve and pour in the solution. Let it sit for several hours. Then, flush it out with cold water.
- Regular maintenance is also key. Check and replace anode rods, test pressure relief valves, and inspect for leaks for peak performance.
Cleaning the inside of your water heater might be a hassle, but it’s worth it for reliable hot water and a longer lifespan. Give your water heater the care it needs, and reap the rewards!
Key Takeaways
- Regular maintenance and cleaning of your water heater is essential to ensure its optimal performance and longevity.
- Before starting the cleaning process, it is important to turn off the power supply and shut off the water supply to the heater.
- Flushing out the sediment and mineral buildup from the tank is crucial to prevent clogs and improve the efficiency of the water heater.
- Using a hose and a bucket, drain the water from the tank and remove any remaining water using a wet/dry vacuum.
- To remove the sediment, attach a hose to the drain valve and let the water flow until it runs clear.
- For stubborn sediment, you can use a descaling solution or vinegar to break it down and flush it out.
- After cleaning, close the drain valve and refill the tank with water, making sure to open a hot water faucet to release any trapped air.
- Finally, turn on the power supply and monitor the water heater for any leaks or unusual noises.
- It is recommended to clean the inside of your water heater at least once a year to maintain its efficiency and prolong its lifespan.
- If you are unsure or uncomfortable with cleaning the water heater yourself, it is best to hire a professional plumber to ensure the job is done correctly and safely.
Understanding the importance of cleaning the inside of a water heater
To ensure the optimal functioning of your water heater, it is crucial to understand the importance of cleaning its interior. The impact of sediment buildup on water heater efficiency and the potential consequences of neglecting water heater maintenance are the key aspects we will explore. By delving into these sub-sections, you will gain valuable insights into the significance of regular cleaning and maintenance to maintain an efficient and long-lasting water heater.
The impact of sediment buildup on water heater efficiency
Neglecting water heater maintenance can have severe consequences. Such as your shower suddenly becoming a cold-zone and your towels becoming rock hard. To avoid this, regular cleaning and maintenance is essential.
Flushing out the tank annually is one way to do so. Turn off the power or gas supply. Then, attach a hose to the drain valve and let the tank empty completely. This will remove all sediment.
Installing a sediment filter or a whole-house water filtration system is also effective. These filters trap sediments before they get to the water heater, preventing the tank from getting clogged. Change or clean them regularly.
Lastly, get a professional plumber to inspect your water heater. They can identify any issues and make necessary repairs and adjustments. They may suggest additional steps, based on your system’s needs.
Potential consequences of neglecting water heater maintenance
Neglecting water heater maintenance can have serious consequences. Homeowners should be aware of the following risks:
- Reduced efficiency – Sediment and mineral deposits can build up, making it harder for the heating element to heat the water. This can lead to longer heating times and higher bills.
- Increased risk of breakdowns – Small issues can become major problems without regular inspection and care.
- Decreased lifespan – Sediment and debris can cause corrosion and damage, leading to early failure.
- Unpleasant odors and taste – Bacteria can cause bad smells and an undesirable drinking experience.
- Health risks – Legionella bacteria can multiply, causing Legionnaires’ disease.
- Voided warranty – Manufacturers often require regular maintenance for warranty protection.
Routine flushing, inspection and cleaning can help keep a water heater functioning optimally. The EPA states that neglecting maintenance can reduce efficiency by 50% or more. Cleaning a water heater may seem hard, but ignoring it can be worse!
Preparing for the Water heater cleaning process
To prepare for cleaning your water heater, gather necessary tools and materials. Remember to ensure safety precautions are taken.
Gathering necessary tools and materials
Gathering the right tools and materials for cleaning is important. It avoids interruptions and makes tasks easier. So, assess the cleaning areas and decide what you need. Make a list of all the items, including:
- microfiber cloths,
- sponges,
- brushes,
- and dusters.
Get the correct cleaning solutions, such as glass cleaner or fabric cleaner. Don’t forget safety gear like gloves and goggles, too.
Consider extra tools such as a vacuum and duster. Store them in a caddy or bucket to make them easy to find. Label your cleaning solutions – look for eco-friendly alternatives, too.
Be prepared and you’ll get great results! And don’t forget, a socket wrench and Teflon tape may be needed during the cleaning process – or when you take apart the toaster, just for fun.
Socket wrench, Teflon tape, and other required tools
Socket wrenches, Teflon tape and other tools are essential for a successful cleaning process. These help remove and replace components with ease. Six key tools to include in your kit:
- Socket wrench – loosen or tighten bolts and nuts.
- Teflon tape – provides a watertight seal when wrapping around pipe threads.
- Plunger – unclog drains and toilets.
- Screwdriver set – remove screws from various surfaces without damage.
- Wire brush – clean rust, dirt and grime off metal surfaces.
- Cleaning solution – remove stains, grease and dirt without damage.
These tools make the process easier and help tasks to be completed accurately. Having them ready saves time too.
Rector Seal Corporation first introduced Teflon tape in the 1960s as a plumbing sealant. Cleaning with white vinegar or citric acid solution is a ‘mad scientist’ experience in your home!
White vinegar or citric acid solution
White vinegar and citric acid solution are great cleaning agents. They can get rid of stains, disinfect surfaces, and remove odors. Plus, they’re safe and environment-friendly.
Differences between the two? White vinegar has acetic acid (5-20%), while citric acid solution has citric acid. Also, the former has a pungent smell, while the latter has a fruity scent.
White vinegar and citric acid solution can both break down dirt and grime, and they’re especially great for hard water stains, soap scum, and mineral deposits on countertops, sinks, and showerheads.
To use them:
- Dilute each one part to one part water.
- Spray or apply with a spray bottle or sponge. Let sit for a few minutes.
- Scrub gently with a soft brush or cloth (in circular motions).
- Rinse thoroughly with clean water.
White vinegar’s acetic acid kills bacteria and germs. Citric acid solution has antimicrobial properties that can kill bacteria and fungi. So, when you need to wash away your sins, make sure to bring a garden hose and a large bucket for all that dirty evidence!
Garden hose and a large bucket
A garden hose and a large bucket are must-haves for cleaning. They are key to completing your tasks easily. Whether it be washing a car or watering plants, these items are essential.
A garden hose is a flexible tube that lets water flow freely. It is usually rubber or PVC, making it robust and long-lasting. With its long length, you can easily clean outdoor spaces like driveways, patios, and decks.
A large bucket partners up with the garden hose. It holds water, so you can transport it from one place to another. Plus, you can use it to mix cleaning solutions or take dirt and debris while cleaning.
These two create a powerful team that simplifies your cleaning. The hose gives you a plentiful water source, while the bucket helps in carrying and organizing cleaning materials.
Choose quality hoses and buckets. Get hoses with brass fittings as they don’t leak and give better water flow. Select buckets with thick walls that can hold heavy loads without breaking or cracking.
To make the tools even more effective:
- Attach various nozzles to the garden hose for your task. A nozzle with adjustable settings allows you to adjust water pressure.
- Use distinct buckets for different cleaning solutions to prevent chemical reactions.
- Flush the garden hose with clean water after each use.
All these tips make your cleaning process successful. The combo of a dependable garden hose and functional large bucket will let you do any cleaning quickly and easily.
Safety first – because turning cleaning into a risky show is not fun.
Ensuring safety precautions are taken
Before cleaning, taking precautions is a must! Here’s how:
- Wear protective gear such as gloves, goggles, and masks to defend from hazardous chemicals and particles.
- Ventilate the cleaning area to reduce exposure to noxious fumes and improve air quality.
- Read product labels carefully and follow instructions to avoid any mishaps.
More importantly, keep in mind these extra details. Store cleaning products far away from children and pets. As well, be cautious when using electronic appliances on wet surfaces to avoid electric shocks.
To increase safety while cleaning, ponder these ideas:
- Write down tasks to make sure you don’t miss any spots that need cleaning. This will help you stay consistent and do a thorough job.
- Take regular breaks during lengthy cleaning sessions to avoid fatigue and injury.
- Have emergency numbers close by in case of accidents or urgent assistance.
By following these pointers, you not only focus on safety but also make your cleaning process smoother. Always remember, taking necessary precautions is important for a secure and successful cleaning experience.
Oh, and don’t forget to switch off the power supply before cleaning, or else your vacuum cleaner might just become a fire-breathing dragon!
Turning off the water heater power supply
Turn off the power supply first! This is a must before you start to clean. It ensures safety and helps prevent any electric accidents. Don’t forget this step, or there could be injuries or equipment damage. Here’s a simple 3-step guide:
- Find the main power switch: It’s usually close to the electric panel or distribution board. Be extra careful and wear gloves and goggles for safety.
- Turn it off: Switch the main power switch to “off”. This will cut off electricity to all connected devices and systems. Check twice that it’s in the right position.
- Check it’s off: To make sure, check if any lights or appliances are still on. Test it with an electric tester or plug in a known-working device into outlets.
Plus, here are some suggestions for a smoother process:
- Plan: Before you start, make a list of areas that need attention and prioritize them.
- Consult experts: If you don’t know much about electrical systems, talk to a professional electrician for help.
By following these steps and suggestions, you can safely turn off the power before you clean. This will reduce risks and improve efficiency when you carry out cleaning tasks.
Shutting off the cold water supply of water heater
Shutting off the cold water supply is essential when cleaning. Here’s a 3-step guide to do it right:
- Locate the main valve: It’s usually near the water meter or where the main supply line enters your home. It could be in a basement, utility room, or outside.
- Turn off the valve: Use a wrench or pliers and turn it clockwise until it’s fully closed. Make sure it’s firmly shut but don’t use too much force. This will stop the flow of cold water.
- Test for closure: After shutting off the valve, check various faucets and fixtures. If you still have residual flow, double-check that the valve is fully closed or get professional help if needed.
Remember to shut off the cold water supply with caution to avoid any accidents. If you forget, like I did once, you may find yourself with an unexpected flood of freezing cold water! So, always double-check and shut off the cold water supply before any plumbing tasks to avoid chaos.
Draining the water heater
To drain the water heater, start by locating the drain valve and attaching the garden hose. Next, open the pressure relief valve to begin the draining process. Allow the water to flow until it is completely drained. This step is crucial in maintaining the efficiency and longevity of your water heater.
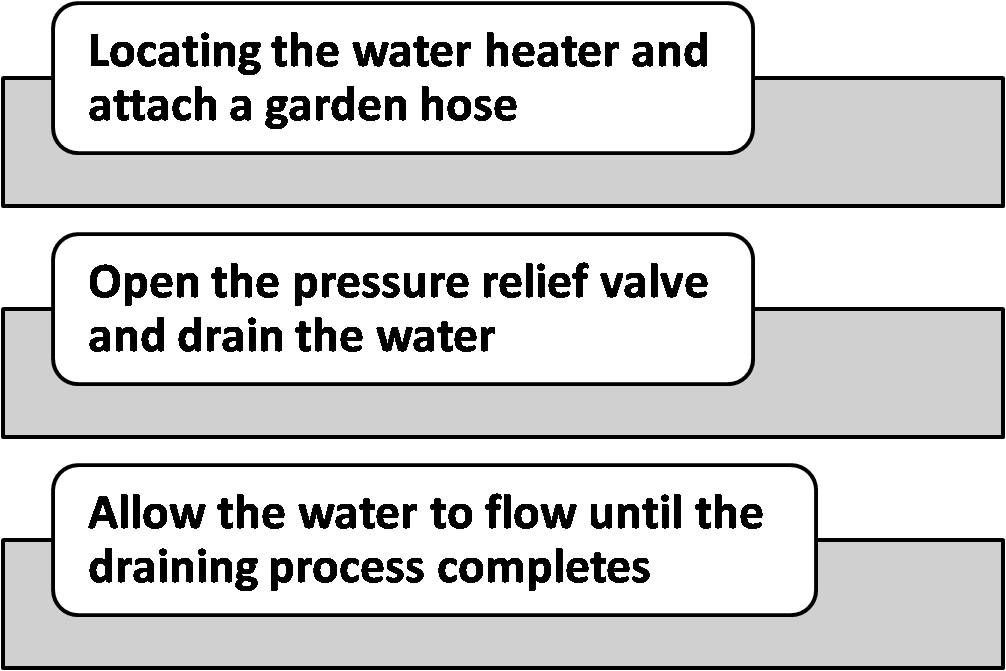
Locating the water heater drain valve and attaching the garden hose
Locating the drain valve and attaching a garden hose to a water heater isn’t difficult. Here’s how:
- Find the valve. Usually, it’s at the bottom. It might be labeled or have a handle or knob.
- Turn off the water heater and disconnect it from any power source. Important safety step!
- Hook up one end of the garden hose. Make sure it’s securely fastened.
Now you’re ready to drain your water heater. But, bear in mind that different brands and models will differ in terms of location and type of drain valve.
John recently bought a fixer-upper home. During renovations, he noticed his water heater needed maintenance. With some online help and his mechanical skills, he was able to locate the drain valve and attach a garden hose without any issues. As a result, he effectively flushed out sediment and restored optimal performance.
When the pressure relief valve is opened, don’t be startled if the water heater releases a hiss like a deflating psychic balloon – it’s merely unleashing all its secrets!
Opening the water heater pressure relief valve and starting the draining process
Draining the water heater is a must for proper functioning and longevity. To do this, start by opening the pressure relief valve. Here’s a step-by-step guide:
- Turn off power: Make sure to turn off the power supply before you begin.
- Locate the pressure relief valve: This is usually marked with a red handle or easy to spot.
- Prepare drainage area: Set up a bucket or hose to collect the released water.
- Open the pressure relief valve: Carefully lift or pull up the handle.
- Connect the hose: Securely attach it to either the drain valve or an outlet.
- Begin draining: Slowly open the drain valve and let gravity work its magic!
Safety first: If you’re unsure, better call a professional. Plus, regular maintenance, like draining the water heater, can help maintain efficiency and extend its lifespan.
Fun fact: According to Energy.gov, flushing your electric water heater annually can save you up to 4% on heating costs! Draining your water heater is an important task – refreshing and necessary for your plumbing system.
Allowing the water to flow until completely drained
Draining your water heater is an essential maintenance task. To make sure it runs efficiently and lasts a long time, you need to let the water flow completely. Here’s a step-by-step guide:
- First, turn off the power to the water heater.
- Locate the drain valve, usually at the bottom of the tank.
- Place a bucket or large container under the drain valve.
- Open the valve, but be careful – the water may be hot.
- Let the water flow until it stops.
- Close the valve and remove the container.
The user manual of your specific water heater model might have variations in terms of locating and operating the valve, so check that too. And don’t use too much force when opening or closing the valve – it could cause damage or leakage.
For an even smoother draining process, remember these tips:
- Make it routine: Flush your water heater at least once a year.
- Wear safety gear: Put on protective gloves to avoid any burns.
- Check the temperature: Adjust the temperature setting on your water heater.
- Seek help: If you notice any strange odors, noises, or leaks, get professional help.
These suggestions not only help you drain your water heater properly, but also prolong its lifespan and save you from extra costs. Regular maintenance is the key!
Flushing out the sediment of the water heater
To flush out the sediment, close the drain valve and detach the garden hose. Then, open the cold water supply to flush out any remaining debris. Repeat the flushing process until the water runs clear. This ensures that your water heater is free from sediment buildup, maximizing its efficiency and extending its lifespan.
Closing the water heater drain valve and detaching the garden hose
- Locate the drain valve, usually at the bottom of your system or water heater. It might be labeled or have a handle/knob.
- Turn it clockwise to close it.
- Attach a garden hose to the drain valve. Make sure it’s tight.
- Find a drainage area for the water.
- Open all faucets/fixtures that use hot water.
Varying systems have different valve placement and procedures. Make sure to consult the manufacturer’s guidelines. When closing the drain valve and removing the hose, be extra careful. Do not rush, as it could lead to leaks. Take caution when handling hot water systems – burns can occur.
In the 16th century, Dutch engineer Jan Leegh water revolutionized the way people drained water from lakes, by using a windmill-powered pump to drain the lake. Regular maintenance of the system through closing the drain valve & detaching the hose helps its efficiency and helps save money in avoiding repairs. Cold water supply cleanses the debris – goodbye sediments!
Opening the cold water supply to flush out any remaining debris
For a successful flush, here’s a 6-step guide:
- Locate the main cold water valve. It’s usually near the water meter or where the main water line enters your home.
- Turn off appliances and fixtures that use cold water, like faucets, showers, or washing machines.
- Prepare a drainage area. Use an outdoor drain or a large bucket to catch the flushed water and debris.
- Open the cold water valves gradually. Start from the highest floor and move down. Begin with half-full pressure and then increase it to full over a few minutes.
- Monitor for debris. Look out for sediment or debris as you open each faucet. Use a strainer or filter if needed.
- Repeat if necessary. After going through all faucets, check if any sediment remains. Keep repeating steps 4 and 5 until no debris is seen.
Different types of plumbing systems may need special procedures. Consult a plumber or see manufacturer guidelines if you have any concerns related to your system.
Flushing out sediment has been around since ancient times. Romans and Greeks used clever methods to clear sediment from their pipes. We keep this tradition alive by using modern techniques to keep our plumbing running smoothly and sustainably. Flushing out sediment is like dating – keep trying until you find the one that runs clear!
Repeating the water heater flushing process until water runs clear
For centuries, people have repeated the flushing process until water runs clear. This is vital for clean drinking water and healthy communities. With modern technology, this practice has evolved – but it’s still important for maintaining clean water systems.
Follow these easy steps for success:
- Turn off water supply – usually with the main valve or individual valves leading to specific areas.
- Start from the highest point and open all faucets, to let out any trapped air.
- Slowly open the main valve or individual valves. Check water for sediment or discoloration. Keep running until clear if any are present.
Regular maintenance and periodic flushing help prevent sediment buildup and prolong the life of plumbing and appliances. Switching from toilet cleaner to vinegar is like going from Freddy Krueger to Casper the Friendly Ghost – it’s the kind of cleanse your tank deserves!
Cleaning the water heater tank with vinegar or citric acid solution
To clean the tank with a vinegar or citric acid solution, start by mixing the solution and introducing it into the tank. Let the solution sit and dissolve the mineral deposits, then flush out the tank again to remove the solution. This process helps to effectively remove mineral buildup and maintain the cleanliness of your water heater.
Mixing the solution and introducing it into the water heater tank
Mix the solution and introduce it into the tank using this 4-step guide:
- Measure vinegar or citric acid and mix it with an equal amount of water in a separate container. Dilute the solution to prevent it from damaging the tank surface.
- Stir the mixture with a non-metallic spoon or stirrer.
- Pour or spray the mixture into the tank, focusing on any problem areas.
- Let it sit for at least 30 minutes. This allows the acidic properties to break down deposits.
Additional tips:
- Agitate stubborn stains with a non-abrasive brush or sponge.
- Rinse the tank with clean water to remove vinegar or citric acid.
- Repeat if necessary for heavy buildup.
Clean your tank with vinegar or citric acid and keep it in optimal condition. Let the solution do the work and relax knowing that mineral deposits won’t put up any resistance.
Allowing the solution to sit and dissolve mineral deposits
For a successful cleaning process, pour vinegar or citric acid solution into the tank, covering all areas affected. Let it sit for at least thirty minutes, allowing it to penetrate and dissolve mineral deposits.
Then, use a soft brush or cloth to gently scrub away the residue and rinse thoroughly.
The longer the solution sits, the more effective it’ll be! Plus, a gentle scrubbing motion will help avoid scratches. Believe it or not, vinegar’s been used as a natural household cleaner for centuries. So, if stubborn build-up persists, trust in its power to give your tank’s surfaces a sparkle! If not, maybe it’s time for psychological warfare!
Flushing out the water heater tank again to remove the solution
When it comes to cleaning a tank with vinegar or citric acid solution, flushing is key! To do this, follow these three steps:
- Empty the tank. You can do this by opening the drainage valve or using a pump. Dispose properly according to local regulations.
- Rinse the tank with clean water multiple times. Fill it partially each time and then drain.
- Inspect the tank for any remaining odor or residue. If there are, repeat step two until the tank is clean.
For extra effectiveness:
- Scrub the inside walls and surfaces with a brush during the rinsing.
- For tougher stains, make a paste out of vinegar, citric acid, and baking soda. Apply and rinse off.
- Clean and flush all valves, pipes, and fittings connected to the tank.
By following these steps, you’ll ensure your tank is fully cleaned of vinegar or citric acid solution, and won’t have any plumbing issues. Now that’s a victory you can really savor!
Reassembling and restarting the water heater
To ensure a smooth operation of your water heater after cleaning, it’s important to reassemble and restart the system correctly. Begin by closing the pressure relief valve and cold water supply. Then, reattach the garden hose and secure all connections. Once done, turn on the cold water supply and allow the tank to fill. Lastly, restore power to the water heater. Follow these steps to get your water heater up and running efficiently again.
Closing the water heater pressure relief valve and cold water supply
To close the pressure relief valve and cold water supply, follow these four steps:
- Find the valve on your water heater. It’s usually on the top or side.
- Lift the lever on the pressure relief valve to start releasing pressure.
- Wait a few minutes for all the pressure to escape.
- Carefully close the lever to seal it shut. Make sure it’s tight.
You have now closed the valve and prevented any possible damage. Additionally, it’s important to turn off the cold water supply.
Remember to stay safe when working with hot water heaters. If you are unsure, seek professional help.
Pro Tip: Check for any wear or damage on the pressure relief valve and cold water supply connections before reassembling. Replace any faulty parts and make sure the garden hose is secure. Otherwise, you could get a surprise shower and a backyard slip ‘n slide!
Reattaching the garden hose and ensuring all water heater connections are secure
It’s time to reattach your water heater’s garden hose and check all connections are secure. Here are 5 steps:
- Put the water heater in its spot. Make sure it’s stable and level.
- Attach one end of the garden hose to the water outlet valve. Tighten it with a wrench or pliers.
- Tighten all connections on the hose, including the junction with the water heater.
- Turn on the water gradually. Check for leaks at the connections. If you spot any, turn off the water and tighten the connections again.
- Test the water heater by turning it on and seeing if hot water flows through the garden hose.
Reattaching and securing the garden hose properly is key to avoiding problems with the water heater. Pay attention to detail – even a small loose connection can cause major issues.
My friend had a flood in his basement due to a loose connection between his garden hose and water heater. He could have avoided this if he double-checked his connections! So remember to do that!
Turning on the cold water supply and allowing the water heater tank to fill
To reassemble and restart your water heater, it’s essential to turn on the cold water supply and fill up the tank. Here’s a quick guide:
- Locate the cold water shut-off valve near the water heater or where the main water supply enters your home.
- Turn it counterclockwise to open the valve.
- While the tank is filling, check for any leaks or drips.
Note: Don’t turn on heating elements or electrical components until the tank is full. Here are some tips for a successful reassembly and restart:
- Check for damage before reassembling.
- Inspect and tighten connections and fittings.
- Close any drain valves before turning on the cold water supply.
- Don’t over-tighten or force connections.
- Follow manufacturer guidelines for your model.
Follow these steps and you’ll be able to easily turn on the cold water supply, fill the tank, and reassemble and restart your water heater. No need for a plumber!
Restoring power to the water heater
A power outage can disturb your water heater functioning. Here are some steps to get the power back on and ensure hot water:
- Look at the circuit breaker panel for a tripped breaker and switch it off then back on.
- Check the wiring connections at the heater’s electrical junction box and tighten any loose wires.
- Look for a reset button near the heating element access panel and press it firmly.
- If the steps don’t fix the issue, check the main electrical panel or consult a pro electrician.
- After the power is restored, wait for the water heater to heat up before using hot water.
Also, make sure there are no other electrical issues affecting the power supply. Regular maintenance of the water heater helps to avoid potential disruptions.
Pro Tip: Label the circuit breakers so you can identify them quickly during such situations. Post-checking and maintenance are necessary for avoiding surprise hot showers!
Performing water heater post-cleaning checks and maintenance
To ensure a thorough post-cleaning process after cleaning the inside of a water heater, it’s important to perform specific checks and maintenance. Start by checking for leaks and ensuring proper water flow. Test the temperature and pressure relief valve (TPR valve) to guarantee its functionality. Then, continue by monitoring the water heater’s performance to ensure optimal operation.
Checking for leaks from water heater and ensuring proper water flow
Performing post-cleaning checks and maintenance is vital for the effectiveness and durability of your water system. Checking for leaks and stream quality is a key part of this. Here’s a guide:
- Inspect all visible pipes, faucets, and connections for any wet spots, mold growth, or unexpected moisture.
- Turn on all the faucets in the house. Check if the water runs properly without any disruptions. Notice slow or weak streams.
- Shut off all taps, but one. Observe the water pressure. If it’s inconsistent or fluctuates, there may be an obstruction or blockage.
- Look at less visible areas, like underground pipes and hidden valves. These may require a professional.
Regular maintenance is necessary for optimal performance of the system. Address any leaks or poor water flow promptly to avoid bigger issues.
Did you know? The EPA found that an average household can waste up to 10,000 gallons of water yearly due to undetected leaks. Early leak detection saves water and money (source: EPA).
Also, make sure the TPR valve is working. A malfunctioning valve will be hot – and not in a good way – with your insurance agent.
Testing the temperature and pressure relief valve (TPR valve) of water heater
Test your temperature and pressure relief valve (TPR valve) for optimal performance. It plays a key role in stopping excessive temperature and pressure from building up. To make sure it’s working, follow these steps:
- Inspect the area: Look for damage or leaks around the valve before testing. Make sure there’s nothing blocking it.
- Put a container below: Put a receptacle under the TPR valve to catch any water that comes out during the test. This helps stop water damage and let you monitor the valve’s functioning.
- Put on safety gear: Wear gloves and goggles to stay safe while testing. Safety is always #1 when it comes to valves and other hazardous equipment.
- Activate the lever: Find the test lever on the TPR valve and lift it to activate the release system. This will show if the valve is working correctly.
- Watch for water discharge: When you lift the lever, check if water comes out into the container. If it does, that means the valve is working properly and can expel pressure and temperature safely.
- Put the lever back: When you’re done, carefully put the lever back to its original position. Make sure it snaps securely into place with no blockages.
Regularly maintain your TPR valve for long-term reliability. Check and test it at least once a year or according to your system’s manufacturer. Nobody likes a cold shower, so make sure to keep an eye on your water heater’s performance after cleaning.
Monitoring the water heater’s performance after cleaning
- Scan for any leaks. Check the ground for any wetness or puddles near your water heater.
- Assess temperature settings. Is the temp too high? That could lead to scalding. Too low? You won’t have enough hot water.
- Examine hot water output. Turn on the faucet or shower. Is the hot water taking longer than normal? Sediment may be blocking the pipes.
- Listen for strange noises. Is the heater making popping or cracking sounds? This could indicate sediment in the tank.
- Keep an eye on energy consumption. Monitor your utility bills to check for unexpected increases.
- Schedule regular maintenance. Have a professional check your heater periodically to ensure it works well long-term.
- Lastly, read the manufacturer’s guidelines for specific maintenance requirements.
Be proactive and manage the performance of your water heater. Don’t forget to look for any 3-week-old spinach hiding behind the couch!
The importance of regular water heater maintenance
Maintaining a water heater is important to ensure optimal performance and a long life. Ignoring such maintenance can result in reduced heating efficiency, increased energy consumption, and even the risk of hazards.
Annually flush the tank to get rid of sediment buildup and enhance energy efficiency. Plus, it’ll extend the life of the heater.
Conduct inspections to check for leaks or faulty components. Making timely repairs prevents small issues from becoming big – saving time and money.
Adjust the temperature settings with the seasons. Lower the temperature during warmer months to conserve energy while getting hot water.
Insulate hot water pipes and tanks to reduce heat loss and increase efficiency.
Regular maintenance of water heaters is essential to save resources and protect the environment. Get the best out of your hot showers by giving your water heater some love!
Tips for maintaining a clean and efficient water heater
Maintaining your water heater is essential for long-lasting use and optimal performance. Here’s how:
- Flush out sediment regularly by draining a few gallons of water from the tank.
- Inspect the pressure relief valve yearly to make sure it works properly.
- Wrap an insulation blanket around the tank to retain heat and boost efficiency.
- Check the anode rod every 3 years, and replace if corroded.
- Have your water heater serviced by a pro once a year to spot any issues.
Also, using cold water for laundry and dishwasher cycles will save energy and reduce strain on your water heater. With these maintenance tips, you can enjoy hot showers and extend the lifespan of your water heater.
Now, to emphasize the importance of regular maintenance, let me share a story. A friend of mine neglected their water heater for years, thinking it would take care of itself. Then one cold winter morning, they woke up to no hot water. After calling a technician, they found out that sediment accumulation had caused irreparable damage to the heating element. This ended in expensive repairs and days without hot showers. Moral of the story: regular maintenance is key to avoiding these problems.
Seeking professional assistance for complex maintenance tasks
Experts have the know-how and aptitude to handle tough maintenance tasks quickly. Hiring specialists saves time too, as they can manage such tasks quickly. Complex maintenance can bring risks, but pros stick to safety rules to avoid any accidents. They possess advanced tools to guarantee that the job is done correctly. Professional help ensures high-grade work, due to their proficiency and expertise. In the long-term, professional maintenance can ward off further damage and expensive repairs.
Furthermore, getting professional help covers more than just that. Every complex maintenance task needs a special process, and pros tailor their solutions accordingly. Before making your decision, evaluate aspects like the service provider’s reputation, customer reviews, and the professionals’ licenses or certificates.
And never forget the benefits of a good water heater system; a warm shower is the answer to forgetting all your other troubles.
Ensuring a worry-free and energy-efficient water heater system.
- Schedule regular inspections and tune-ups for your water heater to nip any possible issues in the bud.
- Insulate the water heater tank to reduce heat loss and lower reheating frequency.
- Change temperature settings according to needs. Lowering it saves energy and still keeps you comfy.
- Invest in an energy-efficient water heater that meets your household’s needs. These models are designed to be economical.
- Monitor water usage patterns and consider installing timers or programmable thermostats. This helps optimize system performance.
- Don’t forget to drain the water heater tank regularly to avoid sediment buildup, which can decrease efficiency.
Frequently Asked Questions
1. How often should I clean the inside of my water heater?
It is recommended to clean the inside of your water heater at least once a year to prevent sediment buildup and maintain its efficiency.
2. What do I need to clean the inside of a water heater?
You will need a garden hose, a socket wrench, a bucket, white vinegar or citric acid, and Teflon tape for reassembly.
3. How do I clean the inside of a gas water heater?
First, turn off the gas supply and the cold water supply to the heater. Attach a garden hose to the drain valve at the bottom of the tank and drain the water. Close the drain valve and pour a solution of white vinegar or citric acid into the tank. Let it sit for a few hours, then flush the tank by opening the cold water supply and draining the water again.
4. Can I clean the inside of an electric water heater?
Yes, the process is similar to cleaning a gas water heater. However, before draining the water heater, make sure to turn off the power to the heater at the electrical panel.
5. Is it necessary to remove the anode rod to clean the water heater?
No, it is not necessary to remove the anode rod during regular cleaning. However, if the rod is heavily corroded, it may need to be replaced.
6. Should I hire a professional plumber to clean my water heater?
While cleaning a water heater is a relatively simple task, if you are unsure or uncomfortable doing it yourself, it is always a good idea to hire a professional plumber. They have the experience and tools to ensure the job is done properly.
Conclusion
To ensure a worry-free and energy-efficient water heater system, it is crucial to understand the significance of regular maintenance. In this conclusion section, we have covered various aspects of maintaining a clean and efficient water heater. These include helpful tips for maintenance, the importance of seeking professional assistance for complex tasks, and the overall goal of ensuring a worry-free and energy-efficient water heater system.
References: