
Table of Contents
Installing a gas water heater vent pipe is essential for safe operation. Without it, nasty gases like carbon monoxide can build up in your home. Here’s how to install one and keep your heating system safe.
- Pick the right pipe. Natural draft heaters need galvanized sheet metal pipes, while power-vented ones require aluminum. Measure and cut the pipes to the right length.
- For natural draft gas heaters, connect the sections with sheet metal screws. Follow the manufacturer’s guidelines for spacing and clearances. For power-vented heaters, the vent pipe can go either way – horizontally through an exterior wall or vertically through the roof.
- Once installed, check for leaks by running hot water. If you have any issues, refer to the owner’s manual or call a plumber.
Understanding the importance of proper venting for gas water heaters
Venting gas water heaters is essential. Without proper ventilation, dangerous exhaust fumes such as carbon monoxide can build up and harm your health. Installing the vent pipe correctly is vital to get rid of these hazardous gases.
When installing a vent pipe, keep in mind a few key points. First, figure out what type of venting system is needed. Traditional natural draft gas water heaters usually need a metal vent pipe from the draft hood on top of the heater, up through the ceiling and away from home.
To install the pipe, you’ll need sheet metal screws, pipes of the right size, and perhaps an offset fitting. All these items are available at home centers or plumbing supply stores. Quality materials are necessary for a safe venting system.
The installation involves connecting the pipes with sheet metal screws and securely fixing them. The exact steps depend on the water heater and home, therefore it’s important to follow manufacturer instructions or ask a professional for advice.
By installing the vent pipe correctly, you’ll direct exhaust fumes outside and protect yourself from carbon monoxide. Don’t overlook the importance of proper ventilation for your gas water heater. Install or repair the vent pipe today for safe and efficient operation.
Gathering the necessary tools and materials for proper venting for gas water heaters
- Measure the diameter of your water heater vent pipe or opening in the draft hood. This helps you decide the size of the new vent pipe.
- Head to the home center or hardware store and buy the materials – sheet metal, screws, fittings and offsets.
- Gather the tools – tin snips, drill, screwdriver.
- Put on gloves and safety glasses for safety.
- Consult the installation manual or get professional advice for any additional tools or materials.
- Prioritize ventilation – check for damage or blockages regularly.
- Remember, it’s key to have appropriate tools and materials for your water heater model and meeting the safety standards.
Assessing the existing venting system (if any) for proper venting for gas water heaters
Assessing the existing venting system (if any):
If you already have a venting system, it’s important to check it before installing anything else. Here’s what to look out for:
- Check the condition of the vent pipe. Look for cracks, holes, or rust.
- Verify proper sizing and materials. These must comply with building codes.
- Evaluate the connection points. Are they secure and sealed?
- Consider any offset or fitting requirements. Are they still in good condition?
- Assess exterior vents. Are they clear of obstructions?
Remember, proper assessment is essential for safe operation of your gas water heater. If you’re not sure, consult a professional.
A true story: My neighbor had a problem with their gas water heater’s ventilation system. A bird’s nest had blocked the vent pipe, resulting in a backflow of exhaust fumes. Thankfully, they got help and repaired the vent pipe quickly. The incident was a reminder to inspect and maintain venting systems to avoid risks.
It’s all about making sure everything gets aired out properly!
Determining the appropriate type of venting for your gas water heater
When selecting venting type, think of local regulations, space, and cost. If unsure, ask a specialist.

It’s important to install the vent pipe correctly. Use sheet metal screws to fasten them together and match the diameter with the manufacturer’s recommendation.
My friend didn’t consider ventilation when they installed their gas water heater. Carbon monoxide filled the house, which could have been prevented. This shows how essential it is to properly vent a gas water heater.
Remember, proper venting and safety are key for optimal performance and to avoid potential hazards.
Measure and plan out the venting route – even ghosts need an escape from the bean burrito-induced fumes!
Measuring and preparing the venting route for proper venting for gas water heaters
- Measure the distance between your gas water heater and the desired vent pipe location.
- Plan the route, taking into account walls, ceilings, or other existing fixtures.
- Choose the right diameter vent pipe. Refer to the manufacturer’s guidelines or consult a pro.
- Keep in mind local building codes.
Now for a fun fact: the concept of venting gas appliances dates back centuries. Clay or stone chimneys were used to carry away smoke and fumes. Advances in tech and materials led to sheet metal pipes. Follow the guidelines and prioritize safety when installing any gas appliance. Enjoy hot water and be safe!
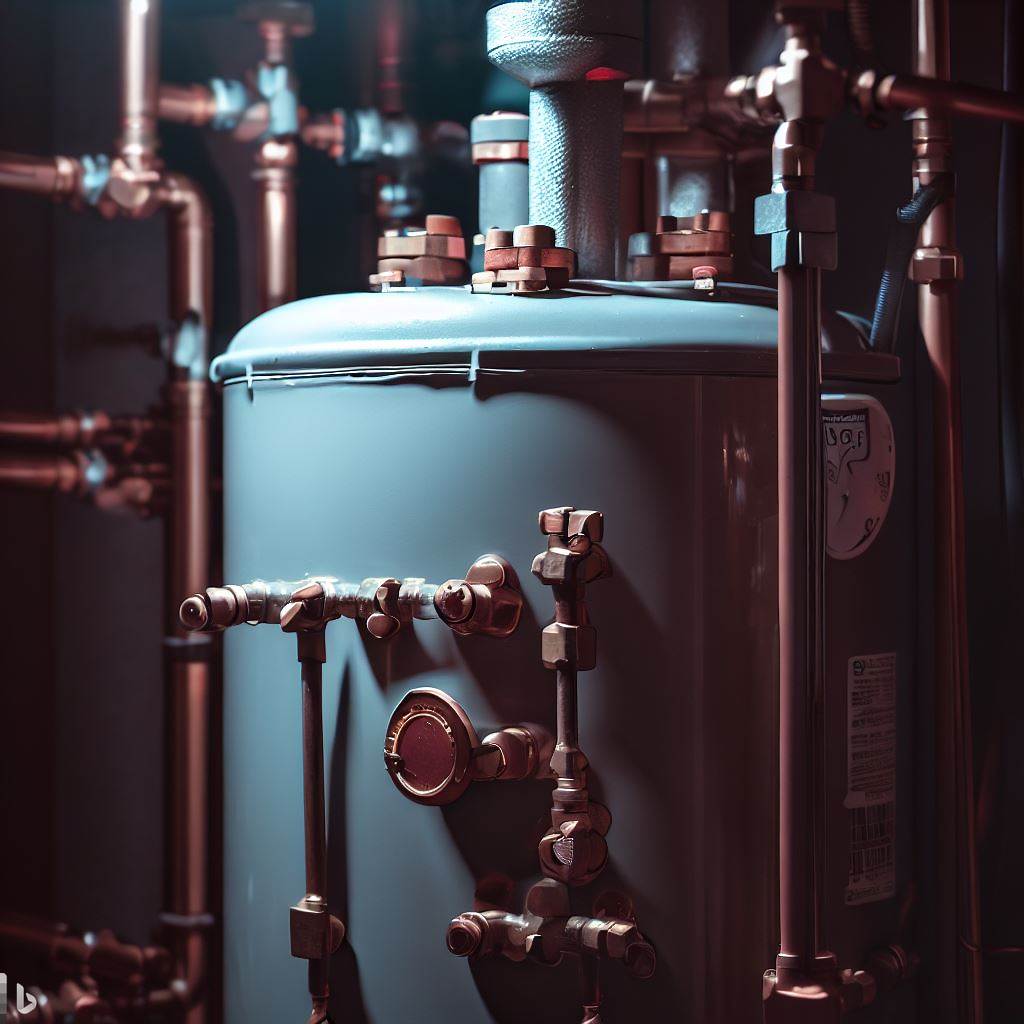
Installing the draft hood and connecting it to the water heater for proper venting of gas water heaters
- Position the draft hood: Put it on top of the water heater tank, making sure it’s aligned with the flue opening.
- Secure with sheet metal screws: Attach the draft hood to the tank with the right screws and tighten them firmly.
- Connect the vent pipe: Connect the vent pipe to the draft hood. Make sure the diameter is suitable for proper airflow and the materials used are fit for venting fumes, such as aluminum.
Venting is super important for gas water heaters. Carbon monoxide buildup can be dangerous, so if you’re not sure or encounter any problems, call a professional. Install the draft hood properly to keep your family safe!
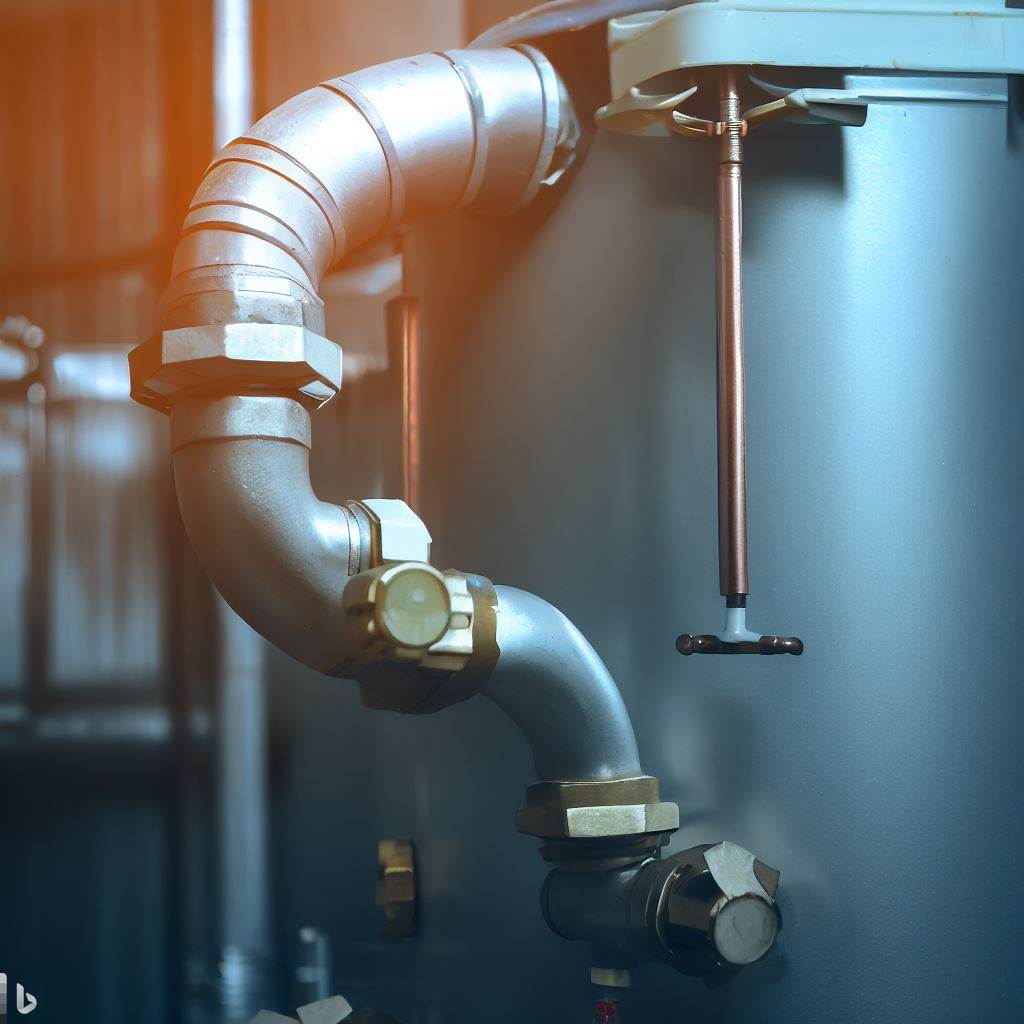
Assembling and connecting the vent pipe sections for proper venting for gas water heaters
Assembling and connecting the vent pipe sections for your gas water heater is important for safety and efficiency. Here’s how to do it correctly:
- Measure and plan. Measure the distance from your water heater to the exit point outside. Buy the right pipe length.
- Purchase materials. Get aluminum or sheet metal pipes, elbows, fittings, flue caps, and sheet metal screws.
- Install draft hood. Attach the draft hood to the top of your water heater tank. It helps direct fumes out and fresh air in.
- Assemble and connect pipes. Use your measurements and the manufacturer’s instructions. Add elbows and fittings where needed.
- Secure connections. Use sheet metal screws to make tight connections that won’t come loose over time.
- Test for proper airflow. Turn on your water heater briefly. Check for proper airflow.
Remember, improper venting can lead to carbon monoxide buildup. If you’re not sure how to do it, get a professional plumber.
Power-vented water heaters may require different types of vents or extra equipment. Refer to the manufacturer’s instructions for your model.
Fun fact: Water heaters consume 14% of the average home’s energy.
Securing the vent pipe to the ceiling/wall using appropriate supports for proper venting for gas water heaters
- Identify the ideal spot for the vent pipe on the ceiling or wall. Make sure it’s clear of combustible materials and follows local building codes.
- Choose the appropriate supports to secure the vent pipe. These must be sturdy enough to handle high temperatures. Use fasteners like screws to attach the supports to your home’s structure.
- Put the vent pipe onto the supports. Angle it slightly upwards for proper exhaust flow. If your vent system requires multiple sections of pipe, use sheet metal screws or connectors specified by the manufacturer. All connections must be tight and sealed.
- Inspect the installation for any damage or looseness. Test the gas water heater for any abnormal odors or fumes. Safety first! Follow local building codes and get professional advice if needed.
- To secure the vent pipe to sheet metal surfaces, use aluminum foil tape and screws. This will reinforce the system and prevent leakage.
- Add insulating material to keep the pipe warm.
Insulating the vent pipe (if required)
Insulating the vent pipe is an important step in the installation process of a gas water heater. It helps prevent heat loss and condensation buildup, leading to optimal performance and efficiency. Here’s how to do it:
- Measure the diameter of the vent pipe: Get the right size insulation for your pipe by measuring its diameter accurately.
- Choose appropriate insulation material: Consider temperature resistance and fire safety when selecting insulation materials like fiberglass or foam insulation sleeves.
- Install the insulation: Cut the insulation material to match the length of your vent pipe. Wrap it tightly around the pipe, making sure there are no gaps or overlaps. Secure and seal the ends with aluminum or sheet metal tape.
Not all situations require insulating the vent pipe. But if your water heater is in an unconditioned space or if you experience issues with heat loss or condensation buildup, insulating can be beneficial.
In addition to insulating, consider these suggestions:
- Ensure proper venting: Comply with local building codes and manufacturer guidelines. Make sure the venting system has sufficient clearance from combustible materials and exhaust fumes are discharged safely outdoors.
- Regular maintenance: Inspect your vent pipe for signs of damage or obstruction, such as rust, corrosion, or debris buildup. Address any issues promptly.
- Professional installation: Seek professional help if you’re unsure about installing or insulating your vent pipe correctly. They can ensure proper installation and compliance with regulations.
By insulating the vent pipe and following these suggestions, you can improve the efficiency and longevity of your gas water heater while ensuring safe operation. Don’t forget to double-check for leaks and potential explosions – safety first!
Finalizing the installation and conducting a safety check of venting of gas water heaters
- Secure the connections of your gas water heater vent pipe with sheet metal screws to ensure there are no gaps or leaks.
- Check for clearance between the vent pipe and combustibles.
- Inspect the draft hood and make sure it is attached and in good condition.
- Conduct a visual inspection of the entire vent system for any signs of damage or obstruction.
- Use a carbon monoxide detector to check for traces of this odorless gas present.
- Test the functionality of your water heater by turning it on and monitoring its performance.
- Remember, safety is key! Follow the manufacturer’s instructions for proper installation and safe operation.
Frequently Asked Questions
1. Does a gas water heater need to be vented?
Yes, a gas water heater needs to be vented to safely remove combustion gases and prevent the build-up of toxic carbon monoxide. Proper venting is essential for the safe operation of the water heater.
2. How to install vent on a water heater?
To install a vent on a water heater, you will need to connect the vent pipe to the draft hood on top of the water heater. Use sheet metal pipes and fittings to create a secure and leak-free connection. Ensure the vent pipe is properly supported and extends to the exterior of your home.
3. What size vent pipe is required for a gas water heater?
The diameter of the vent pipe for a gas water heater will depend on the size of the water heater. Typically, you will need a 3 or 4-inch vent pipe. Consult your water heater manufacturer’s specifications or local building codes for the appropriate size.
4. Where can I find the necessary materials for installing a water heater vent pipe?
You can find the necessary materials for installing a water heater vent pipe at your local home center or hardware store. They will have a range of vent pipes, fittings, and sheet metal screws that you can choose from.
5. Can I install a power vent water heater instead of using a vent pipe?
Yes, you can install a power vent water heater if venting through a pipe is not feasible. Power vent water heaters use a fan to push exhaust fumes directly outside, eliminating the need for a traditional vent pipe. However, they may require access to electricity and additional installation steps.
6. How do I ensure proper venting for my gas water heater?
To ensure proper venting for your gas water heater, make sure the vent pipe is correctly installed, slopes upward, and has no obstructions. Regularly inspect the venting system for any signs of damage or leaks. If you notice any problems, it is important to repair or replace the venting components promptly to maintain safety.
Conclusion
Gas water heaters must be vented safely. Otherwise, dangerous exhaust fumes, including carbon monoxide, can build up and harm your health. For the installation process, you need materials from a home centre or hardware store. The right diameter pipe is essential to ensure good airflow.
First, measure the distance from the heater exhaust to the exit point. Then, use tools like tin snips or a metal-cutting saw to trim the sheet metal pipes. Connect each section with foil tape or screws. Secure the vent pipe in walls and ceilings with supports. Safety should be top priority. Get help from a plumber if needed.
A homeowner found out their vent pipe connection was faulty when they smelled a strange odour in the basement. The screws had become loose, letting fumes escape into their home. After tightening the screws, the issue was fixed before any harm was done. This serves as a reminder to install and maintain gas water heater vent pipes properly.