
Table of Contents
Key Takeaways
- 1. Safety is the top priority when lighting a gas water heater manually. Make sure to turn off the gas supply and allow any accumulated gas to dissipate before attempting to light the heater.
- 2. Familiarize yourself with the different components of a gas water heater, such as the pilot light, thermocouple, and gas control valve. Understanding how these parts work together will make the lighting process easier.
- 3. Before lighting the pilot light, ensure that the gas control valve is set to the “pilot” position. This allows gas to flow to the pilot light when it is ignited.
- 4. Use a longreach lighter or match to ignite the pilot light. Hold the flame near the pilot light while simultaneously pressing the reset button or control knob. This will release gas to the pilot light and ignite it.
- 5. Once the pilot light is lit, continue holding the reset button or control knob for about one minute. This allows the thermocouple to heat up and signal the gas control valve to keep the gas flowing.
- 6. After the oneminute mark, release the reset button or control knob. The pilot light should remain lit. If it goes out, repeat the lighting process.
- 7. Once the pilot light is stable, you can turn the gas control valve to the “on” position. This will allow the main burner to ignite and heat the water in the tank.
- 8. Regularly inspect and maintain your gas water heater to ensure it is functioning properly. This includes checking for any gas leaks, cleaning the pilot light and burner assembly, and replacing any faulty components.
- 9. If you encounter any issues or are uncomfortable lighting the gas water heater manually, it is recommended to contact a professional plumber or gas technician for assistance. They have the expertise to safely handle gas appliances.
Knowing how to manually light a gas water heater is important – it means you can still have hot water even when the pilot light goes out. No need to wait for a technician or go without! Plus, you have the satisfaction of being able to handle maintenance tasks yourself.
Pilot lights can go out for various reasons – like bad thermocouples, dirty pilots or faulty gas control valves. It’s useful to know how to locate the pilot light and safely relight it.
In addition, knowing how to manually light a gas water heater can be a lifesaver when camping or where there’s no electricity. You can ignite the pilot flame using a long lighter or matches.
Safety Precautions: Ensuring Safety Before Attempting to Light the Water Heater
Before attempting to light a gas water heater, it’s important to take certain precautions. Igniting a gas water heater can be dangerous, so safety must come first! Here’s a simple guide to ensure safety:
- Read the manufacturer’s instructions. Know your heater and its safety precautions.
- Shut off the gas supply. Located near the water heater or along the gas line, turn off the valve by rotating it clockwise.
- Check for gas leaks. If you smell rotten eggs or suspect a gas leak, leave the area and call your local gas company.
- Clear the area around the water heater. Remove any flammable items, like paper or cloth.
- Provide proper ventilation. Gas appliances need fresh air circulation. Keep windows and doors open or use exhaust fans.
Step 1: Familiarizing Yourself with the Gas Water Heater and its Components

Additionally, understanding the pilot light and its function is crucial for safe operation. Let’s delve into this sub-section to gain a better understanding of how the pilot light works.
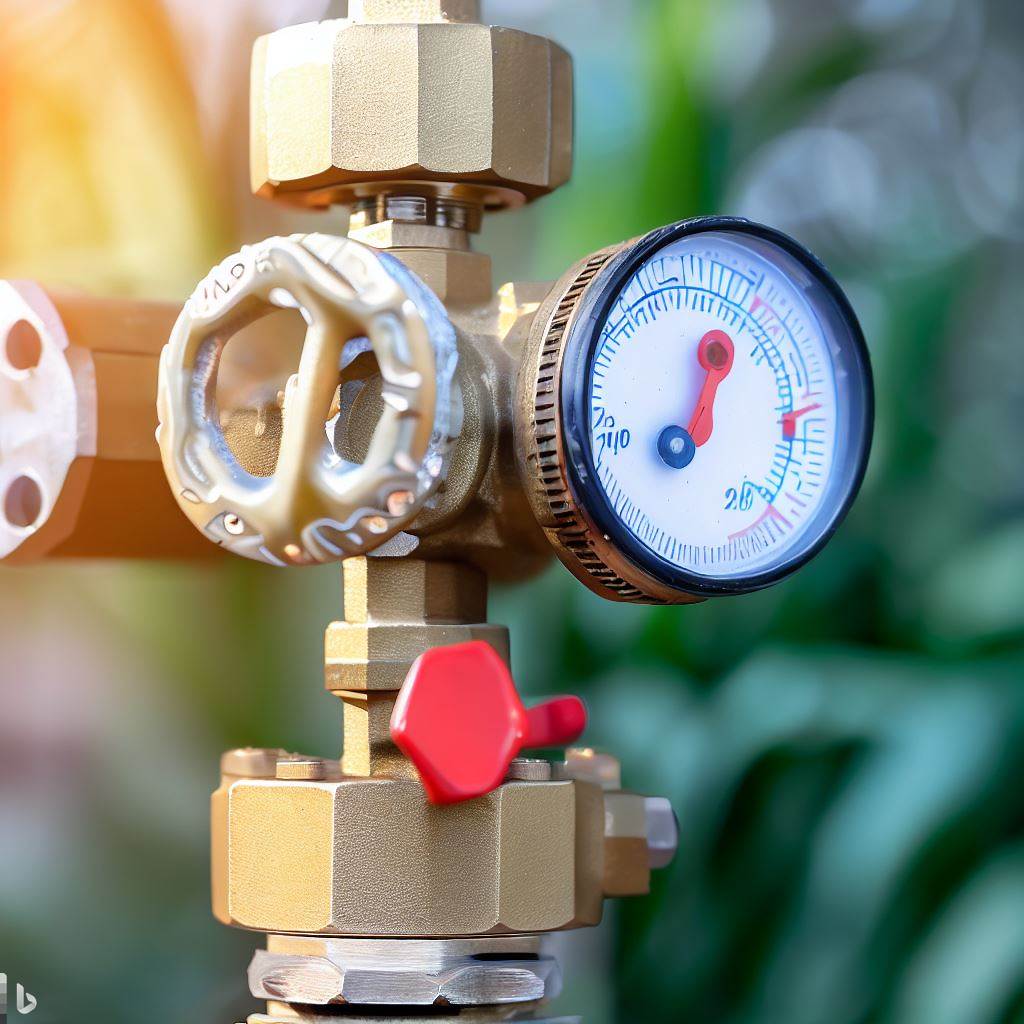
Locating the Pilot Light and Gas Control Valve
- Turn off the gas supply for safety.
- Find and remove the cover panel. User manual can help if needed.
- You should be able to spot the pilot assembly – a small burner tube with a pilot flame at one end.
- Look for the gas control valve, usually near the bottom of the water heater. It regulates the flow of gas.
- Check for labels or markings on the valve to indicate its functions.
- Become familiar with safety features like temperature dial or pressure relief valve.
Remember that different models of water heaters may have variations in design and component placement. Refer to your manufacturer’s instructions for accurate guidance.
Pilot Light and its Function
The pilot light is vital for a gas water heater. It’s the ignition for the burner, so the heater can give out hot water. Without a working pilot light, the water heater won’t work.
Inside the gas water heater lies a tiny, continuous burning flame. This is fed by a small amount of gas, giving a steady and reliable heat. When the tap is opened, more gas is released to the burner. The pilot light then sparks this extra gas, boosting the water temperature.
To make sure the pilot light stays lit, there’s a Safety Thermocouple. It measures the temp near the pilot light, to see if there’s a flame. If not, it shuts off the gas supply to stop any possible issues.
Step 2: Preparing to Light the Pilot Light
To prepare for lighting the pilot light, turn off the power supply to the water heater and verify if there is a gas leak. This crucial step ensures your safety before proceeding. Double-checking for any potential gas leaks is essential prior to igniting the pilot light. By following these precautions, you can proceed safely to the next step of lighting your gas water heater manually.
Turning Off the Power Supply to the Water Heater
To ensure safety and avoid any potential electrical mishaps, it is essential to turn off the power supply to your water heater. Here’s how:
- Find the circuit breaker panel or fuse box – usually in the basement, garage, or utility room.
- Open the cover carefully.
- Spot the circuit breaker or fuse labelled “water heater” or “hot water”.
- For circuit breakers, switch to the “off” position. For fuses, remove the one for the water heater.
- Test by trying a hot water faucet. If there’s no hot water, then power has been disabled.
- Restore power by reversing these steps.
It is important to only turn off the power supply when necessary and if you are familiar with handling electrical systems safely.
Verifying If There Is a Gas Leak
Before lighting the pilot light, it’s critical to check for gas leaks. It’s essential for your safety and to avoid hazardous incidents. Here’s a 3-step guide for verification:
- Listen: Take a moment of silence near the gas appliance. Listen for any unusual hissing or whistling sounds. These noises may mean there’s a gas leak.
- Smell: Natural gas smells like rotten eggs or sulfur. If you notice this smell near your gas appliance, it could be a sign of a gas leak. Take action right away.
- Look: Check for discolored areas, bubbles in water near pipes, or loose fittings. These physical signs might indicate a gas leak and must be addressed quickly.
Be cautious when doing these checks. Don’t use open flames, switches, or electrical devices. Safety is always the top priority when dealing with potential leaks.
In the past, people ignored the importance of verifying gas leaks before lighting the pilot light. This led to accidents and serious consequences.
Step 3: Lighting the Pilot Light
To successfully light the pilot light of your gas water heater, follow these steps in the section titled “Step 3: Lighting the Pilot Light.” Begin by accessing the pilot light and gas control valve. Next, press and hold the pilot button. Finally, use a long lighter or match to ignite the pilot flame.

Accessing the Pilot Light and Gas Control Valve
- Find the gas control valve. It is usually close to the bottom of the water heater. It looks like a small knob or lever. Take time to spot it.
- Turn off the gas supply for safety reasons. Look for the valve near your gas meter or water heater. Turn it clockwise until it is fully closed.
- Remove the access panel to access the pilot light and gas control valve. Unscrew some bolts or use a screwdriver, depending on your water heater model.
- Remember to:
- Be careful when removing the access panel and handling parts related to the gas control valve and pilot light.
- Don’t touch any wires or electric components when accessing these areas.
- If you are unsure, get help from a professional plumber or technician.
Pressing and Holding the Pilot Button
- Start by finding the pilot button on your appliance. It should be labeled and near the gas control valve. Push and hold it down with one hand.
- Use your other hand to light a flame with a long-reach lighter or matchstick. Carefully bring the flame close to the pilot assembly. Make sure the flame catches fire.
- Keep holding down the pilot button for 30 seconds after ignition. This helps the flame stay lit and heats the safety devices – thermocouple or thermopile.
- Slowly, release the pilot button. The flame should stay lit without your continuous pressure. If it goes out, repeat steps two to four.
- To keep your appliance running smoothly, clean and inspect the pilot assembly regularly. Additionally, keep flammable materials away from your appliance. These suggestions will help you maintain a reliable and efficient operation.
Using a Long Lighter or Match to Light the Pilot Flame
Lighting a pilot flame requires a long lighter or match. Follow these five simple steps:
- Locate the pilot light – Usually near the gas control valve, at the bottom of the water heater or furnace.
- Get ready – Make sure you have a long lighter or match that can reach the pilot light easily. Hold it securely and make sure it’s lit.
- Be safe – Stand in a stable position with no flammable materials nearby. Safety should be your priority.
- Ignite the pilot flame – Bring the lit lighter or match close to the pilot light opening and press the gas control valve button/knob. A small flame should ignite.
- Verify ignition – Hold the valve button/knob down for 30 seconds, then let go. Check if the flame remains lit – this indicates successful ignition.
When using a long lighter or match, make sure the pilot light opening is clear and that both hands are free for better control.
Step 4: Verifying the Pilot Light and Adjusting the Gas Control Valve
To ensure the proper functioning of your gas water heater in Step 4, verify the pilot light and make adjustments to the gas control valve. Begin by checking if the pilot flame is lit and staying lit, and then proceed to adjust the gas control valve to reach the desired temperature.
Checking If the Pilot Flame is Lit and Staying Lit
Ensuring the pilot flame is lit and stays lit is key for gas appliance performance. Here’s a step-by-step guide:
- Find the gas control valve, usually on the side or bottom of the appliance.
- Switch the valve to “Off” and wait five minutes for any gas to clear.
- After the waiting time, switch the valve to “Pilot”.
- Use a long lighter/matchstick and ignite the pilot burner while pressing down on the reset button/igniter switch.
- Keep pressing for 60 seconds, then release.
- Check if the pilot flame stays lit.
Pilot lights are essential for reliable ignition in industries and households. Easy verification and adjustment of these components allows us to stay efficient and safe.
Adjusting the Gas Control Valve to the Desired Temperature
Fine-tuning the gas control valve is essential for optimal performance and efficiency. Here are 4 simple steps to adjust it accurately:
- Locate the gas control valve, usually at the bottom of your water heater. It may be labeled, or arrows point to different temperature directions.
- Carefully turn the control knob with a flathead screwdriver. Clockwise to increase temp, counterclockwise to decrease. Make small adjustments and wait for the water temp to stabilize.
- Setting the temp too high may result in scalding water. Too low, and it may not be warm enough. So, find the right balance.
- Once the desired temp is achieved, check the pilot light is lit and stable. If not, go back and relight it.
Frequently Asked Questions
How do I manually light a gas water heater?
To manually light a gas water heater, locate the pilot light and access panel. Turn the gas control knob to Pilot and press and hold the pilot button. Use a long lighter or grill lighter to ignite the pilot flame. Continue holding the pilot button for 1 minute to ensure the pilot stays lit.
Can I manually light my gas water heater?
You can manually light your gas water heater. Most gas water heaters have a pilot light that you can relight manually following the manufacturer’s instructions. It’s important to exercise caution and follow safety guidelines when relighting the pilot.
Why should I manually light my gas water heater?
There are various reasons why you may need to manually light your gas water heater. Common reasons include a malfunctioning gas control valve, a bad thermocouple, or a dirty pilot. By manually lighting the pilot, you can ensure that your water heater keeps providing hot water.
How do I relight the pilot on a gas water heater?
To relight the pilot on a gas water heater, first, turn off the gas and wait for any residual gas to dissipate. Locate the pilot light and access panel. Turn the gas control knob to Pilot and press the igniter button while holding down the reset button. Once the pilot flame ignites, continue holding the reset button for 1 minute to allow the pilot to stay lit.
Where is the pilot light located on a gas water heater?
The pilot light is usually located near the bottom of the gas water heater. It can be found behind a small access panel on the front or side of the unit. Consult your water heater’s manual for the exact location of the pilot light on your specific model.
What should I do if I smell gas when trying to light the pilot?
If you smell gas when trying to light the pilot on your gas water heater, immediately turn off the gas supply valve and do not attempt to light the pilot. Leave the area and contact your gas company or a professional plumbing service for assistance. Gas leaks can be dangerous and should be addressed by trained professionals.
Conclusion
Regular maintenance and troubleshooting are important for keeping your gas water heater in good condition.
Inspect it often for signs of damage or wear, such as leaks, corrosion, or strange smells. Flush it at least yearly, to get rid of sediment and debris that can compromise performance and energy efficiency. Check the pressure relief valve periodically to guarantee it is working correctly. This valve releases extra pressure and prevents the tank from bursting.