
Table of Contents
PTC heaters have unique characteristics that make them great for heating. Let’s dive into what you need to make one.
- A ceramic element coated with silver or platinum, plus leads to connect it to a power source, and a housing to enclose the element.
- Assemble it by attaching the leads, putting the element in the housing, and securing it.
- Remember to use the right power supply, and always take safety precautions.
- To get the most out of your DIY heater, use a heat sink or cooling system, regulate voltage levels, and insulate the housing.

Safety Precautions To Make PTC Heater
When creating a PTC heater, safety should always be a priority. Here’s what to keep in mind:
- Wear protective equipment such as gloves and glasses when handling electrical components.
- Disconnect the power source before working on the heater.
- Don’t touch the heating element with bare hands – it may cause burns.
- Ground the PTC heater properly to prevent electric shocks.
- Regularly check wiring and connections for signs of damage or wear – replace them if necessary.
Ventilation is also key – use the PTC heater in a well-ventilated area. Taking precautions will keep you and the heater safe.
Pro Tip: Before starting, read up on the specific safety guidelines and recommendations from the manufacturer.
Materials and Tools Needed To Make PTC Heater
Ready to make a PTC heater? You’ll need some specific materials and tools. Here’s the list:
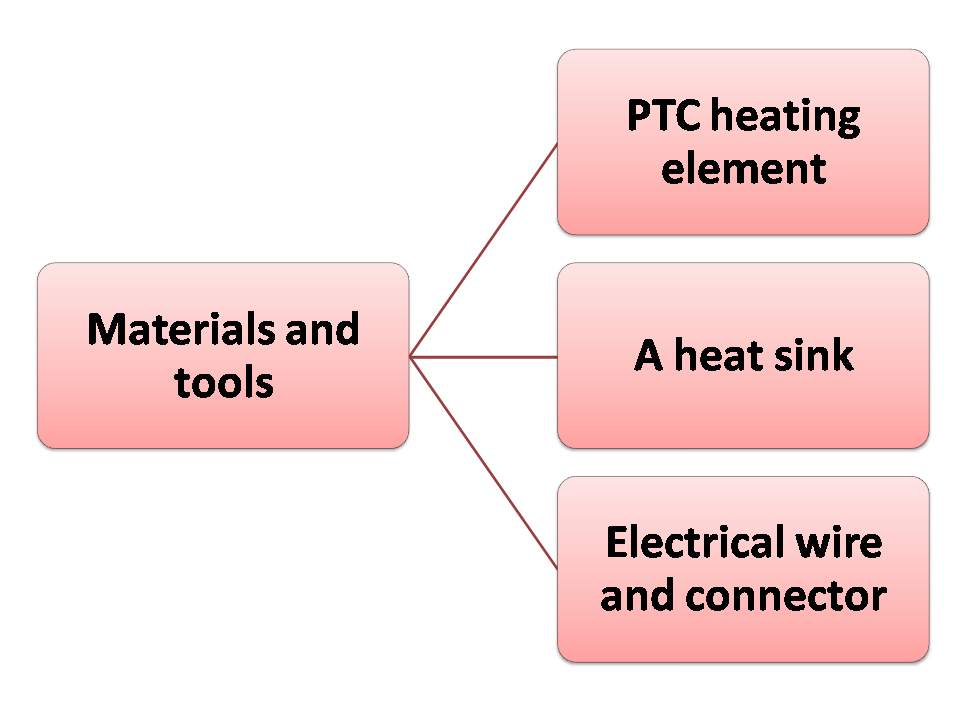
- – A PTC heating element. This is the heat-generating part of the heater. It’s made of ceramic with a property called Positive Temperature Coefficient (PTC). As the temp goes up, the ceramic’s resistance increases.
- – A heat sink. This helps dissipate the heat. Aluminum or copper are great because they have high thermal conductivity.
- – Electrical wires and connectors. Carefully choose wires and connectors that can handle the heater’s power requirements. Ask an expert or look at product specs for help.
Let’s get started! Gather the materials today and get ready to explore DIY heating solutions with confidence and warmth. Or, if you’re feeling adventurous, prepare for a fire hazard!
Step 1: Gathering the Necessary Components for the PTC Heater
Gather the elements for your PTC heater – essential for a successful build. To ensure efficient running, make sure all parts are there before starting. Here’s a guide:
- Research & Identify: Figure out which components you need for your heater. This may include things like a PTC ceramic element, heat sink, electrical resistor, thermal grease, wiring connectors and a power source.
- Procure Parts: Buy the necessary materials from reliable suppliers or stores. Get high-quality items to guarantee optimal performance and safety.
- Check Compatibility: Make sure all the components work together and are suitable for your intended use. This will prevent any future issues or malfunctions.
- Organize & Prepare: Put the components in a neat order for easy access during assembly. Gather necessary tools like pliers, screwdrivers, soldering iron, and wire cutters.
For extra help, look up online tutorials or ask an expert who’s experienced in making PTC heaters. This will give you insight into common mistakes to avoid.
Safety is key – wear protective gear and work in a well-ventilated area.
My friend Alex experienced the importance of being resourceful when gathering parts for a PTC heater. He looked everywhere for the ceramic element, but eventually found it online.
To gather all the components for your homemade PTC heater, plan ahead, pay attention to detail, and don’t give up. You can do it! Now on to Step 2: Assembling the PTC Heater. No fire-breathing dragons here!
Step 2: Assembling the PTC Heater
To assemble the PTC heater efficiently, you need to wire the PTC element and attach the temperature sensor. These sub-sections play a crucial role in the process. The wiring ensures proper electrical connectivity, while attaching the temperature sensor allows for accurate temperature regulation. Step 2 involves these two essential steps.
Wiring the PTC Element
Gather all the components needed for wiring the PTC element of the PTC heater. Identify the positive and negative ends. Connect the positive end to the positive terminal of the power supply. Connect the negative end to the negative terminal. Remember proper wiring is essential for safe and efficient use. Double-check all connections before powering on.
Get ready to feel the heat from the temperature sensor! Let’s explore the hot world of attaching the Temperature Sensor!
Attaching the Temperature Sensor
- To attach the temperature sensor, do this:
- Identify the spot on the PTC heater where it needs to go.
- Position the sensor securely.
- Secure it with screws or adhesive.
- Check the attachment is firm and won’t move.
- Connect the wires to the PTC heater’s terminals.
- Inspect it for any loose ends or errors.
It’s essential to be precise, to get accurate temperature readings and peak performance from the PTC heater. Attaching the temp sensor correctly is key to its efficiency and functioning. A study by Thermometrics Corp. showed accuracy can be improved by up to 20%!
Step 3: Testing and Troubleshooting the PTC Heater
To ensure the functionality of your PTC heater, let’s dive into the testing and troubleshooting process. Testing the heater element and checking the temperature control are vital steps in this stage. These sub-sections will guide you through the necessary procedures to ensure optimal performance and safe operation of your PTC heater.
Testing the Heater Element
Test the Heater Element:
- Check the electrical connections first. Make sure the wires are secure and not damaged.
- Use a multimeter set to ohms. Place one probe on each terminal of the element and take note of the resistance reading.
- Compare the measured resistance to the specified value given by the manufacturer. If it’s much higher or lower, it means the element is defective and needs replacement.
- Also, look for signs of damage like discoloration or burn marks. These may mean the element is faulty.
- Test if it works properly by checking the PTC heating system. It should heat up and maintain a consistent temperature.
Remember, testing procedures can differ depending on the system and the manufacturer.
I once faced a faulty element in my car’s seat warmer during winter. After testing, I found a high resistance reading and had to replace it. After replacing it, the seat warmer worked again and provided warmth during cold drives.
Be ready for a wild journey of temperature tests. You’ll be like a superhero with a special skill in troubleshooting and a mission to bring warmth. Or at least to your car.
Checking the Temperature Control
Checking the temp control on a PTC heater is essential when testing/troubleshooting. It guarantees the desired temp is maintained without over/under-heating. Use a thermometer to measure the heater’s actual temp and compare it to the set temp. If there’s a big difference, a problem with the temp control mechanism is likely.
Start by setting the desired temp on the PTC heater. Allow a few minutes for it to reach its operating temp. Then, place a thermometer near the heating element without obstructing airflow. Wait until both heater and thermometer stabilize. Read/record the temp on the PTC and thermometer. Compare them to see if there’s any discrepancy. If so, you’ll need to calibrate or replace the temp control system.
Recently, a customer reported their PTC heater couldn’t maintain a consistent temp as indicated on the control panel. Investigation revealed one of the thermocouples, responsible for measuring/controlling the internal temp, had worn out. Replacing the faulty thermocouple and performing tests restored proper functionality to the PTC heater.
This incident emphasizes the importance of regularly checking/troubleshooting temp control mechanisms. This will ensure safe/efficient operation of PTC heaters in various applications.
Conclusion: Congrats, if you made it this far without blowing up your PTC heater! You’re an amateur pyrotechnician!
Temperature Control of PTC Heater
Frequently Asked Questions
How to make a PTC heater?
Answer: To make a PTC (Positive Temperature Coefficient) heater, you will need the following materials: PTC heating element, heat sink, insulating material, power supply, and a control circuit.
First, assemble the PTC heating element onto the heat sink using a thermal adhesive.
Then, place the insulating material between the PTC heater and any nearby objects.
Connect the PTC heater to the power supply and control circuit, ensuring proper wiring and safety precautions.
Finally, test the PTC heater to ensure it is functioning correctly.
What precautions should be taken while making a PTC heater?
Answer: When making a PTC heater, it is essential to follow safety precautions, such as wearing protective gloves and goggles. Ensure that the power supply is disconnected before working on the heater. Handle the PTC heating element with care, as it can become hot during operation. Also, double-check the wiring connections and insulation to avoid any electrical hazards or short circuits.
Can I use any PTC heating element for my homemade PTC heater?
Answer: It is recommended to use a PTC heating element specifically designed for heaters to ensure optimal performance and safety. These heating elements are designed to handle high temperatures and provide efficient heat output. Using a compatible PTC heating element will help in achieving the desired heating effect and enhance the overall longevity of the homemade PTC heater.
What is the purpose of a heat sink in a PTC heater?
Answer: The heat sink in a PTC heater helps to dissipate and transfer the heat generated by the PTC heating element. It prevents the heater from overheating by absorbing and spreading the heat away from the active heating area. This improves the overall efficiency and reliability of the PTC heater by maintaining a consistent temperature and preventing damage caused by excessive heat buildup.
Is it possible to control the temperature output of a homemade PTC heater?
Answer: Yes, you can control the temperature output of a homemade PTC heater by incorporating a control circuit and a thermostat. The control circuit allows you to adjust the power supplied to the PTC heating element, thereby regulating the amount of heat produced. By integrating a thermostat, you can set a desired temperature and have the control circuit automatically maintain it by turning the heater on or off as needed.
Can a homemade PTC heater be used for various applications?
Answer: Yes, a homemade PTC heater can be used for various applications, depending on the power and size of the PTC heating element used. It can be utilized for heating small enclosures, warming air or liquids, and even as a component in thermally controlled systems. However, it is important to ensure that the homemade PTC heater meets the specific requirements of the intended application and is properly designed for safe and reliable operation.