
Table of Contents
Tankless water heaters are a popular choice for many homeowners due to their energy efficiency and on-demand hot water. So, let’s explore the process of removing one!
- First, turn off the power supply by disconnecting it from the circuit breaker. Then, if it’s gas-powered, shut off the gas supply by closing the main gas valve.
- To remove the cover, locate and remove the screws holding it in place. Gently lift off the cover, being careful not to damage any wiring or components inside.
- Depending on the model, you may need to disconnect elements like water pipes or electrical connections. Refer to your manufacturer’s instructions for guidance.
- If you’re replacing the old unit with a new one, disconnect all necessary connections before removing it. You may need to drain any remaining water using a garden hose connected to a nearby drain valve.
Pro Tip: It’s always wise to hire a licensed professional to safely remove and install your tankless water heater.
Key Takeaways
- 1. Turn off the power and gas supply to the tankless water heater before starting the removal process. This will ensure your safety and prevent any accidents.
- 2. Drain the water from the tankless water heater by connecting a hose to the drain valve and opening it. Make sure to direct the water to a suitable drainage area.
- 3. Disconnect the water supply lines by turning off the valves and using a wrench to loosen the connections. Be careful not to damage the pipes or fittings during this process.
- 4. Disconnect the gas supply line by turning off the gas valve and using a wrench to loosen the connection. If you are not comfortable working with gas lines, it is recommended to seek professional help.
- 5. Remove any mounting brackets or screws that are holding the tankless water heater in place. This may require using a screwdriver or drill, depending on the type of installation.
- 6. Carefully lift the tankless water heater off its mounting and remove it from the installation area. It may be heavy, so it is advisable to have someone assist you during this step.
- 7. Clean the installation area and inspect it for any damage or leaks. If necessary, make any repairs or adjustments before installing a new water heater.
- 8. Dispose of the old tankless water heater properly according to local regulations. Some areas may require you to take it to a designated recycling center or arrange for a pickup service.
- 9. When installing a new tankless water heater, follow the manufacturer’s instructions and guidelines to ensure proper installation and operation.
- 10. Consider hiring a professional plumber or technician if you are unsure about any step of the removal or installation process. They have the expertise and experience to handle the task safely and efficiently.
Preparing for Tankless Water Heater Removal
Time for tankless water heater removal! Here’s how to prep:
- Turn off the power supply. Do this by switching off the circuit breaker. This is important for safety.
- Shut off the water supply. Find the main shutoff valve and close it. This will prevent any new water entering.
- If applicable, disconnect the gas line. Locate the main gas shutoff valve and turn it off. Then, use a wrench or pliers to disconnect the gas line from the unit.
- Drain the remaining water. Attach a garden hose to the drain valve at the bottom of the unit and open it until all the water drains out.
Keep in mind that these steps are for general tankless heaters. Your specific model may need unique requirements. Consult the unit’s manual or contact a professional service provider if you are unsure.
Taking pictures of each step during disconnection can help when reconnecting a new water heater or troubleshooting any issues that may arise. And don’t forget to remove the tankless water heater cover – you never know what kind of dust and debris you’ll find!
Image of a tankless water heater
Removing the Tankless Water Heater Cover
When it comes to taking off the cover of a tankless water heater, follow these steps:
- Shut off the electricity and gas supply. Very important for safety.
- Find the front cover. It’s usually kept in place with screws or clips.
- Unscrew or remove clips with a screwdriver or wrench.
- Lift off the cover and set aside.
- Check for limescale and sediment buildup. Clean if needed.
- Reattach the cover securely.
Note: Each model may have different instructions. Refer to the product manual.
For extra help, take pictures of each step while disassembling. They can be a reference when putting everything together.
Safety first! Always be cautious with electrical/gas equipment. And if there’s any doubt, get advice from a technician.
By following these steps, you can easily remove and clean the tankless water heater cover. This will help keep your system running optimally for longer.

Image of a water heater after removing the cover
Disconnecting Water and Gas Lines Of Tankless Water Heater
Disconnecting water and gas lines is a must when taking out a tankless water heater. Here’s how:
- Turn off the power first. Switch off the circuit breaker supplying electricity to the water heater for safety.
- Shut off the gas supply. Locate the main gas valve and switch it off. Use a wrench or pliers for this task.
- Disconnect the water lines. Find the cold and hot water shut-off valves near the tankless unit. Turn them both off. Then, loosen and take off the nuts connecting the water pipes to the unit with adjustable pliers or a wrench.
- Detach the gas lines. Locate the gas pipe connected to the tankless water heater. Unhook it with a wrench or pliers. Cap or seal both ends of this pipe to prevent any gas leaks.
Once you’re done, check all connections twice before carrying on.
Did you know? According to Rheem, regular maintenance by removing sediment and scaling can increase the life and performance of a tankless water heater.
Getting rid of a tankless water heater is like dealing with a difficult ex – it takes time, energy, and lots of cussing.
Detaching the Tankless Water Heater
To break up with your hot water provider, follow these steps:
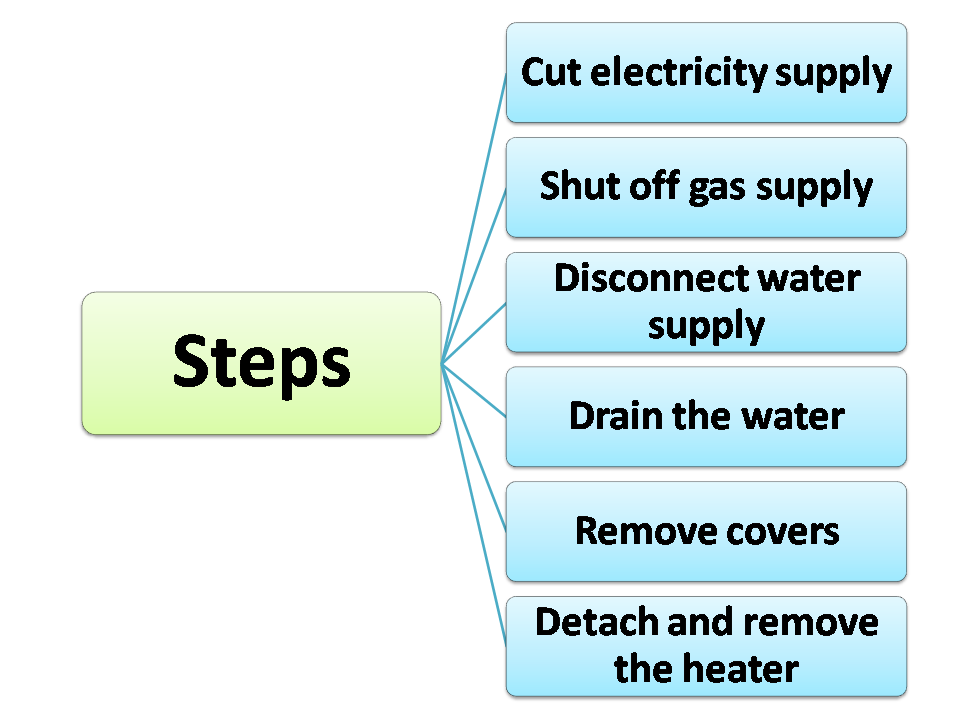
- Cut the electricity supply: Locate the circuit breaker and switch it off.
- Shut off the gas supply: If the heater runs on gas, find the main valve and turn it off. This prevents leaks.
- Disconnect the water supply: Close the hot and cold water valves. Use a wrench to disconnect the lines from both ends.
- Drain the water: Open the drain valve and attach a garden hose. Wait until all water drains out.
- Remove covers or parts: Depending on the model, a cover or other parts may need to be taken off. Check the manufacturer’s instructions.
- Detach and remove the heater: After the preparations, carefully take out the heater.
Remember, these are just general guidelines. Always check the manufacturer’s instructions for the specific model of heater.
Pro Tip: If you’re unsure or uncomfortable with the process, hire a professional. They know how to do it safely and without damage.
By following the steps and getting help if needed, you can easily detach your tankless water heater.
Removing the Tankless Water Heater from the Installation Area
Removing a tankless water heater? No sweat – just follow my directions!
- First, make sure to turn off the electricity and gas supply.
- Next, use a wrench to loosen and disconnect the cold and hot water supply lines.
- If your tankless water heater is electric, disconnect any electrical connections.
- Detach the vent pipe that connects to your tankless water heater.
- Finally, carefully remove the tankless water heater from its installation area.
Be sure to proceed with caution throughout this process. If you’re unsure about any part of removal, consult a professional! For added help, contact customer service or find an expert in your local area who specializes in tankless water heater repair. With these tips, you’ll be able to remove your tankless water heater without any harm or damage.
Frequently Asked Questions
1. How do I remove the cover on my Rinnai tankless water heater?
To remove the cover on a Rinnai tankless water heater, start by turning off the gas supply and disconnecting any electrical connections. Use a screwdriver to remove the screws holding the front cover in place. Carefully lift the cover off and set it aside.
2. What is the best way to remove sediment from a tankless water heater?
To remove sediment from a tankless water heater, turn off the water supply and gas or electric power. Attach a garden hose to the drain valve and open the valve to release the water and sediment. Flush clean water through the heater to remove any remaining sediment.
3. Can I remove the hot water heater element without an element wrench?
It is recommended to use an element wrench to remove the hot water heater element safely. If you don’t have one, you can try using a large adjustable wrench, but be cautious not to damage the element or the tank.
4. How do I replace the filter on my tankless water heater?
To replace the filter on a tankless water heater, locate the filter housing, usually near the water inlet. Turn off the water supply, disconnect the hoses, and remove the filter housing. Replace the old filter with a new one and reassemble everything in the reverse order.
5. Do I need to hire a licensed professional for tankless water heater installation?
While it’s always best to hire a licensed professional to ensure a proper and safe installation, some homeowners with experience may choose to install a tankless water heater themselves. However, be aware that local building codes and regulations should always be followed.
6. What are the pros and cons of a tankless water heater?
Some of the pros of a tankless water heater include energy efficiency, continuous hot water on demand, and space-saving design. However, potential cons include higher upfront costs, the need for professional installation, and the possibility of limited hot water output if multiple sources are used simultaneously.
Conclusion
To remove a tankless water heater, follow these steps:
- Turn off the circuit breaker to cut power.
- Shut off the water and gas supply.
- Unscrew the cover and flush out any sediment or scale with vinegar or descaling solution.
- Disconnect any electrical connections.
- Finally, take the unit out of its mounting brackets or detach it from any pipe connections.
If you are not sure how to do this, hire a licensed professional.