
Table of Contents
A water heater thermocouple is essential to keeping your gas burner lit. Brands like Rheem, Whirlpool and Richmond offer dependable versions. If your pilot light won’t stay lit, it could be time to replace the thermocouple.
When replacing one, follow the steps:
- Turn off the gas supply
- Let the unit cool down
- Locate the pilot assembly and remove it, along with the old thermocouple
- Get a new thermocouple online or at a local hardware store
- Place it in the same position as the old one
- Ensure all connections are secure
- Reassemble the pilot assembly
- Turn on the gas supply and relight the pilot light
A faulty thermocouple can cause your water heater to heat inconsistently or not at all. Make sure you get it fixed promptly to avoid any inconvenience caused by a malfunctioning water heater.
When you shop online, look out for free delivery options. If you’re unsure about installation, consider hiring an expert.
Replacing faulty parts like the thermocouple can extend your water heater’s lifespan. Act now to keep your household running smoothly!
Key Notes
- 1. The thermocouple is a crucial component of a water heater, responsible for detecting the presence of a pilot flame and ensuring the safe operation of the appliance.
- 2. If the thermocouple is faulty or damaged, it can cause the pilot light to go out, resulting in a loss of hot water supply.
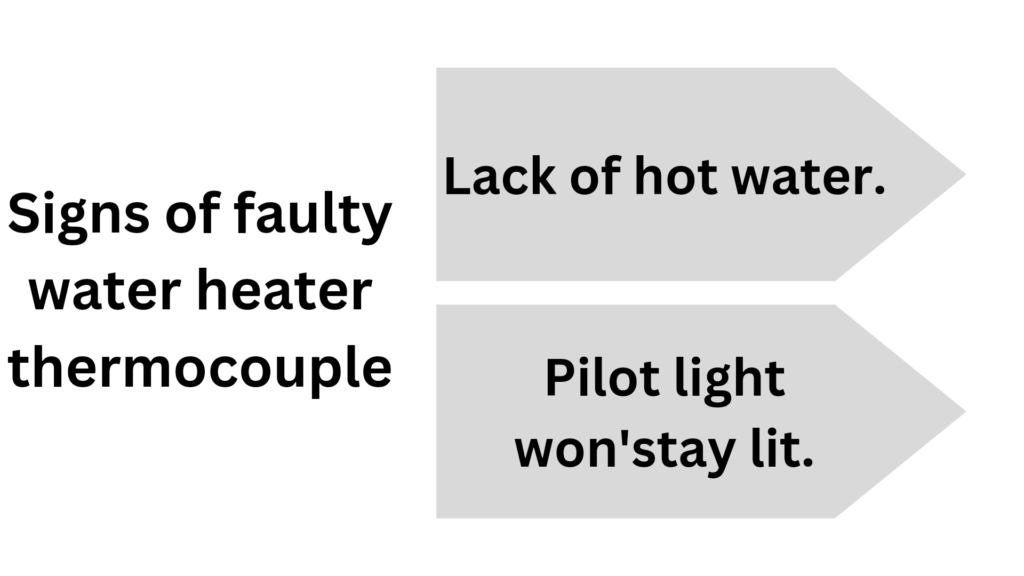
- 3. Signs of a faulty thermocouple include a pilot light that won’t stay lit, a weak or inconsistent flame, or a complete lack of hot water.
- 4. Replacing a thermocouple is a relatively simple and inexpensive fix that can be done by homeowners with basic DIY skills.
- 5. Before replacing the thermocouple, it is important to turn off the gas supply to the water heater and allow it to cool down completely.
- 6. The process of replacing a thermocouple involves removing the old one, cleaning the area, and installing the new thermocouple in its place.
- 7. Regular maintenance and inspection of the thermocouple can help prevent issues and ensure the efficient and safe operation of the water heater.
- 8. If unsure about how to replace a thermocouple or if the issue persists after replacement, it is recommended to seek professional help from a licensed plumber or technician.
What is a Water Heater Thermocouple?
A Water Heater Thermocouple is key to a hot water heater’s safe and efficient performance. It senses the pilot flame and creates a small electric current to keep the gas valve open. This lets gas flow so the main heating can start. Without it, the heater won’t heat water right. It also acts as a safety system, closing the gas supply if no pilot flame is there.
This thermocouple has two different metal wires joined at one end, called junction. When heated up by the pilot flame, it produces an electric potential difference with the thermoelectric effect. This voltage signal controls the gas valve for uninterrupted operation.
Compatibility matters for a water heater thermocouple. Get the one that matches your brand and model. Rheem, Whirlpool, Richmond, AO Smith, Bradford White, State Select, Honeywell, GE, and others have unique thermocouples.
One customer had a water heater that suddenly stopped providing hot water. After troubleshooting, the problem was the faulty thermocouple. They got a new universal replacement and installed it. The hot water came back and since then, no further issues.
It’s vital to know how important a working thermocouple is. Regular inspections and maintenance will keep it running and hot water coming. Don’t be left in the cold – avoid a faulty water heater thermocouple!
Signs of a Faulty Water Heater Thermocouple
A Faulty Water Heater Thermocouple can lead to a number of issues with your water heater. Here are some signs to look out for:
- The pilot light keeps going out: If your water heater’s pilot light frequently goes out, this could be a sign of a faulty thermocouple. The thermocouple is responsible for detecting whether the pilot light is lit, and if it is malfunctioning, it may shut off the gas supply to the pilot light.
- No hot water: Another sign of a faulty thermocouple is a lack of hot water. If the thermocouple is not detecting the pilot light, it may shut off the gas supply to the burner, preventing it from heating the water.
- Burner won’t stay lit: A faulty thermocouple can also cause the burner to keep turning off even when the pilot light is lit. This can result in inconsistent hot water or no hot water at all.
- Water heater won’t ignite: If the thermocouple is not functioning properly, it may prevent the ignition process from occurring. This can lead to a complete failure of the water heater to produce hot water.
In addition to these signs, it’s important to note that a faulty thermocouple can also pose safety risks. A malfunctioning thermocouple may not shut off the gas supply in the event of a pilot light failure, which can result in gas leaks and potential hazards.
If you notice any of these signs, it’s crucial to address the issue promptly. A professional thermocouple replacement can help restore your water heater’s functionality and ensure safe and reliable hot water supply. Don’t wait until the problem worsens or poses a potential danger to your household.
Feeling a little frosty? Maybe your water heater’s just trying to add some chill to your hot water routine.
Lack of Hot Water
No hot water in your home? It could be the faulty thermocouple! This little device senses the pilot light and allows gas to flow to the burner. Without it, no hot water.
Check the pilot light. If it goes out immediately after lighting, you have a faulty thermocouple. Same if the burner doesn’t ignite with a lit pilot light.
One solution is to clean the thermocouple. Over time, soot and debris can build up and stop it from sensing the pilot light. Emery cloth or sandpaper can gently remove dirt and buildup.
Another solution is to adjust the thermocouple’s position. If it’s misaligned or not connecting with the pilot flame, it won’t make enough electrical current for the gas supply. Repositioning it closer to the flame could help.
If all else fails, replace the thermocouple. Constant use can wear it out and make it ineffective. Purchase a new one that matches your water heater model and install according to the instructions.
Take action to restore the hot water! Don’t let a faulty thermocouple rain on your parade.
Pilot Light Won’t Stay Lit
Are you frustrated with your water heater’s pilot light going out? It may be due to a faulty thermocouple. Here’s a step-by-step guide to help sort it out!
- First, check the gas supply valve to make sure it’s fully open.
- Second, use a soft brush or cloth to clean the thermocouple. Be careful not to bend the delicate metal tube.
- Third, make sure the thermocouple is close to the flame.
- Fourth, if none of these steps work, you may need to replace the thermocouple with a professional plumber.
Remember to turn off your water heater before attempting any maintenance. Regularly inspecting and cleaning your water heater will help prevent issues and keep it running optimally. Also, always seek a professional if you’re not sure about handling complex repairs.
Mark’s story is proof that DIY maintenance and troubleshooting can save you from cold showers and keep your water heater running longer. So, grab your safety goggles and get ready to tackle the wild world of thermocouples!
Steps to Replace a Water Heater Thermocouple

Steps to Replace a Water Heater Thermocouple
- Turn off the gas supply: Locate the gas control valve on the water heater and turn it to the “off” position. This will shut off the gas supply to the heater and ensure safety during the replacement process.
- Remove the burner assembly: Use a screwdriver to remove the screws that secure the burner assembly in place. Carefully lift the assembly out of the combustion chamber and set it aside.
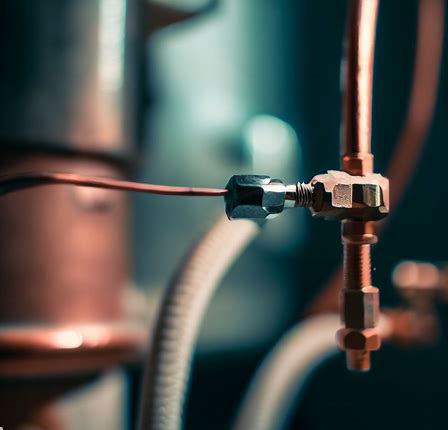
- Disconnect the old thermocouple: Locate the thermocouple, which is a thin copper tube attached to the gas control valve. Unscrew the nuts that hold the thermocouple in place and gently pull it out of the control valve.
- Install the new thermocouple: Take the new thermocouple and insert it into the control valve, making sure it is fully seated. Use the nuts to secure it in place, but be careful not to overtighten.
- Reassemble the burner assembly: Place the burner assembly back into the combustion chamber and secure it with the screws. Make sure it is properly aligned and centered.
Pro Tip: Before re-lighting the pilot, perform a gas leak test by applying a mixture of soapy water to all the connections. If you see any bubbles forming, there is a gas leak and you should seek professional assistance.
Replacing a water heater thermocouple is a relatively simple process that can be done by following these steps. Ensure that you have the necessary tools and always take appropriate safety precautions to avoid accidents.
Want to turn off the gas supply? Just remember, the only thing hotter than your water heater is my collection of burn injuries.
Turn Off the Gas Supply
To replace a water heater thermocouple, the gas supply must first be turned off. This is vital to avoid accidents or leaks. Follow the steps below for a successful outcome.
- Find the gas supply valve
- Switch the valve to the “off” position
- Wait a few minutes to allow the gas to fade away
- Check if the blue flame at the pilot light has disappeared, to verify that the gas supply is off
Be careful when turning off the gas. Any mistake or rush could be hazardous. So, it’s best to take your time.
Also, for your safety, use protective gear like gloves and goggles when carrying out plumbing tasks.
Fun fact: The Spruce – a home improvement website – says that removing the burner assembly may seem daunting but it’s not as tough as explaining modern art to your grandparents!
Remove the Burner Assembly
Removing the Burner Assembly is a must when replacing a water heater thermocouple. Follow these 5 steps for easy removal:
- Turn off the power supply to the water heater. This will prevent any accidental electrical shocks.
- Locate and shut off the gas valve. This ensures a safe environment for removal.
- Unscrew the access panel with a screwdriver and set aside the screws.
- Carefully disconnect the gas line and igniter wire from the burner assembly.
- Use a wrench or socket set to unscrew and remove the screws. Gently lift out the assembly.
Handle all components with caution to avoid damage or accidents. Different models of water heaters may have varying methods for removal. Refer to the instruction manual for manufacturer-specific guidelines.
It’s essential to remove the burner correctly. Inadequate removal may lead to faulty installation and damage other parts of the system, causing further problems. Searching for the old thermocouple requires detective skills and a bit of luck!
Locate and Remove the Old Thermocouple
Finding and removing an old thermocouple from a water heater is key to successfully replacing it. Here are 3 steps to help you:
- Start by turning off the gas supply. This is a safety precaution to avoid accidents.
- Spot the burner access panel, usually near the bottom. Remove any screws or fasteners holding it in place.
- Now you’ll be able to see the thermocouple connected to the control valve assembly. Disconnect it by unscrewing or unclipping.
Be careful handling the thermocouple. It may be hot after being connected to a running heater for a while.
Remember, each water heater model may be different in terms of thermocouple location. Check your manual or contact a professional plumber for help.
Here’s an interesting fact: Faulty thermocouples are one of the most common causes of pilot light problems in gas water heaters, according to HomeServe USA.
Follow these steps and add some extra knowledge to the process. You’ll soon be able to locate and remove the old thermocouple from your water heater. Then, get ready to be the hero of hot showers as you install the new one!
Install the New Thermocouple
To fit the new thermocouple, do these steps:
- Switch off the gas to the water heater.
- Find the old thermocouple and take it out carefully.
- Put the new thermocouple into the same spot as the old one.
- Tighten any necessary bolts or screws to keep the thermocouple in position.
- Turn on the gas supply and check the water heater is working correctly.
Furthermore, read your water heater manufacturer’s manual for extra directions not described here.
Fun fact! According to HomeAdvisor, an online home services marketplace, changing a thermocouple usually costs around $150 to $200.
Putting this burner back together might be easier than trying to mend your life after a bad Tinder date!
Reassemble the Burner Assembly
Reassemble the burner assembly!
- Unscrew bolts and disconnect wires carefully.
- Clean burner of any debris or build-up.
- Place burner back in position, aligned with gas supply line.
- Reattach wires securely.
- Tighten the bolts.
Note: Each water heater model has unique instructions for reassembling the burner assembly. So, check the manufacturer’s manual for proper installation.
Fun Fact: The thermocouple was discovered by Thomas Johann Seebeck in 1821.
Time to Test the Thermocouple: Brace yourself for the cold! If this water heater doesn’t work, you’ll be colder than your ex’s heart.
Testing the New Thermocouple
Test your new thermocouple for optimal performance! Here’s how:
- Shut off the gas supply – Safety first! To prevent any accidents or gas leaks, be sure to switch off the gas supply before testing the thermocouple.
- Feel for heat – Wait a couple of minutes and check if the thermocouple is producing warmth. Place your hand close to the burner area and you should be able to feel some heat. If not, this could signal a faulty thermocouple.
- Test functionality – Re-ignite your pilot light, following the manufacturer’s instructions, and observe if it stays lit. If there are any issues, this could be a sign of an issue with the thermocouple.
Don’t let your water heater become a hazard! Perform a thermocouple test to ensure a safe and reliable heating system in your home. Celebrate with a warm, long shower afterwards!
Frequently Asked Questions
1. What is a water heater thermocouple?
A water heater thermocouple is a safety device that senses the heat of the pilot flame in a gas water heater. It prevents gas from flowing if the pilot flame goes out, thus preventing dangerous gas leaks.
2. How often should I replace the water heater thermocouple?
It is recommended to replace the water heater thermocouple every 5-7 years to ensure proper functioning and prevent potential issues. However, if you notice signs of wear or the pilot keeps going out, it may be necessary to replace it sooner.
3. What are some common signs of a faulty water heater thermocouple?
Common signs of a faulty water heater thermocouple include a pilot light that won’t stay lit, difficulty in igniting the burner, or a water heater that produces no hot water. If you experience any of these issues, it may be time to replace the thermocouple.
4. Can I replace the water heater thermocouple myself?
Yes, it is possible to replace the water heater thermocouple yourself if you have some technical knowledge and are comfortable working with gas appliances. However, if you are unsure or uncomfortable with this task, it is best to hire a professional for safe and proper installation.
5. Where can I purchase a water heater thermocouple?
You can purchase a water heater thermocouple from hardware stores, home improvement centers, or online retailers. It is important to ensure you get the right thermocouple for your specific water heater model.
6. How long does it take to replace a water heater thermocouple?
The time it takes to replace a water heater thermocouple varies depending on your experience level and the complexity of your water heater model. In general, it can take anywhere from 30 minutes to an hour to complete the replacement.
Conclusion
Wrapping up this chat on water heater thermocouples, it’s clear they are very important for hot water heaters. They work as a safety device, allowing the gas burner to only ignite when there is a pilot flame. That prevents nasty gases from entering the living space.
When you choose a thermocouple replacement, it’s vital to think about factors like compatibility with your specific model and brand. Rheem, Whirlpool, Richmond, AO Smith – each has their own specs. Pay attention to details like length and mounting bracket alignment too – it can make a big difference.
For an easy replacement, get help from an expert. They have the experience and knowledge to make sure the thermocouple is fitted properly and works well. Also, check all other parts of the gas burner assembly while replacing the thermocouple – worn-out or faulty pieces could cause problems later.
By following these tips and being mindful in your selection and installation, you can guarantee smooth running and safety. Remember – always switch off the gas supply before maintenance and use soapy water to check for gas leaks after putting everything back together.