
Table of Contents
Key Takeaways
- 1. A thermocouple is a crucial component of a hot water heater as it helps to regulate the gas flow and ensure the pilot light stays lit.
- 2. Before installing a thermocouple, it is important to turn off the gas supply and allow the water heater to cool down completely.
- 3. The thermocouple should be positioned correctly, with the sensor end placed near the pilot light flame.
- 4. It is essential to tighten the thermocouple connections securely to prevent gas leaks.
- 5. After installation, it is recommended to test the thermocouple by relighting the pilot light and ensuring it stays lit.
- 6. Regular maintenance and inspection of the thermocouple is necessary to ensure its proper functioning and prevent any potential issues with the hot water heater.
Installing a thermocouple on a hot water heater can seem daunting, but it doesn’t have to be! With the right knowledge and tools, you can do it with confidence. A thermocouple is an important part of a water heater, as it senses whether the pilot light is on or off. If the pilot light goes out, the thermocouple shuts off the gas supply to prevent any dangerous leaks.
You’ll need a few items to install a thermocouple, such as a new thermocouple, a wrench or pliers, soapy water for leak detection, and a brush or cloth for cleaning. Here are the steps to install a thermocouple:
- Turn off the gas supply and wait for the water heater to cool down.
- Remove the manifold cover plate from the side of the burner assembly.
- Disconnect the old thermocouple from both ends – one end from the gas control valve, and the other end from the pilot supply tube or burner assembly.
- Clean any debris or soot around the connections with a brush or cloth.
- Inspect both ends of the old thermocouple; if necessary, replace it with a new one.
- Connect one end of the thermocouple to the gas control valve and tighten gently with pliers or wrench.
- Connect the other end to either the pilot supply tube or directly into the burner assembly. Again, tighten gently to ensure a secure connection.
- Carefully turn on the gas supply and check for any potential leaks with soapy water. If you see bubbles forming, it indicates a leak. Tighten any connections until the leaks stop.
- Replace the manifold cover plate and secure it with the screws or fasteners.
- Finally, turn on the water heater’s pilot light according to the manufacturer’s instructions.
It’s possible to tackle this task on your own! But if you’re ever unsure about any steps, it’s always best to seek help from a professional plumber. I once had to install a new thermocouple when my hot water heater stopped working, and I was able to get it back up and running in no time.
Installing a thermocouple on your hot water heater is totally doable – with the right knowledge and tools, you can ensure that your water heater functions safely and efficiently for years to come.
What is a thermocouple?
A thermocouple is key for hot water heaters to detect and keep tabs on temperature. It consists of two metal wires connected together, producing a small electric current when heated. That current controls the gas valve and keeps the pilot light lit.

To install a thermocouple:
- Turn off the gas supply and let the heater cool.
- Remove the cover plate to access the burner assembly.
- Disconnect the old thermocouple from the gas control valve and pilot supply tube.
- Take off protective covers from the new thermocouple.
- Attach one end to the gas control valve and the other to the pilot supply tube.
- Check all connections are secure.
- Reassemble the cover plate, turn on the gas supply.
- Turn on the pilot light and check for any issues.
Troubleshooting a faulty thermocouple:
- Make sure the pilot tube and burner assembly are free from debris.
- Examine the thermocouple tip for any damage or wear.
- Tighten the connection between the thermocouple and gas control valve if necessary.
Reasons for replacing a thermocouple on a hot water heater
Time to replace that thermocouple on your hot water heater! It’s essential for proper functioning. Over time, it can wear out or get damaged. Here’s a step-by-step guide:
- Gas supply, turn it off. Locate the gas control valve near the bottom and switch to “off”.
- Remove the manifold cover plate, usually near the bottom. Use a screwdriver or wrench to remove screws.
- Replace the thermocouple, disconnect its connections and remove the old one. Install the new one, making sure all connections are secure.
It’s important to check the instructions in your owner’s manual, or contact a professional if unsure. Also, make sure you get the right replacement part – an exact match for the old thermocouple.
Now for a true story. A few years ago, my friend had a problem with the pilot light. He realized the faulty thermocouple was likely the culprit. He followed the steps and replaced the thermocouple himself, saving time and money.
Ready? Cross your fingers, knock on wood, and sacrifice a small garden gnome – and let’s get to replacing that thermocouple.
Safety precautions before starting the installation process
Before installing a thermocouple on a hot water heater, there are some safety precautions to take. To help you navigate the process, here is a step-by-step guide:
- Turn off the gas supply. Locate the gas control valve usually found at the bottom of the unit. Then, turn it to the “off” position. This will prevent any gas leaks.
- Allow the water heater to cool. The surfaces can cause burns or other injuries, so wait at least 30 minutes.
- Disconnect power source. If there are electronic ignition or other electrical connections, disconnect them.
- Use proper tools and equipment. Collect a wrench, pliers, screwdriver, and a replacement thermocouple.
Additionally, consider these details:
- Read and follow manufacturer’s instructions.
- If you smell gas or suspect a leak, evacuate and contact a professional plumber.
- Take care when working around plumbing vents or sewer lines connected to your toilet.
- Improper installation may lead to gas leaks.
Remember these safety precautions when installing a thermocouple. By following them, you can ensure the functioning of your water heater.
Pro Tip: If you’re unsure, seek assistance from a professional plumber. Their expertise can help ensure optimal safety.
Gathering the necessary tools and materials
- Turn off the gas for safety.
- Find the manifold cover near the bottom of the heater.
- Unscrew the screws with a tool and keep them safe.
- Check if the old thermocouple needs replacing and unscrew it from the gas control valve.
- Ensure the new one is compatible with your heater.
- Gather materials such as gaskets and sealants.
- Read the manual for any unique requirements.
Did you know? Replacing a faulty thermocouple can solve ignition issues and extend the hot water heater’s lifespan.
Get everything you need and get those showers steaming.
Step-by-step instructions for installing the thermocouple on a hot water heater
Don’t sweat it, installing a thermocouple on your hot water heater is a piece of cake! Just follow this step-by-step guide for a successful installation:
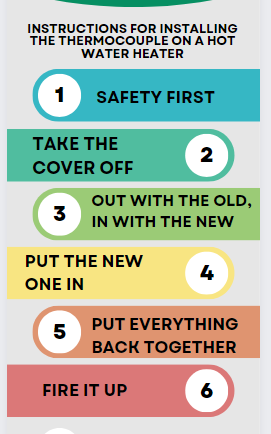
- Safety first: Locate the gas valve and turn it off, pronto, to avoid any accidents.
- Take the cover off: Using the right tools, remove the manifold cover plate and set it aside for later.
- Out with the old, in with the new: Find the old thermocouple near the pilot light assembly and disconnect it from the gas control valve.
- Put the new one in: Get the new thermocouple and attach it securely to the gas control valve. Make sure to follow the manufacturer’s instructions.
- Put everything back together: Reattach the manifold cover plate and secure it with screws or fasteners.
- Fire it up: Turn on the gas supply and check for any gas leaks or smells.
Keep in mind that regularly replacing old thermocouples can help prevent serious issues with your water heater. With the right knowledge, you can keep your hot water heater running smoothly for years to come.
Testing the new thermocouple
- Turn off the gas supply for safety.
- Carefully remove the manifold cover, using a screwdriver or wrench if needed.
- Locate the thermocouple, inspecting it for any damage or wear.
- Test with a multimeter set to millivolts, touching its tip with one probe and connecting the other to its copper lead. A functioning thermocouple should generate a voltage of 20-30 millivolts.
- Confirm all connections between the thermocouple and other components are secure and tight.
- Reassemble the manifold cover and turn on the gas supply.
Regular maintenance of a hot water heater is essential for optimum performance and longevity. Testing the thermocouple beforehand can avoid future issues.
Common troubleshooting tips
Here are the steps to replace the thermocouple on a gas water heater:
- Turn off the gas valve and extinguish the pilot light.
- Remove the cover plate to access the burner and find the thermocouple.
- Loosen it from the gas control valve, then screw in the new one.
- Replace the cover plate.
- Turn on the gas.
- Consult the manufacturer’s instructions to relight the pilot light.
For certain heaters like Honeywell, Whirlpool, Rheem, and GE, check their manuals for installation instructions. A faulty thermocouple can lead to poor heating or a pilot light that keeps going out. Replacing it can get your water heater functioning like new again!
It’s like bringing warmth to plumbing issues – replace the thermocouple and your hot water heater will be happy again! Just ask one homeowner who faced regular issues with their hot water heater. After considering different solutions, they changed the thermocouple and their water heater has been running perfectly ever since.
Frequently Asked Questions
Q1: How do I install a thermocouple on a hot water heater?
To install a thermocouple on a hot water heater, start by turning off the gas supply and shutting off the water heater. Remove the manifold cover and locate the thermocouple next to the pilot light. Unscrew the old thermocouple and disconnect it from the gas control valve. Install the new thermocouple by screwing it into place, making sure it is properly aligned with the pilot light. Reassemble the manifold cover and turn on the gas supply. Finally, light the pilot light according to the manufacturer’s instructions.
Q2: How do I replace the thermocouple on a Honeywell hot water heater?
To replace the thermocouple on a Honeywell hot water heater, follow the same steps mentioned above for installing a thermocouple on a hot water heater. The process is generally similar for different brands, but it’s always recommended to consult the manufacturer’s instructions for your specific model.
Q3: How do I replace the thermocouple on a Whirlpool hot water heater?
The procedure for replacing the thermocouple on a Whirlpool hot water heater is similar to the installation process mentioned earlier. Begin by turning off the gas supply and water heater, then locate the thermocouple near the pilot light. Remove the old thermocouple and install the new one, ensuring it is securely connected to the gas control valve and aligned properly with the pilot light. Finally, reassemble the manifold cover and relight the pilot light.
Q4: How do I replace the thermocouple on a Rheem hot water heater?
Replacing the thermocouple on a Rheem hot water heater involves the same steps as replacing it for other brands. Remember to turn off the gas supply and water heater, then locate and remove the old thermocouple near the pilot light. Install the new thermocouple, making sure it is correctly positioned and connected to the gas control valve. Reassemble the manifold cover, turn on the gas supply, and relight the pilot light following the manufacturer’s instructions.
Q5: Can I replace the thermocouple on a GE gas water heater myself?
Yes, you can replace the thermocouple on a GE gas water heater yourself by following the installation steps discussed earlier. However, if you are unsure or uncomfortable with DIY repairs, it is always recommended to hire a professional plumber for the task.
Q6: What should I do if I smell gas after replacing the thermocouple?
If you smell gas after replacing the thermocouple, leave your home immediately and do not use any open flames or electrical devices. Call your gas provider’s emergency line and wait for their professional plumber or gas technician to handle the situation. Gas leaks can be dangerous and should always be addressed by trained professionals.
Conclusion
A malfunctioning thermocouple can rob you of hot water – so take action today! Follow these steps to install or replace your hot water heater’s thermocouple. You’ll save money, plus enjoy the peace of mind that comes with knowing you’ve taken care of an essential home component. Here’s what to do:
- Turn off the gas supply.
- Use soapy water to detect any gas leaks.
- Replace the faulty thermocouple.
- Check for proper ignition of the pilot light.
- Ensure there are no obstructions in the burner assembly or combustion chamber.
- Inspect the thermocouple tip for any signs of damage or wear.
- Troubleshoot any issues that may occur during or after the installation.
Enjoy consistent hot water in your home with a properly functioning thermocouple.