
Table of Contents
Replacing a water heater can be quite challenging. It may take 2-3 hours for a traditional 50-gallon unit, and 1-2 hours for a tankless unit or heating element. But, these estimates can change depending on the situation. To avoid complications, it’s best to consult with professionals before starting. This will help ensure a smoother installation process with an accurate time and cost estimate. In the end, replacing a water heater isn’t as bad as it seems.
Key Takeaways
- 1. The time it takes to replace a water heater can vary depending on several factors, including the type of water heater being installed and the complexity of the installation process.
- 2. On average, it can take anywhere from 2 to 8 hours to replace a water heater. This includes the time it takes to remove the old water heater, install the new one, and make any necessary adjustments or repairs.
- 3. The type of water heater being replaced can impact the installation time. For example, replacing a traditional tankstyle water heater may be quicker than replacing a tankless water heater, as tankless units often require additional plumbing and electrical work.
- 4. Hiring a professional plumber to replace your water heater can help ensure a quicker and more efficient installation. Plumbers have the necessary expertise and tools to handle the job effectively, reducing the risk of complications or delays.
- 5. It is important to consider the age and condition of your current water heater when determining whether to repair or replace it. If your water heater is old and experiencing frequent issues, it may be more costeffective and timeefficient to replace it rather than continually repairing it.
- 6. Proper maintenance and regular inspections can help extend the lifespan of your water heater and reduce the likelihood of unexpected breakdowns. It is recommended to have your water heater inspected annually by a professional to catch any potential issues early on.
- 7. When replacing a water heater, it is also a good time to consider upgrading to a more energyefficient model. Energyefficient water heaters can help reduce your utility bills and have a positive impact on the environment.
- 8. It is important to follow the manufacturer’s instructions and safety guidelines when installing a new water heater. If you are unsure about any aspect of the installation process, it is best to consult a professional plumber to ensure the job is done correctly and safely.
Understanding the Replacement Process
Replacing a water heater involves several steps that need to be followed accurately and efficiently. To help you understand the process, here is a step-by-step guide:
- Assess the situation: First, a licensed plumber will evaluate your current water heater and determine whether it needs to be replaced. They will consider factors such as age, condition, and efficiency to make an informed decision.
- Consultation and selection: Once it is determined that a replacement is necessary, you will have a consultation with the plumber to discuss your specific needs and preferences. They will guide you in choosing the right water heater model and size for your household.
- Schedule installation appointment: After selecting a new water heater, the plumber will schedule an installation appointment that works for you. This ensures that the replacement process is done in a timely manner, minimizing disruption to your daily routine.
- Removing the old unit: On the day of installation, the plumber will begin by disconnecting and removing the old water heater. This involves disconnecting the water lines, gas line (if applicable), and draining the tank to prevent any potential leaks or damage.
- Installing the new unit: Once the old unit is removed, the plumber will proceed with the installation of the new water heater. They will connect the water supply lines, gas line (if applicable), and ensure proper placement and functioning of the new unit.
- Testing and final checks: After the installation is complete, the plumber will test the new water heater to ensure it is working efficiently and safely. They will also check for any signs of leaks or complications, making necessary adjustments if needed.
Overall, the replacement process typically takes a few hours to complete, depending on the specific circumstances and any unforeseen complications that may arise. It is important to hire a professional service provider like Ambient Edge or Lynns Emergency Plumbers to ensure the job is done correctly and to avoid any potential safety hazards or damage to your home.
If you are in Snohomish County and are in need of a water heater replacement, don’t delay. Call a licensed plumber today to schedule your installation appointment and ensure your hot water needs are met without any further inconvenience or hassle. Don’t miss out on the benefits of a new, efficient water heater and enjoy a comfortable and reliable supply of hot water for years to come.
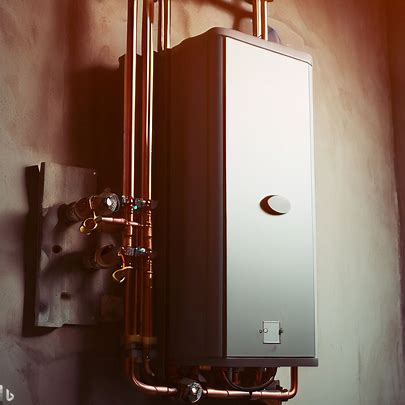
Assessing the Water Heater: Let’s take a peek inside and see if it’s feeling a little heated…or just needs a cold shower.
Assessing the Water Heater
Checking your water heater regularly is key for optimal performance and a longer life. Evaluation helps you spot potential issues and take care of them right away.
A good way to evaluate it is by examining age, efficiency, and function. Here’s what you need to consider:
- Age: How old your water heater is affects its reliability and efficiency. Usually, they last 8-12 years. If it’s close to that time, think about replacing it.
- Efficiency: The energy efficiency of your water heater affects your bills and the environment. New models often use advanced technology and are more efficient. Look for ENERGY STAR® certified ones.
- Functionality: Check for hot water availability and capacity. Also, be on the lookout for leaks, strange noises, and other defects. If any of these happen, you might need a replacement.
Technology has come a long way in terms of energy efficiency and performance of water heaters. So, even if yours seems to work fine, upgrading could bring savings and better reliability.
Now you know the history of water heaters, from firewood to today’s advanced models. It’s amazing how far we’ve come in meeting our hot water needs efficiently!
Gathering the Necessary Tools and Materials
Replacing something? Start with gathering the right tools and materials. Get everything you need to make the process smoother and more efficient.
- Step 1: Compile a list of tools. This could include screwdrivers, wrenches, pliers, and other specialized equipment.
- Step 2: Check your inventory. See if you already have the tools. If not, borrow them or rent them.
- Step 3: Gather the materials. Collect replacement parts, adhesive, safety equipment, and other supplies.
Pay attention to detail. Have all required items before starting.
Organize your workspace. Lay out the tools and materials in a logical order. Keep it clean and tidy to avoid accidents.
By doing this, you will be ready to replace something with ease. Save time, and enjoy a smooth process from start to finish!
Steps to Replace a Water Heater
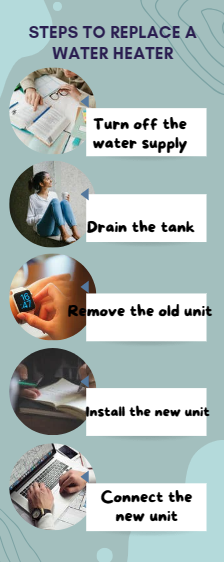
Replacing a water heater involves several steps that can be completed by a licensed plumber. The process generally takes a few hours and ensures a smooth installation of the new unit. Here is a step-by-step guide to replacing a water heater:
- Turn off the water supply: Begin by shutting off the water supply to the old water heater. This can usually be done by turning a valve located on the cold water pipe leading into the tank.
- Drain the tank: Attach a garden hose to the drain valve at the bottom of the water heater and drain the tank completely. Be careful, as the water may still be hot.
- Disconnect the old unit: Disconnect the water lines and gas or electrical connections from the old water heater. It may be necessary to turn off the gas supply or trip the circuit breaker before proceeding.
- Remove the old unit: Carefully remove the old water heater from its location. This may require some physical effort, especially if the tank is large and heavy.
- Install the new unit: Position the new water heater in the appropriate location, ensuring that it is properly aligned with the water lines and gas or electrical connections. Make sure to follow manufacturer instructions for installation.
- Connect the new unit: Reconnect the water lines and gas or electrical connections to the new water heater. Turn on the water supply and check for any leaks. If installing an electric unit, ensure it is properly wired and energize the circuit. For gas units, make sure to test for gas leaks.
It is important to note that the time taken to replace a water heater can vary depending on factors such as the type of water heater, any complications encountered during the installation process, and the experience of the plumber performing the job. It is recommended to consult a licensed plumber to accurately estimate the time required for a specific replacement.
To ensure a smooth and hassle-free water heater replacement, it is advisable to schedule an installation appointment with a reputable plumbing service provider. They can guide you through the process, answer any questions you may have, and handle the installation professionally.
Don’t miss out on the opportunity to have a reliable and efficient water heater in your home. Contact a licensed plumber today to discuss your water heater needs and schedule a consultation.
Turning off the power and water supply – because the only shocking thing I need in my life is a bad pun, not an electrical mishap.
Turning Off the Power and Water Supply
Time to cut off the power and water supply! This is a crucial step when replacing a water heater. It ensures safety and prevents any harm to electrical components and plumbing.
- Find the breaker panel in your home and locate the circuit that supplies power to the water heater.
- Switch off the corresponding breaker to cut off the electricity.
- Then, spot the shut-off valve for the cold water supply line connected to the water heater.
- Shut off the valve completely to halt the flow of cold water.
- To release any pressure in the tank, open a nearby hot water faucet and let it run until no more hot water comes out.
- Finally, double-check that both the power and water are off before proceeding.
Also, wear protective gear such as gloves and goggles while dealing with electrical or plumbing components. It’s best to consult a professional plumber for expert advice before attempting any repairs or replacements.
Fun Fact: The Department of Energy Efficiency & Renewable Energy reported that replacing an old, inefficient water heater with an energy-efficient model could save up to 50% on annual water heating costs. So, wave goodbye to hot showers and say hello to lukewarm disappointment as you drain your existing water heater!
Draining the Existing Water Heater
Drain that old water heater! Follow this 6-step guide to do it safely:
- Shut off the power by finding the circuit breaker labeled for your water heater and switching it off.
- Close the cold water inlet valve. This can be found near the top of the heater. Turn it clockwise until it stops.
- Attach one end of a garden hose to the drain valve at the bottom of your water heater. Put the other end somewhere water won’t cause damage.
- Slowly open the drain valve by turning it counterclockwise. Hot water will come out of the hose.
- Allow all the hot water to drain out. Keep both ends of the hose open until nothing more comes out.
- Close the drain valve and cold-water inlet valve. Carefully remove the hose, ensuring no drips or leaks.
Safety first! Wear protective gear like gloves and eye goggles before starting. Mistakes can lead to potential hazards for you and your property. Now go ahead and take control by draining your old water heater!
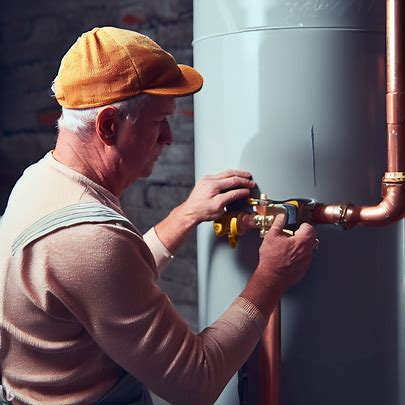
Disconnecting the Old Water Heater
Mark needed a new water heater. He followed 4 steps to disconnect it.
- He turned off the power at the breaker.
- He located the shut-off valve on the cold water pipe and turned it clockwise.
- He connected a hose to the drain valve and let all the water out.
- He used tools like pliers or wrenches to disconnect plumbing connections.
Remember these details:
- Wear protective gear – gloves and goggles.
- Have towels or rags handy.
- If it’s gas, turn off the gas supply.
Mark had a hiccup – stubborn plumbing connections! He couldn’t loosen them, so he called a professional. It showed him that sometimes it’s best to leave it to the experts. A water heater brings warmth into life.
Installing the New Water Heater
Installing the new water heater? Be careful! Follow these steps for a successful installation:
- Choose the right spot. Somewhere that meets safety regulations and is easy to access.
- Clear the area. Remove any debris and obstacles. Put a drain pan beneath the water heater.
- Connect the pipes. Use plumbing fittings to attach the hot and cold water lines. Ensure tight seals.
- Secure electrical connections. Follow manufacturer instructions for safe and proper wiring.
Also, insulate exposed pipes for energy efficiency and heat loss. Check the user manual for requirements or recommendations.
Pro Tip: Safety first! Shut off electricity and gas supply before beginning.
Mixing power and water lines, you might get a shocking hot shower or an electric bill.
Connecting the Water Lines and Power Supply
- Turn off the power and water. Flip the circuit breaker and close the main water valve. Safety first!
- Connect the cold water line. At the top of the water heater, attach one end of a hose to the cold water inlet valve. Secure it tight. Connect the other end to the cold water supply pipe.
- Install a pressure relief valve. Put the pressure relief valve in the spot indicated by the manufacturer. Make sure it’s properly aligned and secure.
- Connect hot water outlet. Attach another hose to the hot water outlet valve. Secure it firmly. Connect the other end to the hot water pipes leading to taps and faucets.
- Turn on power supply. After checking all connections, turn on the electrical switch or reset any breakers.
- Open valves and check for leaks. Open each valve slowly, beginning with the main water valve. Open both hot and cold taps separately. Look for any leaks near connections or valves. Fix them before proceeding.
Remember that proper connections will keep your water heater running optimally. Be cautious when working around electricity and plumbing. Enjoy hot showers by replacing your water heater today. And remember, the only thing scarier than an explosive water heater is your mother-in-law visiting during a cold shower!
Testing and Safety Measures
Testing and Safety Measures are essential when it comes to replacing a water heater. Proper testing ensures the safe and efficient operation of the new unit. Follow these guidelines to ensure a smooth installation process:
| Testing and Safety Measures |
| 1. Shut off the power supply: Before starting any work, turn off the power to the water heater at the circuit breaker or fuse box. This will prevent any electrical accidents during the installation process. |
| 2. Shut off the water supply: Locate the shut-off valve for the water heater and turn it off. This will prevent any water flow during the replacement process and avoid potential leaks or flooding. |
| 3. Drain the water heater: Connect a garden hose to the drain valve at the bottom of the water heater and direct it to a suitable drainage area. Open the valve and drain the water heater completely. This step is crucial to prevent water spillage and damage during the removal process. |
| 4. Disconnect the gas line (if applicable): If your water heater operates on gas, it’s important to disconnect the gas line before removing the unit. This will ensure the safety of the installation process and prevent gas leaks. |
| 5. Remove the old water heater: Carefully disconnect the water lines and any other connections from the old water heater. Take proper precautions to avoid any damage to the surrounding area or other plumbing systems. |
| 6. Install the new water heater: Follow the manufacturer’s instructions and guidelines to properly install the new water heater. Make sure all connections are secure and leak-free. |
| 7. Test for leaks and proper operation: Once the installation is complete, turn on the water supply and check for any leaks. Also, test the new water heater’s functionality by running hot water and ensuring it heats up properly. |
During the replacement process, it is crucial to take proper safety measures and adhere to all guidelines. Hiring a licensed plumber or a professional service provider can ensure a hassle-free installation and minimize any complications.
It is important to note that the time required to replace a water heater can vary based on various factors such as the type of water heater, any complications encountered during the installation, the experience of the plumber, and the availability of necessary equipment and parts.
According to Ambient Edge, a reputable HVAC company, the average time for a water heater replacement ranges between 2 to 4 hours. However, this timeline can vary depending on the specific circumstances and the unique needs of each situation.
If you thought waiting for a water heater to fill up was painful, just wait until you have to test it for leaks.
Filling and Testing the New Water Heater
Filling and testing a new water heater is essential for proper functioning and safety. Here’s a step-by-step guide:
- Shut off power supply: Flip the circuit breaker or turn off the gas supply.
- Connect a hose to the drain valve: Locate the valve at the bottom of the water heater. Place the other end in a suitable draining area.
- Open the pressure relief valve: Lift or pull up on the lever near the top of the water heater.
- Drain existing water: Open the valve slowly and let the water flow out.
- Close valves and fill with fresh water: After all the old water has drained out, close both valves. Open a hot water faucet at home to allow air to escape while you fill up with fresh water.
- Turn on power and test for leaks: After closing the faucets, turn on the gas or electricity. Watch for any leaks around connections and joints.
Also, follow the manufacturer instructions specific to your model for optimal performance.
Plus, not filling or testing a water heater could lead to safety hazards, so it’s important to include it in regular maintenance.
The first known plumbing systems were found in the Indus Valley Civilization in 2500 BCE. Since then, technology and safety measures have improved, making water heater installations more reliable and efficient.
Checking for Leaks and Ensuring Proper Functioning
Test and safety measures are a must for any equipment. Check for leaks and ensure proper functioning to prevent any hazards. Here’s a 5-step guide to help you do that:
- Visual Inspection: Look for drips, puddles, or stains. Any loose connections, damaged seals, or worn-out parts may cause leaks.
- Pressure Testing: Pressurize the system with air, water, or gas. Watch for pressure drops or abnormal fluctuations.
- Leak Detection Tools: Use advanced tools like ultrasonic detectors or thermal imaging cameras to detect even the smallest of leaks.
- Functional Testing: Run the equipment through its normal operating conditions. Monitor performance closely.
- Documentation and Maintenance: Record all inspections, tests, repairs, and maintenance activities. Schedule maintenance regularly to prevent future leaks.
Periodic checks are needed even after initial testing. Prevention is always better than cure! Pro Tip: Regular inspection and maintenance are key to long-term safety and optimal performance. Make it part of your routine! Safety first—unless it’s a joke—that’s more important.
Safety Tips and Precautions
Safety is key in any situation. Follow these tips to prevent accidents and keep everyone safe:
- Wear the right protection – helmets, gloves, safety goggles.
- Inspect equipment before use – check for damage or wear and tear.
- Be mindful of your environment – watch for warning signs and safety instructions.
- Proper lifting techniques – avoid strain and injury.
- Good posture – helps prevent back and neck pain.
- Check electrical appliances – frayed wires or damaged plugs.
Some lesser known safety tips worth mentioning:
- Store chemicals properly – use designated containers with clear labels.
- Have a first aid kit – just in case.
A story to prove why safety matters – a friend ignored wearing safety goggles while doing repairs. He ended up with a piece of debris in his eye, causing pain and temporary loss of vision.
Safety is no joke – follow these tips and take precautions to keep yourself and others safe. Stay safe!
Frequently Asked Questions
1. How long does it take to replace a water heater?
On average, replacing a water heater can take anywhere from 2 to 4 hours. However, this timeframe can vary depending on the complexity of the installation, accessibility of the existing unit, and any necessary repairs or modifications that need to be made.
2. How long does it take to replace a water heater element?
Replacing a water heater element typically takes about 1 to 2 hours. This includes draining the tank, disconnecting the old element, installing the new one, and refilling the tank.
3. How long does it take to remove and replace a hot water heater?
The process of removing and replacing a hot water heater usually takes around 4 to 6 hours. This includes disconnecting and removing the old unit, installing the new one, connecting the water lines, testing the system, and ensuring it functions properly.
4. How long does it take to replace a tankless water heater?
Replacing a tankless water heater can take anywhere from 4 to 8 hours. The installation process involves disconnecting the old unit, making necessary modifications to the plumbing and gas lines, installing the new unit, and testing its performance.
5. How long does it take to replace a heating element in a water heater?
Replacing a heating element in a water heater typically takes around 1 to 2 hours. This involves draining the tank, removing the old element, installing the new one, and refilling the tank.
6. How long does it usually take to replace a hot water heater?
On average, the replacement of a hot water heater takes approximately 4 to 6 hours. However, it’s important to note that this timeframe can vary depending on the specific circumstances and any additional factors that may arise during the installation process.
Conclusion
Replacing a water heater can take differing amounts of time, depending on the type, installation process, and any complications that may crop up. This timespan can range from a handful of hours to a full day.
A licensed plumber typically starts the job by disconnecting the old water heater and extracting it from the space. This step usually lasts for approximately 30 minutes to an hour, depending on how convenient the unit is and any possible issues.
The new water heater is then installed. This entails hooking up the necessary water lines and making sure everything is sealed tight. The amount of time this takes can differ based on the particular model and any additional features.
Sometimes changing a conventional tank-style water heater for a tankless one may require more time as adjustments to gas lines or venting systems may be necessary. Installing a tankless water heater usually requires extra expertise and thus can take longer than installing a traditional tank-style one.
To stay away from any shocking surprises during the installation appointment, it’s wise to talk with your service provider beforehand. They can give you an estimated timeframe according to your unique case.
In conclusion, replacing a water heater can occur within several hours or may take a full day, depending on the kind of unit being installed and any issues that may happen in the course of the process.